Admin, Author At America's Advantage Remodeling - Page 5 Of 21

Посты автора admin

admin

admin

How Do Soft Close Cabinet Systems Work?

Опубликовано: April 3, 2026 в 1:29 pm

Автор:

Категории: Kitchen

Тэги:

Complete Guide to Soft Close Cabinets and Hinges

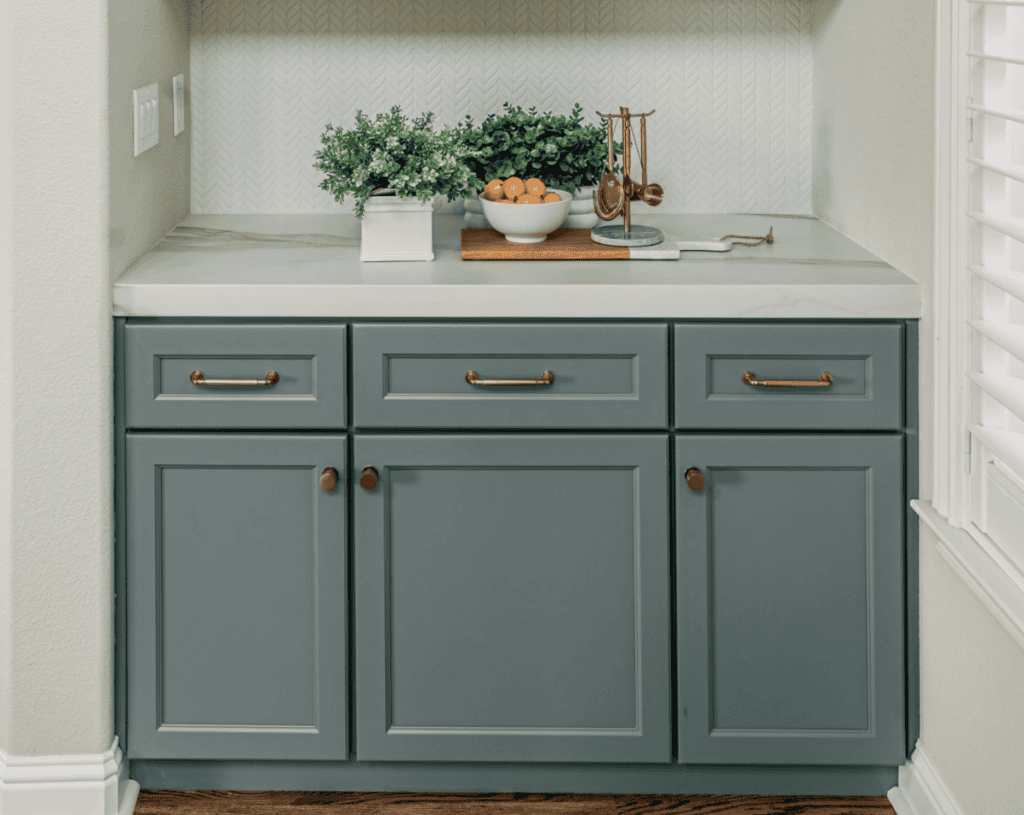
If you have ever dealt with cabinet doors slamming shut or drawers that never seem to close right, you already understand why so many homeowners are upgrading their kitchen cabinets with soft close hardware. One of the most common questions during a renovation project is: how do soft close cabinet systems work and are they really worth it? The answer comes down to smart engineering, better quality hinges, and a noticeable improvement in daily life. Soft close systems are specifically designed to create a quiet, controlled, and smooth door operation that improves both comfort and durability in modern furniture. In this guide, we will explain exactly how soft close cabinet systems work, the mechanism behind them, and why they have become a standard feature in today’s cabinets.

What Is a Soft-Close Cabinet System?

A soft close system is a feature built into cabinet hinges and drawer hardware that allows a cabinet door or drawer to close slowly and quietly instead of slamming shut. Unlike traditional hinges, which allow a door to shut with full force, soft close hinges include a damper and hydraulic system that controls the closing speed. This creates a quiet closing action and helps protect the cabinet frame from repeated impact.

This feature is used in kitchen cabinets, bathroom vanities, and other furniture throughout the home. It is commonly found in both doors and drawers, making it one of the most versatile upgrades available. Most soft close hinges are built directly into the hinge cup or attached as an add-on, depending on the type of hinge used in the cabinets. These various types of hinges are designed to support everything from lightweight cabinet door styles to heavy doors found in modern furniture designs.

How Do Soft-Close Cabinet Systems Work?

The Basic Mechanics Behind Soft-Close

To explain how soft close cabinet systems work, it helps to break down the mechanism. Inside the hinges or drawer slides, there is a small damper combined with a hydraulic system and a spring mechanism. These components work together to control motion and create resistance.

As the cabinet door begins to shut, it moves normally at first. When the door approaches the final few inches, the soft close mechanisms engage. The damper creates resistance, which slows the motion. At the same time, the spring mechanism helps guide the door shut completely. This creates a controlled stop and prevents the door from slamming.

This process allows doors to close softly and quietly every time, regardless of how hard they are pushed. The soft close function is designed to adapt to different door sizes, including heavy doors and taller doors that require additional control.

What Happens When You Close the Cabinet

When you push a cabinet door closed, the movement starts like any standard hinge system. As the door approaches the cabinet frame, the soft close mechanisms activate. The damper applies resistance, slowing the door down. Then, the hinge pulls the door shut in a smooth and controlled motion.

This sequence creates a gentle and quiet finish. Instead of slamming, the door will close gently and settle into place. This controlled movement reduces wear and tear on the cabinets and helps maintain long-lasting performance. It also helps protect the cabinet frame and face frame from repeated impact over time.

Built-In vs. Add-On Soft-Close Systems

Soft close systems can be installed in two main ways:

  1. Built-in systems that come installed in high-quality hinges for new kitchen cabinets and modern furniture.
  2. Add-on systems that can be installed on existing cabinetry using screws and upgraded soft close cabinet hinge hardware.

Both options provide the same soft close feature, but the installation method depends on the type of hinge already in place and the condition of the cabinets.

Soft-Close Hinges vs. Soft-Close Drawer Slides

How Soft-Close Hinges Work

Soft close hinges are used for cabinet doors and are one of the most common upgrades in kitchen cabinets. These hinges contain a built-in damper and hydraulic system inside the hinge cup. As the door swings toward the frame, the hinge engages and slows the closing speed.

Most soft close hinges are adjustable, allowing for precise installation and alignment. Many soft close hinges also include a self-close function, meaning they will pull the door shut once it reaches a certain point. High-quality hinges are designed to handle tens of thousands of cycles, providing durability and long-lasting performance.

How Soft-Close Drawer Slides Work

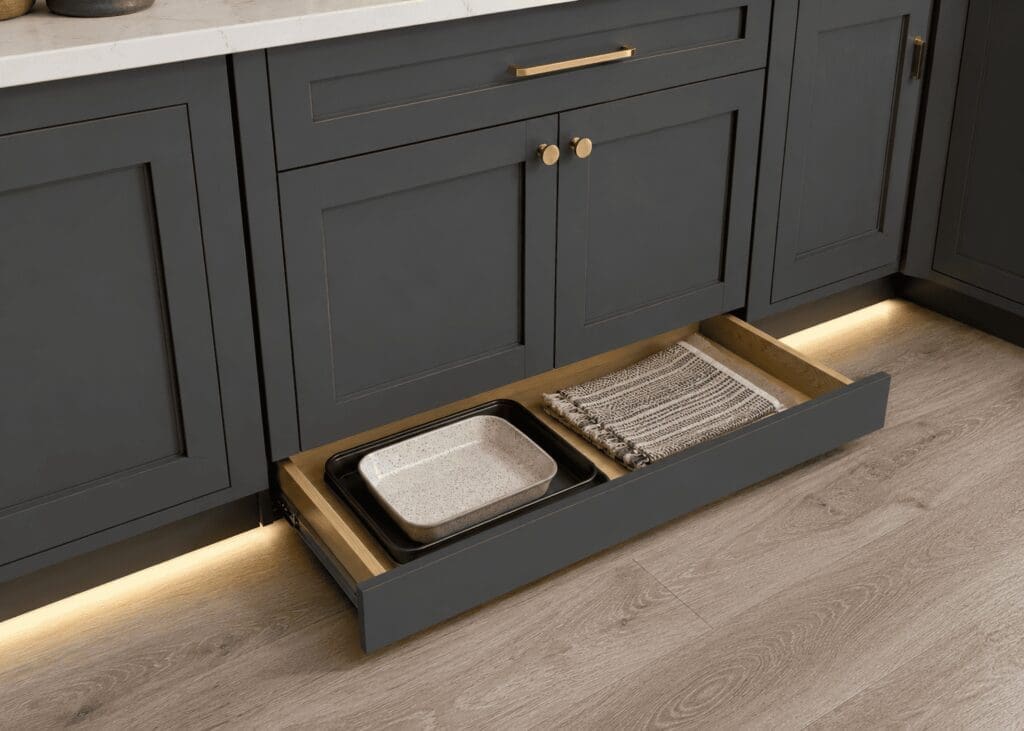
Soft close drawers use a similar concept but apply it to linear motion instead of a swinging door. The slides include a damper and spring mechanism that activates as the drawer is pushed in. As the drawer approaches the cabinet frame, the system slows it down and pulls it shut quietly.
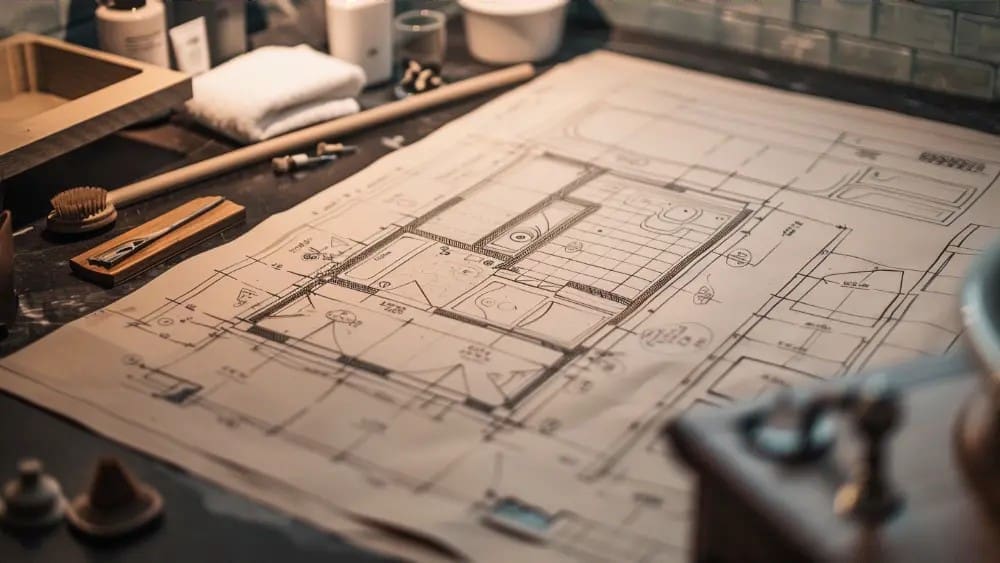
These systems are specifically designed to support heavy doors and drawers, making them ideal for storing kitchen essentials. The result is a quiet, smooth, and controlled closing action that improves everyday use and reduces wear.

Key Differences Homeowners Should Know

The main differences between hinges and drawer slides are how they control motion:

  1. Hinges control the movement of a cabinet door using a pivot point.

  2. Drawer slides control the movement of drawers using a linear track system.
  3. Both use soft close mechanisms, but the installation and hardware differ based on the application.

Soft-Close vs. Self-Close Cabinets: What Is the Main Difference?

Many homeowners confuse soft close hinges with self close hinges, but they are not the same. Self close hinges rely on a spring mechanism to pull the door shut once it reaches a certain point. However, they do not control the closing speed, which can still result in slamming.

Soft close hinges combine both self close and dampening technology. The damper slows the door while the spring mechanism ensures it shuts completely. The main difference is that self close systems focus on function, while soft close systems focus on comfort, safety, and quiet performance.

Self close hinges are still found in some cabinets, but most soft close hinges now include this feature as part of their design, making them a more advanced option for modern furniture.

Benefits of Soft-Close Cabinets in a Kitchen Remodel

Soft close cabinets offer several advantages that go beyond convenience, especially when paired with thoughtfully chosen kitchen cabinet hardware ideas to elevate your remodel:

  1. They reduce noise by eliminating slamming and creating a quiet closing experience.
  2. They increase safety by preventing fast-moving doors from catching fingers.
  3. They help prevent damage and reduce wear and tear on cabinet doors and frames.
  4. They improve the overall quality and feel of kitchen cabinets and bathroom vanities.

These benefits make soft close systems a valuable upgrade in any renovation project.

Are Soft-Close Cabinets Worth the Investment?

For most homeowners, soft close cabinets are worth the investment. The added feature improves durability, reduces wear, and enhances everyday comfort. In a renovation project, soft close systems are often considered a standard upgrade rather than a luxury, especially when you understand the cost to replace cabinets and countertops in 2025.

The quiet operation, long-lasting performance, and improved safety make them a smart choice for any kitchen or bathroom upgrade. Over time, they help reduce wear and tear on cabinets, extending their life and maintaining their appearance.

Can You Add Soft-Close to Existing Cabinets?

When Retrofitting Is Possible

Soft close hinges can often be installed on existing cabinetry. If your cabinets have a compatible face frame and structure, replacing standard hinges with soft close hinges is a straightforward process. For homeowners whose cabinet boxes are still in good shape, refinishing existing cabinets instead of replacing them can pair well with adding new soft close hardware. Add-on dampers can also be installed using screws to create a soft close effect.

When Replacement Makes More Sense

If your cabinets show signs of wear, tear, or outdated construction, replacing them may be the better option. When planning new cabinetry, many homeowners look to current kitchen cabinet trends for 2025 to guide style and layout choices. New cabinets come with integrated soft close mechanisms and improved materials that offer better durability and performance.

What to Look for in High-Quality Soft-Close Hardware

Choosing the right hardware is essential for performance and durability, and working with an experienced remodeler like America’s Advantage Remodeling can help you select options that match your kitchen design and budget:

  1. Look for high-quality hinges with a reliable hydraulic system and damper.
  2. Choose materials that are specifically designed for long-lasting use.
  3. Ensure proper installation to maintain alignment with the cabinet frame and face frame.
  4. Select hardware that provides consistent resistance and controlled closing speed.

These factors ensure your cabinets perform well over time and deliver the full benefits of soft close systems.

Common Problems with Soft-Close Cabinets and How to Fix Them

Cabinets Not Closing Fully

This issue is often caused by misaligned hinges or a worn damper. Adjusting or replacing the mechanism can restore proper function, just as you would troubleshoot and repair a lazy Susan with common problems like misalignment or jamming.

Closing Too Slowly or Too Fast

The closing speed can often be adjusted depending on the type of hinge. Fine-tuning the resistance helps achieve smooth operation.

Worn-Out Hardware Over Time

Over time, hinges and dampers can experience wear. Replacing these components restores the soft close feature and ensures continued performance.

Why Soft-Close Cabinets Are Standard in Modern Kitchen Remodeling

Soft close systems are now a standard feature in modern furniture and kitchen cabinets because they offer clear advantages. They reduce noise, prevent damage, and improve safety. They also help protect cabinets from long-term wear and tear caused by repeated slamming. As homeowners rethink upper cabinet layouts and kitchen cabinet soffits and what to do with them, soft close hardware has become an expected part of updated designs.

With the ability to support heavy doors, improve smooth door operation, and provide consistent performance, these systems are now expected in high-quality kitchen designs, whether you keep existing kitchen soffits and integrate them into your layout or opt for a more open look.

FAQs About Soft-Close Cabinet Systems

Do soft close cabinets wear out over time?

Yes, like all hardware, they can experience wear after years of use. However, high-quality hinges are designed for tens of thousands of cycles and offer long-lasting performance.

Can you turn off soft-close hinges?

Some soft close hinges include a switch that allows you to disable the soft close feature if needed.

Are soft close cabinets more expensive?

They cost slightly more than standard hinges, but the added durability and comfort make them worthwhile.

Do all new cabinets come with soft-close?

Not all cabinets include this feature, but many modern cabinets do.

Can soft close drawers handle heavy weight?

Yes, they are specifically designed to support heavy drawers while maintaining smooth and quiet operation.

Is soft close worth it for small kitchens?

Yes, even in smaller spaces, the reduced noise, improved safety, and better functionality make a noticeable difference.

Final Thoughts: Is Soft-Close Right for Your Kitchen?

Soft close cabinet systems are one of the most practical upgrades you can make in your home. They combine smart engineering with everyday convenience to create a better experience. By controlling how a cabinet door shuts, they reduce wear, prevent damage, and create a quiet and comfortable space.

Whether you are upgrading existing cabinetry or planning a full renovation project, soft close systems offer lasting value. They improve safety, enhance durability, and bring a level of quality that homeowners appreciate every day.

How Do Contractors Prevent Hardwood Floor Warping?

Опубликовано: March 27, 2026 в 3:53 am

Автор:

Категории: Flooring

Тэги:

How Homeowners Can Avoid It

Many homeowners invest in hardwood floors because they add beauty, durability, and value to a home. However, one of the most frustrating problems people encounter is when a floor begins to warp, cup, or buckle. When hardwood floors change shape, the surface becomes uneven, gaps can appear between boards, and in severe situations, the entire floor can lift away from the subfloor.

Understanding how do contractors prevent hardwood floor warping is essential for protecting new hardwood floors and ensuring long-term performance. Professional contractors know that hardwood reacts to moisture, humidity, and temperature conditions inside the home. When wood absorbs too much moisture or experiences rapid temperature fluctuations, wood planks may swell, shift, or buckle out of their natural shape.

During professional installation, contractors follow detailed procedures that help prevent floors from warping. They evaluate the subfloor, measure humidity levels, allow hardwood planks to acclimate, and ensure proper spacing across the room. These steps help maintain a healthy relative humidity level and reduce the risk of buckled hardwood floors later.

Many flooring problems happen because of poor installation, improper installation, or excessive moisture trapped beneath the floor. When these issues occur, wood boards can swell and cause hardwood floor buckling across large sections of the floor. By focusing on moisture control, humidity in your home, and precise installation, professional contractors protect hardwood floors from costly damage in the long run, especially when homeowners invest in high‑quality hardwood flooring and professional installation.

In this guide, we will explain why hardwood floors warp, what causes hardwood floor buckling, how contractors prevent buckled flooring during installing hardwood flooring, and what homeowners can do to protect their floors.

Role of a Flooring Contractor in Preventing Warping

Professional flooring contractors play a crucial role in preventing hardwood floor warping. Their expertise ensures that all installation steps—from moisture testing to acclimation and proper spacing—are meticulously followed to protect your floors from damage.

Why Hardwood Floors Warp in the First Place

Understanding why hardwood floors warp helps explain why proper installation and moisture control are so important. Wood is a natural material that reacts to the environment inside the room. Because wood naturally expands and contracts as humidity levels change, a hardwood floor can shift slightly throughout the year. This movement is normal. However, problems occur when the floor absorbs excessive moisture or when humidity levels rise quickly.

When moisture collects underneath the floorboards or on the surface of the floor, wood boards swell and begin to warp. Over time this swelling may cause hardwood buckling or buckled hardwood floors that require repair. Many flooring problems begin when wood planks are exposed to water damage. Water leaks from appliances, spills left on the surface, or moisture trapped inside the subfloor can push floorboards upward. In moisture‑prone areas like kitchens, choosing the best waterproof flooring for kitchen spaces can greatly reduce the risk of water‑related floor damage. In older homes, moisture may also rise from a crawlspace or basement and reach the flooring from below.

When moisture imbalance affects the floor, planks begin to change shape. Edges may lift, cracks may appear in the surface, and boards can move out of their original shape. If the issue continues, hardwood floor buckling can occur and entire sections of the floor may buckle upward. In the worst case buckling, boards may detach from the subfloor completely. This type of severe buckling is usually the result of water damage or prolonged exposure to excessive moisture.

How Wood Naturally Expands and Contracts

Wood reacts to environmental changes because wood fibers absorb moisture from the air. When humidity in your home increases, wood planks absorb that moisture and swell slightly. When humidity levels drop, the wood dries and shrinks. This process causes floorboards to move throughout the year as temperature and humidity levels shift.

Temperature fluctuations during seasonal changes, especially during cold winter months or humid summers, can stress hardwood floors if the indoor environment is not controlled. If the flooring contractor installs hardwood planks without allowing them to adjust to the room’s temperature and humidity levels, the wood may swell after installation. This swelling creates pressure between boards and causes floors to warp or buckle.

The Three Types of Hardwood Floor Warping

Contractors commonly identify three forms of hardwood floor warping. Each type affects the floor in a different way.

Cupping

Cupping occurs when the edges of hardwood planks rise higher than the center. This usually happens when moisture collects beneath the floorboards. Excess moisture inside the subfloor pushes the edges upward and causes a curved appearance across the floor. Cupping is one of the most common signs of moisture imbalance.

Crowning

Crowning happens when the center of boards rises higher than the edges. This often occurs when surface moisture sits on the floor for extended periods. Water spills, water damage, or high humidity can cause this issue. Crowning may also happen when cupping is sanded or repaired before the moisture problem is resolved.

Buckling

Buckling is the most serious form of hardwood floor damage. When hardwood floor buckling occurs, boards lift completely off the subfloor. In some cases, the floor may buckle several inches above the surface. This severe buckling usually occurs when wood planks absorb excessive moisture and expand beyond the available space. Buckled flooring may require removing damaged planks or replacing entire sections of the floor.

Common Causes of Warped Hardwood Floors

Several issues can cause floors to warp. High humidity, excessive moisture, and water damage are among the most common causes. Water leaks around appliances, plumbing failures, or spills that soak into floorboards can introduce moisture that damages the wood.

Poor installation also contributes to many flooring failures. If hardwood floors are installed over an uneven subfloor, the boards may shift or separate over time. Improper installation can also occur when installers skip acclimation or fail to leave enough expansion gaps along the walls.

Many homeowners in older homes experience flooring problems when moisture travels through crawlspaces or basements. Concrete slabs can also release moisture into the flooring if a proper moisture barrier is not installed.

How Professional Contractors Prevent Hardwood Floor Warping

Professional contractors use a series of installation steps designed to reduce moisture exposure and maintain stable humidity levels inside the home. These steps help protect hardwood floors and prevent hardwood floor buckling.

Moisture Testing Before Installation

Moisture testing is a critical step before installing hardwood flooring. A flooring contractor begins by testing the moisture level in the subfloor to ensure it is safe for installation. If the subfloor contains excessive moisture, contractors delay installation until conditions stabilize. Installing hardwood flooring over a wet subfloor can cause floors to warp shortly after installation begins.

Contractors also measure the moisture level inside the hardwood planks themselves. When the moisture level of the wood closely matches the humidity in your home, the flooring is less likely to swell or buckle later.

Proper Hardwood Acclimation

Before installing hardwood flooring, contractors allow hardwood planks to acclimate inside the room where they will be installed. During acclimation, wood planks sit inside the room for several days so they can adjust to the temperature and humidity levels in the space. This process ensures the wood reaches equilibrium with humidity in your home. If hardwood is installed without acclimation, boards may swell after installation and create pressure between floorboards.

Installing Moisture Barriers

Moisture barriers protect hardwood floors from moisture rising through the subfloor. This step is especially important when flooring is installed over concrete slabs. Concrete naturally releases moisture over time. Without a barrier, this moisture can travel into hardwood planks and cause hardwood buckling. Contractors use protective underlayment materials to block moisture movement. In crawlspaces, vapor barriers help protect floorboards from moisture rising through the ground.

Maintaining Proper Indoor Humidity

Humidity plays a major role in hardwood floor stability. Maintaining healthy relative humidity levels helps prevent hardwood floors from swelling or shrinking excessively. Most professionals recommend maintaining indoor humidity levels between 30 percent and 50 percent. When humidity levels remain consistent, hardwood floors maintain their natural shape and resist warping.

Contractors often recommend using dehumidifiers in humid seasons and humidifiers during cold winter months to maintain stable humidity levels. Dehumidifiers can reduce excessive moisture that may otherwise cause floors to warp.

Leaving Proper Expansion Gaps

During installation, contractors leave expansion gaps between the floorboards and the walls. These gaps create space that allows wood boards to expand during periods of high humidity. Without this space, hardwood planks may press against each other and cause hardwood floor buckling. Expansion gaps are usually hidden beneath trim or baseboards but are critical to preventing buckled hardwood floors.

Choosing the Right Hardwood Flooring Type

In some situations, contractors recommend engineered hardwood rather than solid hardwood. Engineered hardwood flooring uses layered construction that improves stability in environments with changing humidity levels. This option may be recommended for older homes, basements, or rooms where moisture exposure is more likely.

Signs Your Hardwood Floors May Be Starting to Warp

Early signs of flooring damage can help homeowners prevent larger repair costs. Recognizing these warning signs allows a flooring contractor to repair the problem before buckled hardwood floors develop.

Boards Curling at the Edges

Cupping is one of the earliest signs that moisture is affecting hardwood floors. When the edges of boards lift higher than the center, moisture may be building beneath the floorboards.

Raised Centers

Crowning causes the center of wood boards to lift higher than the edges. This may indicate surface water damage or high humidity levels in the room.

Buckling or Lifting

When boards begin to buckle or lift off the subfloor, hardwood floor buckling is already occurring. Minor buckling may only affect a small section of the floor, while severe buckling can lift entire sections several inches above the surface.

Cracks and Gaps Between Boards

Cracks and gaps between floorboards may appear when humidity levels drop. These cracks are often temporary but may indicate large humidity swings that stress the flooring.

How Homeowners Can Help Prevent Hardwood Floor Warping

Homeowners also play an important role in protecting hardwood floors. Simple maintenance steps can reduce moisture exposure and prevent floors from warping.

Control Indoor Humidity

Maintaining stable humidity levels inside the home helps protect wood floors. Dehumidifiers are often used during humid seasons to remove excess moisture from the air.

Clean Up Spills Quickly

Spills left on the surface of the floor can soak into floorboards and cause water damage. Promptly cleaning spills prevents moisture from penetrating the wood, and following proper methods to clean hardwood floors without damaging them helps maintain both appearance and structural integrity.

Use Mats at Entryways

Entryway mats help prevent water from rain or snow from reaching hardwood floors. This simple step can reduce water damage during wet seasons.

Maintain Appliances and Plumbing

Many flooring problems start with water leaks from appliances such as dishwashers, refrigerators, or washing machines. Checking appliances regularly helps prevent hidden water damage that may affect the flooring, which is especially important when you have hardwood flooring in a kitchen with white cabinets or other high‑end design choices you want to protect.

Schedule Professional Inspections

Periodic inspections from a flooring contractor can identify minor buckling or moisture problems early. Early repair helps prevent severe buckling and protects the floor in the long run.

Why Professional Installation Makes the Biggest Difference

Many hardwood floor problems begin with poor installation. Improper installation may include failing to test moisture levels, skipping acclimation, or installing flooring over an uneven subfloor. A professional flooring contractor understands the importance of precise installation. They evaluate the subfloor, monitor humidity levels, and ensure hardwood planks are properly installed across the room.

When hardwood flooring is installed correctly, boards maintain their natural shape and resist warping. Precise installation helps prevent hardwood floor buckling and ensures new hardwood floors perform well for decades.

FAQs About Hardwood Floor Warping

Can warped hardwood floors be repaired?

Yes, warped hardwood floors can often be repaired depending on the severity of the damage. Minor buckling may be corrected by reducing humidity levels and allowing the wood to return to its original shape.

How do contractors repair buckled hardwood floors?

Contractors may remove damaged planks using tools such as a circular saw and pry bar. Replacement planks are then installed to restore the floor surface.

Can water damaged hardwood floors be saved?

If water damage is minor, drying the floor and refinishing may restore the surface. However, severely buckled boards or severely buckled flooring may require replacement planks.

How long does hardwood acclimation take?

Most hardwood planks are acclimated inside the room for several days before installation begins. This process allows the wood to adjust to humidity and temperature conditions.

Will dehumidifiers help prevent hardwood floor buckling?

Yes, dehumidifiers can reduce excessive moisture and help maintain healthy relative humidity levels inside the home.

Protect Your Hardwood Floors With Expert Installation

Hardwood flooring is designed to last for decades when installed properly and maintained carefully. By controlling moisture, managing humidity levels, and ensuring proper installation practices, contractors prevent floors from warping and reduce the risk of hardwood floor buckling.

Many homeowners experience problems with buckled hardwood floors because of poor installation or uncontrolled humidity in their homes. Working with an experienced flooring contractor helps ensure hardwood floors are installed correctly and protected from moisture-related damage.

In the long run, professional installation, regular maintenance, and stable humidity levels will keep hardwood floors strong, beautiful, and resistant to warp for many years.

How Do Contractors Measure Kitchens for New Cabinets?

Опубликовано: March 23, 2026 в 3:53 am

Автор:

Категории: Kitchen

Тэги:

A Step-by-Step Guide

When homeowners begin planning a kitchen renovation, one of the first questions they ask is how do contractors measure kitchens for new cabinets. The answer involves a careful process designed to ensure cabinets fit properly within the available space. Professional remodelers rely on accurate measurements, a clear kitchen layout, and an understanding of standard cabinet dimensions before they order cabinets from a cabinet shop. Even a small error when measuring kitchen cabinets can affect cabinet doors, appliance placement, and countertops. That is why contractors approach the process with attention to detail and a structured method. This step-by-step guide explains how professionals measure your kitchen, plan cabinet space, and prepare for installing new kitchen cabinets that work perfectly within the room. Understanding this process can help homeowners feel confident as they plan a remodeling project and prepare for ordering kitchen cabinets.

Why Accurate Kitchen Measurements Matter Before Ordering Cabinets

Every kitchen renovation starts with accurate measurements. Cabinets must align with walls, appliances, and countertops, and they must also accommodate cabinet doors that open freely without hitting nearby obstacles. Taking accurate measurements helps ensure cabinets fit properly and look balanced within the room. If measurements are off, even slightly, the cabinets may not align with windows and doors or could interfere with appliances.

Accurate measurements also allow contractors to determine cabinet dimensions that match the current kitchen layout or a new layout that improves workflow. When professionals measure your kitchen, they evaluate existing conditions such as wall irregularities, ceiling height, and the placement of existing appliances. These factors influence how cabinets are installed and how the kitchen layout functions once the renovation is complete.

During the planning stage, contractors also consider storage needs, cabinet style, and aesthetic preferences. These decisions influence whether homeowners choose standard cabinet sizes or custom cabinets and how those cabinets will work with the standard depth for kitchen countertops. A professional cabinet installer focuses on precise measurements because it allows the cabinet shop to build cabinets that integrate seamlessly with countertops, appliances, and the surrounding space.

Tools Contractors Use to Measure Kitchens

Professionals use several tools to measure kitchen cabinets and ensure accurate measurements. While the process may appear simple, contractors rely on the following tools to confirm every dimension and measurement before placing a cabinet order.

Standard Measuring Tools

A tape measure is one of the most important tools used when measuring kitchen cabinets. Contractors use a long tape measure to check the width of walls, the height from floor to ceiling, and the spacing between windows and doors. They often measure each section of wall multiple times to confirm dimensions. A level is also used to check whether the floor and ceiling are even. If the floor slopes or the ceiling is uneven, adjustments may be needed when installing cabinets.

Contractors may also use graph paper to sketch a floor plan of the kitchen layout. This drawing helps organize measurements and identify where cabinets, appliances, and countertops will be installed.

Digital Measurement Tools

In addition to manual tools, many contractors use digital laser measuring devices. These tools quickly measure long walls and confirm cabinet measurements with high accuracy. Digital measurements are often transferred into design software that allows contractors to visualize the cabinet space before ordering kitchen cabinets from the cabinet shop. This process reduces the risk of errors and ensures the cabinets will fit the available space once installation begins.

Step 1 | Creating a Rough Kitchen Floor Plan

The first step in measuring kitchen cabinets is creating a rough floor plan. Contractors sketch the shape of the room on graph paper and label the walls, windows, and doors. The floor plan does not need to be perfectly scaled, but it should show the current kitchen layout and identify all fixed elements.

Fixed elements include windows, doors, appliances, electrical outlets, plumbing lines, and gas lines. These elements cannot easily be moved during a kitchen renovation, so contractors must design the cabinet layout around them. During this stage, contractors also review existing conditions such as current cabinetry, countertops, and the placement of the sink. If the homeowner plans to remove existing cabinetry, contractors still measure the space where the cabinets are located. These measurements help determine how new cabinets will fit within the room.

A clear floor plan helps contractors track measurements and understand how each wall connects to the rest of the kitchen layout.

Step 2 | Measuring the Walls

Once the floor plan is complete, contractors begin measuring the walls where cabinets may be installed. Walls are measured from corner to corner using a tape measure to determine the total width of each section. Contractors record these measurements in inches because cabinet dimensions are typically manufactured in inch increments.

Measuring walls accurately is critical for determining how many cabinets will fit within the space. Contractors also divide walls into smaller sections when windows and doors interrupt the surface. Each section is measured individually so the cabinet shop can produce cabinets that align with the kitchen layout.

Wall irregularities are common in older homes, so contractors measure the walls at multiple points. This step helps identify areas where cabinets may need adjustments during installation. Careful measurements ensure cabinets align with countertops, appliances, and the surrounding trim.

Step 3 | Measuring Ceiling Height and Vertical Space

In addition to measuring wall width, contractors measure ceiling height and other vertical dimensions. The height from floor to ceiling determines the size of wall cabinets and the placement of upper cabinets. Ceiling height also influences design features such as crown molding, kitchen cabinet soffits, and under cabinet lighting.

Contractors measure the distance from the floor to the ceiling in several locations along the walls. This step helps identify uneven surfaces or sloped ceilings that could affect cabinet installation. Measuring vertical dimensions also helps contractors determine whether cabinets will extend to the ceiling or leave a gap for trim and crown molding.

When contractors measure your kitchen, they also record the height of windows relative to the floor and the ceiling. These measurements help determine whether cabinets can be installed above or below the windows without interfering with natural light.

Step 4 | Measuring Doors, Windows, and Obstacles

Doors and windows play an important role in cabinet placement. Contractors measure the width and height of windows and doors, along with the distance from each opening to the nearest corner. These measurements ensure cabinets do not block access points or restrict movement through the kitchen.

Contractors also measure trim around windows and doors because trim can reduce available cabinet space. Recording the position of windows and doors helps the cabinet installer determine how cabinet doors will open and whether they will interfere with nearby walls or appliances.

In addition to windows and doors, contractors measure other fixed elements that affect cabinet placement. These elements may include electrical outlets, gas lines, vents, and plumbing connections. Accurately measuring these obstacles ensures cabinets fit properly and that appliances can connect to utilities without modifications.

Step 5 | Measuring Appliances and Utility Locations

Appliances must fit precisely within the cabinet layout, so contractors carefully measure the width, height, and depth of each appliance. This includes the refrigerator, dishwasher, range, microwave, and other built-in appliances. The sink location is also measured to determine the size of the sink base cabinets and the surrounding countertops, as well as the right kitchen counter height for comfortable everyday use.

Contractors review existing appliances to confirm their dimensions and ensure proper appliance clearances. If homeowners plan to upgrade appliances during the kitchen renovation, contractors obtain manufacturer specifications to determine exact dimensions.

Measuring appliances also helps contractors determine how cabinet doors will open and whether appliances require additional space for ventilation. Accurate measurements ensure cabinets integrate seamlessly with appliances and countertops without interfering with their operation.

Step 6 | Planning Around Standard Cabinet Sizes

Most cabinets are manufactured in standard cabinet sizes, which helps contractors design a cabinet layout that maximizes space while maintaining consistent proportions. Base cabinets typically measure about 24 inches deep and support the countertops. Wall cabinets and upper cabinets are usually shallower so they do not interfere with the workspace.

Contractors use measurements from the kitchen layout to determine how different cabinet sizes will fit together. For example, certain corners may require specialized cabinets such as corner cabinet solutions like lazy susans to make better use of cabinet space.

Cabinet style also plays a role in planning. Some homeowners prefer inset doors that sit flush within the cabinet frame, while others choose partial overlay or full overlay cabinet doors that cover more of the cabinet front, or even plan to paint their existing kitchen cabinets for a refreshed look. These design choices influence cabinet dimensions and spacing between cabinets.

During this stage, contractors also consider storage needs and aesthetic preferences. If the current cabinetry does not provide enough storage space, the new layout may include taller wall cabinets or deeper base cabinets to maximize space.

Step 7 | Double Checking Measurements Before Ordering Cabinets

Before the cabinet shop begins building cabinets, contractors review all measurements again to confirm accuracy. Taking accurate measurements is essential because the cabinet order cannot easily be changed once manufacturing begins.

Contractors revisit the kitchen to verify measurements for walls, windows, appliances, and countertops. They also confirm ceiling height and floor level to ensure cabinets will fit properly during installation. This step often includes checking cabinet measurements at multiple points along the walls to account for existing conditions such as uneven surfaces.

Once the measurements are verified, contractors finalize the cabinet order and coordinate with the cabinet shop to begin manufacturing. Accurate measurements during this stage help ensure cabinets arrive ready for installation without costly delays.

Common Kitchen Measurement Mistakes Homeowners Make

Homeowners who attempt measuring kitchen cabinets themselves often encounter common errors. One common error is failing to measure the ceiling height accurately. Another mistake involves overlooking trim around windows and doors, which reduces available cabinet space, especially in compact layouts like 10×10 kitchen floor plans.

Many homeowners also forget to measure around appliances or assume that appliances are standard sizes. These oversights can cause problems when ordering kitchen cabinets. Another issue occurs when homeowners fail to account for wall irregularities or uneven floors. Even small variations can affect how cabinets align with countertops and cabinet doors.

Contractors avoid these issues by taking accurate measurements and evaluating existing conditions throughout the kitchen. Professional help can prevent these mistakes and ensure cabinets fit properly once installation begins.

Should You Measure Your Kitchen Yourself or Hire a Contractor?

Homeowners can measure your kitchen to get a rough idea of cabinet space and potential layouts. Basic measurements using a tape measure can help estimate cabinet costs and explore different cabinet style options.

However, professional cabinet installers provide expert guidance and ensure precise measurements before cabinets are ordered. Contractors understand how to evaluate existing conditions, measure around appliances, and account for structural features such as sloped ceilings or wall irregularities. Their experience helps prevent costly mistakes and ensures cabinets integrate seamlessly with countertops, appliances, and the overall kitchen layout.

What Happens After the Kitchen Is Measured?

Once the kitchen measurements are finalized, contractors begin designing the new layout for the kitchen renovation. This design process includes selecting cabinet style, choosing materials, and planning how cabinets will align with countertops and appliances, including options like properly sized kitchen island dimensions or even a 10×10 kitchen layout with an island when space allows.

The cabinet shop then uses the measurements to manufacture cabinets according to the specified dimensions. Once the cabinet order is complete, installation can begin. During installation, the cabinet installer ensures cabinets are level, cabinet doors open smoothly, and countertops fit perfectly above the base cabinets.

Careful measuring during the planning stage helps ensure the installation process proceeds efficiently.

Frequently Asked Questions

How do contractors measure a kitchen for cabinets?

Contractors measure walls, ceiling height, windows, doors, appliances, and existing cabinetry to create accurate kitchen measurements that guide the cabinet layout.

What tools are used when measuring kitchen cabinets?

Contractors typically use a tape measure, levels, graph paper, and digital laser tools to record cabinet measurements and verify dimensions.

Can homeowners measure their kitchen for cabinets?

Homeowners can measure your kitchen for planning purposes, but professional contractors should confirm measurements before ordering kitchen cabinets.

Why are accurate measurements important for cabinets?

Accurate measurements ensure cabinets fit properly within the space and align correctly with countertops, appliances, and walls.

How long does measuring a kitchen take?

Most contractors can measure a kitchen in less than an hour, although complex layouts or large kitchens may take longer.

Final Thoughts: Why Professional Kitchen Measurements Matter

Measuring kitchen cabinets is a detailed process that requires careful planning and attention to detail. Contractors measure walls, windows, appliances, and ceilings to create a kitchen layout that supports functional cabinet space and efficient workflow.

Taking accurate measurements allows the cabinet shop to produce cabinets that fit the room and align with countertops and appliances. During a kitchen renovation, this step helps ensure cabinets install smoothly and look balanced within the space.

When measurements are handled by experienced professionals, homeowners can feel confident that their new cabinets will fit properly and perform well for years to come.

How Do Contractors Estimate Kitchen Remodeling Budgets?

Опубликовано: March 20, 2026 в 3:53 am

Автор:

Категории: Kitchen

Тэги:

A Homeowner’s Guide

Planning a kitchen remodel is one of the most exciting improvements homeowners can make, but understanding the budget behind the work is often the most challenging part. Many homeowners ask the same question at the beginning of a renovation: how do contractors estimate kitchen remodeling budgets? The answer involves a detailed estimating process that evaluates materials, labor, layout changes, permits, and many other factors that affect the final price.

A professional contractor does not guess or provide a random number. Instead, they gather information about the existing kitchen, review the project scope, and create a structured plan that leads to an accurate estimate. This approach helps homeowners understand the total project cost and prevents costly surprises during construction. A well-prepared estimate also helps homeowners compare multiple estimates from different contractors and make informed decisions about their kitchen renovation.

When done correctly, accurate cost estimation allows the project to stay on schedule and within the planned budget range. Understanding this process can make the difference between a stressful remodel and a successful transformation that results in a beautiful dream kitchen.

Why Kitchen Remodeling Estimates Vary So Much

One of the biggest surprises for homeowners is how much kitchen remodel estimates can vary. Two contractors may provide very different numbers for what appears to be the same project. This happens because every kitchen renovation has different existing conditions, materials, labor requirements, and design goals.

The estimating process begins by examining the project scope and the level of work required to transform the existing kitchen into the homeowner’s desired design. Some remodel projects only involve cosmetic updates such as replacing cabinets, installing new countertops, or updating lighting fixtures. Other renovation projects include structural changes, flooring replacement, plumbing relocation, and appliance upgrades. These differences significantly influence the kitchen remodel cost and overall budget.

Another key factor is material costs. Cabinets, countertops, flooring, and appliances come in a wide range of prices depending on quality and style. A contractor must evaluate current prices for materials and determine how those selections affect the total cost of the project.

Labor costs also play a major role. Skilled trades such as plumbers, electricians, tile installers, and carpenters contribute to the total project cost. The number of labor hours required to complete the work directly affects the estimate and the final kitchen remodel budget.

The 7 Main Factors Contractors Use to Estimate Kitchen Remodeling Costs

Professional contractors rely on several essential factors to determine kitchen remodeling costs. These elements help create an accurate estimate that reflects the true scope of the renovation.

1 | Kitchen Size and Layout

Kitchen size is a key factor in any kitchen remodel estimate. Larger kitchens require more materials such as flooring, cabinets, countertops, and lighting fixtures. Layout changes can increase the total cost because moving sinks, ranges, or refrigerators requires adjustments to plumbing lines and electrical wiring. These changes also increase labor hours and permit requirements.

2 | Cabinets and Storage Solutions

Cabinets often represent the largest portion of a kitchen renovation budget. Installing new cabinets or custom cabinetry increases both material costs and labor costs. Storage features such as pull-out drawers, built-in organizers, and soft-close hardware can also affect the final estimate. Contractors must determine how the cabinetry design will influence the project scope and overall budget.

3 | Countertops and Surface Materials

Countertops are another major element in the kitchen remodel cost. Materials such as quartz, granite, and marble vary significantly in price depending on quality and fabrication requirements. Countertops require precise measurements and professional installation. Contractors must include these material costs and labor costs when creating an estimate.

4 | Appliances and Fixtures

Appliances are an important part of any modern kitchen remodel. Homeowners may choose standard appliances or upgrade to premium appliances and energy efficient appliances that improve performance and reduce energy use. The type of appliances selected can significantly influence the total project cost. Fixtures such as faucets, sinks, and cabinet hardware also contribute to the overall budget.

5 | Plumbing and Electrical Work

Kitchen renovation projects often require plumbing and electrical upgrades. Moving a sink or installing a new dishwasher requires plumbers to adjust existing pipes. Electrical upgrades may include new lighting circuits, appliance connections, and additional outlets. Labor costs for these trades must be included in the estimate to ensure the project stays compliant with building codes.

6 | Permits and Code Requirements

Most kitchen renovation projects require permits and inspections to ensure the work meets local building regulations. Contractors must account for permit fees, inspections, and documentation when preparing the estimate. These requirements are essential for protecting homeowners and ensuring the project is completed safely, and many homeowners begin by asking whether they need a permit to remodel their kitchen.

7 | Labor and Project Management

Labor coordination is a crucial part of any renovation. Contractors must schedule carpenters, plumbers, electricians, and flooring installers to complete the work in the correct sequence. Proper project management ensures quality work and helps prevent delays that could increase costs.

How Contractors Build a Kitchen Remodeling Estimate Step by Step

Creating an accurate estimate involves a structured estimating process that begins with planning and information gathering. Experienced general contractors follow several steps to create reliable estimates for kitchen remodel projects.

Step 1: Initial Consultation and Project Goals

The estimating process begins with a consultation where the contractor gathers information about the homeowner’s goals for the kitchen renovation. During this meeting, the contractor reviews design ideas, desired features, and the homeowner’s budget range. Understanding these priorities helps the contractor plan the project and determine which materials and services will be required.

Step 2: Accurate Measurements and Evaluation

Accurate measurements are essential when estimating a kitchen renovation. Contractors measure the existing kitchen layout, document appliance locations, and review existing conditions that may affect construction. This evaluation helps identify potential challenges such as outdated plumbing, uneven flooring, or structural issues.

Step 3: Material Selection and Design Planning

Once the layout is documented, contractors work with homeowners to select cabinets, countertops, flooring, appliances, lighting, and fixtures. These selections determine the material costs and influence the overall budget. Contractors review current prices for these materials to create an accurate estimate.

Step 4: Labor and Trade Estimates

After materials are selected, the contractor gathers labor estimates from subcontractors involved in the project. Plumbers, electricians, and tile installers provide detailed quotes based on the project scope. These detailed quotes help determine labor costs and ensure the final estimate reflects real installation requirements.

Step 5: Final Proposal and Estimate

The final step in the estimating process is assembling a detailed breakdown of the project costs. This proposal includes materials, labor, permits, and project management services. A detailed breakdown allows homeowners to see where their money will be spent and helps ensure both the contractor and homeowner are on the same page before construction begins.

Average Kitchen Remodeling Cost Ranges in 2025

Understanding the average kitchen remodeling cost in 2025 can help homeowners plan their budget more effectively. While every project is unique, general cost ranges provide helpful guidance.

Minor Kitchen Remodel

A minor kitchen remodel usually includes cosmetic updates such as cabinet refacing, replacing kitchen cabinets and countertops, upgraded appliances, and fresh lighting fixtures. Flooring replacement and new fixtures may also be included. Because the existing kitchen layout remains unchanged, labor costs are lower and the project stays within a smaller budget range.

Midrange Kitchen Renovation

Midrange renovation projects typically include new cabinets, updated appliances, new countertops, and upgraded flooring. For many homeowners, understanding how much a 10×10 kitchen remodel should cost provides a helpful reference point for this level of project. These remodel projects may also include improved lighting and updated fixtures. Labor costs increase because more materials and installation work are required.

Major Kitchen Remodel

A major kitchen remodel transforms the entire space. These projects may involve removing walls, installing custom cabinets, relocating appliances, replacing flooring, and upgrading electrical systems. In high-cost states, it’s important to understand the cost of a full kitchen remodel in California when planning this level of work. Because of the extensive labor and materials required, these projects represent the highest kitchen remodel cost category.

Hidden Costs Contractors Look for When Estimating

Experienced contractors understand that kitchen renovation projects often include unexpected costs. Identifying potential issues early in the estimating process helps reduce surprises later.

Structural Issues

Older homes may have uneven flooring, damaged framing, or walls that require reinforcement. These existing conditions can increase labor and material costs.

Plumbing or Electrical Upgrades

Outdated plumbing or wiring systems may need to be replaced during the renovation. Contractors evaluate these systems when preparing an estimate so the project can proceed safely, and in some regions these upgrades significantly affect overall home remodel costs in areas like Sacramento.

Water Damage or Mold

Water leaks behind cabinets or under appliances can cause hidden damage. Repairing these issues may add unexpected costs to the project, especially in older or unique structures such as mobile home kitchen remodels.

Building Code Updates

Local building codes sometimes require updates to ventilation, electrical outlets, or fire safety features. Contractors include these requirements in the estimate to avoid unexpected charges later.

How Homeowners Can Get a More Accurate Kitchen Remodeling Estimate

Homeowners can take several steps to help contractors provide an accurate estimate for their kitchen remodel.

Have a Clear Vision for the Project

Providing detailed information about your design ideas helps contractors gather information and prepare detailed quotes. Architectural plans or inspiration photos can help clarify the project scope.

Set a Realistic Budget Range

Sharing a realistic budget range helps contractors recommend materials and appliances that align with the homeowner’s financial goals, and many homeowners pair this step with exploring financing options for a kitchen remodel.

Prioritize Must-Have Features

Identify the key features you want in your new kitchen such as an island, new cabinets, upgraded appliances, or durable countertops made from the right material. Prioritizing these elements helps contractors determine how to allocate the budget.

Work With an Experienced Contractor

Working with experienced general contractors ensures the estimating process is handled professionally. Contractors with extensive knowledge can identify potential challenges and create accurate estimates that reflect real construction conditions.

Why Professional Kitchen Estimates Are Worth It

A professional estimate provides far more value than a simple price quote. Detailed quotes help homeowners understand the full scope of the renovation and avoid costly errors in planning. Accurate cost estimation allows homeowners to evaluate multiple estimates and compare services from different contractors. It also ensures that payment schedules, construction timelines, and project expectations are clearly defined.

When both the contractor and homeowner are on the same page, the project moves forward smoothly and the final results meet expectations. Professional planning also protects homeowners from unexpected charges because potential issues are identified early in the estimating process.

Frequently Asked Questions About Kitchen Remodeling Budgets

How much should I budget for a kitchen renovation?

The average kitchen remodel cost varies depending on the project scope, materials, and labor required. Minor remodel projects may cost significantly less than major renovations that include custom cabinets, premium appliances, and structural changes.

Why do contractors provide different estimates?

Contractors may evaluate materials, labor hours, and existing conditions differently. Reviewing detailed quotes from multiple contractors helps homeowners understand the total project cost.

What is the most expensive part of a kitchen remodel?

Cabinets often represent the largest expense in a kitchen remodel because they involve both material costs and installation labor.

Should I include a contingency fund in my budget?

Yes. A contingency fund is essential for managing unexpected costs that may arise during the renovation process.

How long does it take to receive a kitchen remodel estimate?

Most contractors provide a detailed estimate within several days to a few weeks after gathering measurements, reviewing materials, and evaluating the project scope.

Start Planning Your Kitchen Remodel With Confidence

Understanding how contractors estimate kitchen remodeling budgets gives homeowners the knowledge they need to plan a successful renovation. A professional contractor reviews the project scope, evaluates materials and labor costs, and creates a detailed estimate that reflects the true cost of the work.

By considering factors such as cabinets, countertops, appliances, flooring, permits, and labor hours, contractors create a clear plan for the project. Homeowners who request multiple estimates, set a realistic budget, and maintain a contingency fund are better prepared for unexpected costs during construction.

With the right planning and expert guidance, homeowners can confidently move forward with a kitchen remodel that fits their budget and transforms their kitchen into the dream kitchen they have envisioned.

How Do Contractors Ensure Countertop Measurements Are Accurate?

Опубликовано: March 16, 2026 в 3:53 am

Автор:

Категории: Kitchen

Тэги:

How Do Contractors Ensure Countertop Measurements Are Accurate?

Installing a new countertop is one of the most exciting parts of a kitchen renovation, but it is also one of the most technical steps. Homeowners often focus on choosing materials, colors, and edge styles, yet the most important factor behind a successful installation is accurate measurement. Even small measurement errors can cause gaps along walls, poorly aligned seams, or appliances that do not fit correctly. Understanding how do contractors ensure countertop measurements are accurate helps explain why professional measuring is such a critical step before fabrication begins.

Contractors rely on proven processes, specialized tools, and experience to measure countertops correctly. From verifying cabinet placement to using digital templating systems, each step is designed to produce accurate dimensions that allow the countertop to fit perfectly during installation. When done correctly, accurate countertop measurements protect homeowners from delays, material waste, and costly errors. In this guide, we will walk through how professionals measure countertops and why the process matters for long lasting kitchen countertops and smooth countertop installation.

Why Accurate Countertop Measurements Matter in a Kitchen Remodel

Precise measurements are essential when installing new countertops because most materials are cut before they arrive at the home. Granite, quartz, and solid surface slabs are fabricated at a shop using the exact dimensions recorded during measuring. If those dimensions are incorrect, the countertop will not fit the cabinets or walls properly. This can lead to visible gaps, difficult installation, or the need to remake sections of the countertop entirely, which can significantly increase the overall cost of a 10×10 kitchen remodel.

Accurate measurements also help avoid costly mistakes during fabrication. Stone slabs are expensive, and once the material is cut it cannot easily be adjusted. Contractors take careful measurements to prevent material waste and to protect the homeowner’s investment in the new surface.

Another reason measuring is so important is that walls in most homes are rarely perfectly straight. Even new construction kitchens may have slight variations in framing or drywall. Contractors account for wall irregularities when they measure countertops so the back edge of the countertop fits tightly against the back wall.

Accurate countertop measurements also help coordinate appliances. Sink openings, cooktop cutouts, and faucet placements all depend on accurate dimensions. A small measuring error could mean the exact width of an appliance opening is incorrect. Professional measuring prevents those issues and helps ensure a seamless installation once fabrication is complete.

When Contractors Take Final Countertop Measurements

Many homeowners assume contractors measure countertops at the beginning of a renovation. In reality, professional measuring usually happens after several other steps are completed. Contractors wait until cabinets and layout details are finalized before they start measuring.

The base cabinets must be fully installed first. Because the countertop rests on top of the cabinets, their final placement determines the exact countertop length and width. Choosing the right kitchen cabinet depth also impacts how far the countertop will extend into the room. If contractors measure before cabinets are secured, even small cabinet adjustments can affect the final dimensions.

Flooring installation should also be completed before measuring. Flooring can slightly change cabinet height or alignment, which can affect measurements accuracy. Waiting until flooring is finished ensures the countertop will sit properly on a solid foundation, and understanding whether flooring should be installed before or after cabinets helps you plan the sequence of your remodel correctly.

Contractors also verify the location of sinks, cooktops, and other appliances before they measure countertops. These features require cutouts in the countertop area, and the openings must match the appliance specifications exactly. Accurate dimensions ensure the appliances fit correctly after installation.

If the kitchen previously had an existing countertop or existing countertops, those surfaces are usually removed before final measuring. Removing the current countertop exposes the cabinet tops and allows contractors to measure the exact countertop area without interference from old materials; following a careful process for removing a kitchen countertop in 7 steps helps protect your cabinets and walls.

Sometimes an existing backsplash must also be removed before measuring. An existing backsplash can slightly change the depth between the cabinet and the wall. Measuring after removal ensures the back edge of the new countertop sits flush against the back wall.

The Professional Countertop Templating Process

After cabinets and layout elements are ready, contractors move to the templating stage. This step creates a detailed guide used during the fabrication process. A template captures the full layout of the countertop area including appliance openings, overhang dimensions, and wall angles.

Traditional measuring often involved physical templates created from cardboard or thin wood strips. These templating materials were arranged on top of cabinets to replicate the countertop shape. Physical templates still work well for some installations, particularly when the layout includes irregular shapes or complex shapes.

Today many contractors rely on digital templating technology. Digital templating uses a digital device with laser measurement capability to scan the entire countertop space. The system records exact dimensions and creates a precise digital template that can be sent directly to professional fabricators.

A precise digital template allows stone fabricators to translate the measurements into fabrication instructions. Because the template captures angles, wall curves, and cabinet variations, it helps ensure a seamless fit when the countertop arrives at the home. Digital templating can also save time because the measurements move directly from the job site to the fabrication shop without manual re entry.

Templating ensures that measuring captures more than just length and width. The template also includes overhang dimensions, sink cutouts, seam locations, and edge profiles. This information helps create kitchen countertops that fit the cabinets and walls exactly.

Key Measurements Contractors Carefully Verify

Professional measuring involves much more than recording the countertop length. Contractors check multiple elements to ensure the countertop will fit correctly.

The first step is to measure the length and depth of the countertop area. Contractors use a measuring tape or tape measure to measure the length along the cabinet run. They also confirm the standard kitchen countertop depth from the cabinet face to the back wall. The front edge of most countertops typically extends slightly beyond the cabinet face to create a small overhang.

Contractors also measure the exact width of any countertop sections that extend beyond standard cabinet runs. Islands, peninsulas, and breakfast bar areas often require custom overhang dimensions that must be measured precisely, and getting the correct kitchen island height is just as important for comfort and usability.

Another critical measurement involves the location of appliance cutouts. Contractors record the position of sinks, cooktops, and other appliances to ensure the countertop openings match the manufacturer specifications.

Seam placement is also planned during measuring. Large kitchen countertops may require multiple slabs, and seams must be positioned over cabinet supports. Careful measuring ensures seams are discreet and structurally supported, and learning how seams in stone countertops are handled can help you set realistic expectations for the finished surface.

Contractors also verify the front edge and back edge alignment with cabinets and walls. They measure from the cabinet frame to the outermost edge to confirm the countertop edges will align evenly across the kitchen, and they consider the right kitchen counter height for the home so working at the surface feels comfortable and functional.

Tools Contractors Use to Measure Countertops Accurately

Using the right tools makes a significant difference in measurements accuracy. Professional contractors rely on several tools you’ll need to capture accurate dimensions.

A measuring tape or tape measure is one of the most basic tools used during measuring. Contractors use these tools to measure the length and width of cabinet runs and confirm overall square footage.

Laser measuring tools provide additional precision. These digital devices measure distances using laser technology, allowing contractors to capture exact dimensions quickly and efficiently.

Another tool commonly used is a straight edge or long level. Because walls are rarely perfectly straight, contractors use a straight edge to check cabinet alignment and wall surfaces before finalizing measurements.

Digital templating systems represent the most advanced measuring tools available today. These systems scan the countertop area and generate a precise digital template that guides fabrication. The use of digital templating helps ensure accuracy and reduces the chance of human error.

Contractors may also use graph paper when sketching layouts for complex kitchens. Drawing the layout helps visualize complex layouts, irregular shapes, or non standard angles before templating begins.

Challenges Contractors Account for During Measurements

Every kitchen presents unique measuring challenges. Experienced contractors anticipate these issues during the measuring process.

One common challenge is wall irregularities. Because walls are rarely perfectly straight, contractors must account for slight curves or uneven surfaces. They measure along the back edge and sometimes scribe the countertop so it fits tightly against the back wall.

Another challenge involves uneven cabinets. Contractors check cabinet alignment with a straight edge to ensure the cabinets provide a solid foundation for the countertop installation.

Complex layouts can also make measuring more difficult. Kitchens with l shaped or u shaped kitchen designs require contractors to segment separately each section of countertop. Each segment is measured individually to ensure accurate dimensions before calculating the total square footage.

Islands and breakfast bar sections often require additional measurements because they may extend beyond the cabinet structure. Contractors measure the outermost edge carefully to ensure the overhang dimensions match the design plan, tying into broader decisions about overall kitchen island dimensions and clearances in the room.

How Contractors Double Check Measurements Before Fabrication

Professional measuring always includes verification steps before the countertop moves into fabrication. Contractors double check every dimension to ensure accuracy.

The first step is reviewing all measurements taken with the measuring tape and digital device. Contractors confirm that each section of the countertop area matches the recorded dimensions.

They also double check appliance specifications to ensure the cutout sizes match manufacturer requirements. Sink and cooktop openings must match the exact width and depth required for safe installation.

Contractors may also take additional measurements if something appears inconsistent. For example, if a wall angle seems unusual, they will re measure the length and depth to verify the accurate dimensions.

Some contractors perform a final walkthrough with the homeowner before fabrication begins. This review helps confirm overhang dimensions, edge profiles, and seam placement. Verifying these details helps ensure customer satisfaction once the countertop arrives for installation.

Common Countertop Measurement Mistakes DIY Installations Make

While some homeowners attempt to simply measure their own kitchen countertops, professional measuring usually produces better results. Many DIY installations encounter problems due to inaccurate measurements.

One common mistake is measuring the current countertop rather than the cabinets. The current countertop may have irregular overhangs or uneven edges, which can create inaccurate dimensions for the new surface.

Another mistake is ignoring wall irregularities. Walls may appear perfectly straight, but small variations can affect the back edge of the countertop. Professional contractors account for these variations during measuring.

DIY installers may also underestimate the importance of appliance cutouts. Measuring sink and cooktop openings incorrectly can prevent appliances from fitting properly.

Seam placement is another area where mistakes occur. Without proper planning, seams may appear in visible areas or lack structural support. Professional fabricators understand how to measure countertops so seams remain discreet and durable.

Because countertop materials are expensive, these errors can lead to costly mistakes and unnecessary delays.

Why Professional Contractors Deliver Better Countertop Results

Experienced contractors bring specialized knowledge to the measuring process. Their experience helps ensure countertop installation goes smoothly from templating through final placement.

Professional fabricators and contractors understand how different materials behave during fabrication. Granite, quartz, and solid surface materials each require specific handling and cutting techniques. Choosing among popular kitchen countertop materials for your remodel will influence how the fabricator works with the slabs. Accurate countertop measurements help ensure the material supplier receives the correct dimensions for fabrication.

Contractors also understand how to measure countertops for complex layouts such as l shaped kitchens, u shaped kitchen designs, or large islands. These complex shapes require careful measuring and planning to ensure a seamless fit once installed.

Using the right tools and digital templating technology allows contractors to save time while maintaining precision. This technology helps ensure accurate dimensions that produce a seamless installation when the countertop arrives at the home.

Professional measuring also supports long term durability. When countertops are measured correctly, they sit evenly on cabinets and distribute weight properly. This creates a solid foundation that helps the countertop last for years.

Ultimately, professional measuring improves customer satisfaction by ensuring the finished kitchen countertops look beautiful and function exactly as expected.

What Homeowners Should Do Before Countertop Measurements

Homeowners can help ensure accurate countertop measurements by preparing the space before measuring begins.

First, finalize appliance selections including sinks and cooktops. Having the correct specifications ensures the contractor can measure cutouts accurately.

Second, confirm that cabinets are fully installed and secured. The cabinets create the base for the countertop, so measuring should only happen after they are complete.

Third, remove any remaining existing countertops or full height backsplashes. Clearing the workspace allows contractors to measure directly from the cabinet surface and back wall.

Finally, confirm design details such as edge profiles and overhang dimensions. Finalizing these decisions before templating helps avoid changes during fabrication.

FAQs About Countertop Measurements

How precise do countertop measurements need to be?

Countertop measurements must be extremely precise because most countertops are fabricated before installation. Even small variations can affect how the countertop fits against cabinets and walls.

Do contractors measure countertops more than once?

Yes. Contractors typically measure countertops multiple times and double check their measurements before sending them to fabrication. This process helps ensure accuracy.

What happens if countertop measurements are wrong?

Incorrect measurements may require the countertop to be refabricated. This can delay installation and increase project costs.

Can countertops be adjusted onsite?

Minor adjustments may be possible, but most countertop fabrication happens off site. Large errors often require a new slab to be fabricated.

How do contractors calculate square footage?

Contractors measure the length and depth of each section of the countertop area, then calculate the total square footage. Kitchens with irregular shapes may require separate measurements for each segment before adding the totals.

Work With a Contractor Who Gets Countertop Measurements Right the First Time

Accurate measuring is the foundation of successful countertop installation. Contractors rely on professional tools, templating systems, and careful verification steps to ensure accurate measurements before fabrication begins. By accounting for wall irregularities, cabinet alignment, and appliance openings, they create kitchen countertops that fit perfectly in the home.

When new countertops are measured correctly, installation becomes faster, smoother, and more predictable. Homeowners avoid material waste, costly errors, and delays that can occur when measurements are incorrect.

Working with experienced professionals ensures the countertop is measured, fabricated, and installed with precision. With the right tools and careful measuring, your new countertop will provide a seamless fit and a beautiful finish that enhances your kitchen for years to come.

How Do Cabinet Installers Ensure Proper Alignment and Leveling?

Опубликовано: March 13, 2026 в 3:53 am

Автор:

Категории: Kitchen

Тэги:

How Do Cabinet Installers Ensure Proper Alignment and Leveling?

When homeowners begin planning a kitchen remodel, most of the attention goes toward cabinet styles, finishes, and storage features. However, one of the most important parts of the entire project is something many people never see: proper cabinet leveling and alignment, which matters just as much as staying up to date with kitchen cabinet trends for 2025. A kitchen can have beautiful cabinets, but if the cabinets are not properly leveled, the result can be uneven countertops, misaligned doors, and drawers that do not slide smoothly. Professional installers understand that cabinets must be placed precisely to create a stable foundation for the entire kitchen. Understanding how do cabinet installers ensure proper alignment and leveling helps homeowners recognize quality craftsmanship and avoid common mistakes during cabinet installation. This step-by-step guide explains how professionals install kitchen cabinets so they remain stable, level, and visually consistent throughout the entire kitchen.

Why Proper Cabinet Alignment and Leveling Is So Important

Level cabinets are essential for a functional and attractive kitchen. Kitchen cabinets must support heavy countertops, appliances, dishes, and daily use. If cabinets are not properly leveled during cabinet installation, problems can develop quickly, especially when you are also planning around standard depths for base and wall cabinets.

  • Ensures Flat and Secure Countertops: Level kitchen cabinets ensure countertops sit flat and secure. Stone countertops such as granite or quartz require perfectly level cabinet tops to prevent cracking or uneven seams. When cabinets are uneven, installers may struggle to make countertops fit seamlessly along the wall.
  • Proper Door and Drawer Operation: Properly aligned cabinets ensure doors and drawers operate correctly. When cabinets have a slight tilt or are not square, doors may rub against each other and drawers may slide open on their own. Drawer slides rely on cabinets being properly leveled to function correctly.
  • Aesthetic Appeal: Proper leveling matters for the overall aesthetic appeal of the kitchen. When cabinets are installed in a straight line with consistent spacing, the entire kitchen has a professional appearance. Uneven cabinets can leave uneven gaps between cabinet edges or where cabinets meet the wall.
  • Long-Term Durability: Professional cabinet installation provides long-term durability. Kitchen cabinets must support significant weight from countertops and daily storage. Proper leveling ensures cabinets distribute weight evenly across the floor and wall studs, protecting the cabinet structure over time.

Step-by-Step Guide: How Professional Cabinet Installers Ensure Cabinets Are Level

Professional installers follow a careful step-by-step guide to ensure cabinets are installed correctly. Each step in the installation process helps ensure the cabinets are properly aligned, stable, and ready for countertops.

Step 1: Measuring the Kitchen and Creating a Layout Plan

The first step in installing kitchen cabinets is measuring the entire kitchen space. Accurate measurements help installers determine where base cabinets and wall cabinets will be placed along the wall. Measurements also ensure appliances and countertops will fit correctly within the layout.

Marking Reference Lines on the Wall

Installers mark a level line across the wall to guide cabinet placement. A laser level or chalk line is used to create a straight line that represents the top of the base cabinets. This reference line helps installers align all the cabinets across the entire run. The level line acts as a reference point that prevents cabinets from shifting during installation.

Step 2: Finding the Highest Point of the Floor

Floors are rarely perfectly level, especially in older homes. Professional installers begin by locating the highest point on the kitchen floor. This step is essential for proper cabinet leveling.

The highest point becomes the reference point for installing base cabinets. By starting at the highest point, installers can adjust other cabinets to match the same height. This method prevents uneven cabinets and ensures the cabinet tops remain level.

Why Cabinets Are Installed From the Highest Point

If installers start at a low point on the floor, cabinets placed later in the run could become uneven. Locating both high and low points ensures the installation begins at the correct location. From there, installers can place shims under cabinets to compensate for uneven floors and create level cabinets across the entire kitchen.

Step 3: Using Professional Tools for Precision Alignment

Professional installers rely on several essential tools to ensure cabinets are properly aligned during cabinet installation. These tools allow installers to double-check measurements and confirm the cabinets remain level.

Laser Level

A laser level is one of the most important tools used during installing cabinets, especially on full-scale kitchen remodeling projects in Sacramento. The laser level projects a level line across the wall, making it easier to align base cabinets and upper cabinets throughout the kitchen. Installers often double-check cabinet placement with the laser level several times during installation.

Carpenter Levels and Stud Finder

Traditional levels are also used to check cabinets front to back and side to side. A stud finder helps locate wall studs behind the drywall. These wall studs provide the structural support needed to secure cabinets safely to the wall.

Power Drill and Cabinet Tools

Installers use a power drill to secure cabinets with cabinet screws and mounting screws. Using the right tools helps installers align cabinets efficiently while ensuring the screws anchor into the wall studs securely.

Step 4: Using Shims to Correct Uneven Floors and Walls

Uneven floors and walls are common in many homes, which is why installers use wood shims during cabinet installation and plan carefully around existing features like kitchen cabinet soffits. Shims are thin wedges that allow installers to make small adjustments to cabinet height.

What Are Cabinet Shims?

Shims are small pieces of wood placed under cabinets to raise sections slightly until the cabinets are level. Installers carefully place shims beneath base cabinets to compensate for uneven floors.

Where Installers Place Shims

Shims are typically placed under base cabinets along the floor or between cabinets and the wall. This process allows installers to adjust cabinets until they are properly leveled across the entire run.

After the cabinets are secure, installers trim extra shim material with a utility knife. This creates a clean and professional finish while ensuring cabinets remain stable.

Step 5: Aligning and Clamping Cabinets Together

Rather than installing cabinets individually, professionals often align adjacent cabinets before securing them. Aligning cabinets ensures the face frames line up evenly.

Connecting Adjacent Cabinets

Installers clamp adjacent cabinets together and drill pilot holes before driving screws through the face frames, paying special attention to tricky areas like corner cabinet configurations. This step connects the cabinets into one solid structure.

When adjacent cabinets are secured together, the entire run becomes stronger and easier to level. Aligning cabinets this way prevents gaps and ensures cabinets remain properly aligned across the kitchen.

Step 6: Securing Cabinets to Wall Studs

After cabinets are leveled and aligned, installers secure cabinets to the wall studs. Cabinet installation requires cabinets to be firmly anchored to structural framing.

Using Cabinet Screws and Mounting Screws

Installers use cabinet screws and mounting screws to fasten cabinets through the back rails and into wall studs. This step ensures the cabinets can support the weight of countertops, dishes, and everyday kitchen use.

Cabinet brackets may also be used to add support for certain cabinet designs, especially during custom installations.

Step 7: Checking Level and Alignment Throughout Installation

Even after cabinets are secured, installers continue to double-check alignment throughout the installation process. Cabinets installed early in the process can shift slightly as other cabinets are added.

Installers check cabinets front to back and side to side to confirm they remain level. They also verify that cabinets follow the original level line along the wall.

Double-check measurements and alignment during installation helps ensure all the cabinets remain properly aligned before countertops are installed.

Step 8: Final Adjustments After Cabinets Are Installed

Once the cabinets are installed and secured to the wall, installers complete several final adjustments to ensure everything looks and functions properly.

Adjusting Doors and Drawers

Cabinet hinges allow installers to adjust doors so they are properly aligned. This ensures consistent spacing between cabinet doors and drawers.

Drawer slides are adjusted to ensure drawers open smoothly and remain level inside the cabinets.

Installing Filler Strips and Trim

Walls are rarely perfectly straight, so installers often install filler strips between cabinets and the wall. Filler strips prevent uneven gaps from appearing where cabinets meet the wall. Install filler strips carefully to maintain a professional appearance across the entire run.

Common Cabinet Installation Problems Caused by Poor Leveling

Improper cabinet installation can lead to several noticeable problems in a kitchen.

  • Uneven Countertops: Uneven cabinets can cause countertops to slope or separate from the wall. When cabinets are not level, countertop installers may struggle to fit countertops properly.
  • Uneven Gaps Between Cabinets: Another issue is uneven gaps between cabinets. These gaps can affect the aesthetic appeal of the kitchen and make cabinets look poorly installed.
  • Malfunctioning Doors and Drawers: Improper leveling can also cause doors and drawers to malfunction. Doors may swing open due to gravity and drawers may slide out because cabinets are not level.
  • Cabinets Pulling Away from Walls: Poor installation may also cause cabinets to pull away from the wall over time if screws are not anchored correctly into wall studs.

Tools Professional Cabinet Installers Use

Professional cabinet installation requires a wide range of tools designed to ensure precision and efficiency.

  • Laser Level: One of the most important tools used to maintain a consistent level line across the wall during installation, which also affects decisions about installing flooring before or after cabinets.
  • Stud Finder: Used to locate wall studs behind drywall before securing cabinets with screws.
  • Power Drill: Essential for driving mounting screws and cabinet screws into wall studs during installation and preparing for related work like installing tile before or after kitchen cabinets.
  • Clamps: Help align adjacent cabinets while screws are installed through the face frames.
  • Belt Sander: Used for minor adjustments to wood cabinet edges, especially when refinishing or painting kitchen cabinets the right way.
  • Utility Knife: Used for trimming shims during installation when fine-tuning reveals and clearances around updated kitchen cabinet hardware.

Using the right tools makes the installation process faster and helps installers secure cabinets effectively.

Why Professional Cabinet Installation Makes a Significant Difference

Hiring experienced professionals for cabinet installation can make a significant difference in the final result of a kitchen remodel.

  • Professionals understand how to work with uneven floors and uneven walls while ensuring cabinets remain level across the entire kitchen. Their experience helps them locate high and low points on the floor quickly and adjust cabinets accordingly.
  • Professionals understand how to secure cabinets into wall studs using proper screws and mounting techniques. This ensures cabinets remain stable and durable over time.
  • Professional installation provides the precision required for custom installations. Installers carefully align cabinet doors, drawers, and cabinet tops so everything fits seamlessly together.
  • Professionals also know how to properly install toe kick panels along the bottom of base cabinets. The toe kick helps conceal shims and creates a finished appearance.

Signs Your Cabinets Were Installed Incorrectly

Homeowners can often identify cabinet installation problems by looking for several warning signs.

  • Doors that do not stay closed may indicate cabinets are uneven. If cabinets have a slight tilt, gravity may cause doors to swing open.
  • Drawers that slide open may indicate cabinets are not level from front to back.
  • Uneven countertop overhang may indicate cabinets were not properly aligned during installation, which becomes especially noticeable with statement combinations like hardwood floors with white kitchen cabinets.
  • Cabinets that move or feel loose may indicate screws were not anchored properly into wall studs.

These issues can reduce the professional finish of the kitchen and may require adjustments or reinstallation.

FAQs About Cabinet Alignment and Leveling

How do professionals level cabinets on uneven floors?

Installers locate the highest point on the kitchen floor and begin installing base cabinets from that location. They then place shims under other cabinets to create level cabinets across the entire kitchen.

Should cabinets be installed before flooring?

In many cases, base cabinets are installed directly on the subfloor before flooring is added. This allows cabinets to remain stable and prevents shifting over time.

What happens if cabinets are not level?

If cabinets are not level, countertops may not fit correctly and doors and drawers may not operate smoothly.

Can cabinets be adjusted after installation?

Minor adjustments can sometimes be made by loosening screws and adding shims to correct uneven cabinets.

Do cabinets always need to be attached to wall studs?

Yes, cabinets should always be secured into wall studs to support the weight of countertops and kitchen storage.

Work With Experienced Cabinet Installers for a Perfect Kitchen

Cabinet alignment and leveling play a critical role in every kitchen remodel. When cabinets are properly leveled and secured, countertops install correctly, doors and drawers operate smoothly, and the entire kitchen maintains a clean professional appearance.

Professional installers follow careful steps when installing base cabinets and upper cabinets to ensure cabinets remain stable and aligned. From locating the highest point on the floor to securing cabinets into wall studs, every step contributes to a durable installation.

When cabinets are installed with precision, they provide a strong foundation for countertops, appliances, and everyday kitchen use. Proper cabinet installation ensures cabinets remain secure, level, and visually appealing for many years.

For homeowners planning a kitchen remodel, working with experienced installers ensures cabinets are installed correctly, providing both long-term durability and a professional finish that enhances the entire kitchen space.

Best Hardwood Flooring Installation Guide

Опубликовано: March 9, 2026 в 3:52 am

Автор:

Категории: Flooring

Тэги:

What Homeowners Should Know Before Installing Hardwood Floors

Installing hardwood flooring is one of the most impactful upgrades a homeowner can make. A well-installed hardwood floor adds warmth, durability, and long-term value to any living space. This hardwood flooring installation guide explains how to install hardwood floors, what materials are involved, how the installation process works, and what homeowners should expect before beginning a project. Whether you are planning a DIY flooring project or researching professional installation, understanding the steps involved helps ensure the finished hardwood flooring performs well for years.

Hardwood floors are made from natural wood, and wood reacts to moisture, temperature, and structural movement. Because of this, hardwood flooring installation requires careful preparation, proper tools, and the correct installation method. From evaluating the subfloor to placing the first row of hardwood planks, every stage of installation matters. This guide explains how to install hardwood floors correctly and avoid common problems like water damage, loose boards, and uneven flooring.

Why Hardwood Flooring Is One of the Best Upgrades for Your Home

Hardwood flooring continues to be one of the most popular flooring upgrades because of its natural beauty and long lifespan. A hardwood floor can last decades when properly installed and maintained. Unlike carpet or tile that may require replacement over time, wood flooring can often be refinished to restore its original appearance.

A new hardwood floor also improves the appearance of any room and increases property value. Many homeowners choose hardwood flooring because it fits a wide variety of interior styles. From traditional homes to modern remodels, hardwood flooring complements different design preferences. Hardwood planks are available in many finishes and wood species, which allows homeowners to customize their flooring to match their home’s character.

Another benefit of hardwood flooring is durability. Solid hardwood and engineered hardwood products are built to withstand everyday wear when installed properly. Hardwood flooring is especially appealing in high-traffic areas because it maintains its structure and appearance over time. With proper cleaning and maintenance, hardwood flooring can remain a long-lasting feature in the home.

For homeowners considering a flooring upgrade, installing hardwood floors offers both aesthetic and functional benefits. Hardwood flooring adds warmth to the room, improves the feel of the living space, and provides a durable surface that can handle everyday use, especially when installed by professional hardwood flooring specialists.

Types of Hardwood Flooring

Before beginning hardwood flooring installation, homeowners should understand the different types of hardwood flooring available. The two primary categories are solid hardwood and engineered hardwood. Each type has different performance characteristics depending on the environment and the type of subfloor.

Solid Hardwood Flooring

Solid hardwood flooring is made from a single piece of solid wood. Each hardwood plank is typically cut from hardwood lumber and milled with a tongue side and groove edge so the boards connect securely during installation. Solid hardwood flooring is often installed over wood subfloors such as plywood or oriented strand board.

Because solid wood reacts more noticeably to moisture changes, it is generally recommended for above-grade rooms rather than areas with a concrete slab foundation. Solid hardwood flooring can be sanded and refinished multiple times, which extends the lifespan of the floor. Many homeowners choose solid hardwood because of its long-term durability and classic appearance.

Engineered Hardwood Flooring

Engineered hardwood flooring is constructed using several layers of wood bonded together with a real hardwood top layer. The top layer provides the appearance of traditional hardwood while the layered construction improves stability. Engineered hardwood is often used in homes with concrete subfloors or where moisture conditions may vary.

Because engineered hardwood is more resistant to moisture movement, it can sometimes be installed over a concrete slab using glue down installation methods. Engineered hardwood flooring is also commonly installed over radiant heat systems where solid hardwood might expand too much.

Prefinished vs Site Finished Hardwood

Another decision homeowners face during hardwood flooring installation is whether to choose prefinished wood flooring or site finished flooring. Prefinished hardwood flooring arrives with the finish already applied at the factory. This allows installation to move quickly because sanding and finishing are not required inside the home.

Site finished hardwood flooring is sanded and finished after installation. This allows for custom stains and a seamless appearance across the entire floor. Both options can produce a beautiful hardwood floor when installed correctly.

Popular Wood Species

Different wood species affect both the appearance and durability of hardwood flooring. Oak remains one of the most common choices because of its strength and distinctive grain pattern. Maple offers a smoother appearance with a subtle grain pattern. Hickory provides strong color variation and a rustic look, while walnut offers darker tones and a rich texture. Each wood species brings a unique character to the hardwood floor.

Hardwood Flooring Installation Methods Explained

Choosing the correct installation method is essential for a successful hardwood flooring installation. The installation method depends on the type of flooring being installed and the condition of the subfloor.

Nail Down Installation

Nail down installation is the most common method for installing solid hardwood over wood subfloors. In this method, hardwood planks are fastened directly to plywood or oriented strand board using flooring nails. A flooring nailer is used to drive the nails through the tongue side of each board at an angle.

The nails secure the hardwood flooring tightly to the subfloor and create a stable structure. During nail down installation, the boards are typically installed perpendicular to the floor joists to improve structural strength. This technique distributes weight across the floor joists and enhances the structural integrity of the flooring system.

Glue Down Installation

Glue down installation is commonly used when installing hardwood flooring over concrete subfloors or a concrete slab. Instead of nails, a specialized flooring adhesive bonds the wood flooring directly to the concrete surface.

Glue down installation requires careful preparation because the concrete subfloor must be completely dry before the adhesive is applied. A moisture barrier may also be required depending on the moisture conditions within the concrete slab.

Floating Installation

Floating flooring installation is another method often used with engineered hardwood. In this system, the boards connect to one another rather than being fastened directly to the subfloor. An underlayment layer is placed between the subfloor and the hardwood flooring to provide cushioning and support. Floating floors allow slight movement while maintaining stability.

When Professionals Choose Each Installation Method

Professional installers choose the correct installation method based on the type of hardwood flooring, the condition of the subfloor, and the moisture levels in the home. Concrete subfloors typically require glue down installation, while wood subfloors may use nail down installation. The right installation method ensures the hardwood flooring remains stable and performs well over time.

Preparing Your Home for Hardwood Flooring Installation

Preparation is one of the most important steps in hardwood flooring installation. Proper preparation protects the flooring and ensures the finished floor remains stable.

Subfloor Inspection and Preparation

The subfloor must be inspected before hardwood flooring installation begins. Whether the home has plywood, oriented strand board, or concrete subfloors, the surface must be clean and level. Uneven areas should be corrected to ensure the hardwood planks sit flat against the subfloor.

Subfloor preparation may include repairing damaged plywood or removing old flooring materials such as carpet or tile. If old flooring is present, it must be removed carefully to expose the subfloor beneath. Removing old flooring ensures the hardwood flooring sits securely against a stable surface.

Moisture Testing

Moisture testing is critical before installing hardwood floors. Subfloor moisture and environmental humidity can affect the stability of hardwood flooring. Moisture content levels must be tested to confirm that conditions are suitable for installation.

Excess moisture within the subfloor can cause wood flooring to expand, warp, or cup. If installing hardwood flooring over concrete, moisture testing helps determine whether a moisture barrier or underlayment is required.

Acclimating Hardwood Flooring

Before installation begins, hardwood flooring materials must acclimate to the environment of the home. The wood flooring should be stored inside the room where it will be installed so the boards adjust to the temperature and air circulation of the space. Allowing hardwood flooring to acclimate helps reduce movement after installation.

Moving Furniture and Preparing Rooms

Homeowners should remove furniture and personal items from the room before installation begins. Clearing the space allows installers to work efficiently and prevents damage to furniture during the flooring installation process.

Step by Step Overview of the Hardwood Floor Installation Process

Although every project varies slightly, most hardwood flooring installation projects follow a similar sequence of steps.

Step 1: Initial Measurement and Layout Planning

The installation process begins by measuring the room and calculating square footage. Installers determine how the hardwood planks will run across the room and mark guidelines using a chalk line. The chalk line parallel to the starting wall ensures the flooring remains straight throughout the installation.

Step 2: Subfloor Preparation

After layout planning, the subfloor is cleaned and prepared. Underlayment or moisture barrier materials may be placed over the subfloor depending on the installation method. Proper subfloor preparation protects the hardwood flooring and supports long term performance.

Step 3: Installing the First Rows

The first row of hardwood planks is placed along the starting wall. Installers leave expansion gaps between the flooring and the walls to allow the wood to expand naturally. The first board must be aligned carefully because it determines the direction of the remaining flooring.

During the first row installation, installers may use face nailing because the flooring nailer cannot fit near the walls.

Step 4: Installing the Remaining Rows

After the first row is installed, the next row of hardwood planks is connected along the tongue side. Installers continue placing adjacent rows of boards across the room. A flooring nailer is used to drive flooring nails through the tongue side of each board.

End joints are staggered between rows to strengthen the floor and avoid patterns. Cut boards are used to fit the flooring around walls and doorways. Tools such as a pull bar or pry bar help position boards tightly in place.

Step 5: Sanding and Finishing

If the hardwood flooring is site finished, the surface is sanded after installation. Small nail holes may be filled with wood filler before finishing. Sanding creates a smooth surface before stain and protective finishes are applied.

Step 6: Trim and Final Details

After the hardwood flooring installation is complete, trim pieces and transition strips are installed near doorways and walls. These pieces cover expansion gaps and create a finished appearance between rooms.

How Long Hardwood Floor Installation Takes

The timeline for hardwood flooring installation depends on several factors including room size and preparation requirements. A small room may require only one or two days for installation. Larger spaces or whole home flooring installation projects may take several days.

If old flooring such as carpet or tile must be removed, the project may require additional time. Site finished hardwood flooring also requires extra time for sanding and finishing. Planning the schedule in advance helps homeowners prepare for the installation process, including deciding whether flooring should be installed before or after kitchen cabinets.

Hardwood Flooring Installation Cost in 2025

The cost of hardwood flooring installation depends on several variables including materials, square footage, and labor. Hardwood flooring materials vary widely depending on the wood species and finish. Engineered hardwood flooring and solid hardwood flooring may have different price ranges.

Additional costs may include underlayment materials, moisture barrier systems, and subfloor repairs. Homes with concrete subfloors may require specialized flooring adhesive for glue down installation. The total cost of flooring installation can also be influenced by the complexity of the room layout and the amount of preparation required.

Common Hardwood Flooring Installation Mistakes to Avoid

Avoiding common mistakes can help ensure hardwood flooring performs well for many years.

Skipping Moisture Testing

Failing to test subfloor moisture before installation can cause significant flooring problems later.

Installing Over Uneven Subfloors

An uneven subfloor can cause boards to shift or create gaps between planks.

Not Allowing Proper Acclimation

Hardwood flooring should always acclimate before installation to prevent expansion problems.

Poor Layout Planning

Using a chalk line helps maintain straight rows and professional looking results.

Choosing the Wrong Type of Hardwood

Some areas require engineered hardwood rather than solid hardwood because of moisture conditions.

Maintaining Hardwood Floors After Installation

Once hardwood flooring installation is complete, proper maintenance helps protect the wood surface. Regular sweeping removes debris that may scratch the floor. Rugs can protect high traffic areas and help protect the flooring from damage. Furniture pads should be used to prevent scratches when placing furniture on a new hardwood floor. Cleaning products designed specifically for hardwood flooring should be used to protect the finish.

Why Professional Hardwood Flooring Installation Matters

While some homeowners attempt DIY flooring projects, hardwood flooring installation requires precision and experience. Proper installation ensures the flooring is secure, level, and protected from moisture issues.

Professional installation teams have the right tools and experience to install hardwood floors efficiently while maintaining structural integrity. When hardwood flooring is installed correctly, homeowners can enjoy beautiful floors that last for decades.

Frequently Asked Questions About Hardwood Flooring Installation

How long does hardwood flooring installation take?

Most hardwood flooring installation projects take between one and several days depending on the size of the room and the preparation required.

Can hardwood flooring be installed over concrete?

Yes, engineered hardwood flooring can often be installed over concrete subfloors using glue down installation techniques.

Is engineered hardwood better than solid hardwood?

Each option has advantages. Solid hardwood can be refinished many times, while engineered hardwood offers improved moisture resistance.

Do hardwood floors increase home value?

Yes, hardwood flooring is widely considered a premium flooring feature that can improve home value.

How long do hardwood floors last?

With proper installation and maintenance, hardwood floors can last several decades.

Can hardwood floors be installed in kitchens?

Hardwood flooring can be installed in kitchens, but moisture exposure should be managed carefully to prevent damage, and cleaning hardwood floors without damaging them is essential for long-term performance.

Ready to Upgrade Your Home with Hardwood Flooring?

Installing hardwood floors is one of the best ways to enhance the beauty and durability of a home. A new hardwood floor transforms the appearance of a room and adds lasting value to the property.

Whether homeowners choose solid hardwood or engineered hardwood flooring, proper installation and preparation ensure the floor performs well for years. By following this hardwood flooring installation guide, homeowners can better understand the process involved in installing hardwood flooring and make informed decisions before beginning a project.

Granite Countertop Installation Guide

Опубликовано: March 6, 2026 в 3:52 am

Автор:

Категории: Kitchen

Тэги:

What Homeowners Need to Know Before Installation

Granite countertops remain one of the most desirable upgrades for kitchens and bathrooms because they combine durability, natural beauty, and long-lasting performance. This granite countertop installation guide is designed as a comprehensive resource for homeowners who want to understand the full installation process before choosing new granite countertops for their home. When people understand how installing granite countertops works, they can plan renovations more confidently and avoid costly mistakes.

Granite is a natural stone material that delivers timeless beauty, and when the installation is completed correctly, the finished countertops can remain in pristine condition for decades. This precise guide explains how professionals measure the space, prepare cabinets, cut the granite slab, and complete the final installation. Throughout the process, skilled installers focus on precision, accurate measurements, and quality workmanship to achieve a seamless appearance and long-term functionality. Understanding the steps involved will help you plan your project and make informed decisions when choosing granite for a kitchen or bathroom renovation.

Why Granite Countertops Are a Top Choice for Modern Kitchens

Granite countertops continue to be a preferred choice because the material offers durability, beauty, and strong resistance to everyday kitchen wear. Granite is a natural stone formed over millions of years, which means each granite slab has a unique pattern and texture. This natural variation allows homeowners to create kitchens with distinctive surfaces that cannot be duplicated by synthetic materials.

Granite countertops are available in various colors, ranging from light neutrals to darker tones that highlight dramatic veining patterns in the stone. Many homeowners choose honed granite finishes for a softer appearance, while others prefer polished granite surfaces that reflect light and enhance the natural beauty of the stone.

Another reason granite countertops remain popular is their durability. Granite is extremely hard and resistant to scratches, making it an excellent surface for cooking and daily kitchen activity. With proper sealing and routine care, granite surfaces resist stains and maintain their appearance for years. These countertops also contribute to home value, since potential buyers often view granite as a premium upgrade, and understanding how much granite countertops cost overall can help you budget for this investment.

Granite surfaces combine strength with beauty, creating kitchens that feel both functional and elegant. Because every slab has a unique pattern, homeowners can select the perfect granite slab that complements cabinets, flooring, and other fixtures in the kitchen, or compare it with other kitchen countertop materials to consider.

Overview of the Granite Countertop Installation Process

The granite countertop installation process involves several important steps that require careful planning and precision. While the final installation itself may take only several hours, the full process often takes one to three weeks from measurement to completion.

Installing granite countertops begins with planning the layout, selecting the granite slab, and preparing the kitchen space. The process generally includes selecting the slab, measuring the cabinets, templating the countertops, fabricating the stone pieces, and completing the countertop installation at the home site. Each step ensures that the granite pieces fit correctly and maintain structural stability.

Professional installation services focus on accurate measurements and careful planning because even small measurement errors can affect how the slab fits within the space. The installation process also involves planning for seams, sinks, fixtures, and appliances before fabrication begins. Granite slabs are heavy and require skilled handling, so professional installers use specialized tools and techniques to ensure the material is transported and installed safely. When each step of the process is completed properly, the final installation produces granite countertops that combine durability, beauty, and reliable performance.

Step 1 | Choosing the Right Granite Slab

Selecting the right granite slab is the first major step in the installation process. Homeowners often visit a stone supplier to view granite slabs in person because every slab has a unique pattern and color variation. Seeing the slab allows homeowners to choose the perfect granite that complements cabinets, appliances, and other fixtures within the kitchen.

Granite slabs come in various colors and textures, which makes it possible to create a kitchen design that reflects personal style. Some granite slabs feature bold patterns with dramatic veins, while others offer subtle color variations that provide a more uniform appearance. The direction of the stone pattern is also important because installers plan how the slab will be cut to ensure the natural pattern flows across the countertop surface.

During the planning stage, installers also identify the location of sinks, appliances, and other fixtures. These elements require cutouts in the stone, so the placement must be measured carefully. Accurate measurements help ensure the slab will be cut precisely to fit the layout of the cabinets and the overall kitchen space.

Choosing the right slab allows homeowners to achieve the perfect balance between functionality and beauty while ensuring the stone complements the overall kitchen design.

Step 2 | Preparing Cabinets for Granite Countertops

Preparing the cabinets is an essential step before installing granite countertops. Granite slabs are heavy, so the cabinets beneath the stone must be level, secure, and strong enough to support the weight. Professional installers inspect the cabinets and make necessary adjustments before moving forward with the installation process.

Cabinets must be level to ensure the stone surface sits evenly across the entire countertop. If the cabinets are uneven, installers make adjustments to create a flat surface that supports the granite slab properly. In some situations, additional support may be required, especially for kitchen islands or areas where the granite extends beyond the cabinet frame.

Adding support is sometimes necessary when countertops include seating overhangs. Installers may add brackets or reinforcing structures to create additional support for the stone. Proper cabinet preparation ensures the granite will remain stable after installation and prevents stress that could damage the stone.

During this stage, installers also confirm the exact layout of the kitchen space. Accurate measurements and proper cabinet preparation help ensure the stone pieces will fit correctly during the final installation.

Step 3 | Templating the Countertops

Templating is one of the most important steps in the granite countertop installation process. During templating, installers measure the kitchen and create a precise guide for cutting the stone. This stage ensures the granite slab will be fabricated to match the exact dimensions of the cabinets and the available space.

Installers often measure using digital templating tools or specialized measuring equipment. Accurate measurements are essential because the stone will be cut according to these specifications. The template also identifies locations for sinks, fixtures, appliances, and seams. These elements must be measured precisely to ensure the granite pieces fit together correctly.

Templating also allows installers to plan the placement of seams when the countertop requires more than one slab. In larger kitchens, seams connect two pieces of stone. Careful seam placement helps achieve a seamless appearance that blends naturally with the pattern of the granite, and you can learn more about how seams in stone countertops are handled during professional installation.

After measurements are completed, the template is used as the blueprint for fabrication. This step ensures the granite slab will be cut accurately and prepared for installation at the home site.

Step 4 | Granite Fabrication

Fabrication is the stage where the granite slab is transformed into the finished countertop pieces. In the fabrication shop, technicians use specialized tools to cut, shape, and polish the stone. Granite is extremely hard, so professionals rely on durable cutting equipment such as a circular saw fitted with a diamond blade. These tools allow technicians to cut the stone with precision while protecting the integrity of the slab.

The fabrication process begins by cutting the slab according to the template measurements. Workers measure and cut the granite carefully to create pieces that match the layout of the kitchen. During this process, the edges of the stone are shaped and polished to create the chosen edge profile.

Polishing is an important step because it smooths the edges and enhances the natural beauty of the granite surface. Fabricators perform multiple stages of polishing to create a consistent finish along the edges and surface. This polishing process also helps protect the stone from stains and moisture when combined with proper sealing.

Sink openings and fixture cutouts are also created during fabrication. Using specialized tools, technicians cut precise openings for sinks and other fixtures. The edges around these cutouts are carefully polished to maintain durability and ensure the stone remains strong.

Before the pieces leave the fabrication shop, technicians inspect each slab to confirm quality and accuracy. This inspection ensures the granite pieces are ready for installation and will fit properly within the kitchen space.

Step 5 | Granite Countertop Installation Day

Installation day is when the granite pieces are transported to the home and positioned on the cabinets. Installing granite countertops requires multiple installers because the slabs are extremely heavy. The team carefully carries the stone into the home and prepares the area for countertop installation.

If the kitchen has existing countertops, the first step is removing the old countertops. Installers carefully detach old countertops without damaging the cabinets, following many of the same safety and prep steps you’d see in a detailed guide on how to remove a kitchen countertop. After removal, the team checks the cabinets again to confirm they remain level and secure.

Once the cabinets are ready, installers place the granite slab onto the cabinet framework. The pieces are positioned carefully and aligned according to the kitchen layout. Before securing the stone permanently, installers perform a dry fit to ensure each piece fits correctly within the space.

When multiple slabs are used, seams connect the pieces together. Installers apply epoxy resin along the seam edges to create a strong bond between two pieces of granite. The epoxy is color matched to blend with the stone pattern, helping create a seamless appearance. Seams are tightened and cleaned carefully to maintain the beauty of the granite surface.

After the seams are secured, installers attach the countertops to the cabinets using silicone caulk. Silicone caulk provides a flexible bond that helps secure the stone while allowing natural movement between materials. The team also installs sinks and other fixtures beneath the granite surface. Sinks are attached using epoxy and additional supports to ensure they remain secure.

The final installation step includes applying finishing touches. Installers clean the granite surface, check all seams, and confirm the countertops are properly aligned. A final inspection ensures the installation meets quality standards before the project is complete, similar to the attention to detail shown in the company’s kitchen and bathroom remodeling project gallery.

How Long Granite Countertop Installation Takes

Many homeowners are surprised that installing granite countertops can be completed within a single day. The final installation usually takes between four and eight hours depending on the size of the kitchen and the complexity of the project. However, the full installation process includes several stages that occur before installation day.

Templating and measurements typically take one day, while fabrication may take one to two weeks depending on the supplier and the complexity of the slab cutting. Larger kitchens that require multiple slabs may require additional planning for seam placement and adjustments during installation.

Professional installers plan the schedule carefully to ensure each step of the process is completed accurately. Proper planning helps prevent delays and ensures the granite pieces are installed correctly during the final step.

Granite Countertop Installation Cost Factors

Several factors influence the cost of granite countertop installation. The size of the kitchen plays a major role because larger spaces require more granite material and additional fabrication work. The type of granite slab selected also affects pricing because some slabs feature rare colors or patterns that increase cost, and local labor and material rates for kitchen countertop installation in Sacramento or nearby areas can also play a part.

Custom edge profiles and detailed polishing can also influence the total project cost. More complex edges require additional fabrication time and tools. Other features such as backsplashes, decorative edges, or waterfall sides may increase the overall installation cost.

Homeowners planning new granite countertops should also consider additional elements such as sinks, fixtures, and appliances that require custom cutouts in the stone. These features require precise cutting and finishing work during fabrication, especially when coordinating with professional kitchen countertop installers in Vacaville or other local specialists.

A professional estimate helps homeowners understand the complete cost of the project and allows them to plan their renovation budget more effectively.

Can Granite Countertops Be Installed as a DIY Project?

Some homeowners consider installing granite countertops themselves, but granite installation requires skill, precision, and specialized tools. Granite slabs are extremely heavy and difficult to maneuver without professional equipment. Attempting to install the stone without proper training can damage the slab or create safety hazards.

Cutting granite requires powerful tools such as a circular saw equipped with a diamond blade. These tools create stone dust that must be controlled to protect workers and maintain safety on the job site. Professional installers are trained to handle the material safely and make accurate cuts without damaging the stone.

Professional installation services also ensure that seams are aligned properly and that the granite pieces are secured correctly using epoxy and silicone caulk. These techniques create a strong bond between the slab and the cabinet structure. Working with experienced installers helps ensure the granite countertops are installed correctly and remain stable for years.

Post Installation Care and Maintenance

After installation, proper maintenance helps keep granite countertops in pristine condition. Granite is naturally durable, but regular care protects the surface and maintains its appearance. Cleaning granite typically requires mild soap and warm water. Avoid harsh cleaners that could damage the stone surface.

Sealing is another important part of maintenance. Some granite slabs require sealing to protect the surface from stains. Sealing fills small pores in the stone and creates a protective barrier against moisture. When sealing is applied properly, the granite surface resists stains and remains easy to clean.

Homeowners should also avoid placing extremely heavy objects near sink cutouts or seams because those areas can experience additional stress. Using cutting boards and cleaning spills quickly will help protect the surface and maintain the beauty of the granite countertops.

Common Mistakes to Avoid During Granite Countertop Installation

Several mistakes can affect the quality and longevity of granite countertops. Installing granite before cabinets are level can lead to uneven surfaces and structural problems. Poor seam placement may make seams more visible and affect the appearance of the countertop.

Another common mistake involves insufficient support for overhang areas. Granite that extends too far beyond the cabinet base may require additional support to prevent cracking. Installers must also ensure accurate measurements are taken during templating so the stone pieces fit correctly during installation.

Working with experienced professionals helps avoid these issues and ensures the granite countertops are installed correctly the first time.

When to Replace Your Countertops During a Kitchen Remodel

Many homeowners replace their countertops during a full kitchen remodel because it allows the entire space to be redesigned at once. Updating cabinets, appliances, and fixtures together helps create a cohesive design and improves kitchen functionality, especially when working with experienced home remodeling contractors in Sacramento.

Replacing countertops during a remodel also allows installers to coordinate measurements and adjustments more efficiently. Planning these elements together helps ensure the granite slab fits perfectly within the kitchen layout and supports the overall design plan.

FAQs About Granite Countertop Installation

How long does granite countertop installation take?

The final installation typically takes four to eight hours. However, the complete process including templating and fabrication can take one to three weeks depending on the project size.

Do cabinets need to be installed before granite countertops?

Yes, cabinets must be fully installed and level before templating and installation begin. This ensures the granite slab fits properly within the kitchen layout.

Do granite countertops require sealing?

Some granite surfaces benefit from sealing to protect against stains and moisture. A professional installer can recommend whether sealing is necessary for the selected stone.

Can granite crack during installation?

Granite is durable, but improper handling or lack of support can cause cracks. Professional installers prevent this by ensuring cabinets are level and using proper installation techniques.

How thick are granite countertops?

Most granite countertops are either two centimeters or three centimeters thick, with three centimeters being the most common option for kitchens.

Why Homeowners Choose America’s Advantage Remodeling for Granite Countertop Installation

Homeowners want their granite countertops installed with precision, quality, and care. Professional installation services ensure the stone is measured accurately, fabricated properly, and installed securely. Experienced installers understand how to plan seam placement, secure slabs, and complete the finishing touches that create a seamless appearance.

Working with professional remodeling teams ensures every stage of the installation process is handled with expertise. Skilled installers use specialized tools and proven techniques to deliver results that combine beauty, durability, and long-lasting functionality, which reflects the approach described in America’s Advantage Remodeling’s background and values as a trusted remodeling company. Homeowners in nearby communities can also explore home remodeling services in Elk Grove, CA when planning their next project.

Can Hardwood Floors Be Installed in Kitchens Safely?

Опубликовано: March 2, 2026 в 3:52 am

Автор:

Категории: Flooring

Тэги:

What Homeowners Need to Know

Many homeowners planning a remodel eventually ask the same question: can hardwood floors be installed in kitchens safely? The answer is yes. Hardwood floors can work well in a kitchen when the right flooring materials are chosen and when installing wood floors is done correctly. A kitchen is one of the busiest rooms in the house, and the flooring in that space must handle spills, heavy foot traffic, and everyday wear while still looking beautiful.

Hardwood has long been one of the most popular flooring materials in American homes because of its natural beauty, warmth, and long life. Many homeowners request hardwood floors in the kitchen so the flooring flows smoothly from the living room into the kitchen and dining space. That continuity can create visual warmth and make the entire room feel more elegant and connected.

However, installing hardwood in a kitchen does require thoughtful planning. Moisture, humidity, and spills must be considered when choosing wood flooring. Understanding the differences between solid hardwood and engineered hardwood can help homeowners make the right choice for their kitchen flooring.

In this guide, we will look at the benefits of hardwood floors in a kitchen, the potential risks, and the best practices for installing wood floors so they remain durable and beautiful for many years.

Why Homeowners Want Hardwood Floors in the Kitchen

Hardwood floors remain one of the most requested flooring options during kitchen remodels. Many homeowners want the warmth and character that wood flooring brings into a home.

Seamless Open Concept Design

One of the biggest reasons homeowners install hardwood floors in the kitchen is to create a seamless design. When hardwood flooring runs through the living room, hallway, and kitchen, the entire space feels larger and more connected.

In modern homes, the kitchen is often open to the living room, which means different flooring materials can break up the space visually. Hardwood helps create a continuous flow that makes the house feel cohesive. The natural beauty of wood also adds character that other flooring materials sometimes lack.

Increased Home Value and Resale Appeal

Hardwood flooring is widely known for adding value to a house. Many homeowners choose hardwood floors for their durability and timeless appeal because they appeal to future buyers and provide long-lasting quality.

Real wood flooring often signals quality construction and thoughtful design. Oak, maple, and cherry hardwood floors are especially popular because of their durability and classic appearance. These species offer different textures and stains that can match a wide range of kitchen styles.

Warmth and Comfort Compared to Tile

Tile is a common kitchen flooring material, but it can feel cold underfoot. Hardwood floors provide warmth and comfort when you walk across the room. That warmth is especially appreciated in kitchens where people spend a lot of time cooking, cleaning, and gathering.

Wood flooring also softens the overall feel of the room. The visual warmth of hardwood can make a kitchen feel more welcoming and elegant.

The Biggest Concern: Moisture and Water Damage

While hardwood floors are beautiful, moisture is the main factor homeowners should consider when installing wood floors in a kitchen.

Why Water Is the Main Risk for Hardwood Floors

Wood is a natural material that reacts to moisture and humidity. When wood flooring absorbs water, it can swell, expand, or even begin warping. These changes can affect the surface of the flooring and may cause boards to shift.

Unlike vinyl or tile, hardwood is not completely resistant to water. That does not mean hardwood floors cannot work in a kitchen, but it does mean spills must be cleaned up quickly.

Common Sources of Water in Kitchens

Most kitchen flooring damage does not come from normal spills. Instead, hidden leaks are often the problem. Dishwashers, sinks, refrigerators, and ice makers can all introduce moisture if a leak goes unnoticed.

Areas around sinks often experience repeated spills and splashes. Over time, moisture exposure can weaken wood flooring and cause boards to swell or warp.

How Moisture Affects Wood Flooring

When hardwood floors absorb moisture, they can develop issues like cupping or warping. Cupping happens when the edges of the boards rise slightly higher than the center. Warping may occur when moisture levels remain high for long periods.

It is worth noting that most hardwood floor problems come from prolonged exposure to moisture rather than occasional spills. Prompt cleaning and proper maintenance help prevent these issues.

Solid Hardwood vs Engineered Hardwood for Kitchens

Not all wood flooring is the same. Homeowners choosing kitchen flooring should understand the difference between solid hardwood and engineered hardwood.

Solid Hardwood

Solid hardwood is made from a single piece of solid wood. Oak, maple, and cherry are popular species used for solid hardwood floors.

Solid hardwood offers long life and can be sanded and refinished multiple times. Many hardwood floors made from solid wood can be refinished three to five times during their life, which helps restore the beauty of the flooring after years of wear.

However, solid hardwood reacts more strongly to humidity changes and temperature fluctuations. Because the planks are made from solid wood, they expand and contract as humidity rises and falls.

Engineered Hardwood

Engineered hardwood flooring uses several layers of materials. The top layer is real wood, while the lower layers are typically plywood or engineered wood panels.

This layered design makes engineered hardwood more stable than solid hardwood. The construction helps reduce expansion and contraction caused by humidity changes. For that reason, engineered hardwood is often considered a better choice for kitchens.

Engineered wood flooring still provides the beauty and character of real wood while offering improved resistance to moisture and temperature changes.

Choosing the Right Option

When reviewing flooring materials for a kitchen remodel, engineered hardwood is often the better choice because it handles humidity and moisture more effectively. However, solid hardwood can still perform well when installing wood floors is done properly and when the homeowner follows good maintenance practices.

When Hardwood Floors Work Well in a Kitchen

Hardwood floors can work very well in kitchens under the right conditions.

Homes with Stable Indoor Conditions

Hardwood flooring performs best in environments where humidity and temperature remain stable. Homes with proper climate control tend to see fewer issues with wood flooring.

Kitchens Without Frequent Standing Water

Occasional spills are normal in any kitchen. However, kitchens that regularly experience standing water are not suitable for hardwood flooring.

Open Floor Plans

In many modern homes, hardwood floors already extend throughout the living room and dining room. Continuing the same flooring into the kitchen, especially in designs featuring hardwood floors with white kitchen cabinets, helps create a unified design.

Homeowners Willing to Maintain the Floor

Maintaining hardwood floors requires basic care. Cleaning spills quickly, using protective mats near sinks, and keeping humidity levels stable can help hardwood floors last for many years.

Situations Where Hardwood May Not Be the Best Choice

While hardwood floors are beautiful, they are not always the most suitable kitchen flooring.

Homes with Heavy Spills

Families with young children may experience frequent spills and heavy traffic in the kitchen. In these cases, waterproof kitchen flooring options might be a better choice.

Kitchens with Moisture Problems

Kitchens with plumbing issues or persistent moisture may not be ideal for hardwood flooring. Water damage can cause boards to swell and lead to warping.

Rental Properties

Rental homes often experience high traffic and heavier wear. Vinyl kitchen flooring or tile can be more resistant to damage in these situations.

Low Maintenance Preferences

Some homeowners prefer flooring materials that require minimal maintenance and are planning broader updates. Exploring kitchen remodel must‑have features alongside luxury vinyl and waterproof vinyl flooring can provide a wood look without the same moisture concerns.

Best Practices for Installing Hardwood Floors in Kitchens

Installing wood floors in a kitchen requires careful planning and professional installation.

Choose the Right Wood Flooring

Engineered hardwood is often the best option for kitchen flooring because of its stability. The layered construction helps resist humidity and moisture changes, and understanding whether to install flooring before or after cabinets is also important during a kitchen remodel.

Professional Installation Matters

Professional installation is one of the most important factors when installing hardwood flooring. Experienced installers understand how to prepare the subfloor and properly place planks.

Proper installation ensures the boards remain stable and reduces the risk of warping.

Prepare the Subfloor

The subfloor must be clean, level, and dry before installing wood floors. Subfloors may be made of plywood or concrete depending on the structure of the house.

Concrete surfaces require moisture barriers before wood flooring can be installed.

Protect High Moisture Areas

Areas near sinks and dishwashers should have protective mats to reduce water exposure. Mats and rugs help protect the flooring surface from repeated spills.

How to Maintain Hardwood Floors in a Kitchen

Maintenance is essential for protecting hardwood floors in a kitchen environment.

Clean Spills Immediately

Spills should be wiped up quickly so moisture does not seep into the wood flooring. Prompt cleaning prevents stains and protects the surface.

Avoid Excess Water When Cleaning

Using too much water when cleaning can introduce moisture into the wood. Damp cleaning methods designed for hardwood flooring are usually recommended, and following safe hardwood floor cleaning practices helps prevent damage.

Use Protective Mats and Rugs

Mats near sinks and rugs in high traffic areas can help reduce wear. These protective materials also help catch spills before they reach the wood flooring.

Refinish Floors When Needed

Hardwood floors can be sanded and refinished when they begin to show wear. Sanding removes scratches and stains from the surface, and the flooring can be refinished to restore its appearance.

Most hardwood floors can be refinished several times during their life depending on the thickness of the planks.

Alternatives to Hardwood for Kitchen Flooring

While hardwood floors are popular, other flooring materials can work well in kitchens, and coordinating them with the right kitchen countertop materials can create a cohesive design.

Luxury Vinyl Plank

Luxury vinyl plank flooring is designed to replicate the look of hardwood. Many vinyl products offer a realistic wood look and come in styles that resemble oak, maple, or cherry.

Luxury vinyl flooring is resistant to moisture and can handle heavy traffic. For homeowners who want durability and easy maintenance in a compact layout, reviewing 10×10 kitchen floor plan ideas can help decide where each flooring type works best.

Porcelain or Ceramic Tile

Tile flooring remains one of the most durable kitchen flooring options. Tile is resistant to water and stains, making it a reliable choice for busy kitchens.

However, tile can feel harder and colder compared to hardwood floors.

Waterproof Vinyl Flooring

Modern vinyl flooring options include waterproof designs that resist moisture and stains. These materials offer durability while still providing the appearance of wood flooring, and details like kitchen soffits and their design options can further shape the overall look.

Expert Recommendation: Should You Install Hardwood Floors in Your Kitchen?

After reviewing the advantages and potential concerns, hardwood floors can absolutely work in a kitchen when installed properly. Installing wood floors with the right materials and professional installation can create a beautiful and durable surface.

Engineered hardwood is often the better choice for kitchens because it offers greater resistance to humidity changes and moisture. However, solid hardwood can still be suitable when installed in stable environments.

Many homeowners choose hardwood because of the warmth, beauty, and character it brings to the kitchen. When maintained properly, hardwood floors can last for decades and can be refinished several times during their life.

The right choice ultimately depends on the homeowner’s lifestyle, the level of traffic in the kitchen, and the overall design goals for the space.

Frequently Asked Questions About Hardwood Floors in Kitchens

Is hardwood flooring a bad idea for kitchens?

Hardwood flooring is not a bad idea for kitchens. With proper installation and maintenance, it can perform well in many homes.

What type of hardwood works best in kitchens?

Engineered hardwood flooring is often recommended because it handles humidity and moisture better than solid hardwood.

Can hardwood floors handle kitchen traffic?

Yes, hardwood floors are durable and can handle normal kitchen traffic when maintained properly.

How do you protect hardwood floors from spills?

Cleaning spills quickly, using mats near sinks, and maintaining stable humidity levels help protect hardwood floors.

Is engineered hardwood waterproof?

Engineered hardwood is more resistant to moisture than solid hardwood, but it is not completely waterproof.

Thinking About New Kitchen Flooring

Choosing the right flooring for a kitchen renovation is an important decision. Hardwood flooring can create warmth, beauty, and visual continuity throughout the home.

However, the success of hardwood floors in a kitchen depends on selecting suitable materials, proper installation, and consistent maintenance.

Homeowners reviewing flooring options should consider how their kitchen is used, the level of traffic in the room, and how much moisture exposure the flooring may experience.

If you are planning a kitchen remodel and want guidance choosing the best flooring materials, contact our team to review your options. Our customers rely on our experience installing wood floors and helping homeowners select flooring that combines durability, beauty, and long-term performance.

How Durable Are Modern Kitchen Countertops?

Опубликовано: February 27, 2026 в 4:41 pm

Автор:

Категории: Kitchen

Тэги:

A Complete Guide for Homeowners

When homeowners ask how durable are modern kitchen countertops, they are usually thinking beyond color and design. Durability affects how well a surface handles busy kitchens, hot pots and pans, sharp knives, spills, and everyday wear. In a modern kitchen, countertops are one of the most used surfaces, which makes choosing the right countertop material one of the most important decisions in a kitchen remodel. Today’s kitchen countertop materials are more advanced than ever, offering improved heat resistance, stain resistance, and long term performance. Understanding how different countertop materials perform helps homeowners invest in a durable kitchen countertop that fits their lifestyle, budget, and kitchen’s style, and choose from the full range of kitchen countertop materials available today.

Why Durability Matters in Kitchen Countertops

Kitchen countertops take constant abuse. From morning coffee routines to family dinners, they face high temperatures, acidic liquids, heavy cookware, and constant cleaning. A durable countertop surface holds up under pressure without cracking, staining, or losing its natural beauty. In busy kitchens, durability is not a luxury, it is a necessity.

Durable countertops also protect long term value. A worn or damaged surface can quickly date a modern kitchen and impact resale appeal. Choosing durable countertop materials means fewer repairs, easier maintenance, and a kitchen that continues to look great for years. For homeowners planning a kitchen remodel, durability often determines whether a countertop lasts a decade or becomes a lifelong investment in a dream kitchen, especially when working with professional kitchen countertop installation services in Sacramento.

Most Durable Countertop Materials in 2025 Ranked

Modern manufacturing and material innovation have expanded the list of highly durable options available today. Some materials stand out as the most durable countertops due to strength, heat resistant qualities, and low maintenance requirements.

Quartz Countertops and Engineered Stone

Quartz countertops are among the most popular choices in modern kitchen design. Engineered quartz is made through a controlled manufacturing process that blends crushed quartz with resins and pigments. This engineered stone creates a highly durable, non porous surface that resists stains and bacteria. Unlike granite, engineered quartz does not require sealing, which contributes to its low maintenance aspect.

Quartz countertops are stain resistant and easy cleaning makes them ideal for busy kitchens. They are highly resistant to scratches from sharp knives and daily use. However, quartz countertops are not designed to withstand high temperatures directly. Hot pots, hot pans, and hot cookware should always be placed on trivets to avoid damage. With proper care, engineered quartz is extremely durable and maintains its appearance for decades.

Granite Countertops and Natural Stone

Granite countertops remain one of the most trusted natural stone countertops for durability. Granite is an igneous rock formed under intense heat, which gives it exceptional strength and heat resistance. Granite countertops can withstand high temperatures and tolerate hot pots and pans better than many other materials, while homeowners should also understand granite countertop costs and pricing factors.

As a natural material, granite offers one of a kind patterns and natural beauty that enhance a kitchen’s style. Granite countertops do require sealing. Regular sealing and periodic sealing protect the surface from stains and acidic liquids. When properly installed and maintained, granite countertops are highly durable and can last for generations. Natural stone countertops like granite are often considered one of the most durable countertop materials available.

Quartzite Countertops and Marble Countertops

Quartzite countertops are a natural stone option that offers impressive durability. Quartzite is harder than marble and highly resistant to scratches and heat. It can withstand high temperatures and hot cookware, making it suitable for busy kitchens. Quartzite countertops mimic natural stone aesthetics while delivering superior performance.

Marble countertops, while known for elegance and natural beauty, are softer than granite and quartzite. Marble countertops are more prone to etching from acidic liquids and require careful maintenance. They are best suited for homeowners prioritizing visual appeal over maximum durability.

Porcelain, Concrete, and Other Modern Options

Concrete countertops have gained popularity for their industrial aesthetic and durability. Concrete countertops are highly durable and can withstand high temperatures when sealed properly. They do require sealing to resist stains and moisture, but they perform well in modern kitchen and outdoor kitchens alike.

Porcelain surfaces are another emerging option. They offer excellent heat resistance, stain resistance, and durability. Porcelain slabs can mimic natural stone while being lighter and more resistant to environmental stress.

Stainless Steel Countertops

Stainless steel countertops are common in professional kitchens for good reason. Stainless steel is heat resistant, stain resistant, and highly durable. It can handle hot pots, hot pans, and intense heat without damage. Stainless steel countertops are non porous and easy cleaning makes them ideal for food safety.

However, stainless steel can scratch over time and may show fingerprints. For homeowners seeking an industrial look and durable kitchen countertop performance, stainless steel countertops remain a strong choice.

Solid Surface Countertops

Solid surface countertops are made from acrylic and mineral blends. Solid surface materials are non porous and resist stains, making them easy to maintain. Scratches can often be repaired, which extends lifespan. Solid surface is not designed to withstand high temperatures, so hot cookware should be avoided. Still, solid surface offers consistent performance and works well in modern kitchen designs.

Butcher Block Countertops

Butcher block countertops bring rustic charm and warmth into the kitchen. As a natural material, butcher block offers a unique look and can be refinished multiple times. Butcher block countertops are durable when properly cared for, but they require regular oiling and protection from moisture. They are not heat resistant and should not be exposed to hot pots or hot pans. In busy kitchens, butcher block works best as a secondary surface rather than a primary prep area.

Laminate and Tile Countertops

Laminate countertops are budget friendly and come in many designs, but they are less durable than stone countertops. Laminate countertops can be damaged by high temperatures, moisture, and sharp knives. Tile countertops offer heat resistance but grout lines can stain and require maintenance. These materials are best suited for low use spaces.

Countertop Durability Comparison

When comparing countertop materials, homeowners should consider heat resistance, stain resistance, maintenance, and cost per square foot. Granite countertops and quartz countertops often sit at the top of the list for durability. Stainless steel countertops and concrete countertops also rank high in performance. Laminate countertops and tile countertops are more affordable but less durable in demanding kitchens.

Factors That Affect Countertop Longevity

Professional Installation and Proper Support

Even the most durable materials can fail if not properly installed. Professional installation ensures countertops are level, supported, and sealed where required, and that details like seams in stone countertops are handled correctly. Properly installed surfaces resist cracking and shifting over time.

Daily Habits in Busy Kitchens

How a countertop is used daily matters. Cutting directly on stone countertops dulls knives and can scratch surfaces. Placing hot pots and pans directly on sensitive materials shortens lifespan. Simple habits like using cutting boards and trivets protect the countertop surface and preserve durability.

Maintenance and Sealing Requirements

Some materials require sealing. Granite countertops require sealing and regular sealing maintains stain resistance. Concrete countertops and some natural stone countertops also benefit from periodic sealing. Low maintenance options like engineered quartz reduce long term upkeep but still need basic care.

Signs It Is Time to Replace Kitchen Countertops

Cracks, stains that no longer clean, swelling from moisture, or outdated materials can indicate replacement is needed. In a durable kitchen, countertops should support daily life without constant repairs. Upgrading worn surfaces improves both function and appearance, though some homeowners may opt to refresh instead by painting existing kitchen countertops.

Choosing the Right Countertop Material for Your Lifestyle

Busy Families and Durable Kitchen Countertops

For busy kitchens with children and heavy use, quartz countertops and engineered quartz offer durability, stain resistance, and easy cleaning. These durable materials handle spills and messes without constant maintenance, especially when paired with the right kitchen counter height for comfort and usability.

Serious Home Cooks

Homeowners who cook often benefit from granite countertops, quartzite countertops, or stainless steel countertops. These materials can withstand high temperatures, hot cookware, and heavy use.

Budget Focused Remodels

Laminate countertops, tile countertops, and butcher block countertops offer affordability. While less durable, they still perform well with mindful care.

Outdoor Kitchens

Outdoor kitchens require materials that withstand high temperatures and environmental exposure. Granite, concrete, porcelain, and stainless steel perform well outdoors, and pairing them with durable waterproof kitchen flooring helps protect the entire space.

FAQs About Durable Kitchen Countertops

What are the most durable countertop materials?

Granite, quartz, quartzite, stainless steel, and concrete are considered the most durable countertop materials for modern kitchens.

Do natural stone countertops require sealing?

Yes, most natural stone countertops require sealing. Granite countertops require sealing and regular sealing helps resist stains and moisture.

Are quartz countertops heat resistant?

Quartz countertops are highly durable but not fully heat resistant. Hot pots and pans should not be placed directly on quartz.

What countertop is best for a dream kitchen?

The perfect countertop material depends on lifestyle, budget, and kitchen’s style, including whether countertops match or contrast with your cabinets. Quartz offers low maintenance, granite offers natural beauty, and stainless steel offers professional durability, especially when combined with must‑have kitchen appliances and tools for everyday cooking.

Final Thoughts on Modern Countertop Durability

So how durable are modern kitchen countertops? Today’s materials are stronger, smarter, and more versatile than ever. From natural stone countertops with timeless appeal to engineered quartz designed for low maintenance living, homeowners have access to durable countertops that match any design vision. Choosing the right countertop material ensures your kitchen remains functional, beautiful, and durable for years to come. In any kitchen remodel, durability should be the foundation of every decision, supporting a modern kitchen that truly works for everyday life.