How Do Installers Acclimate Hardwood Flooring Before Installation?

How Do Installers Acclimate Hardwood Flooring Before Installation?
When homeowners ask how do installers acclimate hardwood flooring before installation, they are really asking how professionals protect their investment before a single plank is installed. The answer comes down to controlling moisture, stabilizing the job site, and making sure the wood flooring reaches the right balance with its surrounding environment.
Hardwood flooring is a natural material, and because of that, it reacts to temperature and humidity. If it is installed too early, before it reaches equilibrium moisture content, problems can appear quickly. That is why experienced installers follow a detailed acclimation process instead of relying on guesswork. This guide explains exactly how installers acclimate hardwood flooring before installation, what tools they use, and why proper acclimation is essential for long term performance.
Why Hardwood Floor Acclimation Matters More Than Most Homeowners Realize
Wood flooring constantly reacts to humidity levels and temperature changes inside your home. Because wood is a natural material, it absorbs moisture when humidity rises and begins losing moisture when the air becomes dry. This movement can lead to excessive shrinkage, cupping, or dimensional distortion if the flooring is not properly acclimated.
Hardwood flooring acclimate steps are designed to prevent these issues before installation even begins. Without proper acclimation, excessive moisture or too much moisture trapped inside the boards can lead to structural damage and even adhesive failure in some installations.
When installers acclimate hardwood flooring correctly, they ensure the wood reaches equilibrium moisture content, meaning the wood moisture content matches the surrounding air and environmental conditions. This creates a moisture balance that keeps the flooring stable over time. Proper acclimation is not optional; it is a critical part of a successful installation process.
What Acclimation Actually Means: It Is Not Just Letting Wood Sit
Many homeowners believe you simply drop off the flooring and let it sit for a few days. In reality, wood acclimation is a controlled process where installers measure the moisture content of both the flooring and the subfloor until readings stabilize.
The goal is to acclimate wood flooring so it reaches optimal moisture content for that specific home. This depends on relative humidity, temperature and humidity levels, and climate control inside the home. Installers measure the moisture using a moisture meter to ensure accuracy. They do not rely on time alone.
The flooring must reach equilibrium moisture content with the surrounding environment before installation can begin. This is what separates professional work from rushed jobs. Properly acclimated flooring means the boards are no longer gaining or losing moisture at a significant rate, which helps prevent excessive moisture changes after installation.
Step by Step: How Professional Installers Acclimate Hardwood Flooring
1 | Preparing the Home Environment First
The first step is preparing the job site. Installers make sure the home is enclosed and that heating systems and air conditioning are running to maintain normal living conditions. These normal living conditions reflect average conditions that the homeowner will maintain year round.
Climate control is essential because wood flooring must acclimate in a stable environment. Temperature and humidity must be consistent, and relative humidity must fall within a safe range.
If the home is still under construction, with drywall or paint drying, excess moisture can be present. That can lead to too much moisture being absorbed by the wood. Installers wait until environmental conditions are stable before bringing in the flooring.
2 | Moisture Testing the Subfloor
Before installers acclimate hardwood flooring, they perform moisture testing on the subfloor. This step ensures there is no excess moisture or moisture coming from below.
Whether it is wood or concrete, the subfloor must fall within an acceptable range, and this preparation becomes even more important when you plan how the flooring will interact with new kitchen cabinets. Installers use a moisture meter to measure the moisture content in multiple areas. They measure carefully to identify any problem spots.
If moisture levels are too high, the flooring cannot be installed. This step prevents long term issues like adhesive failure or dimensional distortion.
3 | Delivering and Positioning the Hardwood Flooring
Once the job site is ready, the wood flooring is delivered and placed inside the home. The flooring is brought directly into the rooms where it will be installed so it can adjust to the surrounding environment.
Installers remove plastic wrapping or open the inner plastic wrapping to allow airflow. In many cases, plastic removed completely is necessary so the wood can release moisture and begin proper moisture exchange.
Boxes may be opened by lifting the cardboard flap, and installers often cross stack planks to improve airflow. Cross stacking creates the most efficient acclimation by exposing more surface area to the surrounding air. This supports efficient acclimation and allows the wood to reach room temperature.
4 | Measuring Moisture Content in the Flooring
Installers then measure the moisture content of the wood flooring itself. They use a moisture meter to test several boards from different boxes.
This ensures the wood moisture content is consistent across the entire batch. If some boards contain too much moisture or are losing moisture at a different rate, they are set aside.
Measuring moisture content is one of the most important parts of the acclimation process. Installers measure the moisture repeatedly over time to confirm that readings stabilize and remain consistent. This ensures the wood reaches equilibrium moisture content before installation.
5 | Waiting for Moisture Levels to Stabilize
At this stage, installers wait while monitoring moisture levels, humidity, and relative humidity. The flooring must remain in normal living conditions while the wood continues losing moisture or absorbing moisture until balance is achieved.
The goal is for the flooring and subfloor to reach moisture balance within an acceptable range. Relative humidity and surrounding air conditions play a major role in how long this takes.
Solid hardwood often requires more time, while engineered hardwood flooring and engineered floors are more dimensionally stable and may acclimate faster. However, all wood flooring must be properly acclimated regardless of type.
The wood reaches a point where readings stabilize, which indicates it is finally acclimated.
6 | Final Checks Before Installation Begins
Before installation begins, installers perform final moisture testing to confirm everything is within the acceptable range.
They compare the moisture content of the subfloor and the flooring to ensure compatibility. Manufacturer instructions and flooring manufacturer’s recommendations are followed closely.
Only after proper acclimation is confirmed does the installation process begin. This ensures proper installation and long term performance.
How Long Does Hardwood Flooring Need to Acclimate?
There is no single answer because acclimation depends on environmental conditions, humidity levels, and the type of flooring.
Solid wood and solid hardwood typically take longer to acclimate compared to engineered hardwood or engineered wood flooring. Some solid strip flooring products may require several days to weeks, while engineered products may require less time.
However, installers do not rely on time alone. They measure the moisture until the flooring reaches optimal moisture content. Air conditioning and climate control systems help maintain stable temperature and humidity, which supports faster and more efficient acclimation.
Solid vs Engineered Hardwood: Differences in Acclimation
Solid hardwood is made from solid wood, which means it reacts more to humidity and moisture changes. This makes it more prone to excessive shrinkage or dimensional distortion if not properly acclimated.
Installers must acclimate solid hardwood carefully to avoid excessive moisture changes.
Engineered hardwood flooring, also known as engineered wood flooring or engineered wood, is built in layers, making it more dimensionally stable. Engineered floors and engineered hardwood still require acclimation, but the process may be shorter.
Some engineered products allow for quicker installation, but professionals still follow manufacturer instructions to ensure proper acclimation.
Common Acclimation Mistakes and How to Avoid Them
One of the biggest mistakes is skipping proper acclimation entirely.
Another is leaving flooring sealed in plastic wrapping or inner plastic wrapping without airflow. This prevents the wood from adjusting to the surrounding environment.
Failing to cross stack planks or open the cardboard flap slows the most efficient acclimation.
Installing flooring without climate control or ignoring humidity levels can result in too much moisture or excessive moisture remaining in the boards.
These mistakes can lead to structural damage, adhesive failure, and long term flooring issues.
Signs Your Hardwood Was Not Properly Acclimated
When wood flooring is not properly acclimated, problems can appear quickly.
You may notice gaps forming due to losing moisture or excessive shrinkage.
Cupping or warping can occur when the wood absorbs too much moisture.
Movement, squeaking, or dimensional distortion may also develop.
These issues indicate the flooring did not reach equilibrium moisture content before installation.
How Professional Installation Protects Your Investment
Proper acclimation is a key part of protecting your investment in real wood flooring.
By ensuring the wood reaches optimal moisture content and is properly acclimated, installers reduce the risk of long term problems, which is essential for whole-home upgrades like remodeling projects in Roseville, CA.
Professionals use a moisture meter to measure the moisture, monitor humidity levels, and maintain climate control throughout the process.
This ensures proper installation and long lasting performance, especially when paired with correct hardwood floor cleaning and maintenance practices.
Why Homeowners Trust America’s Advantage Remodeling for Hardwood Flooring
At America’s Advantage Remodeling, every flooring project is handled with precision and care, including those that are part of larger home remodeling projects in Elk Grove, CA.
Our team understands how important it is to acclimate hardwood flooring correctly, whether we are working on a full home remodeling project in Davis, CA or a single-room upgrade.
We take the time to measure the moisture, monitor environmental conditions, and ensure your home meets normal living conditions before installation begins.
Whether you choose solid hardwood, engineered hardwood, or engineered wood flooring, our dedicated hardwood flooring services follow manufacturer instructions to deliver reliable results.
Get Expert Hardwood Flooring Installation You Can Trust
If you are planning a flooring project, choosing the right team makes all the difference, and learning more about America’s Advantage Remodeling can help you feel confident in your choice.
At America’s Advantage Remodeling, we handle every step of the process with care, from wood acclimation to final installation as part of our broader home remodeling services in Sacramento.
Contact our team today to get started with a flooring project built on proper acclimation, precision, and lasting results, and explore our remodeling project gallery for design inspiration.
FAQs About Hardwood Floor Acclimation
Do all hardwood floors need to acclimate?
Yes, all wood flooring must be properly acclimated to the surrounding environment before installation.
Can engineered hardwood skip acclimation?
Engineered hardwood and engineered floors still require proper acclimation, even though they are more dimensionally stable.
What happens if flooring is installed too soon?
Installing too soon can lead to excessive moisture issues, dimensional distortion, and long term structural damage.
Can I acclimate hardwood myself?
You can place flooring in the home, but professionals measure the moisture with a moisture meter to ensure accuracy.
Does climate affect acclimation time?
Yes, humidity, temperature and humidity levels, and environmental conditions all impact how long acclimation takes.
How do installers measure moisture in hardwood?
They use a moisture meter to measure the moisture content of both the flooring and subfloor.
Is acclimation different in different climates?
Yes, surrounding air and humidity levels vary by region, which affects how wood reacts.
Final Thoughts: Do Not Rush Hardwood Floor Acclimation
Acclimation is one of the most important steps in installing hardwood flooring.
It ensures the wood reaches equilibrium moisture content and is ready for installation.
Rushing this step can lead to excessive moisture changes, structural damage, and costly repairs.
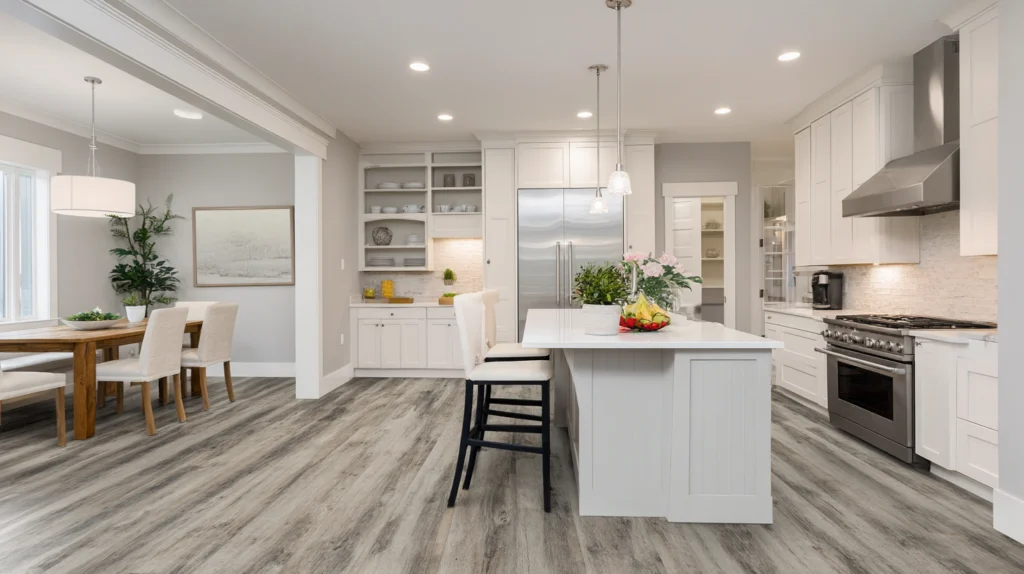
Taking the time to properly acclimate wood flooring ensures long term performance, especially in high-visibility spaces like a kitchen with hardwood floors and white cabinets.