Admin, Author At America's Advantage Remodeling - Page 4 Of 21

Посты автора admin

admin

admin

37 Kitchen Backsplash Ideas with White Cabinets(2026 Sacramento Designer Picks)

Опубликовано: May 5, 2026 в 11:50 am

Автор:

Категории: Kitchen

37 Kitchen Backsplash Ideas with White Cabinets
(2026 Sacramento Designer Picks)

After 25 years of installing kitchens across Roseville, Folsom, Land Park, East Sacramento, and
the rest of the metro, our team at America’s Advantage Remodeling has built more white-
cabinet kitchens than we can count. This guide is a working designer’s breakdown of what
actually looks good with white cabinets in 2026, what costs what, what fails, and how to pick the
right backsplash for your specific kitchen.
We’ll cover 37 ideas across 6 style directions, real Sacramento installation pricing, and a section
on the mistakes we see most often when homeowners pick a backsplash without seeing it in
person.

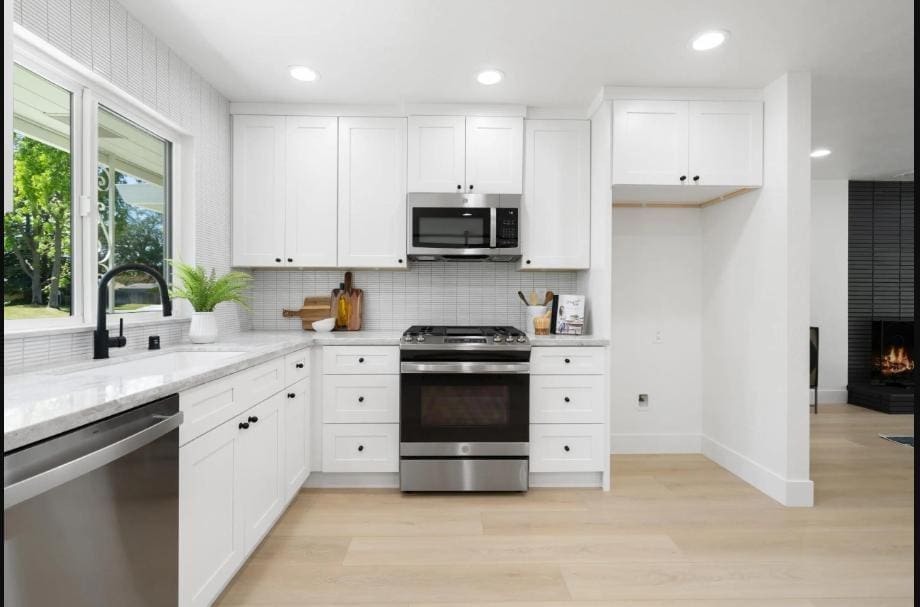
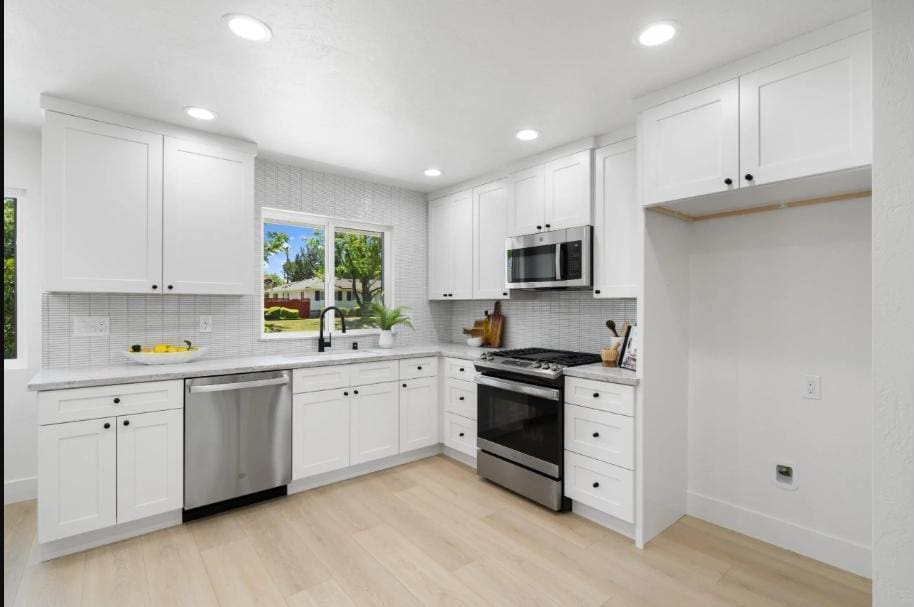
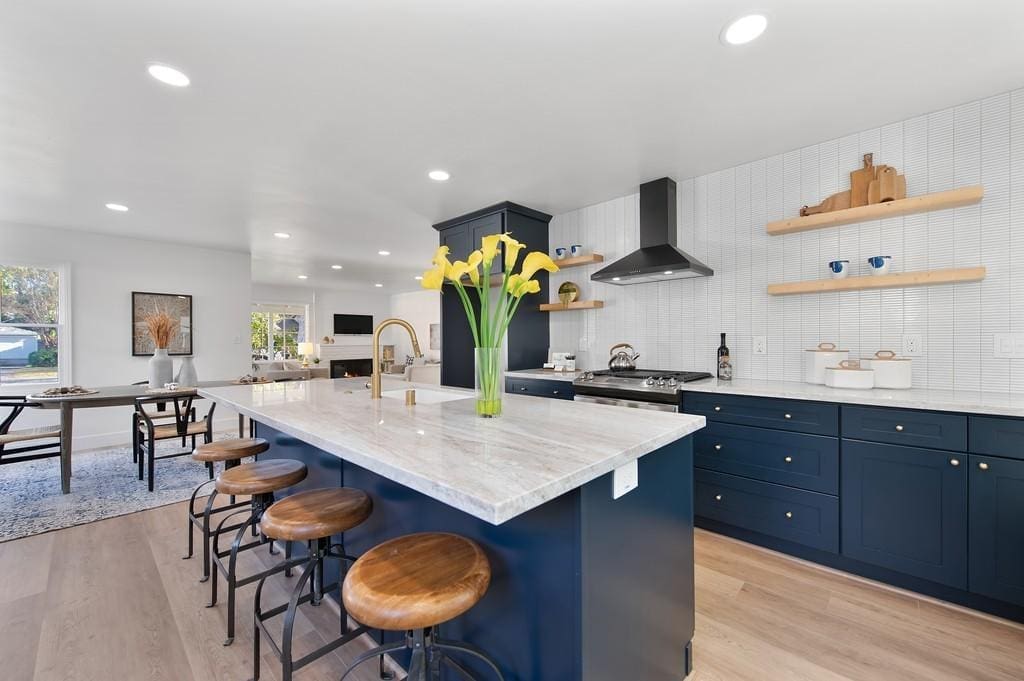
Kitchen Remodel completed by America’s Advantage Remodeling near Poverty Ridge, Sacramento CA featuring modern design. Licensed contractor CSLB #1036517 serving the greater Sacramento area.

Why the Backsplash Matters More with White Cabinets

Style Direction 1: Classic Subway Tile (10 Variations)

Subway tile is the most-installed backsplash in Sacramento and shows no signs of slowing. It’s
the safest choice that still looks intentional. The variations are where the design happens.

  1. White 3×6 subway with white grout — the cleanest, most timeless option. Reads as a
    single bright surface. Good for small kitchens that need to feel bigger.
  2. White 3×6 subway with light gray grout — adds dimension without committing to a
    graphic look. Our most-recommended subway variation for clients who want “subway but
    not boring.”
  3. White 3×6 subway with dark gray or black grout — high-contrast, graphic, pulls the eye.
    Works in modern farmhouse and transitional kitchens. Be aware: dark grout in a
    backsplash means staining behind the range will show fast.
  4. Vertical stack subway — same tile, oriented vertically in a stacked grid. Reads more
    modern, makes ceilings feel taller. Excellent in Land Park bungalows with original 8-foot
    ceilings.
  5. Herringbone subway — same 3×6 tile laid in herringbone pattern. Adds visual interest
    without changing material. Adds about 15-20% to install labor.
  6. Vertical herringbone — herringbone rotated 90 degrees. Less common, more directional,
    draws the eye up.
  7. Beveled subway — same shape and size, but the tile face has a subtle bevel. Catches
    light differently across the day. Reads slightly more traditional.
  8. Handmade or zellige subway — irregular hand-glazed tiles with visible variation. Adds
    craft and texture. More expensive but worth it for high-end farmhouse and
    Mediterranean kitchens common in El Dorado Hills and Granite Bay.
  9. Larger format subway (4×12 or 4×16) — same look, bigger scale. Fewer grout lines,
    reads more modern, easier to clean.
  10. Color-blocked subway — white subway on the main wall, accent color (sage green,
    navy, terracotta) behind the range only. Gives you a focal point without committing the
    whole backsplash to color.

Subway Tile Cost in Sacramento (2026)

Subway TypeMaterial Cost (sq ft)Installed Cost (sq ft)Notes
Standard 3×6 ceramic$2 – $6$12 – $22Most affordable; widely
available
Beveled subway$5 – $12$15 – $28Slight upcharge for
shape
Handmade/zellige$15 – $40$35 – $75Higher labor due to
irregular sizing
Herringbone install
pattern
+15-20% labor+15-20% laborSame tile, more cuts

Style Direction 2: Marble & Stone Look (7 Ideas)

Marble and marble-look backsplashes are the second-most-requested category in our
Sacramento projects, especially when paired with white cabinets and a marble or quartz
countertop that has visible veining. These backsplashes do the heavy design work without color
— the veining provides the pattern.

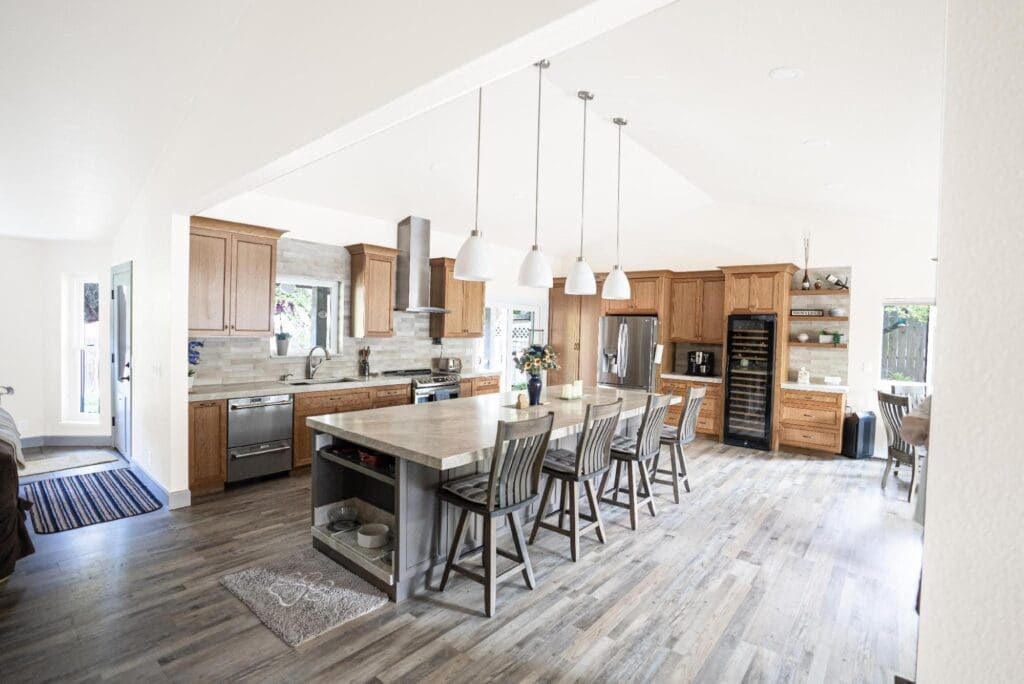
Kitchen Remodel completed by America’s Advantage Remodeling near Carmichael, Sacramento CA. Licensed contractor CSLB #1036517 serving the greater Sacramento area.
  1. Honed Carrara marble subway — soft gray veining on white background, matte finish.
    Stunning with white shaker cabinets. Sealing required and expect minor etching from
    acidic spills over time.
  2. Polished Calacatta tile — bolder, more dramatic veining than Carrara. The veining is the
    focal point. We typically recommend running this only behind the range and using a
    quieter material elsewhere.
  3. Full-height marble slab backsplash — single slab of marble running floor to upper
    cabinets, no grout lines. The most expensive option, the most luxurious look. Common in
    El Dorado Hills and high-end Folsom remodels.
  4. Quartzite slab backsplash — the harder, lower-maintenance alternative to marble. Cost
    similar, durability much better.
  5. Marble-look porcelain tile — printed porcelain that mimics marble. About 1/3 the cost, no
    sealing, no etching. The aesthetic gap has closed dramatically in 2026 — it’s a real
    option, not a compromise. Our most-recommended choice for families with kids.
  6. Marble mosaic (penny round, hex, picket) — small-format marble in mosaic patterns.
    Adds detail and craft. Works as a behind-the-range accent paired with subway
    elsewhere.
  7. Soapstone slab — dark gray-green stone with a soft, matte finish. Unexpected pairing
    with white cabinets. Reads sophisticated, slightly historic. Excellent in East Sac
    craftsman kitchens.

Marble & Stone Cost in Sacramento (2026)

MaterialInstalled Cost (sq
ft)
MaintenanceNotes
Carrara marble tile$25 – $50Sealing every 6-12
mo
Etches with citrus and vinegar
Calacatta marble tile$45 – $90Sealing every 6-12
mo
More dramatic veining
Marble slab (full
height)
$80 – $200Sealing every 6-12
mo
Premium installation
Quartzite slab$70 – $160Light sealingHarder than marble
Marble-look porcelain$15 – $35NoneBest value for the look
Soapstone slab$70 – $130Mineral oil
treatment
Develops patina

Style Direction 3: Textured & Dimensional Tile (6 Ideas)

Textured backsplashes are how you get visual interest without color. They photograph
beautifully and they’re what we recommend when clients want their kitchen to feel custom but
don’t want to commit to a strong color story.

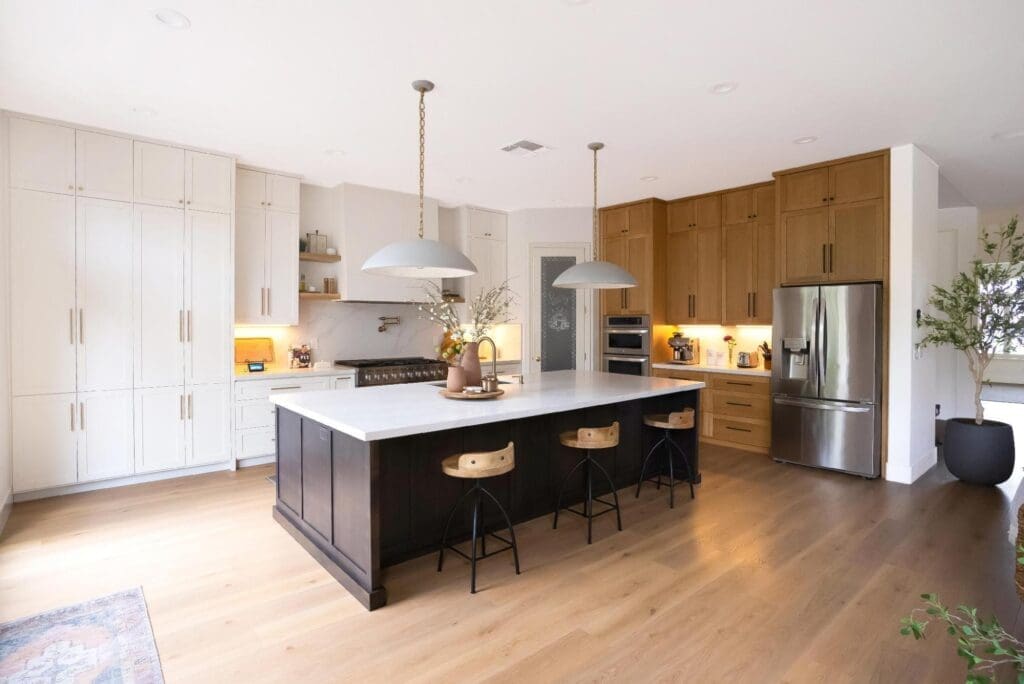
Kitchen Remodel completed by America’s Advantage Remodeling near Broadstone, Roseville CA featuring dark kitchen with large island and warm pendant lights. Licensed contractor CSLB #1036517 serving the greater Sacramento area.
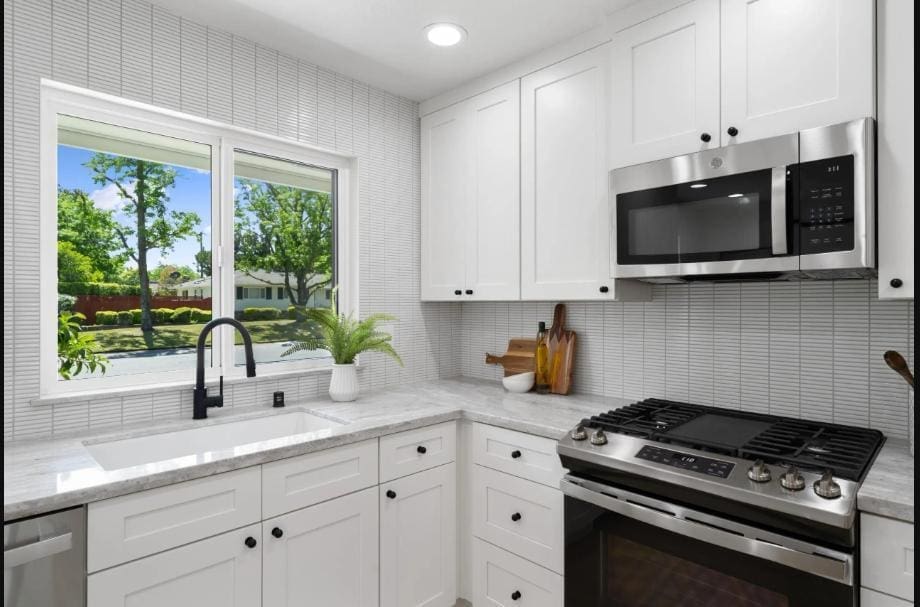
  1. Fluted or ribbed white tile — vertical ridges in white ceramic or porcelain. 2026’s
    breakout texture trend. Adds vertical line and shadow play.
  2. White hexagon tile — small or large hex in white. Reads geometric without being loud.
    Works modern or transitional.
  3. Picket (elongated hexagon) — taller, narrower hex shape. More directional than
    standard hex.
  4. White penny round mosaic — small round tiles in mosaic sheets. Great behind-the-
    range accent. Reads vintage in a Land Park craftsman, modern in a Roseville new-build.
  5. Wavy or scallop tile — tile with curved or wave-shaped edges. Soft, organic, less
    common. Strong aesthetic statement.
  6. 3D dimensional tile — tile with sculpted relief (chevron, basket-weave, geometric).
    Specialty product, premium price, but unforgettable.

Style Direction 4: Color & Contrast (8 Ideas)

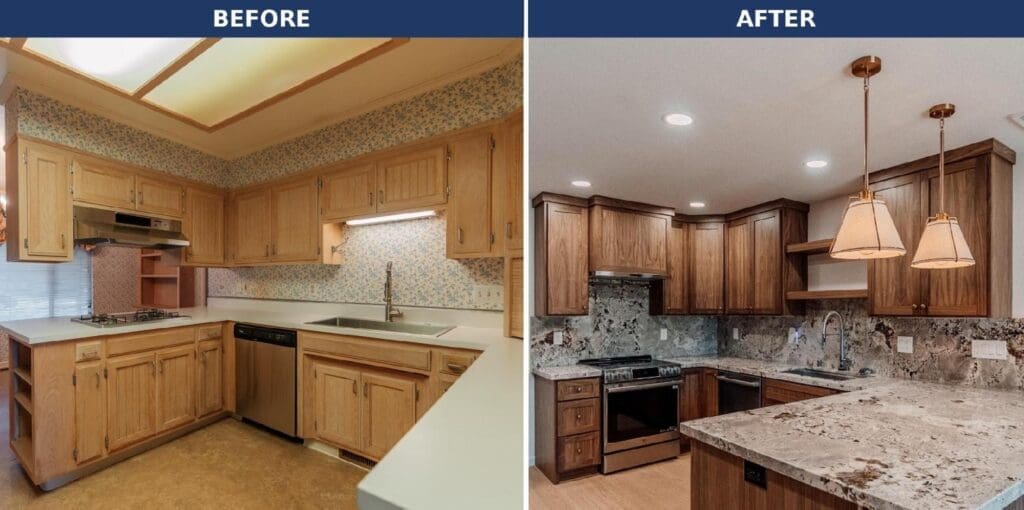
Kitchen Remodel completed by America’s Advantage Remodeling near Folsom Heights, Folsom CA featuring modern design, before and after transformation. Licensed contractor CSLB #1036517 serving the greater Sacramento area.

White cabinets pair with virtually any backsplash color. The decision is how much color and
where. Here are 8 directions we’ve installed in Sacramento kitchens in the last two years:

  1. Sage or muted green tile — 2026’s most-requested color in Sacramento. Calming,
    organic, pairs beautifully with brass hardware. Works in small kitchens because the
    green tones are usually low-saturation.
  2. Navy blue subway — high-contrast, classic, slightly nautical. Works in coastal-style
    kitchens (popular in Davis and Yolo County) and modern farmhouse.
  3. Terracotta or warm clay — Spanish, Mediterranean, Mid-Century leaning. Pairs with
    warm-white cabinets and wood floors. Wrong for cool-white cabinets — the
    temperatures fight.
  4. Soft pink or blush — quietly trending in 2026. Reads warm and unexpected without
    being feminine.
  5. Black tile (matte) — graphic, modern, works in high-ceiling lofts and contemporary new
    builds.
  6. Mixed-color zellige — handmade tile in a tonal range (ocean blues, earth tones, etc.).
    Each tile slightly different. Maximum craft.
  7. Color-blocked install — white tile across most of the wall, single accent color behind the
    range. Lets you commit to color in a contained area.
  8. Bold pattern tile — encaustic, Moroccan, or geometric pattern tile (typically as an
    accent). Strong personality. Best behind range, paired with quiet tile elsewhere.

Style Direction 5: Slab & Continuous Backsplashes (4 Ideas)

Kitchen Remodel completed by America’s Advantage Remodeling near Folsom Heights, Folsom CA featuring modern design, before and after transformation. Licensed contractor CSLB #1036517 serving the greater Sacramento area.

A slab backsplash uses a single piece of stone or quartz running from countertop to upper
cabinets — no grout lines. It’s 2026’s strongest design trend in the high-end Sacramento
market. The look is clean, expensive, and dramatic.

  1. Quartz slab matched to countertop — same quartz running from counter up the wall.
    Reads as a single continuous surface. Easiest to clean (no grout). Premium look.
  2. Contrasting quartz slab — different quartz pattern from the counter, used as a
    backsplash statement. The veining becomes the kitchen’s focal point.
  3. Marble or quartzite slab — natural stone full-height slab. Most expensive option; most
    luxurious result.
  4. Porcelain slab (large-format) — 4×10 or 5×10 foot porcelain panels with marble or stone
    print. The cost-effective slab option. Often indistinguishable from real stone in finished
    form.

WHY SLAB BACKSPLASHES ARE WINNING IN 2026:
No grout to clean, no grout to stain, the veining provides all the visual interest, and full-
height eliminates the awkward gap between subway tile and upper cabinets. Cost is higher
upfront but the maintenance savings over 20 years often offset the difference.

Style Direction 6: Sacramento-Specific Style Notes

Kitchen Remodel completed by America’s Advantage Remodeling near Land Park, Sacramento CA featuring center island. Licensed contractor CSLB #1036517 serving the greater Sacramento area.

Sacramento’s climate and architectural mix create a few backsplash considerations that don’t
come up in national design guides:
West-facing kitchens
Sacramento afternoons are bright. A glossy white subway with white quartz countertops in a
west-facing kitchen can produce serious glare from 3-7 PM in summer. Honed (matte) finishes
solve this. We almost always recommend honed surfaces in west-facing kitchens.

Warm-white is winning over cool-white
Through 2020-2023, the dominant white was a clean, slightly cool white (think “Decorator’s
White” by Benjamin Moore). 2024-2026 has shifted toward warm-whites with a hint of cream or
oat. If your cabinets are warm-white, your backsplash should follow — cool-white tile against
warm-white cabinets reads as a mismatch.

Historic homes (Land Park, East Sacramento, Curtis Park, Old Roseville)
Original 1920s-1940s homes look best with backsplashes that respect their era: handmade-look
subway, zellige, penny round mosaic, beadboard with a tile rail. Glossy modern slab
backsplashes can fight the architecture.

New builds (Lincoln, Roseville, Folsom, El Dorado Hills)
Larger kitchens with 9-10 foot ceilings handle slab backsplashes and dramatic veining well. The
taller wall area means small-format tile can read busy.

Hard water staining
Sacramento water is moderately hard. White grout near a sink will yellow over 2-3 years if not
sealed. We recommend epoxy grout (more expensive, virtually stain-proof) for any white-grout
backsplash, or accepting that the grout will need re-sealing every 12-18 months.

How to Choose the Right Backsplash for Your Kitchen

After 25 years of installs, the framework that consistently produces results we’re proud of:

Step 1: Lock in the countertop first
Backsplash decisions follow countertop decisions, not the reverse. The countertop is the larger
surface, the bigger investment, and the harder thing to change. Pick that, then choose a
backsplash that supports it. See our guides on

Step 2: Match the temperature to your cabinets
Hold tile samples directly against your cabinet door — in your actual kitchen, in actual lighting,
at the time of day you cook most. Cool-white tile against warm-white cabinets is the most
common mistake we see homeowners make from showroom-only selections.

Step 3: Decide your statement piece
A kitchen has one focal point, not three. Either the backsplash makes the statement (bold tile,
color, slab veining), the countertop makes the statement (dramatic quartz or marble veining), or
the cabinetry makes the statement (color, hardware, glass fronts). Pick one. The other two
should be quiet.

Step 4: Sample at scale
A 3×6 tile sample lies flat on a counter. A backsplash is a 30-40 square foot vertical wall. Always
order at least 2 sq ft of sample, lay it out vertically against your cabinet, and live with it for 48
hours before committing.

Step 5: Plan for the cabinet meet
Where the backsplash meets the upper cabinets matters. Full-height (counter to cabinet) is the
cleanest look. Stopping below the cabinets requires a clean termination — Schluter trim, a small
wood ledge, or carrying the tile around the edge. Decide this before installation, not during.

Mistakes to Avoid (From 25 Years of Sacramento Installs)

How AAR Approaches Backsplash Selection

Kitchen Remodel completed by America’s Advantage Remodeling near Hollywood Park, Sacramento CA featuring center island. Licensed contractor CSLB #1036517 serving the greater Sacramento area.

We don’t pick the backsplash for you. We do this:

  1. In-home design consultation in your actual kitchen lighting (not a showroom)
  2. Cabinet temperature reading — we identify whether your cabinets read warm or cool
  3. Countertop coordination — we lay backsplash samples directly on countertop samples
  4. Style direction conversation — we ask what you cook, who uses the kitchen, and how
    long you plan to stay
  5. Material recommendations narrowed to 3-5 options that fit your style, budget, and
    maintenance tolerance
  6. Showroom visit (we partner with Sacramento-area suppliers in Roseville, Citrus Heights,
    and Rancho Cordova)
  7. Sample order and on-site review before final commitment
  8. In-house installation by our own tile crew — no subcontractors, no quality drift

Frequently Asked Questions

What backsplash looks best with white cabinets?
White subway tile with light gray grout is the most universally flattering choice — it’s timeless,
brightens the kitchen, and pairs with virtually any countertop. For more visual interest, marble or
marble-look porcelain tile, fluted white tile, and quartz slab matched to the countertop are the
strongest 2026 alternatives.

Should the backsplash match the countertop or contrast with it?
Either works, but pick one. A matched backsplash (same material as countertop) reads clean
and continuous — best for modern kitchens. A contrasting backsplash adds visual interest and
a focal point — best for traditional and transitional kitchens. What doesn’t work is a busy
countertop combined with a busy backsplash — one of them needs to be quiet.

How much does a kitchen backsplash cost in Sacramento in 2026?
A standard 30-40 sq ft kitchen backsplash with white subway tile and professional installation
runs $700–$1,100 in Sacramento. Marble or natural stone runs $1,500–$3,500. Slab quartz or
quartzite runs $2,500–$6,000. These are 2026 Sacramento metro prices for materials plus labor
on a typical kitchen wall.

Is white subway tile still in style in 2026?
Yes. White subway is the most-installed kitchen backsplash in Sacramento and shows no signs
of slowing. The 2026 evolution is in pattern (vertical stack, herringbone), grout color (light gray
and warm gray gaining over pure white), and finish (matte and beveled gaining over high-gloss).

What’s better with white cabinets — light or dark grout?
Light gray grout is the safest, most flattering choice — it adds subtle dimension without the high-
contrast graphic look of dark grout. Dark grout (charcoal or black) creates a strong pattern and
works in modern farmhouse and industrial kitchens but shows splatter behind the range and is
harder to keep clean. White grout reads cleanest but yellows over time without sealing.
Should I do a full-height backsplash or stop at the upper cabinets?
Full-height (counter to upper cabinets, no gap) is the 2026 default — it eliminates the awkward
break and looks cleaner. The exception is when there’s no upper cabinet (open shelving or a
window above the counter), in which case the backsplash typically extends to ceiling or to a
clean architectural break. Stopping the backsplash mid-wall is rarely the strongest choice.

What backsplash color goes with both white cabinets and gray countertops?
White, soft gray, gray-veined marble or marble-look, sage green, and navy all pair well with
white cabinets and gray counters. Avoid warm tones (terracotta, gold, cream) which fight gray
countertops. The temperature of the gray (warm vs cool) determines which way to lean.

Planning a White-Cabinet Kitchen in Sacramento?

America’s Advantage Remodeling has been designing and installing kitchens across the
Sacramento metro since 2001. Our in-house design team will help you pick the right backsplash
for your specific cabinets, countertop, lighting, and lifestyle — and our in-house tile crew will
install it to a standard we’re willing to put our name on.

Granite vs Quartz Countertops: Which Is Right forYour Sacramento Kitchen? (2026 Guide)

Опубликовано: May 3, 2026 в 9:28 am

Автор:

Категории: Kitchen

Granite vs Quartz Countertops: Which Is Right for our Sacramento Kitchen? (2026 Guide)

For most Sacramento homeowners, quartz is the smarter choice if you want a low-maintenance,
stain-resistant countertop that looks consistent and never needs sealing. Granite is the better
choice if you cook a lot (it handles high heat better), want a one-of-a-kind natural stone look, or
plan to use the surface outdoors. Both materials last 30+ years with proper care and both add
strong resale value.


That’s the short answer. Below we’ll walk through everything that goes into that decision —
2026 Sacramento-area pricing, durability testing, maintenance differences, eco-impact, resale
value, and the scenarios where each material actually wins. If you’re weighing countertops for a
kitchen remodel, our team at America’s Advantage Remodeling has installed both materials in
thousands of Sacramento-area homes since 2001, so this guide reflects what we actually see in
kitchens every day — not just what manufacturers claim.

Granite vs Quartz At a Glance: 2026 Comparison

FactorGraniteQuartz
Cost Installed
(Sacramento)
$70–$230 per sq ft$50–$150 per sq ft
Typical 30 sq ft kitchen$2,100–$6,900$1,500–$4,500
Heat ResistanceExcellent (set hot pan directly)Fair (use trivet above 150°F)
Stain ResistanceGood with sealingExcellent (non-porous)
Sealing RequiredEvery 12–18 monthsNever
AppearanceUnique natural patternsConsistent engineered look
Color OptionsLimited to nature’s paletteVirtually unlimited
Lifespan50–100+ years25–50+ years
Resale ROI70–80% of installed cost75–85% of installed cost
Outdoor UseYes (UV-stable)No (resin yellows in UV)
Eco-FriendlinessNatural, but heavy to transportCan include recycled content

Pricing figures reflect current 2026 Sacramento-area installation quotes and include fabrication,
delivery, and labor. Your exact price will vary based on slab grade, edge profile, cut-out
complexity, and cabinet condition.

Granite Countertops: What They Are and What They Do Well

Granite is 100% natural stone — quarried from the earth in massive slabs and cut to fit your
kitchen. Because every slab forms over millions of years under unique geological conditions, no
two granite countertops are identical. The patterns, veining, and mineral flecks you see in your
kitchen exist nowhere else on earth. For homeowners who want a truly one-of-a-kind surface,
that’s granite’s biggest selling point.

    Granite Pros
  • Exceptional heat resistance — you can place a hot pan straight from the oven onto granite without damage. Serious home cooks love this.
  • Long lifespan — a properly sealed and cared-for granite countertop will easily last 50 to 100+ years.
  • UV-stable — granite can be used in outdoor kitchens without discoloration.
  • High-end appearance — granite signals ‘natural stone’ and holds strong resale appeal in the Sacramento market.

    Granite Cons
  • Scratch-resistant — harder than most common kitchen tools; you’d have to try fairly hard to scratch it.
  • Requires sealing every 12–18 months to prevent staining from wine, oil, and acidic foods.
  • Porous — unsealed granite will absorb liquids and can harbor bacteria in cracks.
  • Heavy — a typical 3cm granite slab weighs 18–19 lbs per square foot, which means your cabinets need to be in sound structural condition.
  • Limited color range — you’re working with nature’s palette, not a designer’s.
  • Visible seams on larger kitchens where one slab can’t cover the full run.

2026 Granite Pricing in Sacramento

Installed granite countertops in the Sacramento metro range from $70 to $230 per square foot depending on slab grade. Level 1–2 granite (common colors, minimal pattern variation) runs $70–$120 installed. Level 3–4 (bolder colors, dramatic veining) runs $120–$170. Level 5 exotic granite (rare colors like emerald, blue, or red) can reach $200–$230+. For a full breakdown of current granite pricing by grade, see our granite countertops cost guide.

Thickness also affects the final price. Most Sacramento kitchens use 3cm (1¼ inch) slabs,
which don’t need plywood backing and are our preferred standard. 2cm (¾ inch) slabs cost less
but require reinforcement — which often erases the savings. Read our detailed breakdown of
granite thickness options for a full explanation.

Quartz Countertops: What They Are and What They Do Well

Quartz countertops are engineered stone — roughly 90–93% crushed natural quartz mineral,
combined with resins, binders, and pigments, then cured under heat and pressure into uniform
slabs. Because the manufacturing process is controlled, quartz has consistent color and pattern
throughout the slab, no variation from piece to piece, and a completely non-porous surface.
Major quartz brands include Caesarstone, Silestone, Cambria, Zodiaq (by DuPont), and MSI Q.

    Quartz Pros
  • Non-porous surface — stains don’t absorb in. Wipe up wine, coffee, oil, and tomato
    sauce with soap and water.
  • Zero sealing required — saves you a service appointment every 1–2 years for the life of
    the countertop.
  • Consistent appearance — what you see in the showroom is exactly what shows up in
    your kitchen. No slab-to-slab surprises.
  • Virtually unlimited design options — quartz can mimic marble, concrete, soapstone, or
    be solid colors not found in nature.
  • Bacteria-resistant — the non-porous surface is inhospitable to the bacteria that can hide
    in unsealed natural stone.
  • Can include recycled content (some brands up to 42% recycled), which helps with green-building certifications.
    Quartz Cons
  • Not as heat resistant as granite — the resin binder can discolor or soften above
    approximately 150°F. Always use a trivet under hot pans.
  • Cannot be used outdoors or in direct sunlight long-term — UV exposure yellows the
    resin over time.
  • Slightly less prestige than natural stone in some luxury segments, though that perception
    is fading.
  • Chip repair is harder than granite — damaged areas may need a full replacement piece
    rather than a spot repair.
  • Lifespan of 25–50+ years is excellent but somewhat shorter than granite’s century-plus
    potential.

2026 Quartz Pricing in Sacramento

Installed quartz countertops in the Sacramento metro range from $50 to $150 per square foot.
Entry-level quartz (simple colors, basic patterns) runs $50–$80. Mid-range quartz (more
convincing marble-look patterns, popular designer colors) runs $80–$120. Premium quartz
(Cambria, Caesarstone top tier, full-veining marble look) runs $120–$150+. Our full quartz
benefits guide covers the trade-offs between brands in detail.

Granite vs Quartz: The 6 Decisions That Actually Matter

  1. Cost — Quartz Usually Wins
    For equivalent quality tiers, quartz tends to come in 10–25% cheaper than granite in the
    Sacramento market — primarily because quartz is manufactured with consistent supply and
    granite has variable slab sourcing costs. The gap shrinks at the top end: premium Cambria or
    full-slab marble-look quartz can cost more than mid-range granite. For budget-conscious
    remodels, quartz offers more design options per dollar.
  2. Daily Use — Depends on How You Cook
    If you regularly take cast iron from the stove to the counter, if you bake a lot, or if you entertain
    with hot serving platters straight from the oven, granite’s heat tolerance matters. Quartz doesn’t
    handle 450°F+ pans gracefully — you’ll get discoloration rings from repeated contact. But in a
    typical Sacramento household where trivets and cutting boards are the norm, quartz’s non-
    porous stain resistance wins more daily-life battles than granite’s heat tolerance.
  3. Maintenance — Quartz Wins Hands Down
    Granite sealing is a 20-minute job that most homeowners can DIY with a $25 bottle of sealer,
    but it’s 20 minutes you have to remember every 12–18 months. Miss a year and your granite
    becomes vulnerable to oil stains and wine rings. Quartz requires no sealing, ever. Daily cleaning
    for both is the same: mild soap, warm water, soft cloth. Skip abrasive pads and acidic cleaners
    on either surface.
  4. Appearance — Preference Wins
    This is the most subjective axis and comes down to whether you want the unmistakable one-of-
    a-kind look of natural stone (granite) or the controlled consistency of engineered material with a
    broader color palette (quartz). Modern quartz has gotten remarkably good at mimicking marble
    and other natural stones, to the point that many homeowners genuinely can’t tell the difference
    from two feet away. Others insist that real stone has a depth and light-play that no engineered
    product matches. Go to a showroom and look at both with samples of your cabinet color and
    flooring to see how they actually pair in your home.


  5. Resale Value — Both Win, Slight Edge to Quartz
    Real estate data from the Sacramento market in 2024–2025 suggests both granite and quartz
    recoup 70–85% of their installed cost at resale — significantly better than laminate or tile but
    slightly below custom cabinet upgrades. Quartz has been slowly pulling ahead in buyer
    preference, especially with 30-somethings who value low maintenance. Granite remains the top
    choice for high-end traditional buyers and luxury segment homes. If your neighborhood average
    sale is $800K+, granite still signals ‘premium.’ Below that, quartz is increasingly the expected
    choice.
  6. Environmental Impact — Quartz Has a Slight Edge
    Granite is a finite natural resource and has a significant carbon footprint from quarrying, cutting,
    and shipping heavy slabs (often from Brazil, India, or China). Quartz is engineered and can
    include recycled content — some brands use up to 42% post-industrial recycled material. Both
    materials last decades and are not hazardous. If environmental impact is a priority for your
    remodel, ask your contractor about recycled-content quartz specifically.

Which Should You Choose? Sacramento-Specific Scenarios

Rather than trying to declare an overall winner (there isn’t one), here’s the framework we use
with AAR clients during kitchen consultations:

    Choose Granite If…
  • You’re a serious home cook who uses cast iron, hot sheet pans, and high-temp
    cookware daily.
  • You want a truly one-of-a-kind look that no neighbor’s kitchen can duplicate.
  • You’re remodeling a luxury-tier Sacramento home ($900K+) where granite signals high-
    end.
  • You’re building an outdoor kitchen or any countertop exposed to direct sunlight.
  • You love the natural-stone aesthetic and are willing to seal every 12–18 months.
    Choose Quartz If…
  • You have young kids or a busy household and want true zero-maintenance.
  • You care about consistent color and pattern — you picked a look and want it to look
    exactly like that.
  • You want a marble look without marble’s maintenance (quartz mimics marble extremely
    well).
  • You’re remodeling a rental, flip, or neighborhood where the expected finish is
    contemporary.
  • Budget matters and you want the most design flexibility per dollar.
  • You’re concerned about bacteria resistance (quartz’s non-porous surface is superior for
    food safety).

4 Common Myths About Granite and Quartz

Myth 1: ‘Quartz is just fake granite.’
Incorrect. Quartz countertops are 90%+ actual natural quartz mineral — arguably the second
most common mineral on earth and harder than most granites. The resin binder is what makes
it ‘engineered,’ not its natural content. Calling quartz ‘fake’ is like calling reinforced concrete
‘fake rock.’


Myth 2: ‘Granite is outdated.’
Incorrect. Granite remains the #1 choice in luxury Sacramento segments above $900K and
continues to be specified in custom homes, especially with the resurgence of warm-toned
cabinetry. The ‘outdated’ label came from the 2005–2015 era when contractors used the
cheapest tan-and-brown granite in every tract home — a style issue, not a material issue.
Today’s granite selections trend toward whites, grays, and dramatic blacks that feel entirely
current.

Myth 3: ‘Quartz can’t handle any heat.’
Overstated. Quartz can handle moderate heat (a mug of coffee, a warm pan, a casserole dish
below 150°F) without issue. What it can’t handle is direct contact with a 450°F cast iron pan
straight from the stove. Use a trivet and you’ll never have a problem.

How AAR Handles Countertop Installation in Sacramento

Whether you pick granite or quartz, installation quality matters as much as the material itself. A
bad install — uneven seams, misaligned edges, inadequate cabinet support — ruins even the
best slab. At America’s Advantage Remodeling, our installers are in-house employees — not
subcontractors — which means the same team who quotes your project is the team who cuts,
templates, and installs. We produce a 3D rendering of your kitchen with your chosen countertop
before any demolition begins, so you can see the pairing of slab + cabinet + backsplash before
committing.


We also bring physical samples to your home for the final decision — not just 3-inch tiles but
larger cuts so you can see the pattern scale in your actual lighting. See our recent countertop
projects
for examples of both granite and quartz installations in Sacramento and Roseville
homes.

Frequently Asked Questions About Granite vs Quartz

Is quartz better than granite for kitchens?
For most modern Sacramento kitchens, yes — quartz is the better choice because it requires no
sealing, resists stains perfectly, and comes in a much wider range of colors and patterns than
granite. However, granite is better for homeowners who cook at high heat frequently, want a
truly unique natural-stone look, or are remodeling a luxury-tier home where natural materials
signal high-end.

Which lasts longer, granite or quartz?
Granite lasts longer. A well-sealed granite countertop can last 50 to 100+ years with minimal
care. Quartz lasts 25 to 50+ years under normal kitchen use. Both timelines exceed the lifespan
of most kitchens themselves, so longevity rarely becomes a deciding factor unless you plan to
pass the home through multiple generations.

How much does it cost to replace granite with quartz in Sacramento?
Replacing existing granite with quartz in a typical 30-square-foot Sacramento kitchen costs
$2,200 to $5,500 installed, including demolition of the existing granite and disposal. If the
cabinets need any leveling or reinforcement, add $300 to $800. Full countertop replacements
are typically completed in one day of installation after template-to-fabrication lead time of 7 to 14
days.

Does granite or quartz add more value to a home?
Both add significant resale value — typically 70% to 85% of installed cost recouped at sale.
Granite has a slight edge in luxury segments ($900K+ Sacramento homes) and for traditional-
style buyers. Quartz has a slight edge in mid-market ($500K to $900K) and for younger buyers
who prioritize low maintenance. In neighborhoods where either is the expected finish, a high-
quality install of either material adds comparable value.

Can you put a hot pan on quartz countertops?
Briefly, yes — but we don’t recommend it. Quartz can handle temperatures up to about 150°F
without damage. A pan that just came off a 425°F oven will exceed that limit and can cause
discoloration or cracks in the resin binder. Always use a trivet or hot pad under hot cookware on
quartz. Granite, by contrast, can handle any direct cookware contact without issue.

Do granite countertops require sealing?
Yes. Granite is a natural porous stone and should be sealed every 12 to 18 months to prevent
oil, wine, and acidic foods from staining the surface. Sealing is a simple 20-minute DIY job with
a $20 to $30 bottle of countertop sealer, or your contractor can handle it as a service call.
Quartz, by contrast, never requires sealing — it’s a non-porous engineered surface.

Which is easier to clean, granite or quartz?
Quartz is slightly easier to clean because its non-porous surface means spills never soak in.
Wipe with soap and water and you’re done. Granite requires the same routine cleaning, but
unsealed granite can absorb liquids, and abrasive cleaners or highly acidic substances (lemon
juice, vinegar) should be avoided on both surfaces to preserve the finish.

Ready to See Granite and Quartz Samples in Your Sacramento Kitchen?

America’s Advantage Remodeling has been installing granite and quartz countertops throughout
Sacramento, Roseville, Folsom, and the greater metro since 2001. Our team includes in-house
designers, fabricators, and installers — no subcontractors. We bring large-format samples
directly to your home so you can see exactly how each slab pairs with your cabinets and
lighting, and we produce a 3D rendering of your kitchen with your selected countertop before
any work begins.

Book a free in-home consultation to see granite and quartz samples side by side. Or browse our
Sacramento countertop portfolio to see completed installations in homes like yours. Questions?
Call us directly at 916-507-0469.

About the Author
Eugene Chernioglo founded America’s Advantage Remodeling in Roseville, CA in 2001. AAR
has completed thousands of kitchen, bathroom, and whole-home renovations across the
Sacramento metro and holds a 4.9-star rating across 225+ Google reviews. CSLB License 1036517.

How to Find the Best Kitchen Remodeling Contractorin Sacramento (12 Vetting Questions to Ask Before You Sign)

Опубликовано: May 1, 2026 в 12:58 pm

Автор:

Категории: Kitchen

How to Find the Best Kitchen Remodeling Contractor in Sacramento (12 Vetting Questions to Ask Before You Sign)

Kitchen Remodel completed by America’s Advantage Remodeling near Hollywood Park, Sacramento CA featuring center island. Licensed contractor CSLB #1036517 serving the greater Sacramento area.

You’ve heard the horror stories. The contractor who cashed the deposit and disappeared. The
one who quoted $35,000 and somehow ended up at $58,000. The friend whose kitchen sat torn
apart for four months while the crew never showed up on Tuesdays. If you’ve been thinking
about remodeling your Sacramento kitchen for years and keep stalling, you’re not being
indecisive — you’re being smart. The contractor industry has earned its reputation.

But here’s the thing: there ARE honest, skilled, family-run remodeling teams in Sacramento. The
trick is knowing how to tell them apart from the ones who’ll leave you with a half-finished kitchen
and a credit card hangover. The difference comes down to twelve specific questions you should
ask every contractor before you sign a single thing — and how they answer.

This guide gives you all twelve, plus what good answers sound like and the red flags that should send you running. Use it on your next three estimates. By the end, you’ll know which contractor to trust with your home — and which ones to politely show the door.

Why Picking the Wrong Sacramento Kitchen Contractor Costs More Than Money

Most Sacramento homes were built between the 1970s and 1990s. That means when you open
up a wall, you can find anything: galvanized plumbing that needs replacing, knob-and-tube
wiring that’s not up to code, water damage hidden behind cabinets, even asbestos in older
drywall. A contractor who knows what they’re doing has seen all of it before. They quote with
margins for the unexpected and communicate clearly when they find something. A contractor
who doesn’t know what they’re doing — or worse, who uses surprises to inflate the bill — turns
those discoveries into a financial and emotional nightmare.


Beyond the money, the wrong contractor costs you weeks of dust, displaced meal prep, missed
work calls, frustrated kids, and the slow-burn anxiety of not knowing when (or if) your kitchen will
be done. The right contractor gets in, gets it done in two to four weeks, communicates every
day, and leaves your home cleaner than they found it. That difference is worth every minute you
spend vetting properly.

If you haven’t already, read our companion guide on what to do BEFORE starting your kitchen
remodel
— it covers the prep work that makes the contractor conversations easier.

The 12 Questions to Ask Before You Sign Anything

Print this list. Bring it to every estimate. Take notes on how each contractor responds — not just
what they say, but how comfortable they seem answering. Discomfort with these questions is
itself a red flag.

  1. Are you licensed in California, and what’s your CSLB license number?

    Why it matters: Every legitimate remodeler in California must hold an active license from the
    Contractors State License Board (CSLB). Unlicensed contractors carry zero accountability — if
    something goes wrong, you have no recourse. The license number lets you verify their status,
    complaint history, and bond information directly with the state.

    ✅ What a good answer sounds like:
    They give you the number immediately, often printed on their estimate or business card.
    They invite you to look it up at cslb.ca.gov and check their record. They mention how long
    they’ve held the license.

    🚩 Walk-away red flag:
    They don’t have one. They give you a number for a license that belongs to someone else
    (called “license borrowing” — illegal). They get defensive or change the subject. They claim
    they don’t need one for “small jobs.”
  2. Do you carry liability insurance and workers’ compensation? Can you email me proof?
    Why it matters: If a worker gets hurt on your property and the contractor doesn’t carry workers’
    comp, you can be held personally liable. If the crew damages your home or a neighbor’s, liability
    insurance is what covers the repair. Both are non-negotiable.

    ✅ What a good answer sounds like:
    They send you Certificate of Insurance (COI) documents within a day or two, listing your
    name as the additional insured. The policies are current and the coverage limits are at least
    $1 million.

    🚩 Walk-away red flag:
    They say “yes, we’re covered” but never send proof. They send expired certificates. They
    tell you their workers are “independent contractors” so they don’t need workers’ comp (a
    frequent dodge — get a lawyer’s opinion before you accept that).
  3. Do you use in-house crews or subcontractors? If subs, do you vet them?
    Why it matters: When a contractor subcontracts the plumbing, electrical, tile, and cabinetry
    work to four different teams, you have four different teams who don’t know each other, don’t talk
    to each other, and aren’t accountable to you. Schedule slips. Quality varies. Nobody owns the
    result. In-house teams who’ve worked together for years know how to coordinate and stand
    behind their work.

    ✅ What a good answer sounds like:
    They have an in-house team — designers, project managers, and craftsmen who are all
    employees. They can tell you names. They can show you the team in their portfolio photos.

    🚩 Walk-away red flag:
    They subcontract everything and can’t tell you who’s actually showing up at your house.
    They’ve never worked with the subs before. They use a different sub for every project.
  4. Can I see photos AND addresses of three to five recent kitchen projects in Sacramento?
    Why it matters: Anyone can post stock photos on a website. The real test is whether they can
    show you actual local projects — and whether the homeowners would let you drive by or even
    talk to you about the experience. Local references are the hardest fakery to pull off.

    ✅ What a good answer sounds like:
    They have a portfolio of recent local work, with project addresses, dates, and the
    homeowner’s first name. They offer to connect you with one or two past clients who’ve
    agreed to be references. They invite you to their showroom to see materials and finishes in
    person.

    🚩 Walk-away red flag:
    All their portfolio photos look like they’re from out of state, or they’re suspiciously high-end
    while the contractor seems unsophisticated. They can’t or won’t share addresses. They get
    cagey about references.
  5. Will you give me a detailed, line-item written estimate before I sign anything?
    Why it matters: A one-page “$45,000 for kitchen remodel” quote tells you nothing — and gives
    the contractor unlimited room to inflate later. A detailed estimate breaks down cabinets,
    countertops, flooring, plumbing, electrical, demolition, disposal, permits, and labor as separate
    line items. That detail is what protects you from “surprise” charges later.

    ✅ What a good answer sounds like:
    Within a few days of the estimate visit, they send a multi-page proposal with every material,
    every labor category, and every fee itemized. They walk you through it line by line. They
    explain what’s included, what isn’t, and what would trigger a change order.

    🚩 Walk-away red flag:
    They quote a single number with no breakdown. They pressure you to sign on the spot.
    They take three weeks to send anything. They use the phrase “trust me” instead of putting it
    in writing.
  6. Who will be my main point of contact, and how often will they communicate with me?

    Why it matters: The biggest source of remodel frustration isn’t the work — it’s the silence. Days
    go by, you don’t know what’s happening, the crew isn’t there, you can’t reach anyone. A good
    contractor assigns a single project manager who texts or calls you with updates every day or
    two and is reachable when you have questions.

    What a good answer sounds like:✅
    They name a specific person (project manager, lead carpenter, or owner) and explain the
    communication cadence — daily check-ins, end-of-day text summaries, weekly walk-
    throughs. They give you their cell number.

    🚩 Walk-away red flag:
    “Call the office” is the only contact method. The owner doesn’t return your calls during the
    estimate phase (which only gets worse during the project). They can’t tell you who’ll be
    running your job.
  7. What’s your typical timeline for a kitchen of my size, and what happens if you go over?
    Why it matters: If a contractor tells you “two to three months” for a standard 10×12 kitchen with
    no structural changes, run. A reasonable timeline for a typical Sacramento kitchen — demo
    through final clean — is two to four weeks with a competent in-house team. The longer the
    project drags, the more it costs you in disruption, eating out, and stress.

    ✅ What a good answer sounds like:
    They give a realistic, specific window (e.g., “3 to 4 weeks from demo to final walk-through,
    depending on cabinet delivery”). They explain what could extend it (custom orders, hidden
    surprises) and what they’ll do to keep you informed.

    🚩 Walk-away red flag:
    They give vague answers (“a couple months”). They quote three months for a project that
    should take three weeks. They have no plan for what happens if they fall behind.
  8. Will you handle permits and inspections, or is that on me?
    Why it matters: Most kitchen remodels in Sacramento require permits — for electrical,
    plumbing, structural changes, and sometimes for the project as a whole. A licensed contractor
    knows the City of Sacramento and county processes and pulls permits as part of the job.
    Homeowners who pull their own permits become legally responsible for the work, which is a
    problem if the contractor cuts corners.

    ✅ What a good answer sounds like:
    They handle every permit, schedule the inspections, and meet the inspector on-site. The
    cost is itemized in your estimate so there are no surprises. They know the local building
    department staff by name.

    🚩 Walk-away red flag:
    They tell you permits aren’t needed (always verify this independently). They want YOU to
    pull permits on their behalf (illegal in California — only the licensed contractor or
    homeowner-of-record can pull permits). They don’t seem to know what’s required.
  9. What happens if you find unexpected issues behind the walls?
    Why it matters: In a 30-50 year old Sacramento home, surprises are likely. A good contractor
    doesn’t surprise YOU — they document the finding with photos, explain the options and costs,
    and get your written approval before doing additional work. A bad contractor adds the work to
    the bill without asking and tells you about it later.

    ✅ What a good answer sounds like:
    They explain their change-order process: any work outside the original scope requires a
    written change order signed by you before it begins. They give you examples of past
    surprises and how they handled them. They build a small contingency into the estimate so
    minor surprises don’t blow the budget.

    🚩 Walk-away red flag:
    They say “we’ll just handle it” — meaning they’ll do the work and bill you. They have no
    formal change-order process. They blame past clients for “surprise” charges that were really
    just things the contractor missed in the original estimate.
  10. Can I see at least 10 verified Google reviews — including how you handled the negative ones?
    Why it matters: Anyone can have five glowing reviews from family members. A contractor with
    50, 100, or 200+ reviews at a 4.7 or higher star rating has a track record that’s nearly impossible
    to fake. Just as important: how do they respond to the occasional negative review? Defensive
    responses signal they don’t take feedback well. Calm, professional responses that try to make
    things right tell you exactly how they’d handle a problem on YOUR project.

    ✅ What a good answer sounds like:
    They have dozens or hundreds of recent Google reviews. They can show you their BBB
    rating. When negative reviews exist, the contractor responded thoughtfully and tried to
    resolve the issue. They’re transparent about reviews on multiple platforms (Google, BBB,
    Houzz, Yelp).

    🚩 Walk-away red flag:
    They have fewer than 10 reviews total. Most reviews are old. They have a string of recent
    one-star reviews with hostile contractor responses. They claim review platforms are “unfair”
    and direct you to testimonials on their own website only.
  11. Do you provide 3D design renderings before demolition begins?
    Why it matters: If a contractor can’t show you a visual mock-up of your finished kitchen —
    cabinet style, countertop color, layout, lighting — you’re being asked to commit to $40,000+ of
    work based entirely on imagination. 3D renderings let you make material and layout decisions
    BEFORE walls come down, which prevents the most expensive remodel mistake: changing
    your mind mid-project.

    ✅ What a good answer sounds like:
    They use design software and create a 3D rendering of your specific kitchen with the
    materials you’ve chosen. They walk you through it on a screen or print it for you. They make
    changes based on your feedback before any work starts.

    🚩 Walk-away red flag:
    They sketch on a napkin. They show you photos of “similar” kitchens instead of yours. They
    tell you to “trust the process” and that you’ll see it as it comes together (which means you’ll
    see expensive surprises mid-build).
  12. What warranty do you offer on your work, and what’s covered?
    Why it matters: California law gives you certain implied warranties, but a reputable contractor
    offers explicit written warranties on workmanship — typically one to ten years depending on the
    trade. Materials carry separate manufacturer warranties. The contractor should be willing to
    come back and fix issues that show up months later without charging you.

    ✅ What a good answer sounds like:
    They offer a written workmanship warranty (commonly 1-5 years on labor, longer on
    cabinets and structural work). They explain what’s covered, what isn’t, and how to file a
    claim. They have a track record of actually returning to fix issues for past clients.

    🚩 Walk-away red flag:
    No warranty in writing. They tell you to “call us if anything goes wrong” without committing to
    anything. Past clients can’t get them to return calls after the final payment cleared.

Red Flags to Walk Away From — No Matter How Good Their Quote Is

Some contractors will pressure you to ignore the warning signs because their price is lower. Donot. A 20% lower quote is meaningless if the project doubles in cost or never finishes. Walkaway if you see any of these:

  • They ask for more than 10% upfront, or they want full payment before work is complete.
    They want cash only, or won’t take a check in their business name.
  • They don’t have a physical business address you can visit (a showroom, an office, an
    actual location — not a P.O. Box).
  • They pressure you to decide today, today only, with limited-time discounts.
  • They badmouth other contractors instead of explaining what makes them different.
  • Their license number is suspended, expired, or doesn’t match the business name.
  • They got their estimate suspiciously fast — without measuring, photographing, or asking
    detailed questions about your home.
  • They make promises that sound too good to be true (“We’ll do your kitchen for $15,000
    and finish in a week”).
    Green Flags That Tell You You’ve Found the Right Sacramento
    Contractor
    On the flip side, here’s what you’ll notice when you’re talking to a team you can actually trust:
  • They take their time on the estimate visit — measuring, photographing, asking about
    how you cook, who lives in the home, what frustrates you about the current kitchen.
  • They listen more than they talk in the first meeting. They ask about your vision before
    pitching their services.
  • They bring physical samples — cabinet doors, countertop pieces, hardware — to your
    home so you can see how materials look in your actual lighting.
  • They have an established showroom in the Sacramento metro area where you can see
    installed work.
  • Their estimate is detailed and arrives within a week (not three weeks).
  • They proactively bring up things you didn’t think of — proper ventilation, future resale
    value, accessibility considerations, energy-efficient appliance pairings.
  • They don’t try to upsell you on things you don’t need. If your existing flooring is fine, they
    tell you to keep it.
  • Past clients have referred their friends and family back to them — and you can verify
    that.

Green Flags That Tell You You’ve Found the Right Sacramento
Contractor

Kitchen and Bathroom Remodel completed by America’s Advantage Remodeling near Highland Reserve, Roseville CA featuring center island. Licensed contractor CSLB #1036517 serving the greater Sacramento area.

On the flip side, here’s what you’ll notice when you’re talking to a team you can actually trust:

  • They take their time on the estimate visit — measuring, photographing, asking about
    how you cook, who lives in the home, what frustrates you about the current kitchen.
  • They listen more than they talk in the first meeting. They ask about your vision before
    pitching their services.
  • They bring physical samples — cabinet doors, countertop pieces, hardware — to your
    home so you can see how materials look in your actual lighting.
  • They have an established showroom in the Sacramento metro area where you can see
    installed work.
  • Their estimate is detailed and arrives within a week (not three weeks).
  • They proactively bring up things you didn’t think of — proper ventilation, future resale
    value, accessibility considerations, energy-efficient appliance pairings.
  • They don’t try to upsell you on things you don’t need. If your existing flooring is fine, they
    tell you to keep it.
  • Past clients have referred their friends and family back to them — and you can verify
    that.

One Last Thing to Do Before You Sign Anything

Verify the contractor’s CSLB license at cslb.ca.gov (free, takes 30 seconds). Confirm the license is active, in the contractor’s name, and shows no recent complaints. Check their bond status. Then check the BBB at bbb.org for any complaint history.
Read the contract twice before you sign. Look for: clear start and end dates, milestone payments tied to completed work (NOT to dates), a complete materials list with brands and model numbers, the change-order process in writing, the warranty in writing, and a total cost cap. If anything is missing or vague, ask for it to be added before you sign.

The Sacramento Kitchen Remodeling Process Doesn’t Have to Be Painful

Most homeowners who go through this vetting process tell us the same thing afterward: they wish they’d done it sooner. The right contractor turns what feels like a terrifying decision into a smooth, exciting transformation. The wrong one turns it into a nightmare.
If you want to see what the right kitchen remodeling process looks like, we cover the full breakdown — from design consultation to final walk-through — on our Sacramento kitchen remodeling page. You can also browse our recent project portfolio to see what completed Sacramento-area kitchens look like, or read what 225+ Sacramento homeowners have said about working with us.

Frequently Asked Questions About Hiring a Kitchen Contractor in Sacramento

How many estimates should I get before choosing a kitchen contractor?
Get three to five written estimates from contractors who have all answered the 12 vetting questions above. More than five and you’ll experience decision paralysis; fewer than three an you don’t have enough comparison data to spot pricing outliers. Make sure all estimates cover the same scope of work — apples to apples — or you can’t compare them fairly.

How much should I expect to pay for a kitchen remodel in Sacramento?
Most full kitchen remodels in the Sacramento metro range from $30,000 to $80,000+ depending on the size, the cabinet quality, the countertop material, and whether you’re moving plumbing or electrical. A small cosmetic refresh (paint, hardware, fixtures) can come in under $15,000. A high-end renovation with custom cabinetry, quartz countertops, and an island can exceed $100,000. Read our complete cost breakdown for current Sacramento pricing.

How long does a typical kitchen remodel take in Sacramento?
A standard kitchen remodel with an experienced in-house team takes 2 to 4 weeks from demolition to final walk-through. Custom cabinet orders can extend the front-end timeline by 4-8 weeks before any work begins. Major structural changes (wall removal, layout reconfiguration) can extend the build time to 5-6 weeks. Anyone quoting 2-3 months for a standard remodel is either subcontracting heavily or has scheduling problems.

Do I need a permit for a kitchen remodel in Sacramento?
Yes, in most cases. Sacramento and most surrounding cities require permits for any electrical work, plumbing changes, structural modifications, or projects above certain dollar thresholds. Cosmetic-only updates (painting, replacing existing fixtures, swapping appliances) typically don’t require permits. Your contractor should handle the permit process for you and include it in their estimate.

What’s the difference between a kitchen designer and a kitchen contractor?
A designer plans the layout, selects materials, and creates the visual rendering. A contractor builds it. Some companies offer both in-house (which saves you from coordinating two separate vendors and prevents the design from being incompatible with what the contractor can actually build). For most Sacramento homeowners, a design-build firm with both capabilities under one roof is the simpler, lower-risk choice.

Should I hire a contractor who has been in business for less than five years?
Be cautious. Newer contractors may be excellent craftsmen who recently went out on their own — or they may be on their third business name after closing two previous companies under bad reviews. Always check the CSLB license issue date and the principal’s history of past licenses. Five-plus years in business with consistent reviews is a much stronger signal of reliability.

What should I do if my contractor goes over budget mid-project?
First, refuse to pay anything beyond the contracted amount until they show you a signed change order documenting the additional work, the reason for it, and the cost. If the overage is truly due to an unforeseen issue (hidden water damage, code violation behind a wall), this is normal and reasonable. If it’s because they underestimated the original scope, you have grounds to dispute. A contract with a total cost cap (which you should have insisted on in the first place) protects you from this entirely.

Ready to Talk to a Sacramento Team That Welcomes All 12 Questions?

Kitchen Remodel completed by America’s Advantage Remodeling near Crown Village, Folsom CA featuring kitchen with dark island and warm pendant lighting. Licensed contractor CSLB #1036517 serving the greater Sacramento area.

America’s Advantage Remodeling has been helping Sacramento and Roseville homeowners remodel their kitchens since 2001. Our entire team is in-house — designers, project managers, electricians, plumbers, cabinet installers, painters. No subcontractors. We bring physical samples to your home, build a 3D rendering of your kitchen before any work starts, send a detailed line-item estimate within days, and complete most kitchens in 2 to 4 weeks. Our 225+ Google reviews tell the story better than we can. Book a free, no-pressure in-home consultation to see what an honest contractor conversation looks like. Or call us directly at 916-507-0469.

About America’s Advantage Remodeling
Founded by Eugene Chernioglo in 2001, America’s Advantage Remodeling is a Roseville-based, family-run remodeling company serving Sacramento, Roseville, Folsom, Elk Grove, and the surrounding metro. We have completed thousands of kitchen, bathroom, and whole-home renovations and maintain a 4.9-star rating across 225+ Google reviews. CSLB License 1036517.

How Do Installers Acclimate Hardwood Flooring Before Installation?

Опубликовано: April 27, 2026 в 1:27 pm

Автор:

Категории: Flooring

Тэги:

How Do Installers Acclimate Hardwood Flooring Before Installation?

When homeowners ask how do installers acclimate hardwood flooring before installation, they are really asking how professionals protect their investment before a single plank is installed. The answer comes down to controlling moisture, stabilizing the job site, and making sure the wood flooring reaches the right balance with its surrounding environment.

Hardwood flooring is a natural material, and because of that, it reacts to temperature and humidity. If it is installed too early, before it reaches equilibrium moisture content, problems can appear quickly. That is why experienced installers follow a detailed acclimation process instead of relying on guesswork. This guide explains exactly how installers acclimate hardwood flooring before installation, what tools they use, and why proper acclimation is essential for long term performance.

Why Hardwood Floor Acclimation Matters More Than Most Homeowners Realize

Wood flooring constantly reacts to humidity levels and temperature changes inside your home. Because wood is a natural material, it absorbs moisture when humidity rises and begins losing moisture when the air becomes dry. This movement can lead to excessive shrinkage, cupping, or dimensional distortion if the flooring is not properly acclimated.

Hardwood flooring acclimate steps are designed to prevent these issues before installation even begins. Without proper acclimation, excessive moisture or too much moisture trapped inside the boards can lead to structural damage and even adhesive failure in some installations.

When installers acclimate hardwood flooring correctly, they ensure the wood reaches equilibrium moisture content, meaning the wood moisture content matches the surrounding air and environmental conditions. This creates a moisture balance that keeps the flooring stable over time. Proper acclimation is not optional; it is a critical part of a successful installation process.

What Acclimation Actually Means: It Is Not Just Letting Wood Sit

Many homeowners believe you simply drop off the flooring and let it sit for a few days. In reality, wood acclimation is a controlled process where installers measure the moisture content of both the flooring and the subfloor until readings stabilize.

The goal is to acclimate wood flooring so it reaches optimal moisture content for that specific home. This depends on relative humidity, temperature and humidity levels, and climate control inside the home. Installers measure the moisture using a moisture meter to ensure accuracy. They do not rely on time alone.

The flooring must reach equilibrium moisture content with the surrounding environment before installation can begin. This is what separates professional work from rushed jobs. Properly acclimated flooring means the boards are no longer gaining or losing moisture at a significant rate, which helps prevent excessive moisture changes after installation.

Step by Step: How Professional Installers Acclimate Hardwood Flooring

1 | Preparing the Home Environment First

The first step is preparing the job site. Installers make sure the home is enclosed and that heating systems and air conditioning are running to maintain normal living conditions. These normal living conditions reflect average conditions that the homeowner will maintain year round.

Climate control is essential because wood flooring must acclimate in a stable environment. Temperature and humidity must be consistent, and relative humidity must fall within a safe range.

If the home is still under construction, with drywall or paint drying, excess moisture can be present. That can lead to too much moisture being absorbed by the wood. Installers wait until environmental conditions are stable before bringing in the flooring.

2 | Moisture Testing the Subfloor

Before installers acclimate hardwood flooring, they perform moisture testing on the subfloor. This step ensures there is no excess moisture or moisture coming from below.

Whether it is wood or concrete, the subfloor must fall within an acceptable range, and this preparation becomes even more important when you plan how the flooring will interact with new kitchen cabinets. Installers use a moisture meter to measure the moisture content in multiple areas. They measure carefully to identify any problem spots.

If moisture levels are too high, the flooring cannot be installed. This step prevents long term issues like adhesive failure or dimensional distortion.

3 | Delivering and Positioning the Hardwood Flooring

Once the job site is ready, the wood flooring is delivered and placed inside the home. The flooring is brought directly into the rooms where it will be installed so it can adjust to the surrounding environment.

Installers remove plastic wrapping or open the inner plastic wrapping to allow airflow. In many cases, plastic removed completely is necessary so the wood can release moisture and begin proper moisture exchange.

Boxes may be opened by lifting the cardboard flap, and installers often cross stack planks to improve airflow. Cross stacking creates the most efficient acclimation by exposing more surface area to the surrounding air. This supports efficient acclimation and allows the wood to reach room temperature.

4 | Measuring Moisture Content in the Flooring

Installers then measure the moisture content of the wood flooring itself. They use a moisture meter to test several boards from different boxes.

This ensures the wood moisture content is consistent across the entire batch. If some boards contain too much moisture or are losing moisture at a different rate, they are set aside.

Measuring moisture content is one of the most important parts of the acclimation process. Installers measure the moisture repeatedly over time to confirm that readings stabilize and remain consistent. This ensures the wood reaches equilibrium moisture content before installation.

5 | Waiting for Moisture Levels to Stabilize

At this stage, installers wait while monitoring moisture levels, humidity, and relative humidity. The flooring must remain in normal living conditions while the wood continues losing moisture or absorbing moisture until balance is achieved.

The goal is for the flooring and subfloor to reach moisture balance within an acceptable range. Relative humidity and surrounding air conditions play a major role in how long this takes.

Solid hardwood often requires more time, while engineered hardwood flooring and engineered floors are more dimensionally stable and may acclimate faster. However, all wood flooring must be properly acclimated regardless of type.

The wood reaches a point where readings stabilize, which indicates it is finally acclimated.

6 | Final Checks Before Installation Begins

Before installation begins, installers perform final moisture testing to confirm everything is within the acceptable range.

They compare the moisture content of the subfloor and the flooring to ensure compatibility. Manufacturer instructions and flooring manufacturer’s recommendations are followed closely.

Only after proper acclimation is confirmed does the installation process begin. This ensures proper installation and long term performance.

How Long Does Hardwood Flooring Need to Acclimate?

There is no single answer because acclimation depends on environmental conditions, humidity levels, and the type of flooring.

Solid wood and solid hardwood typically take longer to acclimate compared to engineered hardwood or engineered wood flooring. Some solid strip flooring products may require several days to weeks, while engineered products may require less time.

However, installers do not rely on time alone. They measure the moisture until the flooring reaches optimal moisture content. Air conditioning and climate control systems help maintain stable temperature and humidity, which supports faster and more efficient acclimation.

Solid vs Engineered Hardwood: Differences in Acclimation

Solid hardwood is made from solid wood, which means it reacts more to humidity and moisture changes. This makes it more prone to excessive shrinkage or dimensional distortion if not properly acclimated.

Installers must acclimate solid hardwood carefully to avoid excessive moisture changes.

Engineered hardwood flooring, also known as engineered wood flooring or engineered wood, is built in layers, making it more dimensionally stable. Engineered floors and engineered hardwood still require acclimation, but the process may be shorter.

Some engineered products allow for quicker installation, but professionals still follow manufacturer instructions to ensure proper acclimation.

Common Acclimation Mistakes and How to Avoid Them

One of the biggest mistakes is skipping proper acclimation entirely.

Another is leaving flooring sealed in plastic wrapping or inner plastic wrapping without airflow. This prevents the wood from adjusting to the surrounding environment.

Failing to cross stack planks or open the cardboard flap slows the most efficient acclimation.

Installing flooring without climate control or ignoring humidity levels can result in too much moisture or excessive moisture remaining in the boards.

These mistakes can lead to structural damage, adhesive failure, and long term flooring issues.

Signs Your Hardwood Was Not Properly Acclimated

When wood flooring is not properly acclimated, problems can appear quickly.

You may notice gaps forming due to losing moisture or excessive shrinkage.

Cupping or warping can occur when the wood absorbs too much moisture.

Movement, squeaking, or dimensional distortion may also develop.

These issues indicate the flooring did not reach equilibrium moisture content before installation.

How Professional Installation Protects Your Investment

Proper acclimation is a key part of protecting your investment in real wood flooring.

By ensuring the wood reaches optimal moisture content and is properly acclimated, installers reduce the risk of long term problems, which is essential for whole-home upgrades like remodeling projects in Roseville, CA.

Professionals use a moisture meter to measure the moisture, monitor humidity levels, and maintain climate control throughout the process.

This ensures proper installation and long lasting performance, especially when paired with correct hardwood floor cleaning and maintenance practices.

Why Homeowners Trust America’s Advantage Remodeling for Hardwood Flooring

At America’s Advantage Remodeling, every flooring project is handled with precision and care, including those that are part of larger home remodeling projects in Elk Grove, CA.

Our team understands how important it is to acclimate hardwood flooring correctly, whether we are working on a full home remodeling project in Davis, CA or a single-room upgrade.

We take the time to measure the moisture, monitor environmental conditions, and ensure your home meets normal living conditions before installation begins.

Whether you choose solid hardwood, engineered hardwood, or engineered wood flooring, our dedicated hardwood flooring services follow manufacturer instructions to deliver reliable results.

Get Expert Hardwood Flooring Installation You Can Trust

If you are planning a flooring project, choosing the right team makes all the difference, and learning more about America’s Advantage Remodeling can help you feel confident in your choice.

At America’s Advantage Remodeling, we handle every step of the process with care, from wood acclimation to final installation as part of our broader home remodeling services in Sacramento.

Contact our team today to get started with a flooring project built on proper acclimation, precision, and lasting results, and explore our remodeling project gallery for design inspiration.

FAQs About Hardwood Floor Acclimation

Do all hardwood floors need to acclimate?

Yes, all wood flooring must be properly acclimated to the surrounding environment before installation.

Can engineered hardwood skip acclimation?

Engineered hardwood and engineered floors still require proper acclimation, even though they are more dimensionally stable.

What happens if flooring is installed too soon?

Installing too soon can lead to excessive moisture issues, dimensional distortion, and long term structural damage.

Can I acclimate hardwood myself?

You can place flooring in the home, but professionals measure the moisture with a moisture meter to ensure accuracy.

Does climate affect acclimation time?

Yes, humidity, temperature and humidity levels, and environmental conditions all impact how long acclimation takes.

How do installers measure moisture in hardwood?

They use a moisture meter to measure the moisture content of both the flooring and subfloor.

Is acclimation different in different climates?

Yes, surrounding air and humidity levels vary by region, which affects how wood reacts.

Final Thoughts: Do Not Rush Hardwood Floor Acclimation

Acclimation is one of the most important steps in installing hardwood flooring.

It ensures the wood reaches equilibrium moisture content and is ready for installation.

Rushing this step can lead to excessive moisture changes, structural damage, and costly repairs.

Taking the time to properly acclimate wood flooring ensures long term performance, especially in high-visibility spaces like a kitchen with hardwood floors and white cabinets.

How Do Hardwood Floors Perform in Humid Environments?

Опубликовано: April 24, 2026 в 1:29 pm

Автор:

Категории: All,Flooring

Тэги:

How Do Hardwood Floors Perform in Humid Environments?

Hardwood floors are known for their timeless and natural beauty as well as long-lasting value. However, many homeowners ask: how do hardwood floors perform in humid environments? The answer depends on how humidity affects wood, the type of wood flooring you choose, and how well your home maintains climate control. In humid climates, floors face unique challenges because wood is a natural material that reacts to moisture in the surrounding environment. When humidity levels rise or fall, wood absorbs and releases moisture, which directly impacts performance. Understanding the impact of humidity is essential to avoid moisture damage, humidity-related damage, and costly repairs over time.

In this guide, we break down how hardwood floors perform in humid environments, what causes humidity issues, and how to choose the right flooring for long-term success.

Understanding How Humidity Affects Hardwood Floors

Wood flooring is highly sensitive to indoor humidity and temperature. Because wood is a natural material, it responds to its surrounding environment through a constant cycle where wood absorbs moisture and releases moisture. When indoor humidity levels increase, wood fibers expand, and when indoor humidity levels drop, wood releases moisture and contracts. This is a natural process, but humidity affects performance when humidity levels fluctuate too often or too drastically. Significant humidity fluctuations, humidity changes, and seasonal humidity shifts can all lead to long-term problems in floors.

Why Wood Expands in High Humidity

In high humidity, excess moisture in the air enters the wood fibers, causing wood to swell. This happens because wood absorbs moisture from the surrounding environment. In humid climates, especially during humid summers and warmer months, humidity levels rise quickly, creating pressure inside flooring materials.

What Happens When Humidity Fluctuates

When humidity levels fluctuate between high and low, the repeated expansion and contraction weaken the structure of wood. These humidity fluctuations are one of the main causes of humidity-related problems. Seasonal changes and changing seasons make this worse, especially in homes without consistent indoor humidity levels.

Common Problems Hardwood Floors Face in Humid Environments

When humidity is not controlled, hardwood floors can develop humidity-related damage that affects both structure and appearance.

Cupping

Cupping occurs when the edges of boards rise higher than the center, usually caused by excess moisture in damp areas or beneath the floors.

Crowning

Crowning is the opposite effect, often occurring after floors dry too quickly following prolonged exposure to excessive moisture.

Buckling

Buckling is one of the most serious forms of moisture damage, where boards lift from the subfloor due to excessive humidity and lack of expansion gaps.

Gaps and Separation

When humidity levels drop into low humidity conditions, wood releases moisture and shrinks, creating gaps. Seasonal changes and seasonal humidity variations often cause this issue.

Finish Damage and Wear

Humidity affects finishes over time. Prolonged exposure to excessive humidity can lead to peeling, dulling, and uneven wear, impacting the floors.

Ideal Indoor Conditions for Hardwood Floors

Maintaining consistent indoor humidity levels is critical for protecting floors from humidity-related damage.

Recommended Humidity Levels

The ideal relative humidity range for most hardwood floors is between 30 percent and 50 percent relative humidity. According to the National Wood Flooring Association, maintaining consistent indoor humidity levels is key to preventing humidity issues.

Temperature Considerations

Heating systems, indoor heating, and air conditioning all play a role in stabilizing indoor humidity levels. HVAC systems help regulate humidity and reduce humidity fluctuations.

Why Stability Matters More Than Perfection

Rather than focusing on exact numbers, homeowners should aim for consistent indoor humidity levels. Avoiding significant humidity fluctuations is more important than maintaining perfect conditions.

Solid Hardwood vs. Engineered Hardwood in Humid Climates

Choosing the right flooring materials is essential in humid climates.

What Is Solid Hardwood?

Solid hardwood is made from a single piece of solid wood. While it offers timeless beauty, it is more vulnerable to humidity changes and lacks the dimensional stability needed for high humidity areas.

What Is Engineered Hardwood?

Engineered hardwood flooring is built using multiple layers with cross-layered construction. This design gives engineered hardwood better dimensional stability and allows it to handle humidity changes more effectively than solid wood floors.

Which Option Performs Better in Humidity?

Engineered hardwood flooring performs better in humid climates because of its cross-layered construction, multiple layers, and better dimensional stability. Engineered wood reduces the effects of humidity and provides more reliable performance.

When Solid Hardwood Still Makes Sense

Solid wood floors can still work in homes with strong climate control, stable indoor humidity, and proper installation. However, solid hardwood is more sensitive to humidity-related problems in high humidity environments.

Best Hardwood Flooring Options for Humid Environments

Selecting the right flooring options reduces the risk of humidity-related damage.

Engineered Hardwood Flooring

Engineered hardwood flooring is one of the best flooring options for humid climates due to its dimensional stability and resistance to moisture.

Pre-Finished vs. Site-Finished Floors

Pre-finished wood flooring is sealed to resist excess moisture, while site-finished floors require additional care to prevent humidity issues.

Wood Species That Handle Humidity Better

Different wood species respond differently to humidity. Choosing stable wood species like oak or hickory can help reduce humidity-related problems.

Installation Matters: The Hidden Key to Performance

Even the best flooring materials can fail without proper installation.

Proper Acclimation Before Installation

Proper acclimation allows wood flooring to adjust to the home’s environment before installation, reducing the impact of humidity changes.

Subfloor Moisture Testing

Testing for moisture ensures there is no excess moisture beneath the floors, preventing future moisture damage.

Expansion Gaps and Layout Planning

Expansion gaps allow for natural expansion and contraction caused by humidity changes.

Why Professional Installation Makes a Difference

Working with experienced professionals at America’s Advantage Remodeling ensures proper installation and helps prevent humidity-related damage.

How to Protect Hardwood Floors in Humid Environments

Protecting floors requires attention to indoor humidity and daily maintenance habits.

Use of HVAC Systems and Dehumidifiers

HVAC systems, heating systems, indoor heating, and air conditioning all help regulate indoor humidity levels and prevent excessive humidity.

Monitor Indoor Humidity

Homeowners should monitor indoor humidity and track humidity levels to avoid humidity issues. Monitoring indoor humidity levels helps maintain consistent indoor humidity levels.

Daily Habits That Make a Difference

Clean up spills quickly, avoid excess moisture, and vacuum regularly to clean hardwood floors without damaging them and protect floors.

Seasonal Maintenance Tips

Seasonal humidity and changing seasons require adjustments. During humid summers, humidity levels rise, while winter indoor heating can lead to low humidity, which is why many homeowners plan comprehensive home remodeling in Elk Grove, CA around climate control improvements.

Signs Your Hardwood Floors Are Affected by Humidity

Recognizing early signs helps prevent costly repairs.

Early Warning Signs

Minor cupping, small gaps, and subtle changes in floors indicate humidity affects performance.

When to Take Action

If humidity levels fluctuate or problems worsen, action should be taken to stabilize indoor humidity levels.

When to Call a Professional

Severe humidity-related damage, such as buckling, requires experienced professionals.

Is Hardwood Flooring a Good Choice for Your Home?

Hardwood floors remain a top choice due to their timeless beauty and durability, but humid climates present unique challenges.

Homes That Are Good Candidates

Homes in areas like Sacramento with expert home remodeling support, with stable indoor humidity, strong climate control, and reliable HVAC systems are ideal.

Situations Where You Should Be Cautious

High humidity areas, damp areas, and spaces with poor ventilation may lead to humidity-related problems, especially in older homes that could benefit from targeted home remodeling in Davis, CA.

Alternative Flooring Options to Consider

Some waterproof flooring options for kitchens perform better in high humidity areas, especially where excessive moisture is present.

Why Homeowners Trust America’s Advantage Remodeling for Flooring Projects

At America’s Advantage Remodeling, we understand the impact of humidity on wood flooring and how to match the right flooring to your home’s environment, drawing on extensive experience with home remodeling projects in Roseville, CA. Our experienced professionals focus on proper installation, climate control, and moisture management to help prevent humidity-related damage and ensure long-lasting performance, and our remodeling gallery showcases real flooring results.

Key Takeaways for Homeowners

  1. How hardwood floors perform in humid environments depends on controlling humidity, choosing the right flooring materials, and ensuring proper installation.
  2. Engineered hardwood flooring offers better dimensional stability than solid hardwood in humid climates.
  3. Maintaining consistent indoor humidity levels helps prevent humidity-related damage and costly repairs.
  4. HVAC systems, air conditioning, and heating systems are essential for climate control and managing indoor humidity.
  5. Monitoring indoor humidity and avoiding significant humidity fluctuations protects floors long term.

FAQs About Hardwood Floors in Humid Environments

Will hardwood floors warp in high humidity?

Yes, high humidity and excessive moisture can cause wood to expand and warp.

What is the best humidity level for hardwood floors?

The ideal relative humidity range is between 30 percent and 50 percent.

Is engineered hardwood waterproof?

No, but engineered hardwood offers better dimensional stability than solid hardwood.

Can I install hardwood in basements or bathrooms?

These areas often have excessive moisture and may not be ideal for wood flooring.

How do I fix cupping in hardwood floors?

Address moisture and humidity levels first, then evaluate repairs.

Do I need a dehumidifier for hardwood floors?

Yes, in humid climates, dehumidifiers help maintain consistent indoor humidity levels.

Final Thoughts: Making Hardwood Floors Work in Any Climate

Hardwood floors can perform well in humid environments when humidity levels are controlled and the right flooring options are selected, as seen in our flooring and remodeling project portfolio. By understanding how humidity affects wood, maintaining optimal humidity levels, and investing in proper installation, homeowners can protect their floors from humidity-related problems. With the right approach, wood flooring can maintain its natural beauty, durability, and performance, even in humid climates with seasonal changes and humidity fluctuations.

How Do Installers Seam Granite Countertops During Installation?

Опубликовано: April 20, 2026 в 1:27 pm

Автор:

Категории: Kitchen

Тэги:

How Do Installers Seam Granite Countertops During Installation?

When most homeowners begin researching granite countertops, one of the first concerns they have is about seams. It is a fair question, especially if you are investing in a major home improvement project and want a clean, high-end look. So, how do installers seam granite countertops during installation, and what should you expect from the finished result?

The reality is that seams are a normal part of working with granite, which is a natural stone. Even the largest slabs cannot always cover an entire kitchen layout, especially in larger kitchens with islands, long runs, or multiple corners. Professional installers use a precise process to join granite pieces so the seam lines are tight, smooth, and as invisible as possible during everyday use. At America’s Advantage Remodeling, we focus on quality kitchen countertop installation from start to finish, helping most homeowners understand exactly how seams are created and why they matter.

Why Granite Countertops Need Seams in the First Place

Granite countertops are cut from large slabs of stone, but even the biggest slabs have limits. When homeowners choose granite for larger kitchens, it is almost always necessary to use more than one slab. Trying to install granite countertops from one slab in a complex layout can lead to breakage or structural issues during transport or installation.

Seams allow installers to safely move and position the material while maintaining strength. In many cases, using two pieces instead of forcing one slab actually improves the overall quality of the installation. This is especially true in larger kitchens with multiple corners, long countertop runs, or kitchen layouts with islands.

Seams are also necessary because cabinets and walls are not always perfectly straight, especially in an older house. Professional installers account for these variations and use seams to ensure the countertop surface fits properly within the space. Compared to other materials like quartz, marble, or concrete, granite behaves differently because it is a natural stone, so seams are part of the process. If you are still deciding, it helps to compare kitchen countertop materials before finalizing your choice. Most homeowners will have at least one seam in their countertop, and that is completely normal.

Where Seams Are Typically Placed, And Why It Matters

Strategic Seam Placement for Strength

Seam placement is one of the most important factors in granite installation. Experienced installers carefully place seams in locations that will not weaken the stone. For example, seams are avoided over dishwashers or large unsupported areas because those spots can flex over time. Installers also avoid placing seams in tight corners where stress can build.

Granite is strong, but like any stone, it can crack under pressure if seams are poorly located. By planning seam placement early and accounting for standard kitchen countertop depth, professional fabricators ensure the granite pieces remain stable after installation.

Seam Placement for Appearance

In addition to strength, seam placement plays a major role in how visible the seam lines will be. Installers often place seams near a sink cutout, along a natural break in the layout, or in less noticeable areas of the countertop. This helps reduce the chance of a visible seam drawing attention, and reflects many of the same techniques used for handling seams in stone countertops in general.

Pattern matching is another key part of this process. Granite has natural movement and variation, so installers work to match the pattern across two pieces. This step helps the seam blend naturally into the stone surface.

What Homeowners Should Expect

Most homeowners should expect at least one seam, especially in larger kitchens. The goal is not to eliminate seams, but to place seams in the best possible location so they are not noticeable during everyday use. In layouts with a kitchen island that includes a sink, thoughtful planning becomes even more important because plumbing, traffic flow, and island size all influence where seams can go. A quality installation will always include careful seam placement planning.

Step-by-Step: How Installers Seam Granite Countertops

Step 1 | Dry Fit the Slabs

The first step in granite countertop installation is the dry fit. Installers place the slabs on top of the cabinets without adhesive to check alignment and spacing. This allows them to confirm that the granite pieces align perfectly before moving forward. During the dry fit, installers check how the countertop surface sits on the cabinets, especially near corners, walls, and the sink.

Step 2 | Preparing the Seam Edges

Once the dry fit is complete, installers prepare the edges where the seams will be formed. The edges must be clean and free of granite dust, debris, or residue. This step is critical for proper bonding.

The edges are also checked to ensure they are cut straight and smooth edges are achieved. Professional fabricators use a wet saw with a diamond blade, and wet cutting helps produce precise edges that align perfectly.

Step 3 | Applying Color-Matched Epoxy

Installers use color-matched epoxy to join the granite pieces together. This epoxy is designed specifically for stone and creates a strong bond. The epoxy is applied to both edges so the surfaces connect completely.

When installers match the epoxy color to the granite pattern, the seam lines become far less noticeable.

Step 4 | Using Seam Setters to Join the Pieces

Seam setters are used to pull two pieces together tightly. These tools allow installers to align perfectly and ensure the surface sits flush across the seam.

This step requires precision because even small shifts can make seams more visible.

Step 5 | Removing Excess Epoxy

As the epoxy is compressed between the slabs, excess epoxy will come out. Installers remove this before the epoxy cures. This step ensures a clean seam line and helps improve overall seam quality.

Step 6 | Final Touches and Polishing

After the epoxy cures, installers perform polishing to refine the seam area. Polishing helps blend the seam into the surrounding stone surface and ensures a smooth finish. The seams are then inspected to confirm quality, alignment, and durability.

What Makes a Granite Seam Good vs. Poor Quality

Ideal Seam Characteristics

A high-quality seam should be tight, level, and well blended. The seam lines should match the surrounding pattern, and the surface should feel smooth. In many cases, seams can appear almost invisible unless you are actively looking for them.

Industry Standards Homeowners Should Know

There are accepted tolerances for countertop seams. While seams may be slightly visible under certain lighting, they should not be wide or uneven. Seam quality depends on precision during installation and the use of the right tools.

Signs of a Poor Installation

Poor seams are easy to identify. Uneven edges, gaps, mismatched epoxy, or poorly placed seams all indicate a problem. A noticeable seam that stands out across the countertop surface is usually a sign of low-quality installation.

Tools and Materials Professionals Use for Seam Installation

Professional installers rely on the right tools to complete the job. A wet saw with a diamond blade is used to cut slabs accurately. Wet cutting reduces granite dust and improves edge quality.

Seam setters help align perfectly and hold slabs in place. Polishing tools refine the surface and improve seam quality. Without these tools, it is difficult to achieve a quality installation.

How Cabinet Preparation Impacts Seam Quality

Cabinets are the foundation of granite installation. If cabinets are not level, seams will not align properly. Installers inspect cabinets carefully and use shims to adjust them.

In an older house, cabinets and walls may not be perfectly straight, which makes this step even more important. Proper cabinet preparation ensures the countertop surface sits flush and reduces stress on seams.

Without proper support, seams can become more visible or fail over time.

Can Granite Seams Be Invisible?

Many homeowners ask if seams can be invisible. While seams are not completely invisible, they can be very difficult to see. Factors like granite pattern, lighting, and viewing angle all affect visibility.

Dark granite with heavy pattern movement tends to hide seams better than lighter material. Since different granite colors and patterns can also affect price, it is wise to understand granite countertop costs as you balance budget with appearance. In a quality installation, seams are designed to be minimally noticeable and blend naturally into the stone surface.

Why Professional Installation Makes All the Difference

Seaming granite countertops requires precision, experience, and attention to detail. Professional installers at America’s Advantage Remodeling understand seam placement, pattern matching, and how to use epoxy correctly.

Experienced installers ensure seams align perfectly and maintain long-term durability. Choosing professional installers helps ensure a quality installation that protects your investment.

What to Expect on Installation Day

On installation day, installers bring pre-cut slabs to the site and begin placing them on the cabinets. They complete the dry fit, apply epoxy, and join the granite pieces.

The process can take several hours depending on the size of the space and number of seams. Professional installers work efficiently to complete the job while maintaining quality.

Before leaving the site, they inspect all seams and ensure the countertop surface meets expectations.

Common Homeowner Questions About Granite Seams

Are granite seams supposed to be visible?

Yes, but only slightly. A visible seam should not be distracting.

How long does epoxy take to cure?

Epoxy cures quickly, but full strength may take longer depending on the product.

Can a bad seam be fixed?

Some seams can be improved with additional epoxy and polishing, depending on the situation.

Will seams crack over time?

When properly installed on stable cabinets, seams should not crack under normal conditions.

Is it possible to have no seams at all?

Only in very small layouts using one slab. Most kitchens require seams.

Do quartz countertops have seams too?

Yes, quartz, marble, and concrete countertops all require seams during installation.

Final Thoughts: Seam Quality Is the True Test of Craftsmanship

Granite seams are a normal part of installation, but they are also one of the clearest indicators of workmanship. A well-executed seam blends into the stone, feels smooth, and holds up over time.

When you choose granite countertops, you are investing in a durable natural stone material that adds value to your home improvement project. Working with experienced installers ensures your granite countertops are installed with precision, from seam placement to final polishing./

How Do Professionals Plan Electrical Upgrades in Kitchen Remodels?

Опубликовано: April 17, 2026 в 1:27 pm

Автор:

Категории: Kitchen

Тэги:

How Do Professionals Plan Electrical Upgrades in Kitchen Remodels?

When homeowners ask how do professionals plan electrical upgrades in kitchen remodels, the answer always starts with strategy, not wiring. A successful kitchen remodel depends on thoughtful kitchen electrical planning that aligns design, function, and safety. At America’s Advantage Remodeling, we approach every kitchen electrical remodel by looking at the entire space first, then building an electrical layout that supports how the homeowner actually lives. This process ensures the electrical system is efficient, code compliant, and ready for modern appliances and future appliances. Whether you are planning a full kitchen renovation or targeted electrical and lighting changes, getting the plan electrical process right from the beginning makes all the difference. In fact, understanding how do professionals plan electrical upgrades in kitchen remodels helps homeowners avoid costly mistakes and ensures a smoother remodeling experience.

Why Electrical Planning Is the Foundation of a Successful Kitchen Remodel

Every kitchen remodel today involves more power, more technology, and more complexity than ever before. A modern kitchen relies on multiple small appliances, large appliances, and high powered appliances all running safely at the same time. Without proper electrical planning, homeowners often deal with constant breaker trips, poor outlet placement, or the need for dangerous extension cords. A well-designed kitchen electrical system eliminates these problems before they start.

Electrical planning also ensures compliance with modern electrical codes and the current electrical code enforced in your area. These codes, including the national electrical code, exist to prevent electrical fires and protect your home. By addressing electrical infrastructure early in the project, professionals can design a kitchen electrical remodel that supports both the appearance and performance of the space. This is why kitchen electrical is never treated as an afterthought, it is a core part of the entire kitchen remodel process.

Step 1 | Starting With the Kitchen Layout and Design

Why Layout Comes Before Electrical

The first step in any kitchen electrical remodel is finalizing the layout. Cabinets, appliances, and the kitchen island all determine where power is needed. Professionals always plan electrical after confirming where the sink, range, and prep zones will be located. This ensures the electrical layout supports real functionality across the entire space.

How Professionals Map Electrical to Real-Life Use

A well-designed electrical layout considers how homeowners use their space daily. From plugging in a coffee maker each morning to using an air fryer during dinner prep, every detail matters. Professionals plan electrical around these habits, making sure small appliances have easy access to power without cluttering counter space. Appliance garages and built-in coffee makers are often incorporated to keep devices hidden while still accessible.

Planning for Kitchen Islands and Peninsulas

The kitchen island is a central hub in a modern kitchen. Professionals plan electrical carefully here, often incorporating pop-up outlets or hidden solutions and integrating features like appliance garages, multipurpose islands, and other 2025 kitchen remodel must-haves. This allows homeowners to install outlets without disrupting the design while still meeting electrical code requirements.

Step 2 | Appliance Planning and Load Calculation

Identifying All Electrical Loads

A key part of kitchen electrical planning is identifying all electrical needs. This includes major appliances like refrigerators and electric ranges, as well as small appliances like blenders and coffee maker stations. Each of these contributes to the overall electrical demands of the kitchen.

Dedicated Circuits Explained

Modern kitchen electrical systems rely heavily on dedicated circuits. Many appliances must have their own circuit or even their own dedicated circuit to operate safely. Dishwashers, garbage disposal units, microwaves, and electric ranges, along with other must-have kitchen appliances and gadgets, all require dedicated circuits. In many cases, a kitchen electrical remodel includes seven circuits or more depending on the design.

Dedicated circuits prevent overload and ensure reliable performance. Without them, homeowners may experience constant breaker trips or reduced appliance efficiency. Professionals also design separate circuits for lighting and outlets to improve safety and performance.

Gas vs Electric vs Induction Considerations

Choosing between gas and electric ranges has a major impact on electrical work. Electric ranges and induction units often require upgrading circuits and sometimes panel upgrades. These modern appliances demand more power, making early planning essential and should be factored into overall 10×10 kitchen remodel cost expectations.

Step 3 | Understanding Kitchen Electrical Code Requirements

Required Small Appliance Circuits

Current electrical code requires small appliance circuits to serve countertop outlets and dining areas. These small appliance circuits ensure that everyday devices like a coffee maker or toaster can operate safely without overloading the system.

GFCI and AFCI Protection

Safety is a top priority in any kitchen electrical remodel. GFCI outlets, also known as ground fault circuit interrupter devices, protect against shock in areas near water. GFCI protection and proper ground fault circuit coverage are required for countertop outlets and near sinks. In addition, arc fault circuit interrupters help prevent electrical fires caused by damaged wiring or fault circuit issues. Both types of protection are essential parts of modern electrical codes.

Countertop Outlet Spacing Rules

Proper outlet placement is required to meet electrical code standards. Countertop outlets must be spaced so that no area is too far from power, reducing the need for extension cords or stretching cords across the kitchen. This improves both safety and convenience and eliminates reliance on dangerous extension cords.

Lighting Code Requirements

Kitchen lighting must meet efficiency and safety standards. LED lighting is now the standard for most kitchen lighting designs, offering long life and energy savings. Lighting planning also ensures that different lighting fixtures are controlled independently for better usability.

Step 4 | Planning Outlet Placement for Function and Convenience

Where Outlets Should Be Installed

Outlet placement is one of the most important parts of a kitchen electrical remodel. Professionals install outlets along countertops, in pantry areas, and near dining spaces. Proper outlet placement ensures easy access to power throughout the entire space.

Smart Outlet Placement Strategies

Smart outlet placement reduces clutter and eliminates the need for extension cords. USB outlets can be added for charging devices, while hidden outlets keep surfaces clean. This approach supports both the appearance and function of a modern kitchen.

Island and Peninsula Outlet Options

Pop-up outlets and concealed solutions are commonly used for a kitchen island. These options allow homeowners to install outlets without interrupting the design while still meeting local codes.

Step 5 | Lighting Design and Electrical Integration

Layered Lighting Approach

A successful kitchen lighting plan uses layered lighting, combining ambient lighting, task lighting, and accent lighting. Ambient lighting provides general illumination, while task lighting focuses on work areas like countertops. Accent lighting highlights design features and adds depth to the entire space.

Under Cabinet and Accent Lighting

Under cabinet lighting is essential in any modern kitchen. Under cabinet LED strips improve visibility and enhance cabinet lighting. Accent lighting and cabinet lighting can also be used to highlight backsplashes and architectural features.

Smart Lighting and Controls

Modern kitchens often include smart switches and advanced controls. Pendant lights, recessed lighting, and recessed lights can all be integrated into one system, giving homeowners complete control over their kitchen lighting environment.

Step 6 | Evaluating and Upgrading the Electrical Panel

When a Panel Upgrade Is Necessary

The electrical panel is the heart of the electrical system. During a kitchen electrical remodel, professionals evaluate whether the panel can handle new appliances and added circuits. If not, panel upgrades are recommended.

Adding Capacity for Future Needs

A kitchen remodel is the perfect time to plan electrical for future appliances and additional electrical needs. Upgrading circuits and expanding panel capacity ensures long term flexibility.

Cost vs Long Term Value

While panel upgrades add upfront cost, they improve safety and performance. They also prevent issues like constant breaker trips and overloaded circuits.

Step 7 | Permits, Inspections, and Professional Oversight

Why Permits Are Required

All electrical work must follow local codes and pass inspection. Permits ensure that electrical components are installed correctly and safely, and they are a key part of understanding when you need a permit to remodel a kitchen.

What Inspectors Look For

Inspectors review wiring, outlet placement, GFCI protection, and compliance with the electrical code. This ensures the kitchen electrical system is safe and reliable.

The Value of Hiring a Professional Electrician

Working with a professional electrician ensures that all electrical and lighting changes are completed correctly. A professional electrician understands electrical code requirements and ensures every detail is handled properly, especially when partnering with kitchen remodeling experts in Sacramento.

Step 8 | Future Proofing Your Kitchen Electrical System

Planning for Smart Kitchens

Modern kitchen design includes smart technology and connected devices. Planning electrical for these features ensures seamless integration into the kitchen electrical system and should be coordinated with a solid plan for financing your kitchen remodel.

Energy Efficiency and Sustainability

LED lighting, energy efficient appliances, and smart controls all contribute to a more efficient kitchen electrical system, which can be incorporated into comprehensive kitchen remodeling projects in Rancho Cordova.

Flexibility for Changing Needs

A flexible electrical layout allows homeowners to adapt their space over time. Whether adding new appliances or reconfiguring the layout, the system is ready.

Common Mistakes Homeowners Make With Kitchen Electrical Upgrades

Many homeowners underestimate their electrical needs during a kitchen remodel. This leads to poor outlet placement, insufficient circuits, and reliance on extension cords. Others fail to plan electrical properly, resulting in costly electrical remodel changes later. Ignoring electrical code requirements can also cause inspection failures. A professional approach to kitchen electrical planning avoids these issues.

How America’s Advantage Remodeling Plans Electrical Upgrades the Right Way

At America’s Advantage Remodeling, we take a comprehensive approach to every kitchen electrical remodel. We plan electrical systems around your lifestyle, ensuring every outlet, circuit, and lighting fixture serves a purpose. Our team coordinates all electrical work, from design to installation, so your kitchen remodel is seamless from start to finish. This approach ensures your kitchen electrical system is safe, efficient, and built to last, reflecting the same values and craftsmanship highlighted on our About America’s Advantage Remodeling company page.

FAQs About Electrical Upgrades in Kitchen Remodels

How much does it cost to upgrade electrical in a kitchen remodel?

Costs vary depending on the scope of the electrical remodel, including the number of circuits and whether panel upgrades are needed.

Do I need to upgrade my electrical panel for a kitchen remodel?

If your panel cannot support modern appliances and additional circuits, an upgrade may be necessary.

How many outlets are required in a kitchen?

How many outlets are required depends on the layout and electrical code, but proper spacing ensures safety and convenience.

Can I keep my existing wiring during a remodel?

In some cases, existing wiring can be reused, but many projects require upgrading circuits to meet modern electrical codes as part of broader home remodeling services in Sacramento.

Are permits required for kitchen electrical upgrades?

Yes, permits are required for most electrical work to ensure compliance with local codes.

What is the difference between GFCI and AFCI protection?

A ground fault circuit interrupter protects against shock, while arc fault circuit interrupters prevent electrical fires.

How long do electrical upgrades take during a remodel?

The timeline depends on the complexity of the kitchen electrical remodel and the extent of electrical and lighting changes, as well as whether you’re working with experienced home remodeling contractors in Roseville, CA.

Final Thoughts: Plan Smart, Build Once, Enjoy for Years

A successful kitchen remodel starts with smart electrical planning. By focusing on electrical layout, dedicated circuits, lighting planning, and code compliance, professionals create a kitchen electrical system that supports your lifestyle. At America’s Advantage Remodeling, we help homeowners navigate every step of the process, ensuring your kitchen electrical remodel delivers lasting performance, safety, and style.

How Do Quartz Countertops Compare to Granite for Durability?

Опубликовано: April 13, 2026 в 1:27 pm

Автор:

Категории: Kitchen

Тэги:

How Do Quartz Countertops Compare to Granite for Durability?

When planning a remodel, many homeowners ask one key question: how do quartz countertops compare to granite for durability? Your kitchen countertop sees constant use, from food prep to spills to hot pans, so choosing the right countertop material matters more than almost any other decision. Both quartz and granite are highly durable options, but they perform differently depending on how you use your space. Understanding quartz vs granite in real-world conditions helps you choose the better material for your home, your habits, and your long-term expectations. In fact, when homeowners compare quartz vs granite, they are really comparing two materials designed for different lifestyles.

What “Durability” Really Means for Kitchen Countertops

Durability goes beyond strength. For kitchen countertops, it includes resistance to heat, stains, scratches, bacteria, and long-term maintenance. Many homeowners assume one of these two materials is simply stronger, but the key differences come down to how each surface responds to daily use. Quartz and granite countertops are both built to last, but they excel in different areas. Some surfaces are better at handling high heat, while others are more stain resistant and easier to maintain. Choosing between quartz vs granite comes down to how you use your kitchen, not just how the material looks. Compared to options like marble, both quartz and granite offer significantly better durability and performance.


Quartz Countertops Durability Breakdown

What Quartz Is Made Of

Quartz countertops are an engineered stone made from crushed quartz crystals combined with resins and pigments. This engineered product is manufactured in controlled environments, making it highly consistent in both structure and appearance. Unlike natural stone that comes from quarries, quartz is manufactured to eliminate weak points. Quartz makes it easier to achieve uniform patterns and consistent surfaces throughout the home. Because it is engineered, it is also easier to control texture and finish.

Strengths of Quartz Countertops

Quartz countertops are non-porous, which means they are naturally resistant to stains, bacteria, and mold. This makes them a top choice for both kitchens and bathrooms. Because quartz surfaces are non-porous, they do not require sealing, which significantly reduces maintenance over time. Many homeowners prefer quartz because it is low maintenance and easy to clean. Quartz is also highly durable and scratch resistant under normal use. The engineered composition gives quartz countertops reliable performance across every slab. In addition, quartz maintains its polished appearance with minimal effort, making it ideal for busy households where convenience matters.

Weaknesses of Quartz

Quartz is extremely durable, but it does have limitations. One of the biggest concerns is heat resistance. Quartz is not as heat resistant as granite because it contains resins. Placing a hot pan or hot pots directly on quartz surfaces can lead to discoloration or damage. This is why it is important to use trivets to protect the surface from high heat. Quartz can also be affected by direct sunlight over time, especially in areas with large windows. While quartz is resistant to scratches, improper use can still cause visible wear.

Best Use Cases for Quartz

Quartz countertops are best for homeowners who want low maintenance and consistent surfaces. They are ideal for busy kitchens, bathrooms, and households where spills are common. Many homeowners choose quartz because it provides reliable durability without requiring ongoing care like sealing. When comparing quartz vs granite, quartz often stands out for convenience and performance in everyday environments.


Granite Countertops Durability Breakdown

What Granite Is

Granite countertops are made from a natural stone that is an igneous rock composed of minerals formed deep within the earth’s crust. This igneous rock includes other minerals that create unique patterns and variations in each slab. Granite is extracted from quarries and then cut, shaped, and polished into usable surfaces. Because granite is natural, every slab has a unique appearance that cannot be replicated by manufactured materials.

Strengths of Granite Countertops

Granite countertops are extremely durable and highly durable under heavy use. Granite is naturally resistant to heat, which makes it ideal for cooking environments. When comparing quartz and granite countertops, granite wins in heat resistance. You can place hot pans or even a hot pan directly on granite surfaces with much lower risk of damage. Granite surfaces are also scratch resistant and maintain their polished finish over time, especially when seams in stone countertops are expertly handled. Granite counters can last for decades when properly maintained, making them a strong long-term investment for homeowners.

Weaknesses of Granite

Granite is a natural stone, which means it is porous and can absorb liquids. Because of this, granite countertops require sealing to protect against stains and bacteria. Without proper sealing, granite surfaces can develop stains or even mold in extreme cases. Most granite countertops require annual sealing or periodic sealing depending on use. While granite is durable, it can chip along edges if impacted, and granite countertop cost factors such as edge profiles and thickness can influence both durability and budget. This is especially important to consider during installation and daily use.

Best Use Cases for Granite

Granite countertops are best for homeowners who cook frequently and need surfaces that can handle high heat. They are also ideal for those who value natural stone and unique patterns. When comparing quartz vs granite, granite is often the better choice for traditional kitchens and high heat cooking environments, especially when you evaluate which countertop materials to consider for your kitchen based on style and maintenance needs.


Quartz vs. Granite: Side-by-Side Durability Comparison

Stain Resistance

Quartz wins because it is non-porous and does not absorb liquids. Granite countertops can resist stains, but only when properly sealed. Without sealing, granite surfaces are more vulnerable to stains.

Heat Resistance

Granite wins in this category. Granite surfaces can handle high heat and direct contact with hot pots and pans. Quartz requires protection from a hot pan to prevent damage.

Scratch Resistance

Both quartz and granite countertops are scratch resistant, but neither is completely immune to scratches. Proper care helps maintain the surface.

Chip and Crack Resistance

Both materials can chip if impacted, especially along edges. Proper installation helps reduce the risk of damage.

Maintenance Requirements

Quartz countertops are low maintenance and do not require sealing. Granite countertops require sealing to maintain their durability and resistance to stains and bacteria.

Long-Term Durability

Both quartz and granite countertops are highly durable and can last for decades. The better material depends on how well they are maintained and how they are used.


Which Countertop Lasts Longer in a Real Kitchen?

In real kitchens, durability depends on usage. Quartz performs better in households that prioritize low maintenance and stain resistance. Granite performs better in environments where heat exposure is common. Many homeowners find that quartz and granite both offer long-term durability, but the better choice depends on daily habits, the right kitchen counter height for your home, and personal preference. Quartz vs granite is less about which material lasts longer and more about which performs better in your specific situation.


Common Homeowner Mistakes That Reduce Countertop Lifespan

  1. Placing a hot pan directly on quartz surfaces, which can cause damage from heat
  2. Skipping sealing on granite countertops, leading to stains and bacteria buildup, or rushing the process when you remove an old kitchen countertop
  3. Cutting directly on surfaces, which can cause scratches over time
  4. Using harsh cleaners that damage the finish of the stone
  5. Ignoring proper care, which reduces the lifespan of both materials

Cost vs. Durability: Which Is the Better Long-Term Investment?

The cost of quartz and granite countertops can vary depending on the slab, design, and availability. Quartz is often slightly higher in upfront cost, but its low maintenance makes it cost effective over time. Granite may have a lower initial cost in some cases, but it does require sealing and ongoing maintenance. Both materials are considered premium surfaces and can increase home value, especially when you plan the cost to replace cabinets and countertops as part of a full remodel. Choosing the better material depends on whether you prioritize convenience or natural performance.


How to Choose the Right Countertop for Your Lifestyle

Choose Quartz If You Want

Quartz countertops are the better choice if you want low maintenance, consistent appearance, and strong resistance to stains and bacteria. Quartz surfaces are ideal for busy households that want easy care and long-term durability.

Choose Granite If You Want

Granite countertops are the better choice if you want natural stone, better heat resistance, and unique patterns. Granite counters are ideal for homeowners who cook frequently and need surfaces that can handle high heat, and for those deciding whether countertops should match or contrast with cabinets for their preferred look.

When to Talk to a Remodeling Professional

Choosing between quartz vs granite can be challenging. A professional can help evaluate your needs and recommend the best countertop material based on your lifestyle, especially if you’re planning kitchen countertop installation in Sacramento, CA and want expert guidance.


Why Professional Installation Matters for Durability

Proper installation is critical for both quartz and granite countertops. Poor installation can lead to cracks, uneven surfaces, and long-term issues. Ensuring proper support and placement helps protect your investment. Choosing experienced professionals to install your countertops ensures long-lasting performance, particularly if you’re considering kitchen countertop services in Vacaville, CA.


FAQs — Quartz vs. Granite Durability

Is quartz more durable than granite overall?

Quartz is more stain resistant and low maintenance, while granite is more heat resistant. The better material depends on your needs.

Can you put hot pans on quartz countertops?

It is not recommended to place hot pans or a hot pan directly on quartz surfaces.

Does granite crack or chip easily?

Granite is extremely durable but can chip if impacted along edges.

How often does granite need to be sealed?

Granite countertops typically require sealing every one to two years to maintain durability.

Which countertop is better for resale value?

Both quartz and granite countertops are desirable and can increase home value.

What is the easiest countertop to maintain?

Quartz countertops are the easiest to maintain because they do not require sealing.

Do quartz countertops scratch easily?

Quartz is scratch resistant but not completely immune to scratches.

Which is better for families with kids?

Quartz is often preferred due to its low maintenance and resistance to stains and bacteria.


Final Verdict: Quartz vs. Granite for Durability

When comparing quartz vs granite, both materials offer excellent durability. Quartz countertops provide low maintenance, non-porous protection, and strong resistance to stains. Granite countertops offer superior heat resistance and natural durability. Both quartz and granite countertops are highly durable and can last for decades. The final decision comes down to personal preference, lifestyle, and how much maintenance you are willing to handle.


Ready to Choose the Right Countertop for Your Kitchen?

Choosing between quartz and granite countertops is an important decision. Both materials offer long-lasting performance, and the right choice depends on your needs, your style, and your daily routine. With proper care and professional installation, your countertops will remain durable, functional, and visually appealing for years to come, whether you install new surfaces or opt to paint existing kitchen countertops for a budget-friendly refresh.

How Heat Resistant Are Quartz Kitchen Countertops?

Опубликовано: April 10, 2026 в 1:27 pm

Автор:

Категории: Kitchen

Тэги:

What Homeowners Need to Know in 2026

If you are planning a kitchen remodel, one of the most important questions to ask is: how heat resistant are quartz kitchen countertops? Homeowners continue choosing quartz countertops because they combine durability, style, and low maintenance benefits. However, understanding how heat affects this countertop material is critical. Quartz countertops are heat resistant, but they are not heat proof. That difference matters in a busy kitchen where hot items, pots, and cookware are used daily. This guide explains how quartz countertops handle heat, how much heat is too much, and how to protect your quartz countertops from heat damage so your investment lasts, while you also consider the overall cost to replace cabinets and countertops in a full kitchen remodel.

What Makes Quartz Countertops Heat Resistant?

How Quartz Countertops Are Made

Quartz countertops are a type of engineered quartz made from natural quartz crystals combined with polymer resins, pigments, and resin binders. This engineered stone is designed to create a solid surface that is both durable and visually consistent. Natural quartz is highly heat resistant, but the resin used to bind the material together is more sensitive to excessive heat and high temperatures. Because of this, quartz countertops’ heat resistance is strong but not unlimited.

Unlike natural stone countertops, which are formed from natural materials under extreme heat in the earth, engineered quartz is manufactured. This process creates consistency but also means the quartz slab relies on resin for structure. The resin can react to heat exposure, which is why quartz countertops must be protected in real kitchen environments and carefully handled if you ever remove your existing kitchen countertop during a remodel.

Why Quartz Performs Well in Everyday Kitchens

In everyday use, quartz counters perform extremely well. They easily handle heat from coffee mugs, hot dishes, and normal cooking activity. Quartz offers reliable durability in a busy kitchen, making it one of the most popular stone countertops available. However, placing a hot pan directly on the quartz surface or exposing it to high heat repeatedly can cause heat damage over time.

How Much Heat Can Quartz Countertops Actually Handle?

Manufacturer Temperature Ranges Explained

Many homeowners ask how much heat quartz countertops can handle. While there is no single answer, most engineered quartz products can tolerate moderate heat, typically between 150 and 300 degrees Fahrenheit. Some quartz slab options may perform slightly better depending on the ratio of natural quartz to polymer resins.

The key factor is the resin. Higher resin content reduces heat resistance, while more natural quartz increases durability. This variation is why heat resistance differs across brands and why understanding heat exposure matters more than relying on exact numbers.

The Real-World Rule Homeowners Should Follow

The safest approach is simple: never place a hot pan directly on quartz countertops. Even though quartz countertops’ heat resistant qualities are strong, direct contact with hot items can lead to heat damage. Always use trivets or hot pads when placing hot cookware on the surface. This is the most effective way to protect your quartz countertops from heat.

Heat Sources That Pose the Biggest Risk

Certain heat sources are more dangerous than others when it comes to quartz countertops. Hot pots, baking sheets, and a hot pan directly from the oven can create excessive heat. Small appliances like air fryers and toaster ovens also produce sustained heat exposure when left in one place. These situations increase the risk of heat damage and can lead to scorch marks or resin burn on the quartz surface.

What Happens If Quartz Gets Too Hot?

Discoloration and Burn Marks

When quartz countertops are exposed to excessive heat, the resin can begin to break down. This can result in scorch marks, discoloration, and visible burn marks on the surface. Resin burn is one of the most common types of heat damage and often leads to permanent damage in the affected area.

Cracking from Thermal Shock

Thermal shock occurs when a quartz slab experiences a rapid temperature change. For example, placing a hot pan directly on a cool surface can create stress that leads to cracking. This is more likely near seams or edges, where the surface may already be under tension.

Long-Term Structural Damage

Repeated heat exposure can weaken the internal structure of the engineered stone. Over time, the polymer resins degrade, reducing the strength of the quartz slab. This type of heat damage may not be visible right away but can shorten the lifespan of your countertops.

Quartz vs Granite: Which Handles Heat Better?

Granite’s Natural Heat Resistance Advantage

Granite countertops are made from natural stone formed under extreme heat and pressure. Because of this, granite countertops can handle heat better than quartz, which is one reason many homeowners explore the overall cost of granite countertops when comparing materials. Natural stone holds up well against hot pots, hot items, and even a hot pan directly in some cases.

Why Many Homeowners Still Choose Quartz

Quartz countertops remain popular because they are low maintenance, stain resistant, and do not require sealing. Unlike some natural stone countertops that require sealing, quartz offers a simpler maintenance routine while still delivering excellent durability. Quartz counters also provide consistent design options that many homeowners prefer over other surfaces, and even existing surfaces can sometimes be refreshed with painted kitchen countertops for a budget-friendly update.

Which Is Better for Your Kitchen?

Choosing between granite and quartz countertops depends on your lifestyle. If you frequently place a hot pan directly on the surface, granite may be better. If you prefer low maintenance and strong stain resistance, quartz is one of the great materials available, as long as you protect your quartz from heat and understand which countertop materials are best for your kitchen.

How to Protect Your Quartz Countertops from Heat Damage

Simple Daily Habits That Prevent Damage

Protecting quartz countertops from heat damage comes down to simple habits. Always use trivets or hot pads when placing hot items on the surface. Never place a hot pan directly on the quartz surface. Let cookware cool before setting it down whenever possible.

Smart Kitchen Setup Tips

A well-designed kitchen setup helps prevent heat damage. Use cutting boards, trivets or hot pads, and protective mats for appliances like air fryers and toaster ovens. These steps help distribute heat and reduce the risk of excessive heat exposure in one area of the countertop, especially if you’re planning features like a waterfall kitchen island where the countertop material wraps down the sides.

What to Do If Damage Happens

If heat damage occurs, the affected area may show scorch marks, burn marks, or discoloration. Minor issues may be cleaned with a soft cloth and gentle cleaning products. A mixture of baking soda can sometimes help remove light stains. Avoid abrasive cleaners, as they can damage the quartz surface further.

Is Quartz Still a Good Choice for Busy Kitchens?

Pros That Make Quartz One of the Most Popular Options

Quartz countertops are one of the most popular kitchen countertops because they are durable, stain resistant, and low maintenance. They do not require periodic sealing like many natural stone countertops, which makes them easier to maintain over time. Quartz counters are designed to handle everyday use in a busy kitchen.

Understanding Its Limitations

While quartz countertops’ heat resistant properties are strong, they are not designed for extreme heat or direct contact with hot cookware. Understanding how materials perform helps homeowners avoid unnecessary heat damage.

Who Quartz Is Perfect For

Quartz is ideal for homeowners who want a durable and attractive countertop material without the maintenance of natural stone. It works well in a busy kitchen as long as you use hot pads and take steps to protect your quartz countertops from heat.

Expert Insight: What Remodelers Want You to Know About Quartz

Common Mistakes Homeowners Make

A common mistake is assuming quartz is heat proof. Homeowners often place a hot pan directly on the surface, which can lead to heat damage. Understanding the difference between engineered quartz and natural stone countertops is essential.

How Professional Installation Impacts Performance

When you install quartz countertops, proper support and fabrication are critical. A well-installed quartz slab performs better under heat exposure and daily use, and understanding how seams in stone countertops are handled can help you know what to expect from a quality installation. Professional installation ensures long-term durability.

Why Education Matters Before You Choose a Countertop

Choosing the right countertop material is about more than appearance. It is about how the material will perform in your daily routine and how details like the right kitchen counter height for your home affect comfort and usability. Quartz countertops are a strong option, but knowing how to protect quartz countertops from heat ensures long-term satisfaction.

Frequently Asked Questions About Quartz Heat Resistance

Can you put a hot pan on quartz countertops?

No, never place a hot pan directly on quartz countertops. Always use hot pads or trivets to prevent heat damage.

Will quartz crack from heat?

Quartz can crack under extreme heat or thermal shock, especially with sudden temperature changes.

Are quartz countertops heat resistant or heat proof?

Quartz countertops are heat resistant, not heat proof. They can handle heat from everyday use but not high heat or direct contact with hot items.

Can small appliances damage quartz countertops?

Yes, appliances like air fryers and toaster ovens can cause heat damage if placed directly on the surface without protection.

Is quartz safe around stovetops and ovens?

Yes, quartz countertops are safe when properly installed and used with hot pads and basic precautions.

Final Verdict: Are Quartz Countertops Heat Resistant Enough for Your Kitchen?

Quartz countertops are highly heat resistant and perform well in everyday kitchen conditions. However, they are not designed to handle direct contact with hot pots, hot pan placement, or excessive heat. By using trivets or hot pads and following simple habits, you can prevent heat damage and protect your quartz countertops for years.

Thinking About Upgrading Your Countertops?

If you are planning a kitchen remodel and comparing stone countertops, quartz remains one of the best choices available. Quartz offers durability, stain resistance, and low maintenance benefits that make it ideal for modern homes. When you install quartz countertops with the right care approach, you can protect your quartz and enjoy long-term performance in your kitchen countertops, especially when working with experienced kitchen countertop installers in Sacramento, CA.

How Much Value Does a Kitchen Remodel Add to a Home?

Опубликовано: April 6, 2026 в 1:27 pm

Автор:

Категории: Kitchen

Тэги:

How Much Value Does a Kitchen Remodel Add to a Home in 2026?

When homeowners ask how much value a kitchen remodel adds, the answer depends on strategy, not just spending. A kitchen remodel is one of the most impactful home improvement projects because it directly affects daily living and buyer perception. In today’s real estate market, the kitchen is often the deciding factor for prospective buyers, which means the right upgrades can significantly boost both enjoyment and home value.

Understanding “How Much Value Does a Kitchen Remodel Add to a Home” is crucial for making informed renovation decisions. A well-planned kitchen remodel improves function, updates style, and aligns your home with current buyer expectations. Whether you are preparing to sell or planning to stay long term, understanding the return on investment (ROI) of a kitchen remodel helps you make smarter decisions about your renovation cost and overall goals. If you are wondering how much value you can realistically expect, the answer lies in making the right upgrades, not just bigger ones.

The Real ROI of a Kitchen Remodel (2026 Data Breakdown)

Average ROI by Remodel Type

The kitchen remodel ROI varies depending on the size and scope of the project. A minor kitchen remodel offers the strongest return on investment, often delivering an average ROI that can exceed 100 percent when done correctly. This is why a minor kitchen remodel offers such strong performance in the real estate market.

A midrange major kitchen remodel typically delivers a moderate return on investment, while a high-end major remodel or major renovation often returns less. Extensive remodels and luxury upgrades increase the total cost but do not always translate into higher resale value.

A minor remodel usually includes painting cabinets, updating cabinet hardware, replacing countertops, and installing new appliances. A major kitchen remodel or major remodel may involve custom cabinetry, custom cabinets, layout changes, and full kitchen renovation work.

Why ROI Varies So Much

Several factors influence kitchen remodel ROI. The local market plays a major role, as home value ceilings can limit how much you can recover. In a competitive real estate environment, buyers expect updated kitchens, but they may not pay extra for luxury upgrades that exceed neighborhood standards.

A well-executed kitchen remodel using high-quality materials will outperform poorly planned projects. Efficient layouts, open concept kitchens, and modern kitchen features align with current kitchen trends and help significantly boost return on investment.

ROI vs Resale Value vs Appraisal Value

Return on investment (ROI) measures how much of your renovation cost you recover. Resale value reflects how your kitchen renovation affects your home’s resale price. Appraisal value is based on comparable homes in the real estate market.

Even when ROI is not 100 percent, remodeled kitchens improve buyer appeal, attract buyers, and increase the likelihood of a faster sale. Many real estate professionals and even a local real estate agent will confirm that updated kitchens influence kitchen remodel decisions for sellers.

What Actually Adds the Most Value in a Kitchen Remodel

Layout Improvements and Functionality

Improving layout is one of the best ways to enhance functionality and increase home value. Open concept kitchens remain one of the most requested upgrades because they create a functional space and improve flow. Efficient layouts make a kitchen easier to use while increasing buyer expectations and satisfaction.

Cabinet Upgrades and Storage Solutions

Cabinets define the kitchen’s appearance and contribute to both usability and aesthetic appeal. Upgrading to custom cabinetry or custom cabinets improves both durability and design. Features like ample storage and upgraded cabinet hardware enhance functionality.

A minor kitchen remodel often includes painting cabinets or replacing cabinet fronts, which can transform the space in a few days and help save money compared to full replacement.

Countertops and Material Choices

Replacing countertops is one of the most impactful upgrades. Quartz countertops continue to lead because they combine durability with style. Many homeowners choose quartz countertops when replacing countertops to create a modern kitchen look that appeals to buyers.

Choosing high-quality materials helps maintain property value without pushing renovation cost too high.

Lighting That Transforms the Space

Lighting enhances both function and the kitchen’s appearance. Task lighting, under cabinet lighting, and ambient lighting work together to create a brighter, more inviting space. Proper lighting can significantly boost both usability and overall aesthetic appeal.

Appliances and Energy Efficiency

Updating appliances is essential for a modern kitchen. Stainless steel appliances and modern appliances remain standard expectations in remodeled kitchens.

Energy-efficient appliances and energy-efficient models are especially attractive to eco-conscious buyers. These upgrades help reduce utility costs, lower utility bills, and improve overall energy efficiency. Replacing appliances with new appliances that are energy efficient is one of the simplest ways to increase home value.

What Does Not Add as Much Value (Common Costly Mistakes)

Overly Luxury or High-End Remodels

A major kitchen remodel that includes high-end appliances or professional-grade appliances may not deliver the best return on investment. If your upgrades exceed what buyers expect in your local market, your home’s resale value may not increase enough to justify the cost.

Trend-Heavy Designs That Age Quickly

Following short-term kitchen trends can hurt long-term home value. A well-executed kitchen remodel should focus on timeless design instead of overly trendy features.

Ignoring Function for Aesthetics

A kitchen that looks good but lacks functionality will struggle in the real estate market. Buyers prioritize efficient layouts, counter space, and functional space over purely visual upgrades.

Kitchen Remodel vs Other Home Improvement Projects

Kitchen vs Bathroom Remodel ROI

Kitchen remodel ROI often outperforms many home improvement projects. While bathrooms add value, kitchens tend to have a stronger influence in real estate decisions and overall home value.

Kitchen vs Whole Home Renovations

Whole home remodeling or a major renovation can improve property value, but it also increases renovation cost and risk. A kitchen remodel provides a focused way to improve home value without committing to a full-scale project, especially when working with experienced Sacramento home remodeling contractors.

Why Kitchens Lead Buyer Decisions

The kitchen is often the centerpiece of the home. In the real estate market, remodeled kitchens with modern appliances and updated finishes attract buyers and improve buyer appeal.

How to Maximize the Value of Your Kitchen Remodel

Set the Right Budget for Your Goals

Understanding your kitchen remodel cost helps avoid unexpected expenses and keeps your project aligned with your goals. Whether you choose a minor remodel or a major remodel, planning helps control total cost and maximize return on investment.

Focus on Midrange Upgrades with High Impact

A minor kitchen remodel offers one of the best opportunities to achieve a strong average ROI. Updates like new flooring, replacing countertops, updating appliances, and improving cabinet fronts can significantly boost home value, particularly when coordinated by professional home remodeling services in Elk Grove.

Work With a Professional Remodeling Team

Working with experts in home remodeling leads to better planning and faster project completion. Professionals help avoid costly mistakes and ensure a well-planned kitchen remodel that meets both design and financial goals.

Choose Timeless Over Trendy

Timeless design improves long-term resale value and buyer expectations. Neutral colors, efficient layouts, and durable materials create a kitchen that remains appealing over time.

Is a Kitchen Remodel Worth It If You Are Not Selling?

Daily Lifestyle Improvements

A kitchen remodel enhances daily life by creating a more functional space with better counter space and improved storage.

Emotional Return and Enjoyment

Creating a dream kitchen or even a gourmet kitchen provides long-term satisfaction and enjoyment beyond financial return, and browsing a kitchen and home remodeling gallery can help you visualize what’s possible.

Long Term Investment Thinking

Even if you are not selling soon, a kitchen remodel supports long-term home value and prepares your home for future resale.

How Kitchen Remodeling Impacts Home Value in Your Local Area

Local Market Considerations

The local market and broader real estate trends determine how much value a kitchen remodel adds. Understanding buyer expectations helps guide smart decisions.

Remodeling Trends in Your Area

Popular kitchen trends include open concept kitchens, energy-efficient upgrades, and modern kitchen layouts that enhance functionality and the kitchen’s appearance, all of which are central to professional kitchen remodeling in Sacramento.

Signs It Is Time to Remodel Your Kitchen

  1. Outdated layout or design that no longer fits your lifestyle
  2. Lack of ample storage or inefficient layouts
  3. Worn materials, aging cabinet fronts, or outdated finishes
  4. Preparing to enter the real estate market and improve buyer appeal

Frequently Asked Questions About Kitchen Remodel Value

What is the average ROI of a kitchen remodel in 2026?

The average ROI varies, but a minor kitchen remodel offers the highest return on investment. A major kitchen remodel typically delivers a lower average ROI depending on scope.

Does a kitchen remodel increase home value?

Yes, a well-executed kitchen remodel can significantly boost home value, especially when aligned with local market expectations.

Should I remodel my kitchen before selling?

In many cases, yes. Updating key features like replacing appliances, replacing countertops, and improving layout can increase resale value and attract buyers.

What is the most valuable kitchen upgrade?

Layout improvements, energy-efficient appliances, and storage upgrades provide the strongest return on investment.

How much should I spend on a kitchen remodel?

Your budget should align with your home value, local market, and goals to avoid overspending.

Is a small kitchen remodel worth it?

Yes, a minor remodel is often the best way to maximize return on investment (ROI) while keeping renovation cost manageable.

Why Homeowners Trust America’s Advantage Remodeling

Homeowners trust America’s Advantage Remodeling for high-quality home remodeling that focuses on craftsmanship, efficient layouts, and creating a modern kitchen that enhances functionality and improves the kitchen’s appearance. Every kitchen renovation is handled with attention to detail to ensure lasting value.

Start Your Kitchen Remodel With Confidence

A kitchen remodel is a significant investment, but when done right, it can significantly boost home value, improve resale value, and reduce utility costs over time. By focusing on energy-efficient upgrades, high-quality materials, and thoughtful design, you can create a modern kitchen that meets your needs today and supports your home’s resale in the future.

If you are ready to move forward, the right plan will help you save money, avoid unexpected expenses, and achieve a strong return on investment.