All Archives - Page 8 Of 11 - America's Advantage Remodeling

All

Red Flags of a Bad Contractor: 10 Warning Signs (Sacramento Guide)

Опубликовано: June 25, 2026 в 11:02 am

Автор:

Категории: All,Kitchen

After 25 years of remodeling homes across Sacramento, Roseville, and Folsom, I have walked into more than a few projects that another contractor started and abandoned. The pattern is almost always the same — the warning signs were there before the homeowner signed, but they were easy to miss when you are excited to finally start your kitchen or home remodel. I am Eugene Chernioglo, founder of America’s Advantage Remodeling. Here are the ten red flags I tell my own friends and family to watch for, so you can spot a bad contractor before you hand over a deposit.

1. They ask for a large deposit upfront

A legitimate contractor has credit with suppliers and does not need most of your money to start. In California, the law caps the down payment on a home improvement contract at 10% of the total or $1,000, whichever is less. If someone asks for 30%, 50%, or the full amount before any work begins, that is the single biggest warning sign there is. Payments after the deposit should be tied to real milestones — not the calendar.

2. They only take cash

Insisting on cash eliminates your paper trail and usually means the contractor is avoiding taxes, working without proper insurance, or hiding something. Always pay by check or credit card so you have documentation and a way to dispute a charge if the work goes wrong. A contractor who refuses anything but cash is telling you how they operate.

3. They can’t (or won’t) show a license and insurance

In California, any home improvement project over $500 in combined labor and materials requires a licensed contractor. A good one provides their CSLB license number without hesitation — you can verify it instantly at the Contractors State License Board website. They should also carry general liability insurance and workers’ compensation. If a worker is injured on your property and the contractor has no workers’ comp, you can be held liable. For reference, our license is CSLB #1036517.
4. The bid is dramatically lower than everyone else’s

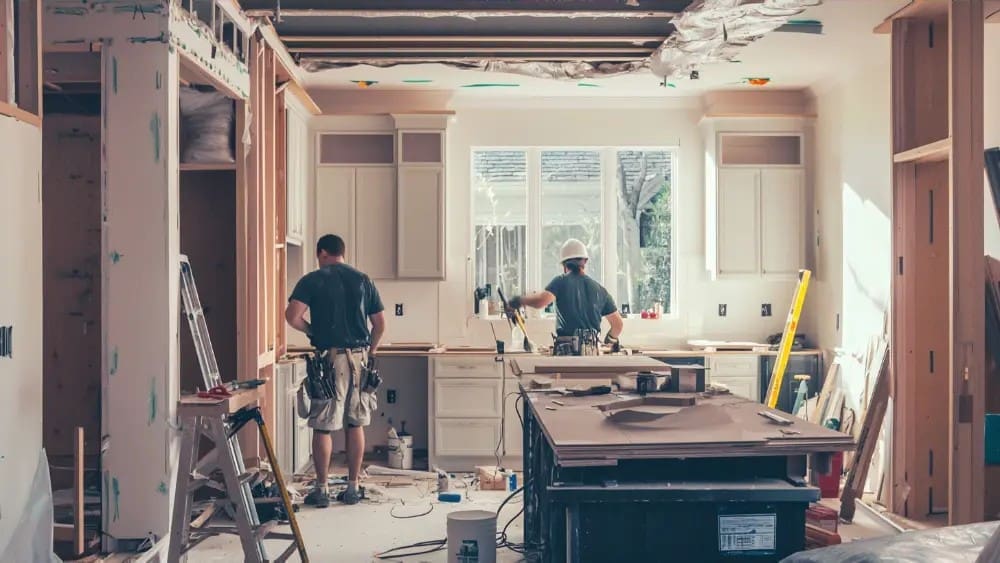
Getting multiple bids is smart. But if one quote comes in 25 to 30 percent below the others, something is wrong. They have either missed part of the scope, plan to use substandard materials, or intend to hit you with change orders once your kitchen is demolished and you have no choice but to pay. The lowest bid is rarely the cheapest project once it is finished.

5. There’s no written contract — or it’s vague

A handshake is not a contract. A proper agreement spells out the full scope of work, the materials and finishes, the payment schedule tied to milestones, the start and completion dates, and everything that is NOT included. If a contractor resists putting details in writing or hands you a one-paragraph estimate with no specifics, walk away. The contract protects both of you — vagueness only protects them.

6. They pressure you to sign today

“This price is only good today” and “I have another customer interested” are manipulation tactics, not business realities. A legitimate contractor wants you to feel confident and gives you time to decide. High-pressure sales tactics are a sign of desperation or dishonesty — a remodel is a major investment, and the right contractor respects that.

7. They want you to pull the permits

The contractor should pull the permits, because they are the one responsible for the work meeting code. If they ask you to pull them, it usually means they are unlicensed or trying to dodge accountability if an inspection fails. Worse is the contractor who tells you permits are a waste of money and you do not need them — unpermitted work can stall a future home sale and force you to tear out finished work.

8. They’re available to start tomorrow

Good contractors are booked weeks or months out. “I can start tomorrow” often means they are desperate for work — and you should ask yourself why a quality contractor would have no jobs lined up. It can also be a sign of a scam where they take your deposit and disappear. A reasonable wait for a reputable team is normal and worth it.

9. Communication is already bad

If a contractor is hard to reach, dodges your questions, or misses meetings before you have hired them, it will only get worse once they have your money. Poor communication during the sales stage reliably predicts a project where you are left in the dark, unsure what phase the work is in or when anyone will show up. How they treat you now is how they will treat you for the whole remodel.

10. A pattern of bad reviews — or none at all

One negative review can be a fluke. A pattern of the same complaints — abandoned projects, poor communication, demanding more money — is a clear warning. Pay attention to how the contractor responds to criticism, too. And be cautious of a contractor with no online footprint at all, or one who has changed company names several times, which can be a way to bury a bad reputation. We have built our reputation on 225-plus reviews at a 4.9-star average over 25 years in Sacramento.

If something feels off, it probably is. You are about to trust this person in your home with a significant sum of money — do not ignore warning signs because you are eager to start. The good contractors are out there: licensed, insured, transparent about pricing, and patient with your questions. They are worth waiting for.

Planning a kitchen or home remodel in the Sacramento area? We will give you a detailed, itemized estimate with no surprises and answer every question before you commit. Reach out for a free in-home consultation.

Work with a licensed, insured Sacramento remodeler you can trust. Call (916) 507-0469 or request your free in-home consultation.

Frequently Asked Questions

Q: What are red flags when hiring a contractor?

A: The biggest red flags are demanding a large upfront deposit, accepting only cash, refusing to show a license or insurance, and pressuring you to sign immediately. In California, the legal deposit cap is 10% or $1,000, whichever is less, so any larger demand is a serious warning sign. A bid that is dramatically lower than competitors and a vague or missing written contract are also major concerns.

Q: How much deposit should a contractor ask for?

A: In California, a contractor can legally request no more than 10% of the total project cost or $1,000, whichever is less, as a down payment. Anything beyond that is a violation of state law and a strong red flag. Legitimate contractors have supplier credit and don’t need most of your money before starting work, so payments after the deposit should be tied to completed milestones.

Q: How do I check if a contractor is licensed in California?

A: Verify any California contractor’s license for free at the Contractors State License Board (CSLB) website by searching their name or license number. A licensed contractor provides their number without hesitation. California requires a licensed contractor for any home improvement project exceeding $500 in combined labor and materials.

Q: Is it a red flag if a contractor only accepts cash?

A: Yes, cash-only payment is a significant red flag. It eliminates your paper trail and usually signals the contractor is avoiding taxes, operating without insurance, or hiding something. Always pay by check or credit card so you have documentation and the ability to dispute a charge if work goes wrong.

Q: Should the contractor or the homeowner pull permits?

A: The contractor should pull the permits because they are responsible for the work meeting building code. If a contractor asks you to pull the permits, it often means they are unlicensed or trying to avoid accountability for failed inspections. A contractor who claims you don’t need permits at all is a serious warning sign.

Q: What is a common red flag?

A: One of the most common red flags is a bid that comes in far below the others. A quote 25 to 30 percent under competing bids usually means the contractor missed part of the scope, plans to use substandard materials, or intends to add change orders once work begins and you can’t easily switch. The lowest bid often becomes the most expensive project once it’s finished, so compare bids on scope and materials, not just the bottom-line number.

Q: What should be included in a contractor’s written contract?

A: A proper contract should include the full scope of work, specific materials and finishes, a payment schedule tied to milestones, start and completion dates, and a clear list of what is not included. A vague one-paragraph estimate or a refusal to put details in writing is a red flag. The contract protects both you and the contractor, so detail is in your favor.


Do You Need a Permit to Remodel a Kitchen in Sacramento?

Опубликовано: June 25, 2026 в 10:36 am

Автор:

Категории: All,Kitchen

It is one of the first questions Sacramento homeowners ask me before a kitchen remodel: do I actually need a permit for this? The honest answer is that it depends entirely on the scope of work — and most contractor articles online answer it for Florida or Texas, not for here. I am Eugene Chernioglo, founder of America’s Advantage Remodeling, and in 25 years of remodeling kitchens across Sacramento, Roseville, and Folsom, I have pulled a lot of City and County permits. Here is a clear, Sacramento-specific answer on when you need one, what is exempt, what it costs, and how the process actually works.

The short answer

In Sacramento, you do need a permit for a kitchen remodel any time the work touches the home’s systems or structure — electrical, plumbing, mechanical (ventilation), windows, or walls. You do not need a permit for purely cosmetic updates that leave those systems alone. Since most full kitchen remodels involve at least new wiring or moved plumbing, the majority of them require a permit. When in doubt, the safe assumption is that your project needs one.

What does NOT require a permit

Sacramento treats minor, surface-level updates as exempt. If you are only changing the look of the kitchen without altering systems or structure, you generally do not need a permit for:

  • Painting walls and cabinets
  • Installing new flooring, wall tile, or backsplash
  • Replacing cabinets in the same footprint (no electrical or plumbing changes)
  • Swapping countertops
  • Like-for-like fixture or appliance swaps that use the existing connections

The rule of thumb: if you are not opening a wall and not touching wiring, pipes, or ductwork, it is usually exempt. If you are simply changing a fixture in place, there is often a smaller, simpler fee rather than a full permit. Still unsure? One quick call to the City of Sacramento building department settles it.

What DOES require a permit

Once a remodel touches the kitchen’s “guts” or its structure, Sacramento requires a permit. That includes:

  • Electrical work — adding or relocating outlets, running new circuits, or upgrading the panel for new appliances.
  • Plumbing changes — moving the sink, adding a pot filler, or running new lines for a refrigerator or dishwasher in a new location.
  • Mechanical / ventilation — installing or relocating a range hood, ductwork, or new ventilation falls under mechanical review.
  • Windows — adding a new window or changing ventilation must be coordinated with the building department for energy and air-quality standards.
  • Structural changes — removing or modifying a wall, or enlarging an opening in a load-bearing wall, always requires a permit. Sacramento may require you to submit plans verifying that a wall is non-load-bearing.

Sacramento sorts these into two buckets: non-structural remodels (new wiring, plumbing, cabinets in place, no walls touched) and structural remodels (walls removed or openings created). Structural projects carry more review and often need a licensed professional’s plans.

How the Sacramento permit process works

The City of Sacramento runs permits through its building department at 300 Richards Boulevard, and applications are submitted online through the Accela Citizen Access Portal. The basic path looks like this:

  1. Prepare documentation — a drawing of the existing kitchen, project plans, a materials and fixture list, and contractor details.
  2. Submit the application online through the Accela portal (or in person at 300 Richards Boulevard).
  3. Pay the fees, which are calculated from the project’s scope and valuation.
  4. Plan review — the city checks the plans for code compliance and may request revisions.
  5. Inspections — once approved, inspectors check the work at key construction phases. Work must pause until each inspection passes.

A typical kitchen permit takes roughly 4 to 6 weeks to be approved, depending on how busy the department is and whether the project is structural. Once issued, a Sacramento permit is generally valid for 180 days — if work does not start within that window, it needs to be renewed.

What permits cost

Sacramento does not charge one flat number — the cost depends on the scope and the project’s valuation. A kitchen remodel permit can include a building permit fee, inspection fees, a construction debris fee, and in some cases a fire department review fee. Simple fixture swaps fall at the low end; structural work with plan review costs more. The building department can prepare a preliminary fee estimate on request. The important thing to budget for is that permit fees are a real but modest line item next to the overall remodel — and far cheaper than the cost of fixing unpermitted work later.

Who pulls the permit — you or the contractor?

In most cases, your contractor pulls the permit, and that is how it should be. The contractor is responsible for the work meeting code, so they carry the accountability for inspections. Homeowners can apply directly as an owner-builder, but doing so transfers the liability to you. Be cautious of any contractor who suggests skipping permits to save time or money — that is one of the clearest red flags of an unreliable contractor. At AAR, we handle the entire permit process as part of the job, from application to final inspection. Our license is CSLB #1036517.
Why permits matter (and the risk of skipping)

Permits exist to keep the work safe and up to code, but they also protect you financially. Unpermitted work can stall a future home sale, force you to open finished walls for an inspector, or rack up fines. And many homeowners do not realize that insurance companies can deny claims on unpermitted work, leaving you on the hook for damages. One more Sacramento-specific note: homes built before 1980 may require asbestos or lead testing before certain work, which is exactly the kind of older-home surprise our team is used to handling without blowing up the timeline.

Planning a kitchen remodel in the Sacramento area and not sure what your project needs? We will tell you exactly which permits apply, handle the entire process, and give you an itemized estimate with no surprises. Reach out for a free in-home consultation.

Let a licensed Sacramento contractor handle the permit maze for you. Call (916) 507-0469 or request your free in-home consultation.

Frequently Asked Questions

Q: Do you need a permit to remodel a kitchen in Sacramento?

A: Yes, in Sacramento you need a permit for a kitchen remodel whenever the work involves electrical, plumbing, mechanical (ventilation), window, or structural changes. Purely cosmetic updates — like painting, new flooring, backsplash, or swapping countertops — are exempt. Because most full remodels include at least new wiring or relocated plumbing, the majority of them require a permit.

Q: What kitchen work is exempt from a permit in Sacramento?

A: In Sacramento, cosmetic updates that don’t alter the home’s systems or structure are exempt from permits. This includes painting walls and cabinets, installing flooring or wall tile, replacing cabinets in the same footprint, swapping countertops, and like-for-like fixture or appliance swaps using existing connections. If you’re not opening a wall or touching wiring, pipes, or ductwork, it’s usually exempt.

Q: How long does it take to get a kitchen remodel permit in Sacramento?

A: A kitchen remodel permit in Sacramento typically takes about 4 to 6 weeks to be approved, depending on how busy the building department is and whether the project involves structural changes. Structural remodels that need plan review take longer than simple non-structural permits. Once issued, the permit is generally valid for 180 days.

Q: How much does a kitchen remodel permit cost in Sacramento?

A: Sacramento permit costs vary by project scope and valuation rather than a single flat fee. A kitchen permit can include a building permit fee, inspection fees, a construction debris fee, and sometimes a fire department review fee. Simple fixture swaps cost less, while structural work with plan review costs more. The building department can prepare a preliminary fee estimate on request.

Q: What happens if you renovate your home without a permit?

A: Renovating without a required permit can lead to fines and stop-work orders, a stalled or failed home sale, having to open up finished walls so an inspector can verify the work, and denied insurance claims on the unpermitted portion. Purely cosmetic updates — painting, flooring, backsplash, or countertop swaps that don’t touch systems or structure — don’t need a permit, so there’s no risk there. But for any electrical, plumbing, or structural changes, pulling the permit upfront is far cheaper than fixing an unpermitted remodel later.
Q: Does the homeowner or contractor pull the kitchen remodel permit?

A: In most cases the contractor pulls the permit, which is the safer option because they’re responsible for the work meeting code and carry accountability for inspections. Homeowners can apply directly as an owner-builder, but this transfers liability to them. Be cautious of any contractor who suggests skipping permits — a reputable contractor handles the permit process as part of the job.
Q: Do I need a permit to remove a kitchen wall in Sacramento?

A: Yes, removing or modifying a wall in a Sacramento kitchen always requires a permit, and the city may require submitted plans verifying whether the wall is load-bearing. Structural changes carry more review than non-structural remodels and often need a licensed professional’s plans. It’s safest to assume a wall is load-bearing until a professional confirms otherwise.

Standard Kitchen Counter Height & Depth: The Complete Dimensions Guide

Опубликовано: June 25, 2026 в 6:04 am

Автор:

Категории: All,Kitchen

When homeowners start planning a kitchen, counter height and depth are usually the first real measurements they need — and they’re the ones that quietly determine how comfortable the whole kitchen feels to work in. Stand at a counter that’s the wrong height for an hour of meal prep and your back will tell you about it. After 25 years remodeling kitchens across the Sacramento area, I’ve set thousands of counters to the standard dimensions, and I’ve also customized plenty for taller and shorter households. I’m Eugene Chernioglo, and here’s everything you need to know about standard kitchen counter height and depth.

Standard Kitchen Counter Height: 36 Inches

The standard kitchen counter height is 36 inches from the floor to the top of the countertop. This number is the result of a 34.5-inch-tall base cabinet with a standard countertop on top, and it’s been the industry baseline for decades because it suits the comfortable working height of most adults. Everything else in the kitchen — your dishwasher, your range, your sink — is engineered to fit under or align with that 36-inch surface, which is why sticking close to standard keeps a remodel predictable.

Standard Kitchen Counter Depth: 25 to 26 Inches

Standard counter depth is 25 to 26 inches, measured from the wall to the front edge. That comes from a 24-inch-deep base cabinet plus a 1- to 2-inch overhang at the front. The overhang keeps spills off your cabinet doors and gives your knees a little clearance when you lean in to work. On islands, depth often increases because you have cabinets accessed from both sides or a seating overhang on one side.

Counter Height vs. Bar Height

This is where a lot of confusion comes in, so let’s make it simple. There are two common surface heights in a kitchen:

  • Counter height: 36 inches — the standard work surface, paired with 24- to 26-inch counter stools.
  • Bar height: 42 inches — a raised surface, paired with taller 28- to 30-inch bar stools.

A 36-inch island feels integrated and is easier for serving and prep, while a 42-inch bar creates a raised ledge that hides dishes and clutter from the adjoining living room. Many of the open-concept kitchens we build in Folsom and Roseville use a two-level island — 36 inches for the working side and a 42-inch raised bar for seating.

Countertop Thickness

Counter height assumes a standard slab thickness. Most quartz and granite countertops are 1.25 inches thick (3 cm), which is the standard we install for durability. A thinner 2 cm option exists and is sometimes used with a built-up edge to look thicker. The slab thickness is included in that 36-inch finished height, so it’s accounted for automatically when the cabinets are set at 34.5 inches.

When to Customize Counter Height

Standard works for most people, but counter height is one of the easier things to personalize during a remodel. If the primary cook is tall, raising the counter to 37 or 38 inches can save years of back strain — and because appliances have adjustable leveling feet, a one- to two-inch change rarely causes fit problems. If the cook is shorter, dropping slightly can make prep more comfortable. The key is deciding deliberately. When my team designs your kitchen, we ask who does the cooking and how tall they are, because a counter built around the actual cook is one of those details that makes a kitchen feel custom.

Getting Your Counter Dimensions Right

Standard kitchen counter height is 36 inches and standard depth is 25 to 26 inches — numbers that have stood the test of time because they fit how most people cook. Knowing them lets you plan your kitchen with confidence and spot when a custom adjustment is worth making. If you’re ready to bring those dimensions to life, my team at America’s Advantage Remodeling has been remodeling Sacramento-area kitchens since 2001. We handle everything in-house — design, cabinets, countertop fabrication, and installation — and we bring the samples to your home so you can see exactly how it all comes together. Reach out for a free in-home consultation.

Frequently Asked Questions

Q: What is the perfect height for kitchen counters?

A: The standard and most comfortable kitchen counter height is 36 inches from the floor, which suits the majority of people for everyday prep and cooking. This is achieved by setting a 34.5-inch base cabinet under a standard countertop. Some homeowners customize the height slightly — a bit lower for shorter cooks or a bit higher for taller ones — but 36 inches is the proven baseline that works for most kitchens.

Q: What depth is best for kitchen counters?

A: Standard kitchen counter depth is 25 to 26 inches, which comes from a 24-inch-deep base cabinet plus a 1- to 2-inch countertop overhang. This depth gives you enough workspace while keeping the back of the counter within easy reach. Deeper counters of 27 inches or more are sometimes used on islands or for a more generous prep surface, but 25 to 26 inches is the standard for perimeter counters.

Q: Is 24 inches considered counter height?

A: No, 24 inches is the depth of a standard base cabinet, not the counter height — the finished counter height is 36 inches from the floor. The confusion is common because cabinets are described by both depth and height. To be precise: a base cabinet is 24 inches deep and 34.5 inches tall, and once the countertop is added the surface sits at 36 inches.

Q: What is the standard size for a kitchen countertop?

A: A standard kitchen countertop sits 36 inches off the floor and is 25 to 26 inches deep, with the length determined by your cabinet run. Standard countertop slab thickness is typically 1.25 inches (3 cm) for quartz and granite, though 2 cm options exist. These dimensions are consistent across most kitchens, which is why prefabricated counters and standard cabinets fit together so predictably.

Q: What is bar height versus counter height?

A: Counter height is 36 inches and pairs with standard counter stools around 24 to 26 inches tall, while bar height is 42 inches and pairs with taller stools of 28 to 30 inches. Counter height feels more integrated with the kitchen and is easier for serving food, while bar height creates a raised divider that hides clutter from the adjoining room. Many Sacramento kitchens we remodel use a 36-inch island for prep with a section at 42 inches for seating.

Q: Is 37 inches too high for a kitchen countertop?

A: A 37-inch counter is slightly above the 36-inch standard but is acceptable, especially for taller households who find it more comfortable. The one-inch difference is minor and won’t cause appliance fit problems, since dishwashers and ranges have adjustable leveling feet. If you’re building for a tall cook, raising the counter an inch or two is a reasonable custom choice.

Q: What is the minimum depth of a kitchen counter?

A: The practical minimum counter depth is about 25 inches for a standard perimeter counter, matching the 24-inch base cabinet plus overhang. Going shallower than 24 inches limits usable workspace and may not accommodate standard appliances and sinks. For tight spaces, shallower 15- to 18-inch counters are sometimes used on a secondary wall, but the main work counter should stay at standard depth.

Inset Cabinets vs. Overlay: What’s the Difference and Are They Worth It?

Опубликовано: June 25, 2026 в 5:57 am

Автор:

Категории: All,Kitchen

When homeowners come into a kitchen project knowing they want a “high-end” or “custom” look but can’t put their finger on why some kitchens have it, the answer is often the cabinet door style. Inset cabinetry is one of the biggest drivers of that furniture-quality feel — and one of the most common things people ask me to explain versus the more affordable overlay options. After 25 years building kitchens across Sacramento, Roseville, and Folsom, I’ve installed both styles in hundreds of homes. I’m Eugene Chernioglo, and here’s the honest comparison so you can decide what’s right for your kitchen and your budget.

What Are Inset Cabinets?

Inset cabinets have doors and drawer fronts that fit flush inside the cabinet’s face frame, so when everything is closed the doors sit even with the frame around them. It’s the most traditional cabinet construction, and it produces a clean, built-in, furniture-like look that reads as craftsmanship. The reason it costs more is precision: every door has to be fitted exactly to its opening, with consistent gaps all the way around, which takes more skill and time to build and hang.

What Is Overlay (and Full Overlay)?

Overlay cabinets have doors that rest on top of the face frame rather than inside it. There are two kinds:

  • Standard (partial) overlay: the doors cover part of the frame, leaving a visible band of frame between doors. This is the most economical and traditional overlay style.
  • Full overlay: the doors cover nearly the entire frame, leaving only a thin reveal between them. This gives a sleek, modern look and is the style used on frameless European cabinets.

Overlay is more affordable than inset and, in full overlay, gives you that clean contemporary face with very little frame showing. It also tends to maximize the usable door size and storage opening.

Inset vs. Overlay: The Real Trade-Offs

Here’s how I lay it out for homeowners deciding between them. Inset gives you the most traditional, high-end, furniture-quality look — at the highest price, with slightly less interior storage and some sensitivity to humidity since flush wood doors can move with the seasons. Overlay gives you a more budget-friendly option with full overlay leaning modern and standard overlay leaning classic, with maximum storage and fewer fit issues. Neither is “better” — inset suits classic and transitional kitchens where the framed, built-in look is the whole point, while overlay suits contemporary designs and tighter budgets.

A Note on Cost and Construction

Inset is the priciest door style because of the precise construction it demands, and it’s always built on a framed cabinet — you can’t get a true inset look on frameless cabinets. If the inset look is your goal, you’re choosing framed, American-style construction. When my team helps a homeowner decide, we look at the kitchen’s overall style and the budget together: sometimes inset on a key run (like an island or a furniture-style hutch) with overlay elsewhere delivers the high-end feel without the full-kitchen inset price. That kind of mix is where an experienced in-house team earns its keep.

Which Should You Choose?

If you want a timeless, traditional, custom-quality kitchen and the budget supports it, inset cabinets deliver a look overlay simply can’t match. If you want a clean modern face or you’re managing cost, full overlay is an excellent choice, and standard overlay is the value option. The right answer comes down to your style and your budget — and there’s no wrong choice, just the one that fits your kitchen. If you’d like to see and feel the difference in person, my team at America’s Advantage Remodeling brings door samples right to your home. We’ve been building Sacramento-area kitchens since 2001, all in-house, and we’ll help you choose the door style that gives you the look you want at a price that works. Reach out for a free in-home consultation.

Frequently Asked Questions

Q: What is it called when cabinet doors are inset?

A: When cabinet doors sit flush inside the cabinet frame rather than on top of it, the style is called inset cabinetry. The doors and drawer fronts are set into the face frame so they’re even with it when closed, creating a clean, furniture-like look. Inset is considered the most traditional and high-end of the cabinet door styles, and it requires precise construction to fit each door exactly within its opening.

Q: What are the disadvantages of inset cabinets?

A: The main disadvantages of inset cabinets are higher cost, slightly reduced storage space, and sensitivity to humidity. Because the doors fit precisely inside the frame, they cost more to build, the face frame takes up a little interior room, and wood doors can stick or gap as they expand and contract with seasonal humidity. For most homeowners the trade-off is worth the premium look, but these are real factors to weigh.

Q: Are inset cabinets more expensive?

A: Yes, inset cabinets are more expensive than overlay cabinets, typically commanding a noticeable premium because they require more precise construction and tighter tolerances. Each door must be fitted exactly within its frame opening, which takes more skilled labor and material. The result is a high-end, custom look, but homeowners should expect inset to be the priciest of the door-mounting styles.

Q: Which is better, overlay or inset cabinets?

A: Neither is objectively better — it depends on your style and budget. Inset cabinets offer the most traditional, furniture-quality look at a higher price, while full overlay cabinets give a clean, modern appearance and maximize storage at a lower cost. Inset suits classic and transitional kitchens where the framed look is the goal; overlay suits contemporary kitchens and tighter budgets. A good remodeler matches the choice to your design and what you want to spend.

Q: What is the difference between inset and overlay cabinets?

A: The difference is where the doors sit: inset doors fit flush inside the cabinet face frame, while overlay doors rest on top of the frame, either partially (standard overlay) or covering nearly all of it (full overlay). Inset gives a traditional, built-in look and costs more; overlay is more affordable and, in full overlay, gives a sleek modern face with minimal frame showing. The mounting style affects both appearance and price more than function.

Q: Why do people like inset cabinets?

A: People like inset cabinets because they have a timeless, custom, furniture-like appearance that signals quality, with clean flush lines and visible, often decorative hardware. The precise fit reads as craftsmanship, and the style suits classic and transitional kitchens beautifully. For homeowners who want their kitchen to feel high-end and traditional, inset delivers a look that overlay cabinets can’t quite match.

Q: Are inset cabinets framed or frameless?

A: Inset cabinets are always framed — the inset style requires a face frame for the doors to be set into, so it is not available as a frameless (European) construction. Frameless cabinets, by definition, have no face frame and use full overlay doors. If you want the inset look, you’re choosing framed cabinet construction, which is the traditional American building method.

Kitchen Cabinet Sizes & Dimensions: A Sacramento Remodeler’s Complete Guide

Опубликовано: June 25, 2026 в 5:43 am

Автор:

Категории: All,Kitchen

After 25 years of remodeling kitchens across the Sacramento area — from older homes in Land Park to new builds in Folsom and Roseville — I’ve learned that almost every successful kitchen starts with one unglamorous thing: getting the cabinet dimensions right. Cabinets eat up the biggest chunk of your budget and define how the whole room functions, so understanding the standard sizes before you start planning puts you in control of the project instead of at the mercy of it.

This guide walks through every standard kitchen cabinet dimension — base, wall, and tall — in plain inches, plus how cabinets are measured and how to fit them into your actual space. I’m Eugene Chernioglo, and my in-house team has installed thousands of these in real Sacramento kitchens, so everything here comes from the field, not a catalog.

Why Cabinet Dimensions Matter More Than You Think

Cabinets aren’t just storage — they set the height of your countertops, the position of your backsplash, the clearance for your appliances, and the reach to your upper shelves. Get a dimension wrong and the ripple effect hits your plumbing, your electrical outlets, and your counter fabrication all at once. That’s why we measure obsessively before a single cabinet is ordered. The good news is that the industry has settled on a set of standard sizes, and once you know them, the whole kitchen becomes a predictable puzzle.

Standard Base Cabinet Dimensions

Base cabinets are the workhorses that sit on the floor and carry your countertop. The standards almost never change:

  • Depth: 24 inches without the countertop. With the overhang, finished depth is usually about 25–26 inches.
  • Height: 34.5 inches on their own, reaching 36 inches once the countertop is installed — the comfortable working height for most people.
  • Width: 9 to 48 inches, in 3-inch increments. Sink bases are typically 30, 33, or 36 inches wide.
  • Toe kick: the recessed notch at the bottom is standard at about 3.5 inches tall and 3 inches deep, so you can stand close to the counter comfortably.

In Sacramento’s older homes, we sometimes find the existing run was built non-standard decades ago, which is one reason a dated kitchen can feel slightly off. Switching to standard base cabinets during a remodel almost always improves both function and resale appeal.

Standard Wall Cabinet Dimensions

Wall cabinets (also called upper cabinets) mount above the counter and hold everyday dishes and glassware:

  • Depth: 12 inches is standard, though 15-, 18-, and 24-inch depths exist for cabinets above a refrigerator or for a deeper look.
  • Height: 12, 30, 36, or 42 inches. A 30-inch cabinet leaves space above for a soffit or open display; a 42-inch cabinet runs closer to an 8-foot ceiling for maximum storage.
  • Width: 9 to 48 inches, in the same 3-inch increments as base cabinets, so uppers and lowers line up cleanly.
  • Mounting height: wall cabinets are typically installed 18 inches above the countertop — the sweet spot for reach and appliance clearance.

Standard Tall Cabinet Dimensions

Tall cabinets — pantries, utility cabinets, and oven cabinets — run from the floor up:

  • Height: 84, 90, or 96 inches, chosen to match your ceiling and your wall cabinet height.
  • Depth: either 12 inches (to align with wall cabinets) or 24 inches (to align with base cabinets), depending on the use.
  • Width: commonly 18, 24, or 36 inches for pantries and oven cabinets.

How Cabinets Are Measured and Labeled

Cabinet sizes are always written as width × height × depth, in inches. Manufacturers use shorthand codes — a “B24” is a 24-inch-wide base cabinet, a “W3030” is a 30-inch-wide, 30-inch-tall wall cabinet. When you understand that depth and height are usually fixed and width is the variable you’re choosing, reading a cabinet order or a kitchen plan suddenly makes sense. When my team measures your kitchen, we record wall lengths, ceiling height, and the exact location of every window, door, outlet, and plumbing rough-in, because those fixed points determine which standard widths fit where.

Planning Cabinet Sizes for Your Space

Here’s how we approach a real Sacramento kitchen. We start by mapping the immovable elements — the sink location, the range, the refrigerator opening, and the windows. Base cabinets fill the floor run first, using standard widths and a filler strip to close any leftover gap of an inch or two. Wall cabinets then stack above, aligned to the bases. Tall cabinets anchor the ends or frame the refrigerator. Because every choice here affects how your new kitchen cabinets meet the counter, the plumbing, and the electrical, this is exactly the stage where working with an experienced in-house team prevents the costly “we have to reorder” moment that plagues so many remodels.

If you’re weighing custom versus stock cabinets, the dimensions above apply to both — the difference is that custom cabinetry can fill odd dimensions exactly, while stock relies on standard widths plus fillers. For most Sacramento kitchens, a thoughtful mix delivers the best value, and our team helps you decide where custom is worth it and where it isn’t.

Bringing It All Together

Standard cabinet dimensions are the foundation every great kitchen is built on — 24-inch-deep bases at 36 inches finished height, 12-inch-deep wall cabinets at 30 to 42 inches, and tall cabinets from 84 to 96 inches. Once you know the numbers, you can plan with confidence and have a far more productive conversation with your remodeler. If you’re ready to turn those measurements into a real, functional kitchen, my team at America’s Advantage Remodeling has been doing exactly that for Sacramento-area families since 2001. We bring the samples to you, measure everything ourselves, and handle the entire project in-house — design, cabinets, counters, and installation — with no subcontractors. Reach out for a free in-home consultation and we’ll help you get every dimension right the first time.

Frequently Asked Questions

Q: What are standard kitchen cabinet sizes?

A: Standard base cabinets are 24 inches deep, 34.5 inches tall (36 inches with countertop), and come in widths from 9 to 48 inches in 3-inch increments. Wall cabinets are 12 to 24 inches deep, with heights of 12, 30, 36, or 42 inches. Tall pantry and utility cabinets run 84, 90, or 96 inches high. These dimensions are consistent across most American cabinet manufacturers, which makes planning a remodel predictable.

Q: What is the standard size of a kitchen wall cabinet?

A: Standard wall cabinets are 12 inches deep and most commonly 30 or 36 inches tall, with 42-inch cabinets used when homeowners want storage closer to the ceiling. Widths range from 9 to 48 inches in 3-inch steps. The right height depends on your ceiling height and whether you want a soffit, open space, or cabinets running all the way up.

Q: What size is a kitchen cabinet in inches?

A: A standard base cabinet is 24 inches deep and 34.5 inches tall before the countertop, reaching 36 inches once the counter is installed. Wall cabinets are 12 inches deep, and widths for both run from 9 to 48 inches. Cabinet depth almost never changes, but width and height options give you flexibility to fit any kitchen layout.

Q: How is cabinet size measured?

A: Cabinet sizes are listed as width × height × depth, always in that order and always in inches. For example, a “B24” base cabinet is 24 inches wide, with the standard 34.5-inch height and 24-inch depth assumed. When measuring your space, record wall length, ceiling height, and the location of windows, doors, and plumbing so the layout accounts for every obstacle.

Q: How do I choose the right cabinet size?

A: Start with your wall measurements and the fixed points in the room — windows, appliances, plumbing, and doorways — then fill the space with standard cabinet widths in 3-inch increments. Base cabinets anchor the layout, wall cabinets follow above, and filler strips close any small gaps. Because cabinet choices affect plumbing, electrical, and counter fit at once, this is the stage where an experienced remodeler prevents expensive mistakes.

Q: How many cabinets fit in a 10×10 kitchen?

A: A standard 10×10 kitchen typically holds about 10 to 12 cabinets — a mix of base and wall units — which is why “10×10” became the industry’s baseline for comparing cabinet pricing. The exact count depends on your layout, appliance placement, and whether you include a pantry or island. The 10×10 figure is a useful starting reference, but every real kitchen varies once windows and doors are factored in.

Q: What is the 1/3 rule for cabinets?

A: The 1/3 rule suggests dividing kitchen storage so roughly one-third serves each main zone — prep, cooking, and cleanup — so cabinets and drawers sit where you use their contents. It’s a planning guideline, not a building code, and a good designer applies it alongside your cooking habits. The goal is storage that matches how your family really moves through the kitchen.

Standard Kitchen Cabinet Heights: How Tall Should Your Cabinets Be?

Опубликовано: June 25, 2026 в 5:12 am

Автор:

Категории: All,Kitchen

Of all the measurements that go into a kitchen, cabinet height is the one homeowners ask me about most — and for good reason. It decides how comfortably you reach your dishes, how much storage you get, and whether the room feels open or closed in. After 25 years remodeling kitchens across Sacramento, Roseville, and Folsom, I can tell you that getting cabinet heights right is the difference between a kitchen that feels custom-built and one that feels slightly off without anyone being able to say why. I’m Eugene Chernioglo, and this guide breaks down every standard cabinet height in plain inches.

Standard Base Cabinet Height

Base cabinets are standardized at 34.5 inches tall on their own. Once your countertop is installed on top, the finished working surface sits at 36 inches off the floor — the comfortable counter height for the majority of people. That 36-inch number is the anchor the rest of the kitchen is measured from, including where your wall cabinets get mounted. The toe kick at the bottom accounts for about 3.5 of those inches, with the cabinet box making up the rest.

Standard Wall (Upper) Cabinet Heights

Wall cabinets come in three standard heights, and choosing between them is mostly about your ceiling and how much storage you want:

  • 30 inches: the most common choice for 8-foot ceilings, leaving roughly 18 inches of open space above for a soffit, crown molding, or display area.
  • 36 inches: a middle option that adds storage and reduces the gap above to about 12 inches on an 8-foot ceiling.
  • 42 inches: the maximum-storage choice that reaches nearly to an 8-foot ceiling, or pairs well with 9-foot ceilings. The top shelf needs a step stool but the extra capacity is significant.

There’s also a 12- or 15-inch short cabinet used above refrigerators and over ranges, where a full-height cabinet won’t fit.

The 18-Inch Rule: Counter-to-Cabinet Clearance

The standard clearance between your countertop and the bottom of your wall cabinets is 18 inches. This is the sweet spot — enough room to use a stand mixer or coffee maker on the counter, but close enough that the upper shelves stay within reach. Some homeowners stretch this to 20 inches for a more open feel or to accommodate a taller backsplash, but going below 15 inches makes the counter feel cramped. When my team installs your cabinets, we set this clearance based on your height and how you actually cook.

Standard Tall Cabinet Heights

Pantry and utility cabinets are made in three standard heights — 84, 90, and 96 inches — so they can align cleanly with the top of your wall cabinets for a built-in look. A 96-inch tall cabinet reaches an 8-foot ceiling exactly, while 84-inch versions pair with 30-inch wall cabinets mounted at standard height.

How Ceiling Height Changes Everything

Your ceiling height is the single biggest factor in choosing cabinet height. On a standard 8-foot ceiling, 30-inch uppers leave a tidy gap, 36-inch uppers leave a smaller one, and 42-inch uppers nearly close it. On a 9- or 10-foot ceiling, you have a choice: run 42-inch cabinets and leave open space above, stack a second row of glass-front cabinets for display, or build the cabinets all the way up with a soffit or trim. In many older Sacramento homes we work in, ceilings are exactly 8 feet, which is why the 30- and 36-inch options come up most often. In the newer Folsom and Roseville builds, taller ceilings open up more dramatic options.

Choosing the Right Height for Your Kitchen

There’s no universally “correct” cabinet height — there’s the right height for your ceiling, your storage needs, and your reach. A shorter household might prefer 30-inch uppers so the top shelf stays usable; a family that needs maximum storage might go 42-inch and accept the step stool. The key is making this decision deliberately, with all the measurements in front of you, rather than defaulting to whatever the showroom display happened to use. If you’d like help thinking it through, my team at America’s Advantage Remodeling brings cabinet samples and measurements right to your home. We’ve been remodeling Sacramento-area kitchens since 2001, all in-house, and we’ll make sure your cabinet heights fit both your ceiling and the way you live. Reach out for a free in-home consultation.

Frequently Asked Questions

Q: What is a normal height for kitchen cabinets?

A: Standard base cabinets are 34.5 inches tall on their own and 36 inches with the countertop, while wall cabinets are most often 30, 36, or 42 inches tall and mounted 18 inches above the counter. Tall pantry cabinets run 84 to 96 inches. These heights are consistent across most manufacturers, so a normal kitchen has its counters at 36 inches and its upper cabinets reaching 54 to 90 inches off the floor depending on the cabinet chosen.

Q: Are 42 inch cabinets too tall?

A: No, 42-inch wall cabinets are not too tall — they are a popular choice for 9-foot ceilings and for homeowners who want maximum storage that reaches nearly to the ceiling. The top shelf will require a step stool, but the extra storage is usually worth it. For standard 8-foot ceilings, 42-inch uppers leave little or no gap above, which gives a clean, built-in look many homeowners prefer.

Q: Is 36 inch cabinet height standard?

A: Yes, 36-inch wall cabinets are one of the standard heights and a common choice for 8-foot ceilings, leaving roughly a 12- to 15-inch gap above for a soffit, crown molding, or open space. The other standard wall cabinet heights are 30 and 42 inches. The right choice depends on your ceiling height and whether you want cabinets to reach the ceiling or leave display space above.

Q: What is the difference between 30 and 36 inch kitchen cabinets?

A: The difference is six inches of vertical storage and how close the cabinets come to the ceiling. A 30-inch wall cabinet leaves more space above for a soffit or open display and adds about one fewer shelf, while a 36-inch cabinet provides more storage and a fuller look. On an 8-foot ceiling, 30-inch cabinets typically leave an 18-inch gap and 36-inch cabinets leave about 12 inches.

Q: What is the minimum height between counter and upper cabinets?

A: The standard clearance between the countertop and the bottom of wall cabinets is 18 inches, which gives you room to use small appliances and work comfortably. Some homeowners go up to 20 inches for extra openness or to fit taller backsplash appliances. Going below 15 inches makes the counter feel cramped and limits appliance use.

Q: Can kitchen cabinets be too high?

A: Yes, wall cabinets mounted too high become hard to reach and leave usable storage out of practical range, while cabinets mounted too low crowd the countertop. The standard 18-inch clearance above the counter balances reach and workspace for most people. A good remodeler adjusts mounting height to the homeowner’s height and how the kitchen will actually be used.

Q: What is the average height of kitchen cabinets?

A: On average, base cabinets bring the counter to 36 inches off the floor, and wall cabinets are mounted with their bottom edge 54 inches off the floor (36-inch counter plus 18-inch clearance). The top of a standard 30-inch wall cabinet lands at 84 inches, while a 42-inch cabinet reaches 96 inches — right at an 8-foot ceiling. These averages hold across most American kitchens.

Kitchen Soffits: What They Are, Whether to Remove Them, and How to Update Them

Опубликовано: June 25, 2026 в 4:59 am

Автор:

Категории: All,Kitchen

If you’ve got a kitchen built in the 1980s or 1990s — and a lot of homes around Sacramento, Citrus Heights, and Carmichael are — there’s a good chance you’re staring at a soffit right now and wondering whether it has to be there. It’s one of the most common questions I get, and the honest answer is: it depends on what’s inside. After 25 years of opening up these boxes in real kitchens, I can walk you through what a soffit is, what’s usually hiding in it, and your options — whether that’s removing it for taller cabinets or turning it into something that looks intentional. I’m Eugene Chernioglo, and here’s the straight story on kitchen soffits.

What Is a Kitchen Soffit?

A kitchen soffit is the boxed-in section that fills the gap between the top of your wall cabinets and the ceiling. You’ll also hear it called a bulkhead or a cabinet drop. In most homes it’s a hollow drywall box, but its job varies: sometimes it hides ductwork, plumbing vents, or electrical wiring, and sometimes it’s purely there to close off the dust-collecting gap above cabinets so the kitchen looks finished. Understanding which kind you have is the whole ballgame when it comes to deciding what to do with it.

What’s Actually Inside Your Soffit?

This is the question that determines everything, and there’s only one reliable way to answer it: open a small exploratory section and look. Inside, we typically find one of these:

  • Empty space — the soffit is a hollow box built only to fill the gap. This is the easiest case and the best candidate for removal.
  • Electrical wiring — often relocatable without major work.
  • Plumbing vent pipes — these can sometimes be rerouted, which adds cost and complexity.
  • HVAC ductwork — the most involved to relocate, and sometimes the reason a soffit stays.
  • Structural framing — occasionally the soffit is doing a structural job and must be handled carefully.

In a lot of older Sacramento homes, the soffit turns out to be hollow, which makes for a satisfying, relatively straightforward removal. But I never promise that until we’ve looked — guessing wrong is exactly how a “quick” job turns into an expensive surprise.

Should You Remove Your Kitchen Soffit?

Removing the soffit opens up the space above your cabinets, lets you install taller cabinets for more storage, and instantly makes a dated kitchen feel taller and more modern. If the soffit is empty or only hides minor wiring, removal is usually well worth it. If it conceals ductwork or plumbing, the decision becomes a cost-benefit conversation — the payoff is the same open, updated look, but the work to get there is greater. Because soffit removal is most cost-effective when you’re already replacing cabinets, it’s a decision best made as part of a full kitchen remodel rather than as a standalone project.

What to Do With a Soffit You Can’t Remove

Sometimes the ductwork or plumbing inside makes removal impractical — and that’s okay, because a soffit can be turned from an eyesore into a feature. Here are the approaches my team uses:

  • Wrap it to match the cabinets so it reads as built-in millwork instead of leftover drywall.
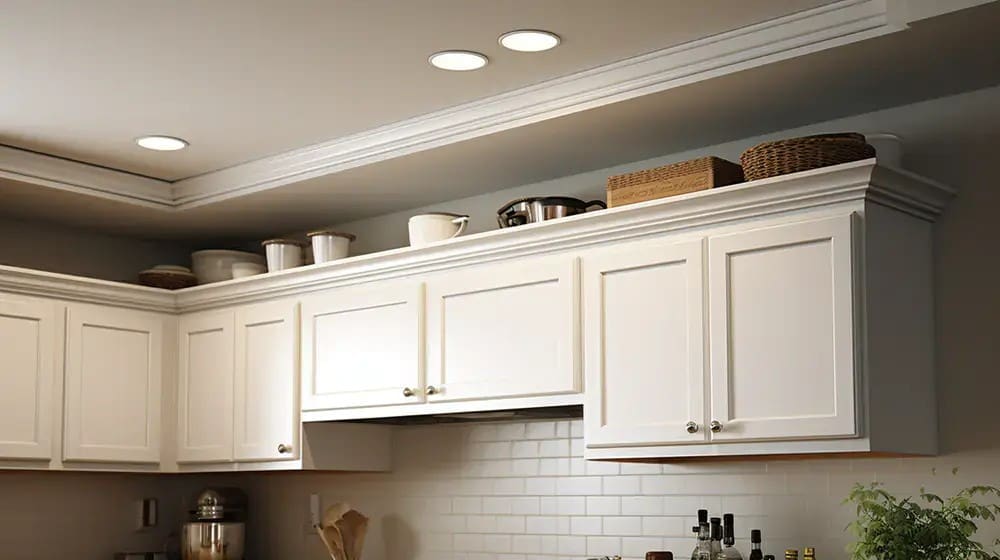
  • Add crown molding to blend the soffit into the cabinetry for a finished, custom look.
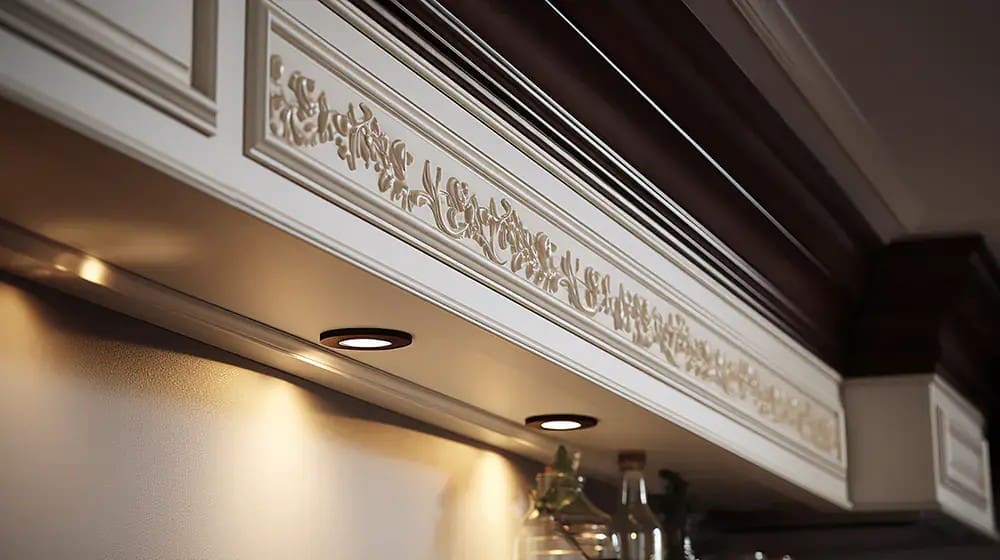
  • Turn the face into a display ledge or run accent lighting along it to make it intentional.
  • Paint it to match the ceiling so it visually recedes.

Done well, a soffit stops looking like something you settled for and starts looking like something you chose.

Making the Right Call for Your Kitchen

A kitchen soffit isn’t automatically something to rip out or something to live with — it’s a decision that depends entirely on what’s inside and what look you’re after. The smart first move is always to open it up and find out. If you’re weighing what to do with the soffit in your kitchen, my team at America’s Advantage Remodeling has been removing, rerouting, and reimagining them in Sacramento-area kitchens since 2001. We do all the work in-house — demolition, any duct or plumbing rerouting, cabinets, and finishing — so there’s one accountable team from the first exploratory cut to the final crown molding. Reach out for a free in-home consultation and we’ll tell you exactly what your soffit is hiding.

Frequently Asked Questions

Q: What is the purpose of a soffit in a kitchen?

A: A kitchen soffit is the boxed-in section between the top of your wall cabinets and the ceiling, and its original purpose was usually to hide ductwork, plumbing, or electrical wiring, or simply to fill the gap above cabinets so dust couldn’t collect. In some homes it’s purely decorative or structural framing. Whether it can be removed depends on what’s inside it, which is why an experienced remodeler always opens an exploratory section before promising removal.

Q: Should I remove the soffit above my kitchen cabinets?

A: Removing a kitchen soffit is worth it if it’s empty or only hides minor wiring, because it lets you install taller cabinets and makes the kitchen feel more open and updated. However, if the soffit conceals ductwork, a plumbing vent, or structural framing, removal becomes more involved and costly. The right call depends on what’s inside, so the first step is always to open a small section and look before committing.

Q: How much does it cost to remove kitchen soffits?

A: Removing an empty kitchen soffit is a relatively minor job, while a soffit hiding ductwork, plumbing, or wiring costs more because those utilities must be rerouted. The price also depends on whether you’re replacing cabinets at the same time, since soffit removal is most cost-effective when done as part of a full remodel. For an accurate number, a remodeler needs to see what the soffit contains — which is why we open an exploratory section before quoting.

Q: What is behind a kitchen soffit?

A: Behind a kitchen soffit you might find empty space, electrical wiring, plumbing vent pipes, HVAC ductwork, or structural framing — it varies by home. Many soffits, especially in older Sacramento houses, are simply hollow boxes built to close the gap above cabinets. The only way to know for certain is to open a small section, which determines whether removal is a simple job or requires rerouting utilities.

Q: Can you remove a soffit without removing cabinets?

A: In many cases yes, a soffit can be removed without taking out the existing cabinets, though it requires careful work to protect them and patch the ceiling and wall afterward. However, soffit removal is often done alongside a cabinet upgrade because the open space above old cabinets looks unfinished, and installing taller cabinets makes the most of the newly opened height. A remodeler can advise which approach makes sense for your kitchen.

Q: Are kitchen soffits outdated?

A: Kitchen soffits aren’t inherently outdated, but the dated, hollow drywall boxes common in 1980s and 1990s kitchens often make a space feel older and lower. Removing the soffit for taller cabinets, or refinishing it to look intentional, both modernize the kitchen. The best choice depends on what’s inside the soffit and your overall design — sometimes a well-finished soffit with crown molding looks deliberately built-in rather than dated.

Q: What can I do with a soffit I can’t remove?

A: If a soffit can’t be removed because it hides ductwork or plumbing, you can make it look intentional by wrapping it with the same finish as the cabinets, adding crown molding to blend it in, running it as a shelf or display ledge, or installing accent lighting along it. The goal is to make the soffit read as a designed feature rather than leftover framing. A skilled remodeler can turn an unremovable soffit into an asset.

Luxury Kitchen Design: The Elements That Make a Kitchen Feel High-End

Опубликовано: May 21, 2026 в 11:58 am

Автор:

Категории: All,Kitchen

Luxury Kitchen Design: The Elements That Make a Kitchen Feel High-End

A luxury kitchen isn’t defined by how much you spend — it’s defined by a set of design choices: premium materials, custom or custom-look cabinetry, integrated high-performance appliances, a generous island, statement lighting, and a relentless attention to detail and proportion. Get those elements right and a kitchen reads as high-end whether the budget is large or carefully prioritized. Get them wrong and even an expensive kitchen can feel builder-grade.

If you want your kitchen to feel upscale and custom rather than ordinary, here are the elements that actually create that high-end feeling — and which ones deliver the most impact.

1. Premium Materials, Used Intentionally

Luxury starts with materials: natural stone counters (quartzite, marble, or high-end quartz), a statement backsplash that runs to the ceiling, real wood or high-quality cabinetry, and quality flooring. The key isn’t using expensive materials everywhere — it’s choosing a few standout surfaces and letting them shine. A single dramatic island waterfall edge or a full-height stone backsplash often does more than scattering premium finishes throughout.

2. Custom (or Custom-Look) Cabinetry

Nothing signals luxury like cabinetry that fits the space perfectly — floor-to-ceiling cabinets, integrated panels, hidden hardware, and clean, intentional lines. Custom cabinetry eliminates the filler strips and awkward gaps that make a kitchen feel builder-grade. Even semi-custom cabinetry, designed and installed precisely, can achieve the same tailored look.

3. A Generous, Well-Designed Island

The island is the heart of a luxury kitchen. A larger island with seating, a waterfall edge, or a contrasting finish becomes the room’s centerpiece. Beyond looks, a luxury island is *functional* — ample prep space, storage, and often a prep sink or beverage center built in.

4. Integrated, High-Performance Appliances

Luxury kitchens favor professional-grade appliances and, increasingly, integrated ones — refrigerators and dishwashers hidden behind cabinet panels for a seamless look. A statement range or range hood can also serve as a focal point. The goal is appliances that perform beautifully and either disappear or stand proudly as design features.

5. Statement Lighting

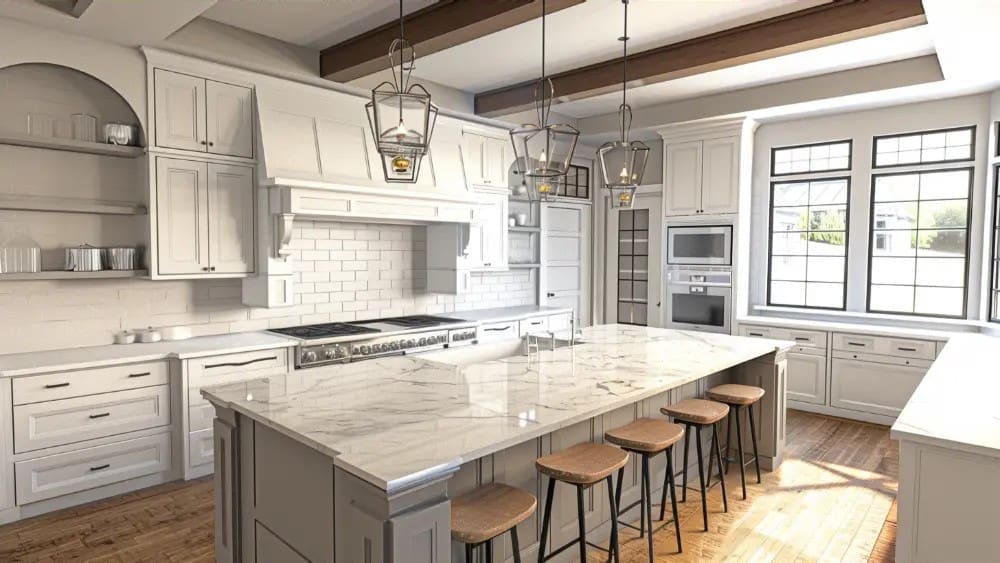
Layered, intentional lighting separates luxury kitchens from ordinary ones: sculptural pendants over the island, recessed lighting for overall illumination, under-cabinet lighting for prep, and often accent lighting inside glass cabinets. Lighting on dimmers lets the kitchen shift from bright workspace to warm gathering space.

6. Thoughtful Storage and Organization

A hallmark of luxury is that everything has a place: deep drawers with custom dividers, a walk-in or built-in pantry, appliance garages that hide small appliances, and pull-out organization. A clutter-free kitchen *feels* expensive because the design did the work of hiding the mess.

7. Details and Proportion

Finally, luxury lives in the details: quality hardware, well-chosen faucets, consistent finishes, and — most importantly — proportion. Cabinets that reach the ceiling, balanced spacing, and a layout that flows are what make a kitchen feel designed rather than assembled. These details cost relatively little but make an outsized difference.

You Don’t Need an Unlimited Budget

Here’s the truth most homeowners don’t realize: a kitchen that *feels* luxurious is more about smart prioritization than raw spending. Investing in a few high-impact elements — a stunning island, full-height backsplash, ceiling-height cabinets, great lighting — and keeping the rest clean and intentional often reads as more luxurious than spreading the budget thin across everything. The skill is knowing where to spend and where to hold back.

How We Design High-End Kitchens in Sacramento

At America’s Advantage Remodeling, we’ve designed and built upscale kitchens across Sacramento, Roseville, Folsom, and El Dorado Hills since 2001. Creating a luxury feel is about getting the proportions, materials, and details exactly right — and showing you the result before you commit. We model your kitchen in 3D so you can see the island, the cabinetry lines, the lighting, and the finishes working together, and our in-house team builds it to that standard.

Want a Kitchen That Feels Custom and High-End?Luxury is in the details and the proportions — and those are hard to judge from a mood board. Our Sacramento-area design team will model your high-end kitchen in 3D so you can see the materials, the island, and the lighting working together before you invest a dollar in the build. Call 916-507-0469 or request your free design consultation. Serving Roseville, Sacramento, Folsom, El Dorado Hills, and surrounding areas since 2001.

Frequently Asked Questions

What makes a kitchen look luxurious?

A kitchen looks luxurious through premium materials used intentionally, custom or custom-look cabinetry with clean lines, a generous well-designed island, integrated high-performance appliances, layered statement lighting, and careful attention to proportion and detail. It’s the combination and execution of these elements — not just expensive finishes — that create a high-end feel.

How can I make my kitchen look high-end on a budget?

Focus your budget on a few high-impact elements: a standout island, a full-height backsplash, ceiling-height cabinets, quality hardware, and layered lighting, while keeping everything else clean and intentional. Smart prioritization and clutter-free organization often read as more luxurious than spreading a budget thin across the entire kitchen.

What countertops are used in luxury kitchens?

Luxury kitchens often use natural stone like quartzite or marble, high-end quartz, or dramatic statement slabs, frequently with details like a waterfall island edge or full-height backsplash. The choice depends on the look and maintenance preference, but the surface is usually treated as a focal design element rather than just a work surface.

Are integrated appliances worth it in a luxury kitchen?

Integrated appliances, which hide refrigerators and dishwashers behind cabinet panels, are a hallmark of luxury kitchen design because they create a seamless, custom look. They’re worth it for homeowners who want a clean, uninterrupted aesthetic, though professional-grade statement appliances can also serve as intentional focal points.

What is the most important element of a luxury kitchen?

The island and overall proportion are often the most important elements of a luxury kitchen. A generous, well-designed island anchors the room as a functional centerpiece, while correct proportions — like ceiling-height cabinets and balanced layout — are what make a kitchen feel designed and high-end rather than assembled.

What lighting is best for a luxury kitchen?

Luxury kitchens use layered lighting: sculptural statement pendants over the island, recessed lighting for general illumination, under-cabinet lighting for prep, and often accent lighting inside glass cabinets. Putting the lights on dimmers allows the kitchen to shift from a bright workspace to a warm entertaining space.

How do I make custom cabinets look high-end?

To make cabinetry look high-end, run cabinets to the ceiling, eliminate filler gaps, use hidden or minimal hardware, keep lines clean and consistent, and ensure precise installation. Even semi-custom cabinetry achieves a luxury look when it’s designed to fit the space exactly and installed with attention to detail and proportion.

What is the kitchen work triangle in luxury design?

The kitchen work triangle is the principle that the sink, stove, and refrigerator should form an efficient triangle so the cook moves easily between them. In luxury kitchens it is often expanded into defined zones for prep, cooking, cleanup, and storage, but the underlying goal of effortless flow stays central to a high-end design.

How big is a luxury kitchen?

There is no fixed size for a luxury kitchen — proportion and layout matter more than square footage. Many high-end kitchens run 200 square feet or larger to accommodate a generous island and zones, but a smaller kitchen can feel luxurious through quality materials, ceiling-height cabinetry, and a well-planned layout. Execution, not size, defines luxury.

About the Author

This guide was written by Eugene Chernioglo, owner of America’s Advantage Remodeling, a licensed kitchen and home remodeling contractor (CSLB #1036517) serving Roseville, Sacramento, Folsom, El Dorado Hills, and the surrounding area since 2001. AAR holds a 4.9-star rating across 225+ Google reviews and an A+ rating with the BBB. Eugene and the AAR team handle design, fabrication, and installation in-house, giving homeowners a single accountable partner from the first 3D rendering to the final walkthrough.

2026 Kitchen Cabinet Color Trends: What’s In (and What Lasts)

Опубликовано: May 19, 2026 в 11:56 am

Автор:

Категории: All,Kitchen

2026 Kitchen Cabinet Color Trends: What’s In (and What Lasts)

The biggest kitchen cabinet color trends for 2026 move away from the all-cool-gray era toward warmth and nature: soft warm whites and creams, earthy greens, natural and stained woods, moody blues, and rich two-tone combinations. The throughline is warmth and personality — homeowners are trading sterile, matchy kitchens for spaces that feel inviting and individual. The best part: most of these trending colors are also timeless, so choosing one doesn’t mean dating your kitchen in three years.

If you’re planning a remodel and want a color that feels current *and* lasts, here are the 2026 cabinet colors worth considering — and how to choose one you won’t regret.

1. Warm Whites and Creams

Crisp, cool white is giving way to warm whites, creams, and soft off-whites. They keep a kitchen bright and open but feel cozier and less clinical than the stark whites of the last decade. These shades are about as timeless as it gets and pair with almost any countertop, floor, and hardware.

2. Earthy and Sage Greens

Green is the standout color of 2026 — especially soft sage, olive, and deeper forest greens. Green reads as calming and natural, works beautifully on lower cabinets or an island, and pairs gorgeously with warm woods and brass hardware. It’s bold enough to feel current but grounded enough to last.

3. Natural and Stained Wood

After years of painted-everything, natural and stained wood cabinets are back — warm oak, walnut tones, and rift-cut woods. Wood brings texture and warmth that paint can’t, and it’s increasingly paired with a painted color in two-tone designs. This is one of the strongest 2026 directions.

4. Moody Blues

Navy and deeper blues continue to be popular, especially on islands and lower cabinets. Blue is friendly, classic, and works across coastal, traditional, and modern kitchens. For 2026, the trend leans slightly moodier and more saturated than the brighter navies of a few years ago.

5. Two-Tone Combinations

Two-tone kitchens — typically a warm neutral up top with a richer color or wood below, or a contrasting island — remain one of the strongest directions. They add depth and let you bring in a trending color without committing the whole room to it.

6. Soft Black and Charcoal Accents

Black and charcoal continue as accent colors — on an island, a pantry wall, or lower cabinets — paired with lighter tones. Used in moderation, they add sophistication and contrast without making a kitchen feel heavy.

How to Choose a Color That Won’t Date

The secret to a timeless kitchen isn’t avoiding trends — it’s anchoring with a neutral and adding one personality color. Keep your most permanent, expensive elements (cabinets, counters) in durable warm neutrals or natural wood, and express the trend through one accent: a green island, navy lowers, brass hardware. That way the bones stay current for years, and refreshing the look later is easy.

It’s also worth seeing any color in *your* kitchen’s actual light. A green that looks perfect in a showroom can read very differently under your lighting, against your floors, with your countertop. This is where guessing gets expensive.

How We Help Sacramento Homeowners Choose Cabinet Colors

At America’s Advantage Remodeling, we’ve designed kitchens across Sacramento, Roseville, and Folsom since 2001, and color is one of the decisions homeowners stress about most. We model your chosen colors in 3D in your actual kitchen — under your lighting, against your floors and counters — so you can see exactly how a 2026 trend color will read in your space before a single cabinet is painted or ordered.

See Your 2026 Cabinet Color Before You CommitA trending color is only right if it works in *your* kitchen, under *your* light. Our Sacramento-area design team models your cabinet colors in 3D against your actual space, so you choose with confidence — not from a paint chip and a hope. Call 916-507-0469 or request your free design consultation. Serving Roseville, Sacramento, Folsom, El Dorado Hills, and surrounding areas since 2001.

Frequently Asked Questions

What kitchen cabinet colors are trending for 2026?

The top 2026 kitchen cabinet color trends are warm whites and creams, earthy and sage greens, natural and stained woods, moody blues, two-tone combinations, and soft black or charcoal accents. The overall direction is toward warmth and personality, moving away from the all-cool-gray look of recent years.

Is gray still in style for kitchen cabinets in 2026?

Cool gray is fading as the dominant cabinet color in 2026, replaced by warmer neutrals like creams, greiges, and natural woods. Gray hasn’t disappeared, but warmer, earthier tones now feel more current. If you have gray cabinets, warming up the surrounding finishes keeps the look fresh.

What is the most timeless kitchen cabinet color?

Warm white and off-white are the most timeless kitchen cabinet colors because they stay bright, pair with almost any countertop and floor, and rarely look dated. Natural wood tones are similarly enduring. Anchoring with a timeless neutral and adding one trend accent color is the safest long-term approach.

What cabinet color makes a kitchen look bigger?

Light cabinet colors like warm white, cream, and soft greige make a kitchen look bigger because they reflect more light and create an open, airy feeling. If you want a darker color, placing it on the lower cabinets or island while keeping the uppers light preserves that sense of space.

Are green kitchen cabinets a trend that will last?

Sage and earthy greens are a leading 2026 trend, and softer, muted greens tend to have staying power because they read as calming and natural rather than bold or novelty. Using green on an island or lower cabinets, paired with neutral uppers, is a low-risk way to embrace the trend.

Should kitchen cabinets be lighter or darker than the walls?

Kitchen cabinets are usually lighter than or in contrast to the walls, but there’s no strict rule. A common approach is light cabinets with slightly darker or neutral walls for an open feel, or darker cabinets against light walls for contrast. What matters most is balance and how the colors read under your kitchen’s lighting.

How do I pick a cabinet color that won’t go out of style?

Anchor your kitchen with a timeless neutral or natural wood on the cabinets and counters, then express current trends through easily changed accents like hardware, an island color, or paint. This keeps your most expensive, permanent elements current for years while letting you refresh the look affordably over time.

Are white kitchen cabinets out of style for 2026?

No, white kitchen cabinets are not out of style for 2026 — warm whites and creams remain a top choice. What has shifted is the tone: bright, cool, stark whites are giving way to softer, warmer whites that pair with natural wood and earthy accents. White stays the safest, most timeless cabinet color.

Which kitchen cabinet color looks outdated?

Cool, flat gray and the orange-toned honey oak of the ‘80s and ‘90s read as the most dated cabinet colors heading into 2026, and very stark, cold whites can also feel out of step. Warming up the palette with creams, natural woods, or muted greens is the simplest way to keep a kitchen current.

About the Author

This guide was written by Eugene Chernioglo, owner of America’s Advantage Remodeling, a licensed kitchen and home remodeling contractor (CSLB #1036517) serving Roseville, Sacramento, Folsom, El Dorado Hills, and the surrounding area since 2001. AAR holds a 4.9-star rating across 225+ Google reviews and an A+ rating with the BBB. Eugene and the AAR team handle design, fabrication, and installation in-house, giving homeowners a single accountable partner from the first 3D rendering to the final walkthrough.

Soapstone Countertops: Pros, Cons, and Care (2026 Guide)

Опубликовано: May 19, 2026 в 11:51 am

Автор:

Категории: All

Soapstone Countertops: Pros, Cons, and Care (2026 Guide)

Soapstone countertops are a natural stone surface with a soft, matte finish and a distinctive dark gray-to-charcoal color that often develops green or blue undertones. Their biggest advantages are that they’re completely non-porous (so they never need sealing and resist stains), highly heat-resistant, and develop a beautiful aged patina over time. The trade-offs: soapstone is softer than granite or quartz, so it can scratch — though scratches sand out easily — and the color naturally darkens with age. For homeowners who want a distinctive, low-maintenance, characterful surface, soapstone is a hidden gem.

If you’re tired of seeing the same quartz in every kitchen and want something with more soul, soapstone deserves a look. Here’s the honest rundown.

What Is Soapstone?

Soapstone is a natural quarried stone composed largely of talc, which gives it a smooth, soft, almost soapy feel — hence the name. It’s been used for centuries in everything from science-lab countertops to wood stoves precisely because it’s non-porous and heat-resistant. In kitchens, it brings a quiet, understated elegance that pairs beautifully with both modern and traditional designs.

The Pros of Soapstone

Non-porous — never needs sealing. Unlike granite or marble, soapstone doesn’t absorb liquids, so it resists stains from wine, coffee, and oil without any sealing. This is its biggest practical advantage.

Excellent heat resistance. Soapstone shrugs off heat — you can set a hot pot directly on it without worry. This is why it was historically used around stoves and in laboratories.

Distinctive, timeless look. The soft matte finish and deep gray tones feel calm and high-end without being flashy. It stands apart from the ubiquitous white quartz look.

Easy to repair. Because it’s soft, minor scratches can be sanded out with fine sandpaper and a little mineral oil — a DIY-friendly fix that stone like granite can’t offer.Naturally antibacterial and food-safe. Its non-porous surface doesn’t harbor bacteria, making it a hygienic, food-safe prep surface.

The Cons of Soapstone

Softer than granite or quartz. Soapstone scratches and can chip more easily than harder stones. The upside is that scratches sand out — but if you want a surface that never shows a mark, soapstone isn’t it.

Color darkens over time. Soapstone naturally develops a darker, richer patina, especially where it’s handled and oiled. Many homeowners love this; others want it applied evenly with mineral oil to control the look. Either way, expect it to change.

Limited color range. Soapstone comes in grays and charcoals with subtle veining — there’s no bright white or bold color option. If you want variety, your palette is limited.

Less common, so sourcing varies. Soapstone isn’t stocked as widely as granite or quartz, so slab selection may take more effort.

Soapstone vs. Granite and Quartz

vs. Granite: Granite is harder and comes in more colors, but it’s porous and needs sealing. Soapstone is softer but non-porous and more heat-resistant. Granite resists scratches better; soapstone resists stains and heat better.

vs. Quartz: Quartz is engineered, extremely durable, and comes in endless colors including marble looks, but it can scorch under heat and never develops natural character. Soapstone is natural, handles heat better, and ages with patina — but scratches more easily and offers fewer color choices.

For a homeowner who values heat resistance, zero sealing, and a one-of-a-kind natural look — and who appreciates a surface that ages with character — soapstone wins.

How to Care for Soapstone

Soapstone care is genuinely minimal. Clean it with mild soap and water — no special stone cleaners or sealers needed. Many owners apply food-grade mineral oil periodically to deepen and even out the patina, though this is optional and purely aesthetic. Minor scratches can be buffed out with fine sandpaper followed by a coat of oil. That’s it — no sealing schedule, no special products.

Is Soapstone Right for Your Kitchen?

Choose soapstone if: you want a distinctive, natural surface that never needs sealing, you cook a lot and value true heat resistance, and you appreciate a material that develops character over time. It’s perfect for homeowners who want something different from the quartz mainstream.Look elsewhere if: you want a bright white or colorful counter, you need maximum scratch resistance, or you dislike the idea of the color evolving. In those cases, quartz or quartzite may suit you better.

How We Help Sacramento Homeowners Choose Countertops

At America’s Advantage Remodeling, we’ve guided Sacramento and Roseville homeowners through countertop decisions since 2001. Soapstone isn’t for every kitchen, but for the right homeowner it’s a standout choice — and we’ll show you real slabs, explain how the patina will develop, and model it in your kitchen in 3D so there are no surprises after installation.

Want a Countertop That Isn’t Like Everyone Else’s?Soapstone is a quietly stunning, low-maintenance choice that most homeowners never consider. If you want something distinctive, our Sacramento-area team will show you real soapstone slabs, explain exactly how the patina develops, and model it in your kitchen in 3D before you decide. Call 916-507-0469 or request your free design consultation. Serving Roseville, Sacramento, Folsom, El Dorado Hills, and surrounding areas since 2001.

Frequently Asked Questions

Are soapstone countertops a good choice?

Soapstone countertops are an excellent choice for homeowners who want a non-porous, heat-resistant, low-maintenance natural stone with a distinctive look. They never need sealing and resist stains and heat well. The main trade-offs are that they’re softer than granite (so they scratch) and the color darkens with age.

Do soapstone countertops need to be sealed?

No, soapstone countertops never need sealing because soapstone is naturally non-porous and doesn’t absorb liquids. This is one of its biggest advantages over granite and marble. Some owners apply mineral oil periodically, but this is purely to deepen the color and patina, not to seal the stone.

Do soapstone countertops scratch easily?

Soapstone is softer than granite and quartz, so it can scratch more easily, but scratches are easy to repair. Minor scratches buff out with fine sandpaper and a coat of mineral oil, restoring the surface. Many homeowners find the lived-in patina, including light marks, part of soapstone’s character.

Can you put hot pans on soapstone?

Yes, you can set hot pans directly on soapstone because it’s highly heat-resistant — it was historically used around wood stoves and in laboratories for this reason. While trivets are still good practice for any countertop, soapstone handles direct heat far better than quartz, which can scorch.

How is soapstone different from granite?

Soapstone is softer and non-porous, so it never needs sealing and resists heat better, but it scratches more easily and comes only in gray tones. Granite is harder and offers many colors and patterns, but it’s porous and requires periodic sealing. Soapstone wins on heat and maintenance; granite wins on hardness and color variety.

Does soapstone change color over time?

Yes, soapstone naturally darkens and develops a richer patina over time, especially in areas that are handled often or treated with mineral oil. Many homeowners love this evolving character. If you prefer a consistent look, applying mineral oil evenly across the surface helps control and unify the darkening.

Is soapstone more expensive than granite or quartz?

Soapstone is generally a premium material and its price varies with slab availability and quality, often falling in a similar range to mid-to-high granite and quartz. Because it’s less commonly stocked than those materials, pricing and selection vary, so a quote on your specific kitchen gives the accurate figure.

Is soapstone safe and non-toxic for kitchen countertops?

Yes, soapstone is completely safe and non-toxic for kitchen countertops. It is a dense, non-porous natural stone that doesn’t harbor bacteria and has long been used for laboratory surfaces and food preparation. The mineral oil sometimes applied to it is food-safe, so there are no health concerns with everyday kitchen use.

Can you use vinegar or acidic cleaners on soapstone?

Yes, soapstone resists acids, so vinegar and acidic foods won’t etch or damage it the way they would marble — a major advantage of the stone. For everyday cleaning, mild soap and water is all you need, and harsh chemicals are unnecessary.

About the Author

This guide was written by Eugene Chernioglo, owner of America’s Advantage Remodeling, a licensed kitchen and home remodeling contractor (CSLB #1036517) serving Roseville, Sacramento, Folsom, El Dorado Hills, and the surrounding area since 2001. AAR holds a 4.9-star rating across 225+ Google reviews and an A+ rating with the BBB. Eugene and the AAR team handle design, fabrication, and installation in-house, giving homeowners a single accountable partner from the first 3D rendering to the final walkthrough.