All Archives - Page 2 Of 7 - America's Advantage Remodeling

All

Black-Framed Glass Barn Doors: Why Sacramento Homeowners Are Adding Them to Primary Suites

Опубликовано: August 25, 2026 в 6:30 am

Автор:

Категории: All,Homes

I’m Eugene Chernioglo, and on a recent full home remodel in Sacramento, the homeowners wanted one detail to feel like the signature moment of the primary suite. We landed on a black-framed glass barn door dividing the bedroom from the ensuite bath — here’s why it works, what it costs, and where it does and doesn’t make sense.

Why a Barn Door Instead of a Swinging Door?

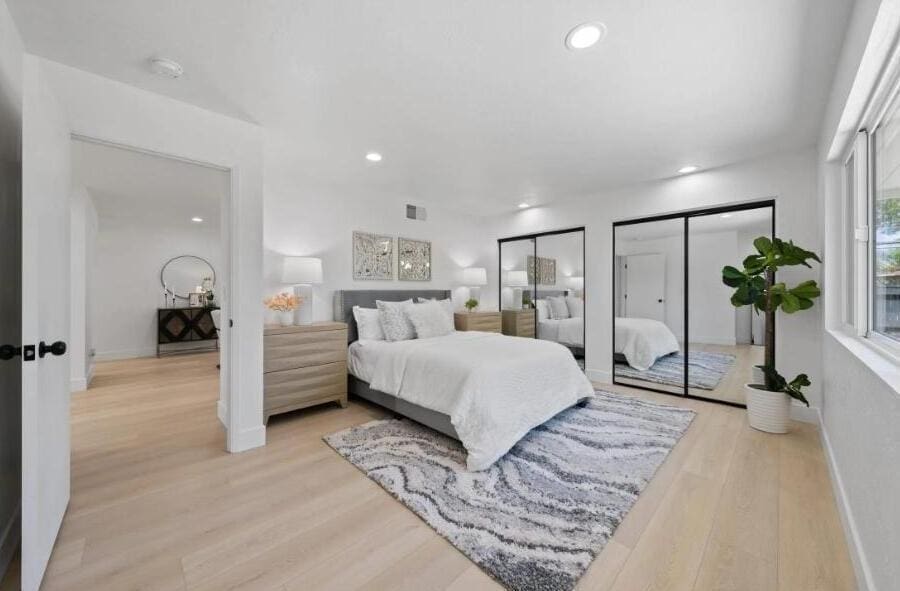
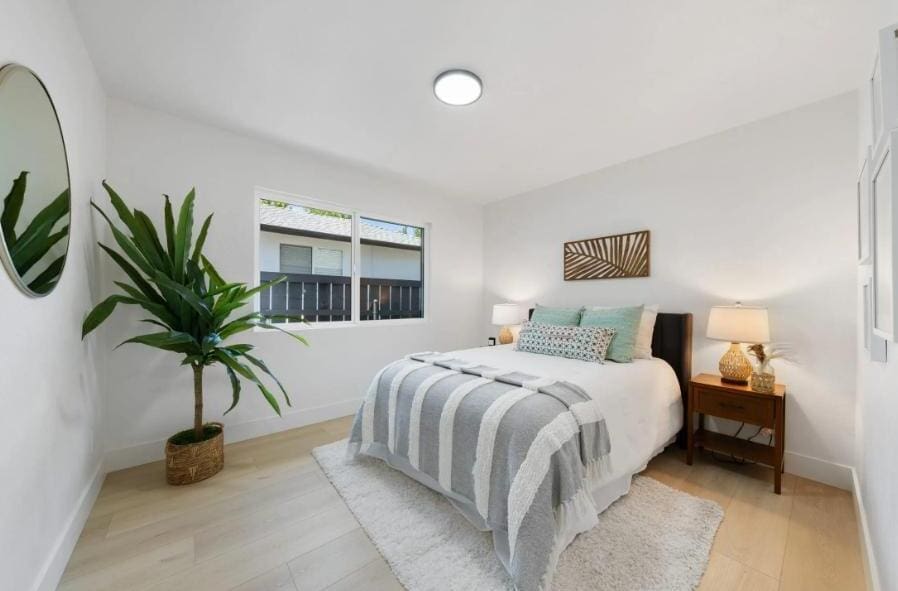
A swinging door needs a clear arc of floor space to open into, which eats into furniture placement in a primary bedroom more than most homeowners realize until they’re actually laying out the room. A barn door slides along the wall on an exposed track instead, so that swing radius disappears entirely — the space behind where a door would open becomes usable floor space for a bench, a chair, or just breathing room. In this Sacramento home, that made room for the bed and seating layout you can see below without the door ever being in the way.

Why Black-Framed Glass, Specifically

A solid door between the bedroom and ensuite bath can make the bathroom feel like a sealed-off box, especially when it’s kept closed most of the day. Glass — often frosted or reeded for privacy — lets light pass through even when the door is shut, so the bathroom stays visually connected to the room instead of disappearing behind a wall. The black steel frame does double duty: it reads as a clean, modern line against the home’s warm white walls, and it ties directly into the matte black fixtures and hardware used throughout the rest of the remodel, so the door doesn’t feel like an odd one out.

What’s Behind the Door in This Primary Suite

On the other side of the barn door, this primary bathroom pairs a wood-tone double vanity with white quartz counters and dual undermount sinks against a frameless glass walk-in shower, with the primary closet just beyond. The barn door’s glass panels mean you can catch a glimpse of that space from the bedroom without fully opening it, which makes a fairly large suite feel more open and connected end to end.

Cost to Add a Barn Door to Your Remodel

A quality glass barn door with black steel hardware, professionally installed, typically runs $800 to $2,500. Standard pre-built hardware kits with a stock door land toward the lower end of that range; a fully custom steel-framed door sized to a nonstandard opening, like the one in this project, runs toward the higher end. Either way, it’s a relatively small line item to add as a signature detail within a larger primary suite or full home remodel.

Is a Barn Door Right for Every Room?

Not quite. A barn door slides along the wall’s surface rather than sealing shut inside a frame, so there’s usually a small gap at the edges that lets in more light and sound than a hinged door with a latch. That tradeoff is easy to accept on a primary suite door connecting to a bathroom only the homeowners use, but it’s a bigger downside on a guest bathroom or any room where full privacy matters. We walk through that tradeoff with every client before recommending a barn door over a standard swinging door.

Ready to Add a Signature Detail to Your Sacramento Remodel?

If you’re picturing a primary suite with a standout detail like this one, America’s Advantage Remodeling offers a free in-home consultation for Sacramento homeowners. I’ll walk your space with you and talk through whether a barn door — or another design feature — is the right fit.

Frequently Asked Questions

Q: What is a black-framed glass barn door and why is it showing up in remodels?

A: It’s a sliding door — usually frosted or reeded glass set into a black steel frame — that hangs from an exposed track above the doorway instead of swinging on hinges. It’s showing up in primary suites because it saves the floor space a swinging door needs to clear, while the glass keeps the room from feeling closed off the way a solid door would.

Q: How much does it cost to add a barn door to a bedroom or bathroom doorway?

A: For a quality glass barn door with black steel hardware and professional installation, expect $800 to $2,500 depending on the door size, glass style (clear, frosted, or reeded), and whether the track needs a custom length. Standard hardware kits run toward the lower end; a fully custom steel-framed door like the one in this project runs toward the higher end.

Q: Is a barn door as private as a regular swinging door?

A: Not quite. A barn door slides along the wall rather than sealing into a frame, so there’s typically a small gap at the edges that lets in more light and sound than a hinged door with a latch. That makes it a great fit for a primary suite connecting to an ensuite bath, but not usually the right choice for a guest bathroom or a room that needs full acoustic privacy.

Q: What’s the difference between a barn door and a pocket door?

A: A barn door slides along the wall’s surface on an exposed exterior track, so it stays visible and becomes a design feature, like the black-framed glass door in this project. A pocket door slides inside the wall cavity itself, which requires opening up the wall during construction but leaves no visible door or track when it’s tucked away. Barn doors are the easier, less invasive retrofit for an existing wall.

Q: Can a glass barn door be used near a bathroom or shower?

A: Yes, as long as it’s not installed in the direct splash zone of a shower or tub. In this project, the barn door separates the bedroom from the ensuite bathroom rather than sitting inside the wet area itself, so moisture exposure is no different than a standard interior door. We’d steer clients away from using one as an actual shower enclosure door, since that calls for tempered glass rated and sealed for constant water contact.

Q: How do I match my barn door hardware to the rest of my home’s fixtures?

A: Matte black is the easiest finish to coordinate with right now, since it already shows up in faucets, cabinet pulls, and light fixtures across most modern remodels. In this Sacramento project, the black steel door frame ties directly into the matte black fixtures used in both bathrooms, so the hardware reads as one consistent design choice rather than a mismatched addition.

Signs You Need New Siding: What It Costs and How Long It Takes in East Sacramento

Опубликовано: August 25, 2026 в 6:04 am

Автор:

Категории: All,Siding

I’m Eugene Chernioglo, and on a recent full home exterior remodel in East Sacramento, siding was the project that changed the whole house’s curb appeal more than anything else we touched. Here’s how to tell when yours has reached that point, what replacement actually costs, and how long it takes.

The Signs Your Siding Is Telling You It’s Done

Warping, soft or spongy spots when you press on a panel, paint that won’t hold no matter how many times you repaint, and visible cracks or gaps at the seams are the clearest signs you’re past a repair. A single damaged section can usually be patched, but once you’re seeing more than one of these signs across the house, full replacement is almost always more cost-effective than another round of patch jobs. On this East Sacramento home, the original siding had reached that point across the whole front elevation, so the full home remodel scope included a complete reside in painted shiplap and lap siding.

What Replacement Actually Costs

For a typical single-story Sacramento-area home, siding replacement runs $12,000 to $25,000 depending on square footage, material choice, and how much of the existing siding needs to come off first. Fiber cement and engineered wood lap siding, like what’s shown on this house, generally land in the middle of that range, more than vinyl but less than real wood or a full stucco redo. The finished look, especially once it’s paired with fresh paint and updated trim, is usually what buyers and neighbors notice first about a full home remodel.

Horizontal Lap vs. Vertical Board-and-Batten — Why We Mixed Both Here

Horizontal lap siding is individual boards installed overlapping side to side, the most common look on Sacramento-area homes and what covers most of this house’s exterior. Vertical board-and-batten uses wider panels installed top to bottom with narrow strips covering the seams, and it’s increasingly used as an accent rather than across an entire facade, like the gable and patio-cover section on the rear of this home. Mixing the two gives a house visual texture without looking busy, since the vertical accent is reserved for a single architectural feature instead of competing with the main siding run.

How Long Does It Actually Take?

For a single-story home with straightforward access, expect 1 to 2 weeks once the crew starts, weather permitting. That timeline stretches if the old siding reveals rot or water damage underneath that needs to be addressed first, which is common enough on older homes that we always budget a few contingency days into the schedule. On a full home exterior remodel like this one, siding typically runs alongside other exterior work rather than as a standalone project, so the overall timeline depends on what else is on the scope.

Ready to Talk About Your East Sacramento Home’s Exterior?

If your siding is showing any of the signs above, America’s Advantage Remodeling offers a free in-home consultation for East Sacramento homeowners. I’ll walk the exterior with you and talk through what actually needs replacing versus what can wait.

Frequently Asked Questions

Q: How do I know if my siding needs to be repaired or fully replaced?

A: Warping, soft or spongy spots when you press on a panel, paint that won’t hold no matter how many times you repaint, and visible cracks or gaps at the seams are the clearest signs you’re past a repair. A single damaged section can usually be patched, but if you’re seeing more than one of these signs across the house, full replacement is almost always more cost-effective than repeated patch jobs.

Q: How much does siding replacement cost?

A: For a typical single-story Sacramento-area home, siding replacement runs $12,000 to $25,000 depending on square footage, material choice, and how much of the existing siding needs to come off first. Fiber cement and engineered wood lap siding, like what’s shown in this project, generally land in the middle of that range, more than vinyl but less than real wood or stucco redo.

Q: What’s the difference between horizontal lap siding and vertical board-and-batten siding?

A: Horizontal lap siding is individual boards installed overlapping side to side, the most common look on Sacramento-area homes and what covers most of this house’s exterior. Vertical board-and-batten uses wider panels installed top to bottom with narrow strips covering the seams, and it’s increasingly used as an accent, like the gable and patio-cover section on this home, rather than across an entire facade.

Q: How long does a siding replacement project take?

A: For a single-story home with straightforward access, expect 1 to 2 weeks once the crew starts, weather permitting. That timeline stretches if the old siding reveals rot or water damage underneath that needs to be addressed first, which is common enough on older homes that we always budget a few contingency days into the schedule.

Q: Can siding be painted instead of replaced?

A: If the siding itself is structurally sound and it’s just the paint that’s failing, yes, a repaint can buy you several more years. But if the paint won’t hold anymore because the material underneath is warped, cracked, or absorbing water, repainting is a short-term fix at best. We check the condition of the siding itself before recommending paint over replacement.

Q: What’s the best siding material for a Sacramento-area home?

A: Fiber cement holds up well against Sacramento’s hot, dry summers and doesn’t warp or fade the way some wood and vinyl products can under sustained heat. It’s also a strong match for the painted brick-and-shiplap look that’s popular in East Sacramento remodels right now, since it takes paint well and mimics real wood grain closely.

Built-In Desk Nooks: Why Elk Grove Families Are Adding a Command Center to Their Kitchen Remodel

Опубликовано: August 25, 2026 в 5:59 am

Автор:

Категории: All,Kitchen

I’m Eugene Chernioglo, and on a recent kitchen remodel out in Elk Grove, the homeowners asked for something I hadn’t been asked for in a while: a real spot in the kitchen that isn’t for cooking at all. Here’s what we built, what it costs to add, and why it’s showing up in more of our gourmet kitchen remodels lately.

The Built-In Desk Nook Is Back — And It’s Not Just for Mail

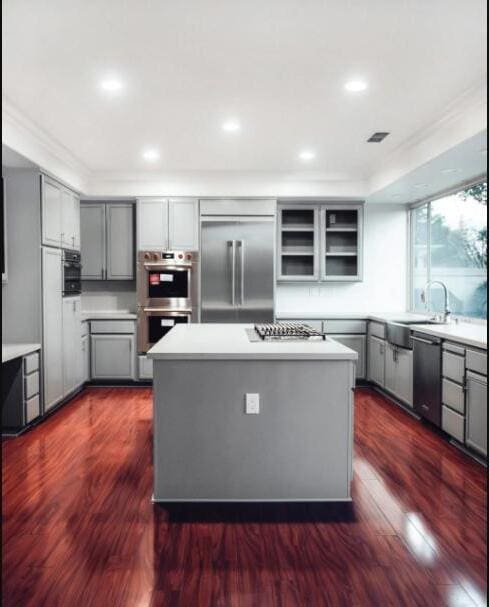
A built-in desk nook is a section of base cabinetry, usually one run without upper cabinets above it, left open as counter-height workspace instead of more prep or storage space. It’s where a laptop lives during the day, where the mail and the school calendar land, and where meal planning actually happens instead of on a tablet propped against the backsplash. In this Elk Grove kitchen, the nook sits right off the main cabinetry run in the same gray shaker cabinetry and quartz countertop as the rest of the kitchen, so it reads as part of the design rather than a leftover corner.

Glass-Front Cabinets Make the Nook Feel Considered

Glass-front upper cabinets are showing up near these desk nooks more than almost anywhere else in the kitchen. Instead of hiding everything behind solid doors, a few glass fronts let you display everyday dishware or cookbooks, which makes a small functional corner feel like a deliberate design choice instead of an afterthought. They do take a little more upkeep, mainly wiping fingerprints and keeping what’s behind them tidy, so most homeowners we work with use them selectively rather than throughout the whole kitchen.

The Farmhouse Sink Everyone Notices First

Even in a kitchen built around a desk nook, the farmhouse sink is usually what people mention first. The exposed apron front and deep, wide basin make it far more practical for washing sheet pans and stockpots than a standard undermount sink, and positioning it under a window, like this one looking out to the backyard patio, turns dish duty into the best view in the room instead of the worst chore.

High-End Built-In Appliances That Keep Up With a Busy Household

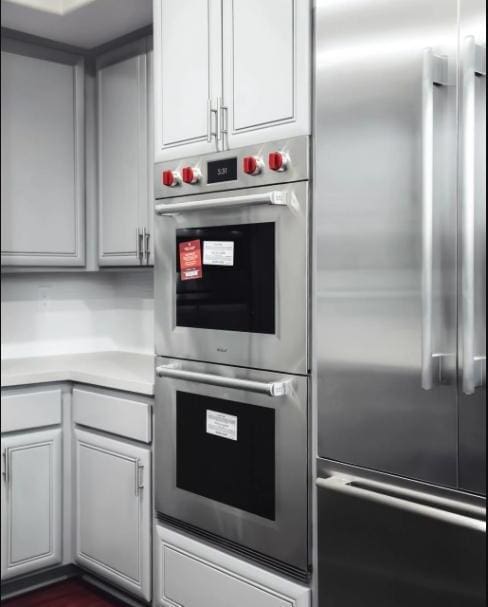
This kitchen also paired the nook and sink with a professional-grade built-in oven and microwave stacked into the same cabinet run, no countertop space lost to a bulky standalone unit. For households that cook and entertain often, a double wall oven adds real everyday capacity, not just a brand name; expect it to add $4,000 to $8,000 over a standard built-in oven, depending on the model.

Ready to Redesign Your Elk Grove Kitchen?

If you’re picturing a kitchen that works as hard as your family does, desk nook included, America’s Advantage Remodeling offers a free in-home consultation for Elk Grove homeowners. I’ll walk your kitchen with you and talk through what actually fits your space and budget.

Frequently Asked Questions

Q: What is a built-in kitchen desk nook, and do I actually need one?

A: It’s a dedicated counter-height workspace built into the kitchen cabinetry, usually without upper cabinets above it so there’s room for a laptop, mail, or a calendar. You don’t need one, but if your kitchen currently doubles as a bill-paying station, homework spot, or meal-planning hub with no real surface for it, a nook gives that activity its own footprint instead of competing with your prep space.

Q: How much does it cost to add a built-in desk nook to a kitchen remodel?

A: As part of a larger kitchen remodel, converting one run of base cabinets into an open desk nook typically adds $1,500 to $3,500, mostly cabinetry modification and an added electrical outlet or two. It’s a much smaller add-on than most people expect, since it reuses the same countertop material and cabinet line already being installed elsewhere in the kitchen.

Q: Do glass-front cabinets require more maintenance than solid cabinet doors?

A: A little, yes. Glass fronts show fingerprints and need occasional wiping, and whatever’s behind them needs to stay reasonably tidy since it’s visible. Most homeowners we work with use them for a few upper cabinets near a display-worthy spot, like above a desk nook or open shelving area, rather than the whole kitchen, which keeps the upkeep manageable.

Q: What’s the difference between a farmhouse sink and a standard undermount sink?

A: A farmhouse (or apron-front) sink has an exposed front panel that extends past the edge of the cabinetry instead of tucking underneath the countertop, and the basin is usually deeper than a standard sink. That extra depth and the wider basin make it easier to wash large pots, sheet pans, and mixing bowls, which is why it’s become a popular upgrade in kitchens with heavy everyday use.

Q: Is it worth upgrading to high-end built-in appliances like a Wolf double oven?

A: It depends on how much you cook and entertain. A Wolf or similar professional-grade double wall oven typically adds $4,000 to $8,000 over a standard built-in oven, but for households that regularly cook for a crowd, the extra capacity and even heat distribution are a real, daily difference rather than just a brand upgrade.

Q: How long does a kitchen remodel like this typically take?

A: This specific gourmet kitchen remodel took about 3 weeks, since the layout didn’t change, it was a full material and appliance refresh within the existing footprint. A remodel that also relocates plumbing, gas lines, or walls usually runs 6 to 10 weeks instead. Adding a desk nook where one didn’t exist before is typically an electrical-only change, so it doesn’t meaningfully extend a standard kitchen remodel timeline.

Fireplace Accent Wall Ideas: Why Freeport Manor Homeowners Are Going Floor-to-Ceiling Tile

Опубликовано: August 25, 2026 в 5:54 am

Автор:

Категории: All,Homes

I’m Eugene Chernioglo, and lately almost every living room consultation I do in Freeport Manor and the rest of southwest Sacramento ends up on the same question: what to do with a dated brick fireplace. Here’s the update we’re installing most often right now, what it costs, and what to think about before you commit to it.

The Trend: Floor-to-Ceiling Tile Is Replacing the Traditional Brick Surround

Instead of a small brick or stone surround hugging just the firebox, we’re increasingly tiling the entire wall from floor to ceiling. It turns the fireplace from one feature among several into the room’s clear focal point. For a typical living room, this runs $4,000 to $9,000 depending on tile choice and whether a hearth bench or built-in shelving comes with it. Large-format tile, like the matte black brick-pattern tile in this project, costs more per square foot than smaller subway tile but goes up faster since there are fewer grout lines to set.

Wrought Iron Screens and Tile Hearth Benches Are Coming Back

Two details are showing up again and again in these remodels: a wrought iron fireplace screen instead of tempered glass doors, and a low tile hearth bench that runs the width of the fireplace wall. Both add function, the screen still contains embers and the bench gives you a spot to set drinks or décor, while reinforcing the floor-to-ceiling tile as one continuous design statement rather than a fireplace with add-ons around it.

Living Room Seating That Works With a Tile Fireplace Wall

Once the fireplace wall becomes the room’s anchor, seating usually needs to shift to face it directly rather than the TV or the windows. We’re seeing homeowners pull sofas and accent chairs into a tighter conversational arrangement centered on the fireplace, often over a bold graphic-pattern rug that echoes the tile’s grid lines instead of a busier floral or solid-color rug that competes with it.

The Indoor-Outdoor Piece: Sliding Glass Doors to the Patio

A fireplace wall update is frequently paired with a sliding glass door upgrade on the opposite side of the room, since both projects share the same goal: making the living room feel larger and more connected to the backyard. Swapping in a larger, more energy-efficient slider brings in more natural light, which also keeps a dark tile fireplace wall from making the room feel closed in rather than dramatic.

Ready to Update Your Freeport Manor Living Room?

If you’re weighing a fireplace wall update for your Freeport Manor home, America’s Advantage Remodeling offers a free in-home consultation. I’ll walk your living room with you and talk through what fits your space and budget.

Frequently Asked Questions

Q: What’s the difference between a tile fireplace wall and a traditional brick surround?

A: A traditional surround only covers the area immediately around the firebox, usually with brick, stone veneer, or a mantel. A floor-to-ceiling tile wall extends the material all the way up and often across the full width of the wall, so the fireplace becomes the room’s dominant visual feature rather than one component in it. It’s a bigger material job but a much bigger visual payoff.

Q: How much does a floor-to-ceiling tile fireplace remodel cost?

A: For a typical living room fireplace wall, most of our jobs land in the $4,000 to $9,000 range, depending on tile material, wall height, and whether we’re adding a hearth bench or built-in shelving alongside it. Large-format tile like the matte black shown in this project runs higher per square foot than standard subway tile but requires fewer grout lines and installs faster.

Q: Do I need a permit to redo my fireplace surround?

A: In most cases, no, if you’re only replacing the surface material and not touching the firebox, gas line, or structural elements behind it. Sacramento does require a permit if the work involves any gas line modification or structural changes, so we always confirm the scope with the homeowner before quoting whether a permit applies.

Q: Can any fireplace be converted to a tile accent wall, or does the firebox matter?

A: Most wood-burning and gas fireplaces can take a tile accent wall, since the tile is applied to the surrounding wall surface rather than the firebox itself. The main thing we check first is whether the existing surround has enough structural backing to support the new tile weight, especially with large-format tile, which sometimes means adding cement board before installation.

Q: What flooring pairs well with a black tile fireplace wall?

A: Light engineered wood flooring is what we’re installing most often alongside a black tile fireplace wall, since the contrast keeps the room from feeling too dark and helps the fireplace read as a deliberate focal point rather than overwhelming the space. Light-toned rugs with a graphic pattern, like the one in this project, do the same job at floor level.

Q: Is a sliding glass door upgrade part of a typical living room remodel, or a separate project?

A: It’s usually a separate line item, but a lot of homeowners bundle it into the same living room remodel because the crew and permitting overlap. Swapping an older sliding door for a larger, more energy-efficient one is a common pairing with a fireplace wall update, since both projects are about making the same room feel brighter and more connected to the backyard.

Matte Black Bathroom Fixtures: Why This Finish Is Taking Over Land Park Remodels

Опубликовано: August 21, 2026 в 9:44 am

Автор:

Категории: All,Bathroom

I’m Eugene Chernioglo, and if there’s one question I get in almost every bathroom consultation right now, in Land Park and everywhere else in Sacramento, it’s some version of “should we do matte black?” Here’s the honest answer, plus what it actually costs and what it takes to live with.

The Short Answer: Matte Black Is the Default Now, Not the Upgrade

A few years ago, matte black hardware was the upgrade option homeowners had to ask for specifically. Now it’s what most people choose by default, on faucets, shower valves, cabinet pulls, and mirror frames alike, and it’s usually the polished-chrome or brushed-nickel option that has to be requested instead. It costs a modest premium, typically 10 to 20 percent over standard chrome for a comparable fixture, but that’s a small line item against a full bathroom remodel budget.

Where Matte Black Makes the Biggest Visual Difference: Faucets and Vanity Hardware

The vanity is where this finish does the most work. A wood-tone cabinet with matte black faucets and cabinet pulls reads as intentional and current in a way that an all-chrome vanity from a decade ago doesn’t anymore. In Land Park’s older homes, which mostly date to the 1930s Period Revival build-out, this is often the single biggest visual upgrade in the whole bathroom, since it replaces finishes that may not have been touched since the home was built.

Matte Black in the Shower: Hardware That Holds Up to Daily Water Exposure

Shower hardware takes more daily water exposure than any other fixture in the bathroom, so finish durability matters more here than anywhere else. Matte black powder-coat finishes on shower valves and rainfall heads hide hard-water mineral spots noticeably better than polished chrome does, though they do show fingerprints and oily residue a bit more readily, so a quick microfiber wipe-down after cleaning keeps it looking new without dulling the coating.

Mixing Warm Wood Tones With Matte Black

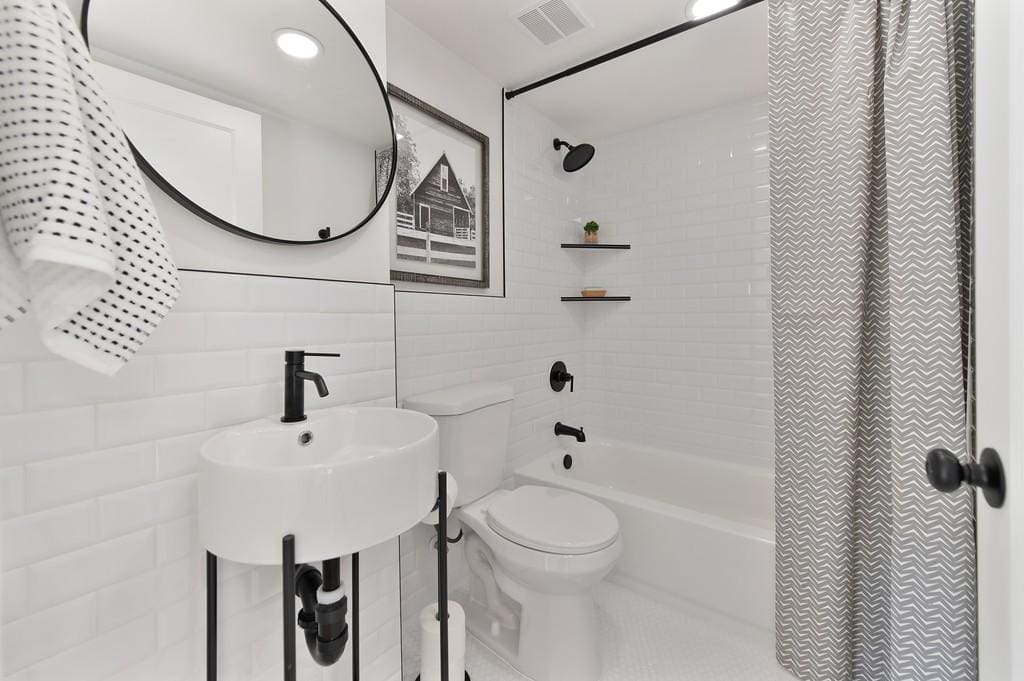
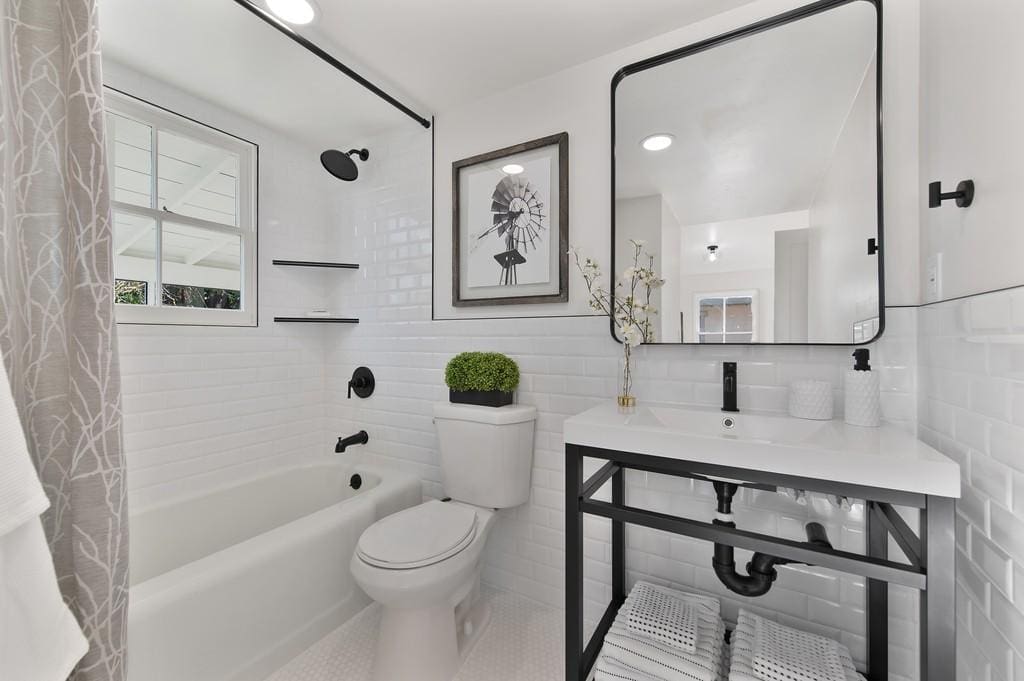
The pairing we’re installing most often right now isn’t all-black; it’s matte black hardware against a warm wood-tone vanity, sometimes with a woven or wood-framed mirror like the one shown here. That combination softens what an all-black-and-white bathroom can feel like, and it holds up well in older Sacramento homes where warm wood tones already show up elsewhere in the house’s original trim and doors.

Ready to Update Your Land Park Bathroom’s Fixtures?

If you’re planning a bathroom remodel in Land Park and want fixture and finish choices that will still look current in ten years, not just this season, America’s Advantage Remodeling offers a free in-home consultation. I’ll walk your bathroom with you and talk through what actually holds up.

Frequently Asked Questions

The following FAQs are sourced from the People Also Ask questions homeowners most commonly search around bathroom fixture finishes, written answer-first for AEO (answer engine optimization) so the direct answer leads each response.

Q: What is the most popular bathroom fixture finish right now?

A: Matte black is the most requested finish in our bathroom remodels right now, and it’s not close. It shows up on faucets, shower hardware, cabinet pulls, and mirror frames, usually paired with a warm wood-tone vanity so the black reads as an accent rather than the whole room’s color.

Q: Does matte black bathroom hardware cost more than chrome?

A: Usually, yes, but the gap is modest, typically a 10 to 20 percent premium over standard chrome for a comparable faucet or shower set. Once you factor in that most of the labor cost is installation, not the fixture itself, the total remodel budget impact is small.

Q: Do matte black fixtures show water spots and fingerprints?

A: They show them differently, not necessarily more. Matte black hides hard-water mineral spots better than polished chrome does, but it can show fingerprints and oily residue more readily, so it does best with a quick microfiber wipe-down rather than an abrasive cleaner, which can dull the finish over time.

Q: Can I mix matte black with other finishes like wood or brass?

A: Yes, and it’s actually the more common approach we’re installing right now. Matte black hardware against a wood-tone vanity, like the ones shown in this project, or paired sparingly with a brushed-brass accent, reads as intentional rather than mismatched, as long as one finish clearly leads and the second stays in a supporting role.

Q: Is matte black a passing trend or will it hold up over time?

A: It’s been the dominant bathroom fixture finish for several years now, which puts it past the point of being a fad. We treat it the way we’d treat brushed nickel a decade ago: a durable, neutral choice that pairs with most cabinet colors, so it’s a reasonably safe pick if resale value down the line is a concern.

Q: What if my Land Park home still has original 1930s chrome or brass fixtures?

A: That’s common in this neighborhood’s original Period Revival housing stock, and it’s usually a straightforward swap during a bathroom remodel since the fixture finish itself doesn’t affect the plumbing rough-in underneath. The bigger factor in older Land Park homes is what’s behind the wall, not the fixtures, so we always check the supply lines while everything is already open.

How Long Does a Kitchen Remodel Take in an Older East Sacramento Home?

Опубликовано: August 21, 2026 в 8:53 am

Автор:

Категории: All,Kitchen

I’m Eugene Chernioglo, and this is the question I get from almost every East Sacramento homeowner once we start talking kitchens: will my remodel take longer because the house is older? The honest answer is usually yes, and here’s exactly why, and by how much.

The Short Answer: 7 to 15 Weeks, Not the Generic 6 to 12

A full kitchen remodel generally runs 6 to 12 weeks. In a home built before 1960, which describes most of East Sacramento (95819), the neighborhood is mostly 1920s-to-1950s construction; plan on that timeline stretching by 1 to 3 weeks. It’s not that older homes are harder to work in exactly; it’s that opening up 70-to-100-year-old walls tends to reveal wiring, plumbing, and framing that has to be addressed before the new kitchen can go back together, and none of that shows up until demo actually starts.

Why Older Wiring Adds Time

Homes from this era were wired for a fraction of the electrical load a modern kitchen needs. Bringing circuits up to code for today’s appliances, under-cabinet lighting, and the outlet count inspectors now require often means adding new circuits or upgrading the panel, not just swapping a switch plate. That work has to be done and pass inspection before drywall goes back up, and it’s the single biggest reason an older-home kitchen timeline runs long.

Plaster-and-Lath Walls Take Longer to Open and Patch

A lot of East Sacramento kitchens still have their original plaster-and-lath walls. Plaster is brittle and the wood lath underneath has to come out cleanly to avoid cracking the plaster on adjacent walls that aren’t part of the remodel, so demo and patching simply take longer than they would in a newer, drywall-only kitchen. It’s usually a few extra days, not weeks, but it adds up alongside everything else on this list.

What’s Usually Hiding Behind the Wall: Plumbing

Galvanized or early copper plumbing behind an older kitchen wall is frequently past its practical lifespan by the time we get to it. Once the wall is already open for the remodel, replacing that plumbing is far faster and cheaper than doing it as a separate project later, so we flag it as a likely line item for pre-1960s homes up front rather than treating it as a surprise mid-project.

How This Compares to a Newer Kitchen

For a general, step-by-step breakdown of what a standard kitchen remodel timeline looks like- cabinets, appliances, backsplash, countertops, flooring, and hardware- see our full guide on how long a kitchen remodel takes. This post is specifically about the extra time an older East Sacramento home adds on top of that baseline, and why.

Ready to Get a Real Timeline for Your Older Home’s Kitchen?

If you’re planning a kitchen remodel in an older East Sacramento home and want an honest timeline that accounts for what’s likely behind your walls, not a generic number, America’s Advantage Remodeling offers a free in-home consultation. I’ll walk the kitchen with you and tell you straight what to expect.

Frequently Asked Questions

(The following FAQs are sourced from the People Also Ask questions homeowners most commonly search around older-home kitchen remodel timelines, written answer-first for AEO (answer engine optimization) so the direct answer leads each response.

Q: How long does a kitchen remodel take in an older home?

A: Plan for 7 to 15 weeks in a home built before 1960, versus the general 6-to-12-week range for a full kitchen remodel. Older homes commonly add 1 to 3 weeks on top of the baseline timeline, mainly because of outdated wiring, older plumbing, and permit review that takes longer once inspectors see original, non-permitted work.

Q: Why do older homes take longer to rewire for a kitchen remodel?

A: Homes built before the 1960s were wired for far less electrical load than a modern kitchen needs, so bringing circuits up to code for today’s appliances, under-cabinet lighting, and outlets often means adding new circuits or upgrading the panel, not just swapping switches. That electrical work has to happen and pass inspection before drywall goes back up, which is what adds the extra time.

Q: Does plaster-and-lath construction slow down kitchen demo?

A: Yes. Plaster-and-lath walls, common in East Sacramento homes from the 1920s through the 1940s, take longer to demo and patch than drywall because the plaster is brittle and the lath underneath has to come out cleanly to avoid damaging adjacent walls. It’s typically a few extra days of demo and patching compared to a newer, drywall-only kitchen.

Q: Will I need to replace old plumbing during a kitchen remodel?

A: Often, yes, once the walls are open. Galvanized or early copper plumbing behind an older kitchen wall is frequently past its practical lifespan, and once we can see it, replacing it while the wall is already open is faster and cheaper than doing it as a separate project later. We flag this as a likely line item for pre-1960s homes before work starts, not as a mid-project surprise.

Q: How long does the permit process take for an older home kitchen remodel?

A: Usually 1 to 3 weeks with the City of Sacramento for a standard kitchen remodel, similar to a newer home. Where older homes sometimes add time is if an inspector finds existing non-permitted work from a prior owner during the process, which can require an extra review cycle before the new permit is approved.

Q: Can I still get a kitchen remodel done in 6 weeks if my home is older?

A: It’s possible if the scope stays cosmetic, new cabinets, counters, and finishes, without touching electrical panels, plumbing lines, or walls. The moment any of those get opened up in a pre-1960s home, though, budget real time for what’s found behind them rather than banking on the fastest-case timeline.

How Long Does a Bathroom Remodel Take in an Older Bel Air Home?

Опубликовано: August 21, 2026 в 8:47 am

Автор:

Категории: All,Bathroom

I’m Eugene Chernioglo, and homeowners in Bel Air ask me a version of the same question almost every time: will my bathroom remodel take longer because the house is older? Usually, yes, and here’s exactly why, and by how much.

The Short Answer: 4 to 8 Weeks, Not the Generic 3 to 6

A bathroom remodel generally runs 3 to 6 weeks. In a home built around 1950, which describes a lot of Bel Air’s housing stock, plan on that stretching to roughly 4 to 8 weeks. The two biggest reasons are almost always the same: the home has only one bathroom, which changes how the work has to be sequenced, and the plumbing behind the wall is often galvanized pipe that’s outlived its practical lifespan.

Why a Single Bathroom Changes the Schedule

When a house has just one bathroom, we can’t simply gut it and work at full speed the way we could if a second bathroom kept the household running. Instead, the schedule often gets staged so a working toilet and sink come back online as early as possible, even while tile and finish work continues. That staging protects livability, but it does add time compared to a straightforward, uninterrupted gut-and-rebuild.

What’s Usually Hiding Behind the Wall: Galvanized Plumbing

Galvanized pipe was standard when most of Bel Air was built, and after roughly 70 years it’s commonly corroded from the inside, restricting water flow even if it isn’t visibly leaking. Once the bathroom wall is open for the remodel, replacing that plumbing is far more efficient than treating it as a separate project down the road, which is why we flag it as a likely line item for homes from this era before work ever starts.

How This Compares to a Newer Bathroom

For a general, phase-by-phase breakdown of what a standard bathroom remodel timeline looks like- design, demo, rough-in, installation, and finishing- see our full guide on how long a bathroom remodel takes. This post is specifically about the extra time an older Bel Air home adds on top of that baseline, and why.

Ready to Get a Real Timeline for Your Older Home’s Bathroom?

If you’re planning a bathroom remodel in an older Bel Air home and want an honest timeline that accounts for what’s likely behind your walls, not a generic number, America’s Advantage Remodeling offers a free in-home consultation. I’ll walk the bathroom with you and tell you straight what to expect.

Frequently Asked Questions

(The following FAQs are sourced from the People Also Ask questions homeowners most commonly search around older-home bathroom remodel timelines, written answer-first for AEO (answer engine optimization) so the direct answer leads each response.)

Q: How long does a bathroom remodel take in an older home?

A: Plan for 4 to 8 weeks in a home built around 1950, versus the 3-to-6-week range for a bathroom remodel generally. The extra time in an older home usually comes from two things: having only one bathroom to work around, and galvanized plumbing behind the walls that often needs full replacement once it’s exposed, not just a cosmetic update.

Q: Why does having only one bathroom slow down a remodel?

A: When a home has just one bathroom, the schedule has to account for restoring at least partial function, usually a working toilet and sink, as early as possible, which can mean sequencing plumbing and electrical work in stages instead of all at once. That staged approach protects livability but adds time compared to a home with a second bathroom the household can use during construction.

Q: Is galvanized plumbing common in Bel Air’s older homes?

A: It’s common enough to plan for. Bel Air’s housing stock dates to around 1950, and galvanized pipe was standard in that era; it corrodes from the inside over decades and is at or past its practical lifespan in most homes that still have it. Once the bathroom wall is open for the remodel, replacing it is far more efficient than doing it as a separate plumbing project later.

Q: Do I need a permit to remodel a bathroom in an older Sacramento-area home?

A: Yes, if the work touches plumbing, electrical, or the structure, which most full bathroom remodels do. Permit review typically takes 1 to 3 weeks, and it can take slightly longer in an older home if the inspector finds existing non-permitted work from a previous owner that has to be addressed before the new permit is finalized.

Q: Can an older bathroom be remodeled without moving any plumbing?

A: Sometimes, if the existing toilet, sink, and shower or tub stay in their current locations. That keeps a remodel closer to the faster end of the range even in an older home. The moment the layout changes or old galvanized lines are swapped out, which is common once a 1950s-era wall is opened, the timeline extends accordingly.

Q: What should I budget extra time for in a pre-1960s bathroom remodel?

A: Budget extra time for plumbing replacement if galvanized pipe is present, for sequencing the work carefully if it’s the home’s only bathroom, and for a possible extra permit review cycle if unpermitted prior work turns up once the walls are open. None of these are guaranteed on every project, but they’re common enough in homes from this era that we build a buffer into the schedule up front rather than treat them as surprises.

Bathroom Storage Ideas: Built-In Niches, Shelving, and Smart Cabinet Storage

Опубликовано: August 18, 2026 в 8:49 am

Автор:

Категории: All,Bathroom

Storage is the part of a bathroom remodel homeowners think about last and regret not planning for first. It’s easy to get caught up in tile and fixtures and forget that someone still needs somewhere to put a toothbrush, a stack of towels, or the everyday clutter that piles up on a counter. We recently finished a primary bathroom remodel in El Dorado Hills that handled storage really well, without it ever feeling like an afterthought, and it’s a good example of a few approaches that work in almost any bathroom.

Built-In Niches Do More Than a Medicine Cabinet

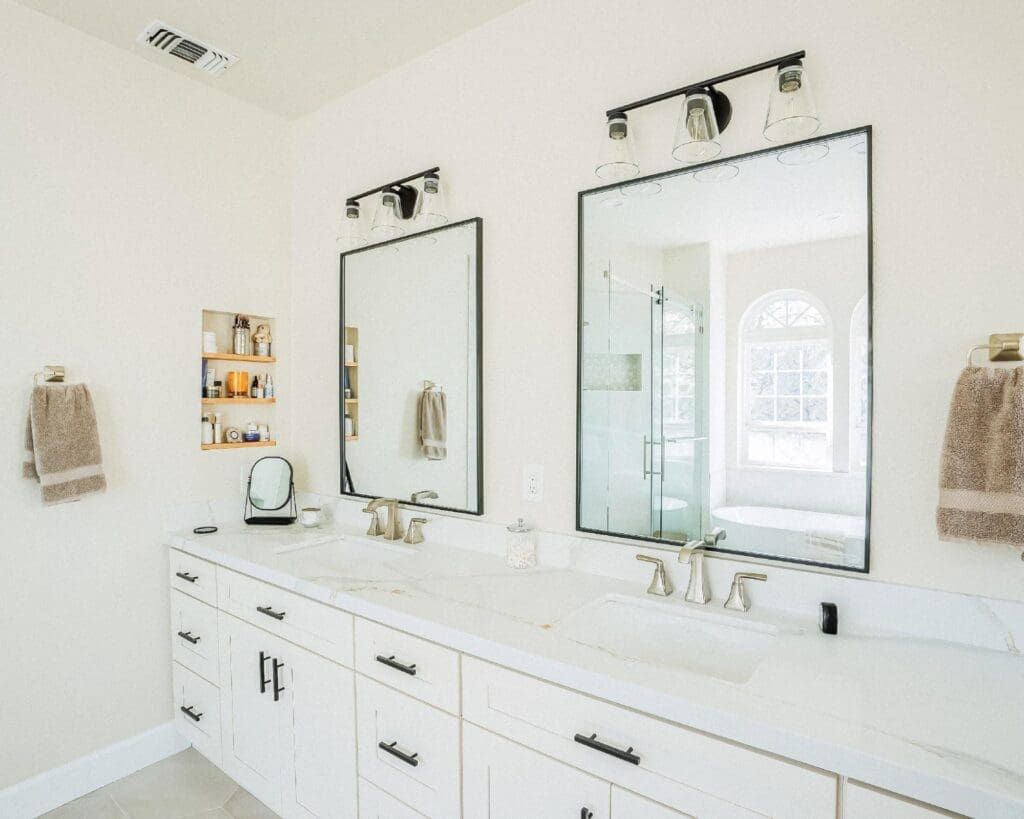
The niche shown above is recessed right into the wall next to the vanity, with three open wood shelves for everyday items, and a small tabletop mirror on the counter below it. Because it’s built into the wall rather than mounted on top of it, it doesn’t eat into counter space or make the room feel smaller, it just quietly holds everything that would otherwise end up cluttering the countertop.

Open Shelving Adds Storage Without Adding Bulk

Not every storage solution needs to be enclosed. A round, open wall shelf like the one below adds a spot for décor and small items without the visual weight of a full cabinet. It’s a good option for a wall that doesn’t have room for built-in framing, or for a homeowner who wants storage that also functions as display space.

Don’t Overlook the Cabinets You Already Have

Sometimes the biggest storage upgrade isn’t new storage at all, it’s making the cabinets you’re already installing work harder. Full-extension drawers, dedicated dividers, and simply choosing cabinetry with enough depth and drawer count up front all make a real difference in how usable the space feels day to day. Hardware matters here too: the matte black bar pulls shown below aren’t just a finish choice, they mark each drawer clearly at a glance, which sounds minor until you’re the one digging through the wrong one at 6 a.m.

Planning Storage Before You Plan Finishes

The best time to figure out storage is early, before cabinet orders go in and wall framing is finalized. A built-in niche has to be planned into the wall, not added after the drywall is up. If you know you want open shelving, that placement affects electrical and plumbing layout too. Storage that gets bolted on as an afterthought rarely looks as intentional as storage that was part of the plan from day one.

  • Recessed niches work best planned into the wall before drywall goes up, not retrofitted later
  • Open shelving adds storage and display space without the bulk of a full cabinet
  • Full-extension drawers and dividers make existing cabinetry more usable without adding new pieces
  • Distinct hardware on each drawer makes daily use easier, not just a style choice

If your bathroom remodel needs more thoughtful storage, not just more square footage, my team at America’s Advantage Remodeling can help you plan niches, shelving, and cabinetry that actually work for how you use the space.

Frequently Asked Questions

Q: How do I add more storage to a small bathroom?

A: Built-in wall niches and open shelving both add storage without taking up floor space or bulking out the room, and are especially effective in a small bathroom. Making better use of existing cabinetry with full-extension drawers and dividers can also add real storage without any construction at all.

Q: Are built-in bathroom niches better than a medicine cabinet?

A: A built-in niche and a medicine cabinet both add storage, but a niche is fully recessed and open, so it doesn’t project into the room or add a door to work around. A medicine cabinet offers enclosed, hidden storage. Many bathrooms benefit from both, used for different types of items.

Q: Can I add a built-in shelf niche during a remodel?

A: Yes, but it needs to be planned before drywall goes up, since a niche is recessed into the wall cavity. If you’re remodeling a bathroom and want a built-in niche, raise it early in the design process rather than after framing is complete.

Cabinet Refacing vs. Replacement: Which Saves You More Money?

Опубликовано: July 31, 2026 в 4:32 pm

Автор:

Категории: All

“What does kitchen cabinet refacing cost, and is it actually worth it compared to just replacing everything?” is one of the most common cost-saving questions I get in a kitchen consultation. The honest answer is that it depends on the condition of your existing cabinet boxes and how much you want to change about the layout. After 25 years remodeling kitchens across the Sacramento area, here’s how I walk clients through that decision.

What Refacing Actually Involves

Cabinet refacing keeps your existing cabinet boxes in place and replaces the doors, drawer fronts, and hardware, along with new veneer on any exposed box surfaces. It’s a legitimate way to change the entire look of a kitchen, new door style, new color, new hardware, without touching the layout. The tradeoff is that refacing only works if the boxes themselves are in good structural shape. If there’s water damage, warping, or the layout needs to change, refacing isn’t the right fit.

What Replacement Actually Involves

Full replacement means new cabinet boxes from the studs out, which opens up the layout entirely, you can add an island, change the footprint, adjust cabinet heights, or reconfigure storage completely. It’s more disruptive and costs more, but it’s the only option if you’re changing the kitchen’s layout or if the existing boxes aren’t sound enough to reface.

What Kitchen Cabinet Refacing Actually Costs

Refacing is less expensive than replacement primarily because it skips the demolition, new box construction, and the electrical/plumbing rework that often comes with a full layout change. Refacing cost is driven mainly by two things: the door and drawer front material you choose, and how much of the existing box surface needs new veneer. A simple laminate refacing job costs far less than a solid-wood refacing job with premium hardware — the range is wide enough that “how much does refacing cost” rarely has one single answer without seeing the kitchen.

But refacing isn’t always dramatically cheaper than replacement. High-end door styles and finishes on a refacing project can approach the cost of a modest full replacement. The bigger cost driver is usually the layout: if you’re not changing the footprint, refacing saves real money. If you are changing the footprint, you’re paying for a replacement either way, refacing or not.

When Refacing Makes Sense

  • Cabinet boxes are structurally sound, with no water damage or warping
  • You’re happy with the current layout and don’t need to move plumbing or appliances
  • You want a different look, new color, new door style, new hardware, without a full renovation
  • Budget is the primary constraint and layout changes aren’t essential

When Replacement Makes Sense

  • The layout needs to change, adding an island, moving an appliance, or reconfiguring storage
  • Cabinet boxes show water damage, warping, or structural wear
  • You want full control over interior storage features (soft-close drawers, pull-out organizers, deeper boxes)
  • You’re doing a broader kitchen remodel where cabinets are just one part of the scope

Both approaches can produce a beautiful result, the right call comes down to your cabinet boxes’ condition and whether the layout itself needs to change. If you’re not sure which situation you’re in, that’s exactly what a walkthrough is for. My team at America’s Advantage Remodeling can take a look at your existing cabinets and give you a straight answer before you commit to either approach.


Frequently Asked Questions

Q: How much does kitchen cabinet refacing cost?

A: Cost varies mainly based on the door and drawer front material you choose and how much veneer work the existing boxes need. Simple laminate refacing is on the lower end, while solid-wood doors with premium hardware can approach the cost of a modest full replacement.

Q: Is cabinet refacing worth it?

A: Cabinet refacing is worth it when your existing cabinet boxes are structurally sound and you’re happy with the current layout. It gives you a new look at a lower cost than full replacement, but isn’t the right choice if the boxes are damaged or the layout needs to change.

Q: How much does it cost to reface kitchen cabinets?

A: Refacing costs less than full replacement in most cases, since it avoids demolition and new box construction, but the exact cost depends heavily on the door style and finish you choose, high-end refacing can approach the cost of a modest full replacement.

Q: What’s the difference between cabinet refacing and replacement?

A: Refacing keeps the existing cabinet boxes and replaces only the doors, drawer fronts, and hardware. Replacement removes the boxes entirely and installs new ones, which allows for layout changes that refacing can’t accommodate.

Q: Can you reface cabinets if the layout is changing?

A: No. Refacing only works with the existing cabinet box layout. If you’re adding an island, moving an appliance, or reconfiguring storage, you need full replacement.

2026 Kitchen Color & Material Trends: What’s Replacing the All-White Kitchen

Опубликовано: July 31, 2026 в 2:43 pm

Автор:

Категории: All,Kitchen

This question comes up in almost every primary bathroom consultation I do: is a double vanity worth it, or is a single vanity the smarter call? The honest answer depends less on square footage than most people assume, and more on how mornings actually go in your house.

Warm Neutrals Are Replacing Stark White

Greige, mushroom taupe, and creamy warm whites are showing up far more often than the cool, stark white that dominated the last several years. It’s a subtle shift, but it changes the whole feel of a kitchen, warmer and more lived-in, rather than clinical.

Natural Wood Tones Are Back

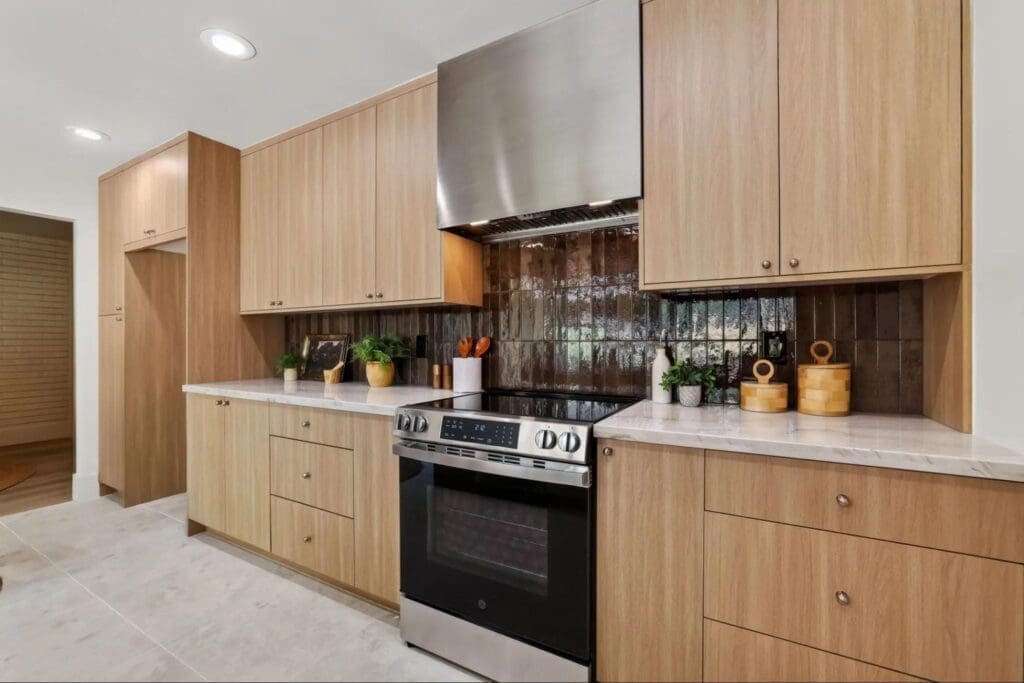
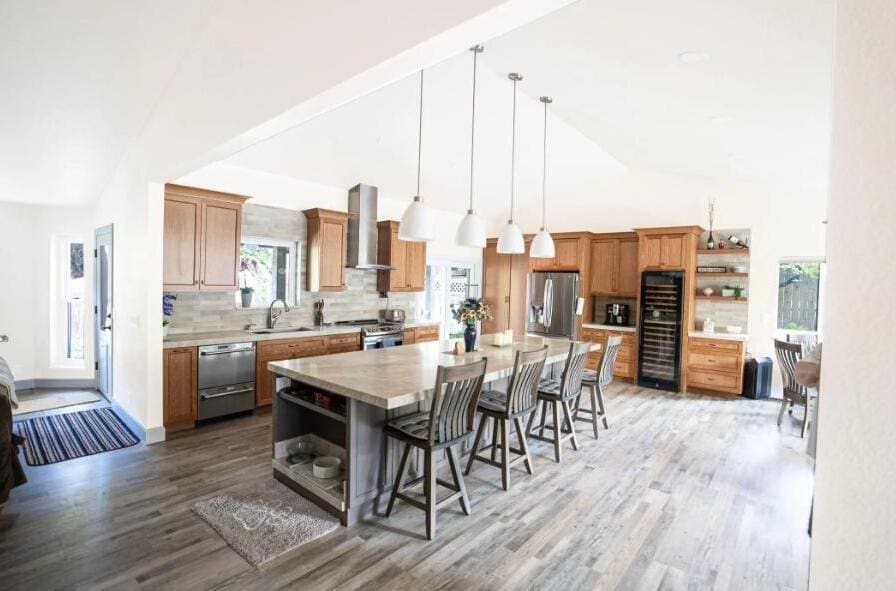
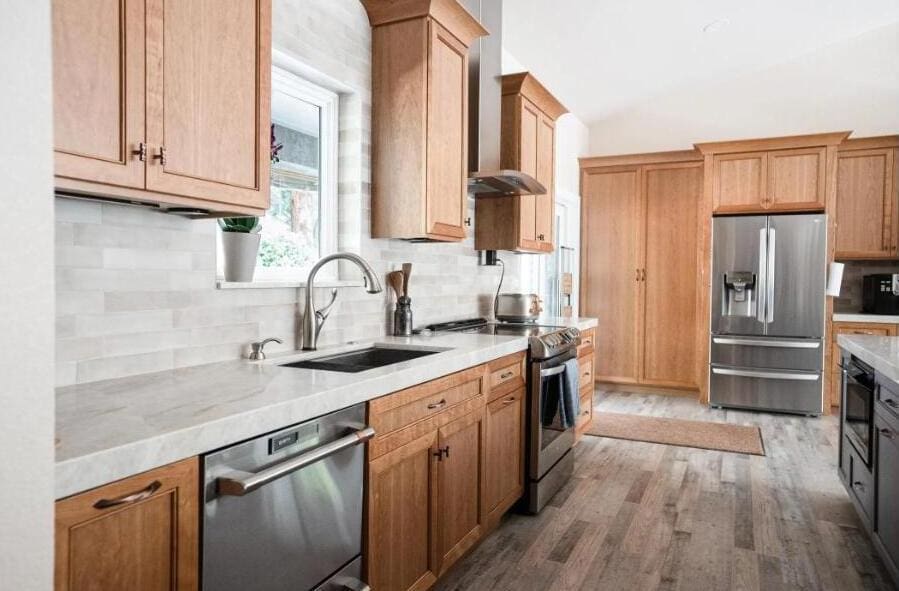
Walnut, cherry, and warm oak cabinetry are having a real moment. On a recent project of ours in Cameron Park, the client kept warm oak cabinetry throughout paired with a built-in wine fridge and open shelving, exactly the kind of warm, natural-material look driving a lot of 2026 requests.

Slab Stone Backsplashes

Instead of tile, full-slab stone backsplashes that run seamlessly from countertop to upper cabinets are becoming a popular upgrade for homeowners who want a more luxurious, continuous look.

Warm Metals Over Chrome

Brass, brushed gold, and other warm-toned fixtures are steadily replacing the cool chrome and stainless finishes that were standard for years, on faucets, cabinet hardware, and especially statement lighting. A recent project of ours in Roseville leaned into this with a pair of brass dome pendants over the island, paired with a mix of white and natural wood cabinetry.

Mixed Materials Over Matchy-Matchy

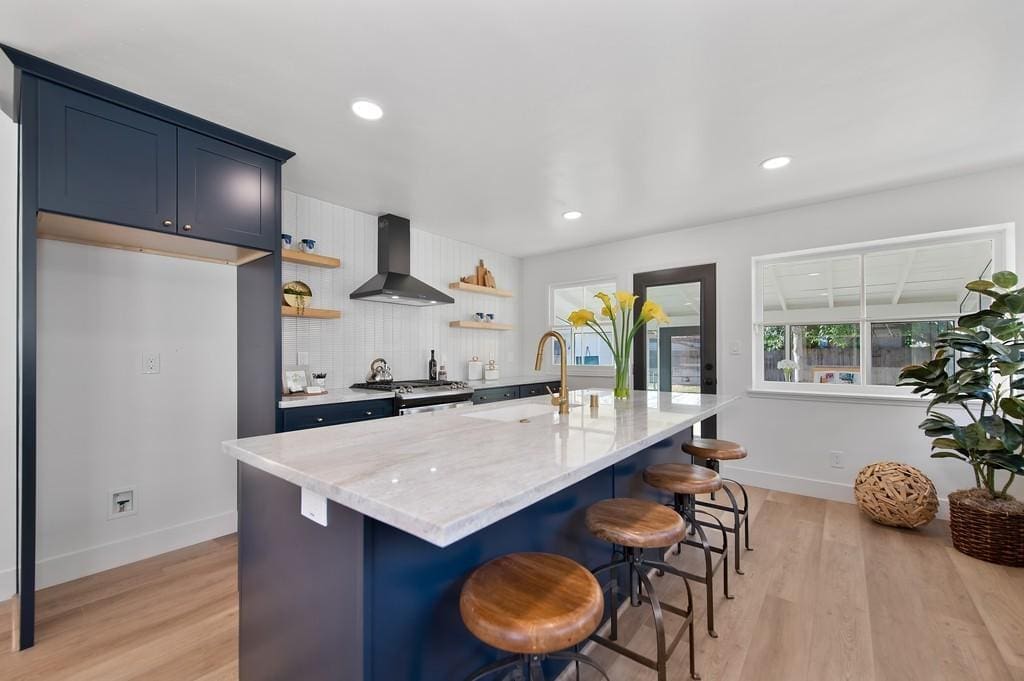
Rather than one material used throughout, more kitchens are combining wood, stone, and metal deliberately, a wood island against painted perimeter cabinets, for example, or mixed hardware finishes instead of one uniform metal.

Should You Chase the Trend?

Trends are a useful lens, but I always tell clients: choose finishes you’ll still love in ten years, not just what’s popular this year. The good news about the 2026 shift toward warm neutrals and natural materials is that it’s also simply more timeless than some trends of the past decade, which makes it an easier one to commit to.

If you’re planning a kitchen remodel and want to talk through what’s trending versus what actually fits your home long-term, my team at America’s Advantage Remodeling is happy to walk through it with you.

Frequently Asked Questions

Q: Are white kitchens still in style in 2026?

A: White kitchens haven’t disappeared, but warm neutrals like greige, mushroom taupe, and creamy warm whites are increasingly replacing the starker, cooler whites that dominated recent years.

Q: What kitchen colors are trending for 2026?

A: Warm neutrals, natural wood tones like walnut and warm oak, and earthy palettes are trending for 2026, moving away from the stark white and cool gray tones popular in previous years.

Q: Is brass or gold hardware still trending in kitchens?

A: Yes, warm metals like brass and brushed gold continue to gain ground over cooler finishes like chrome, especially on lighting, faucets, and cabinet hardware.