All Archives - Page 3 Of 7 - America's Advantage Remodeling

All

Which Room Should You Remodel First? How to Sequence a Full Home Remodel

Опубликовано: July 31, 2026 в 2:37 pm

Автор:

Категории: All,Kitchen

When homeowners come to us planning a full home remodel, the question I hear almost as often as “what will this cost” is “where do we even start?” It’s a good question, because the order you renovate in actually matters done in the wrong sequence, you end up redoing finished work or living through more disruption than necessary. After 25 years managing full home remodels across the Sacramento area, here’s how I sequence a project.

Start With What You Can’t See: Systems First

Before any room gets its new look, the home’s underlying systems need attention: electrical, plumbing, HVAC, and structural issues. On a recent 14-week full home remodel we completed in Sacramento (zip 95819), we started by updating the plumbing and electrical systems and adding insulation and a new HVAC system, all before a single finish surface went in. Doing this first means you’re never cutting into a finished wall or newly tiled floor to fix something that should have been addressed earlier.

Then the Exterior

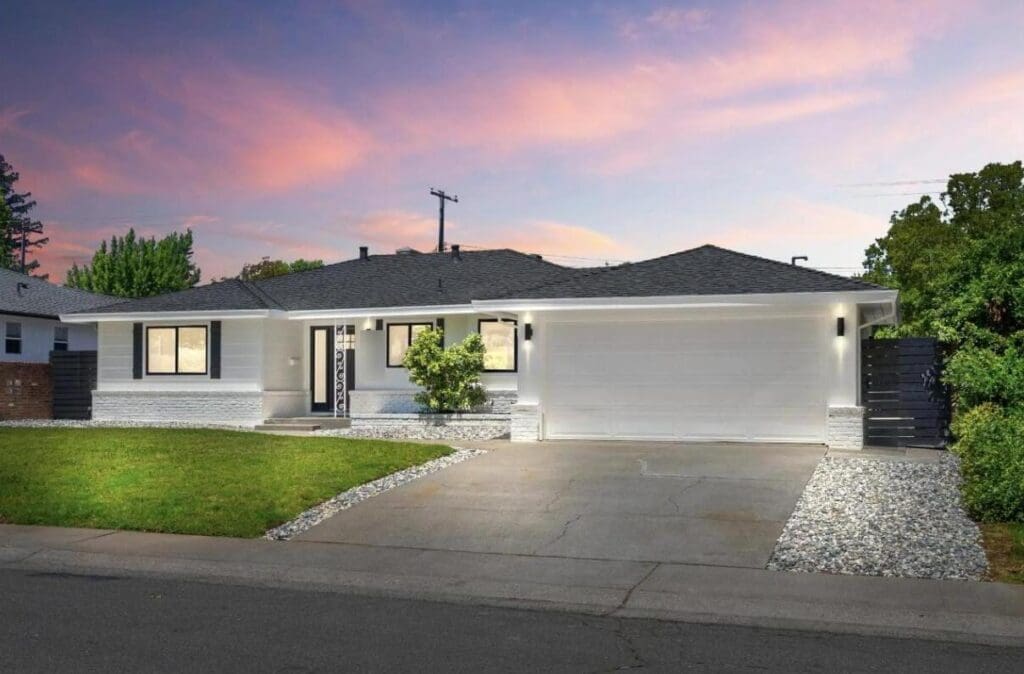
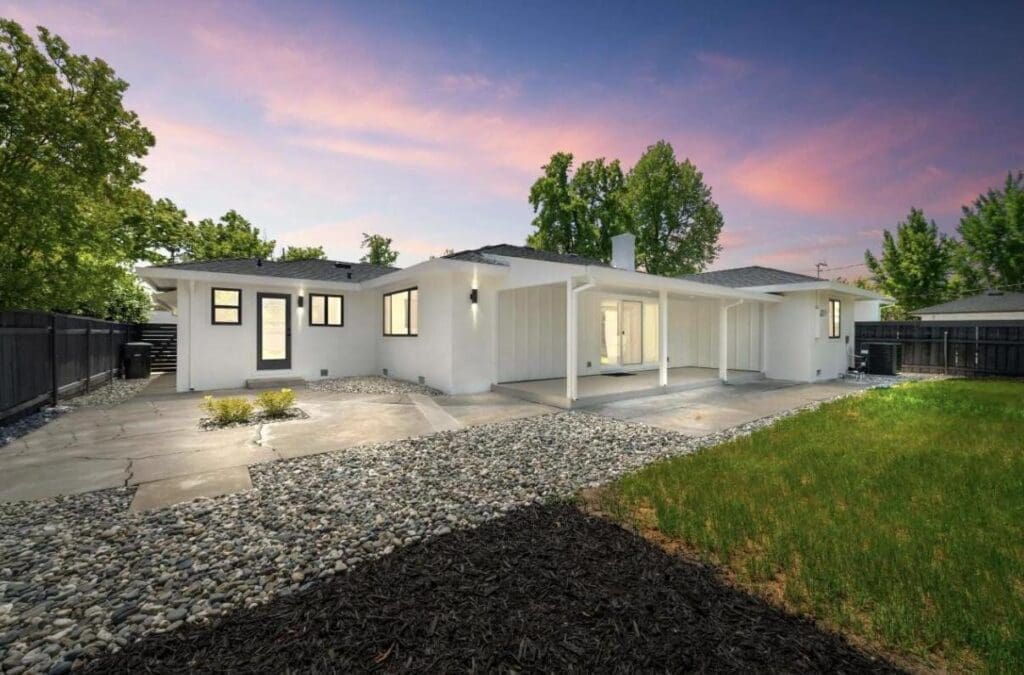
Once the home’s systems are sound, the exterior is typically next, roofing, siding, and any structural repairs. This protects everything you’re about to build inside from weather exposure during construction, and it also means exterior crews and interior crews aren’t tripping over each other on the same timeline. On that same 95819 project, we refreshed the siding, repainted the facade, installed a new roof, and updated the landscaping as part of this phase.

Kitchen and Bathrooms Next

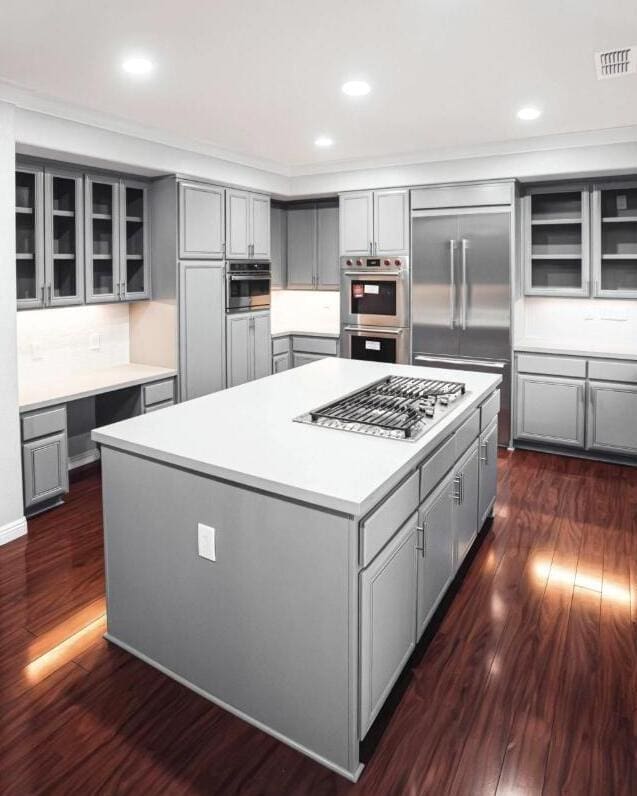
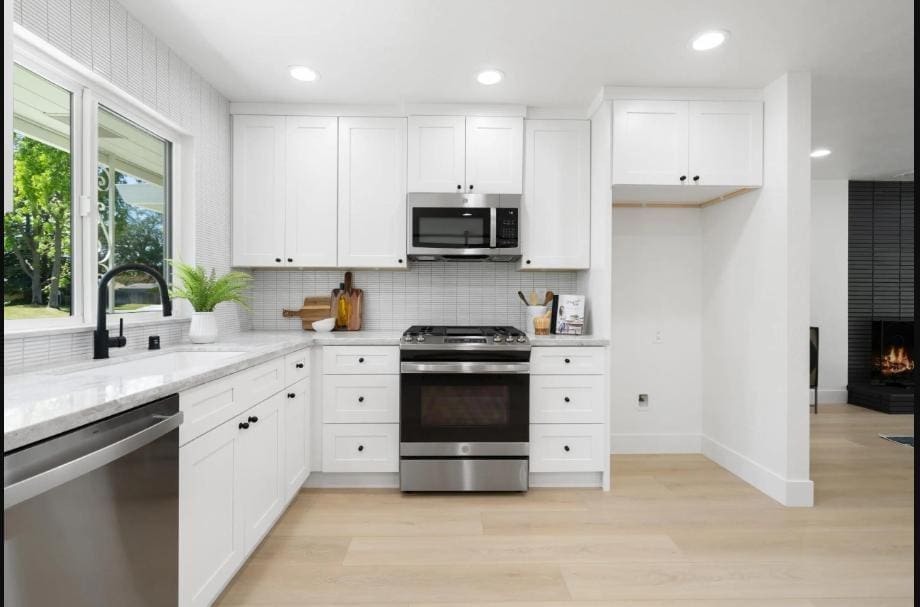
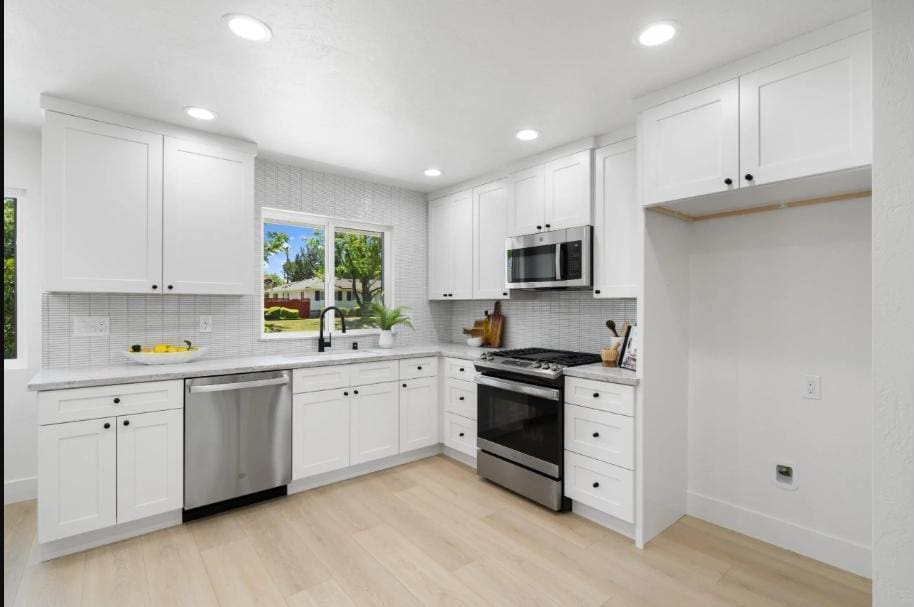
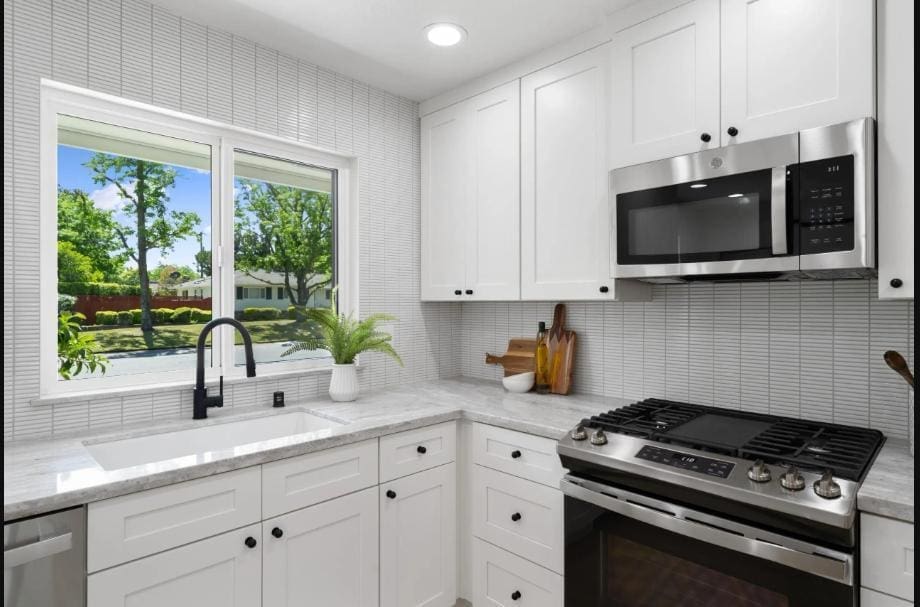
Kitchens and bathrooms involve the most plumbing, electrical, and structural complexity of any interior rooms, which is why they typically come before simpler cosmetic spaces. Tackling them earlier in the interior phase also means the most disruptive, messiest work is behind you sooner rather than later. The before-and-after shown at the top of this article is a good example of the scale of that transformation, a dated kitchen in Walnut Grove, still wearing its original wallpaper and laminate counters, turned into the finished space on the right.

Living Spaces and Flooring Last

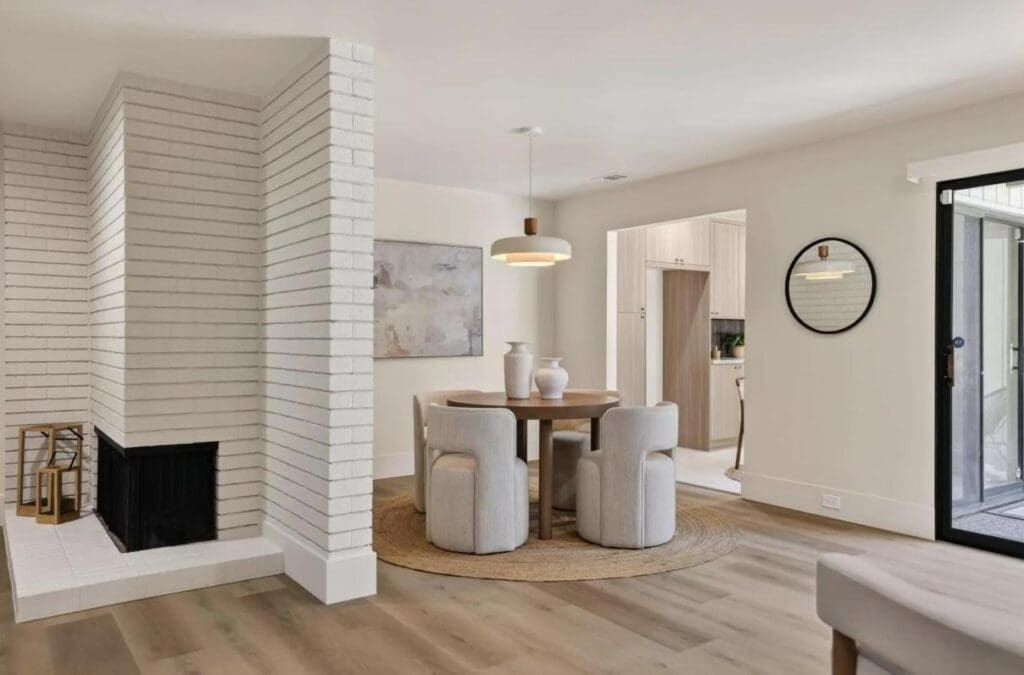
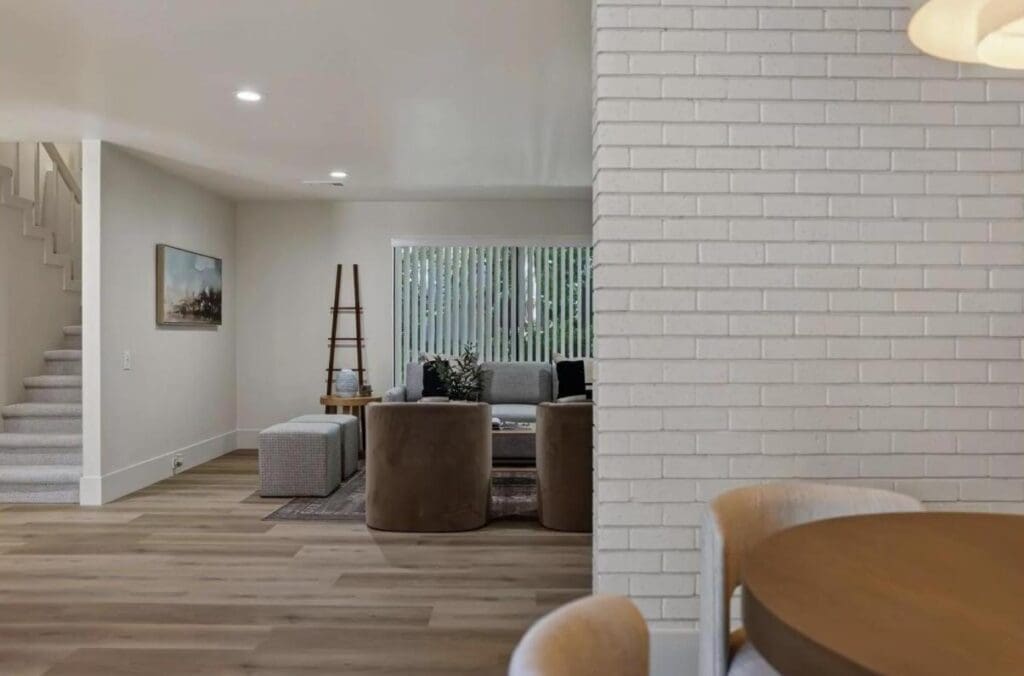
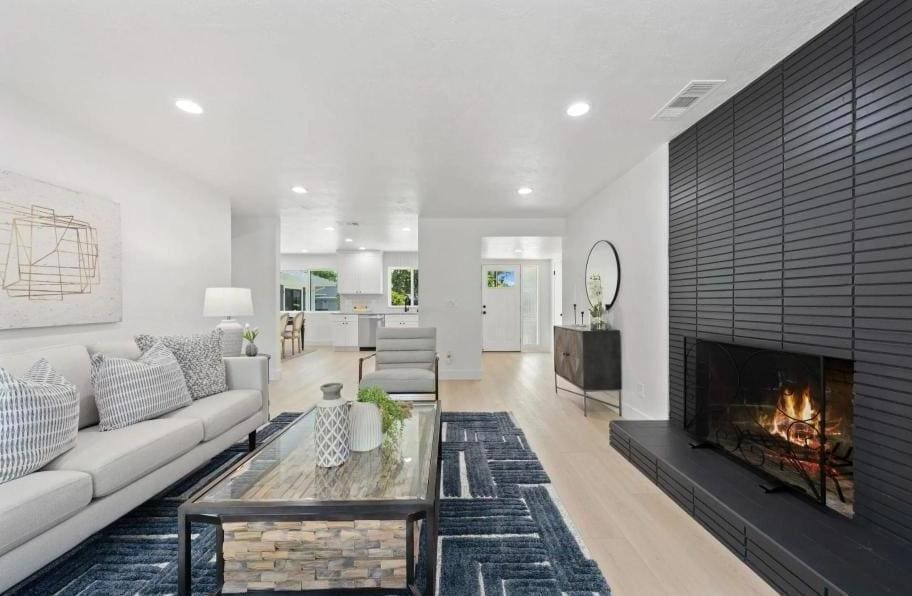
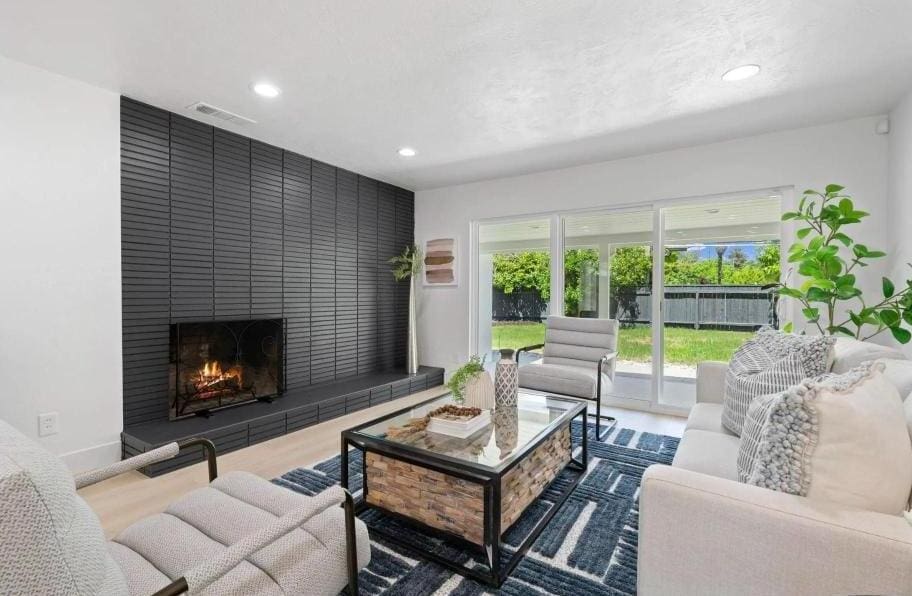
Flooring, paint, and finish work in living rooms, bedrooms, and hallways generally come last. This sequencing protects new floors and finishes from the heavier foot traffic and equipment involved in kitchen and bathroom work, and it means the areas you’ll actually relax in are the freshest when the project wraps. On a recent full home project of ours in Roseville, the living room’s new flooring, built-in shelving, and fireplace surround were among the final pieces to come together, the payoff after the less glamorous systems and kitchen work was already behind us.

A Rough Sequence

  • 1. Systems: electrical, plumbing, HVAC, insulation, structural repairs
  • 2. Exterior: roof, siding, windows, landscaping
  • 3. Kitchen and bathrooms
  • 4. Remaining interior: flooring, paint, trim, finish work

Every home is different, and a good contractor will adjust this order based on your specific project — but this is the framework that keeps a full home remodel moving efficiently rather than backtracking. If you’re planning a whole-home project, my team at America’s Advantage Remodeling can walk your property and map out a sequence that fits your home and your timeline.


Frequently Asked Questions

Q: What should you remodel first in a full home renovation

A: Start with what’s behind the walls: electrical, plumbing, HVAC, and any structural repairs. Addressing these systems first avoids having to cut into newly finished surfaces later in the project.

Q: Should you do the exterior or interior first in a full home remodel?

A: Exterior work like roofing and siding typically comes after systems but before interior finishes, since it protects the home from weather exposure while interior construction is underway.

Q: Why do kitchens and bathrooms usually get remodeled before living rooms and bedrooms?

A: Kitchens and bathrooms involve the most plumbing, electrical, and structural complexity, so tackling them earlier keeps the most disruptive work concentrated in one phase, while simpler cosmetic spaces like living rooms and bedrooms are typically finished last.

Walk-In Shower vs. Bathtub: How to Decide for Your Bathroom Remodel

Опубликовано: July 31, 2026 в 2:33 pm

Автор:

Категории: All,Bathroom

This is one of the most common questions I get in a bathroom consultation, and there isn’t a single right answer, it depends on who uses the bathroom and how. After 25 years remodeling bathrooms across the Sacramento area, here’s how I actually walk clients through this decision.

The Case for a Walk-In Shower

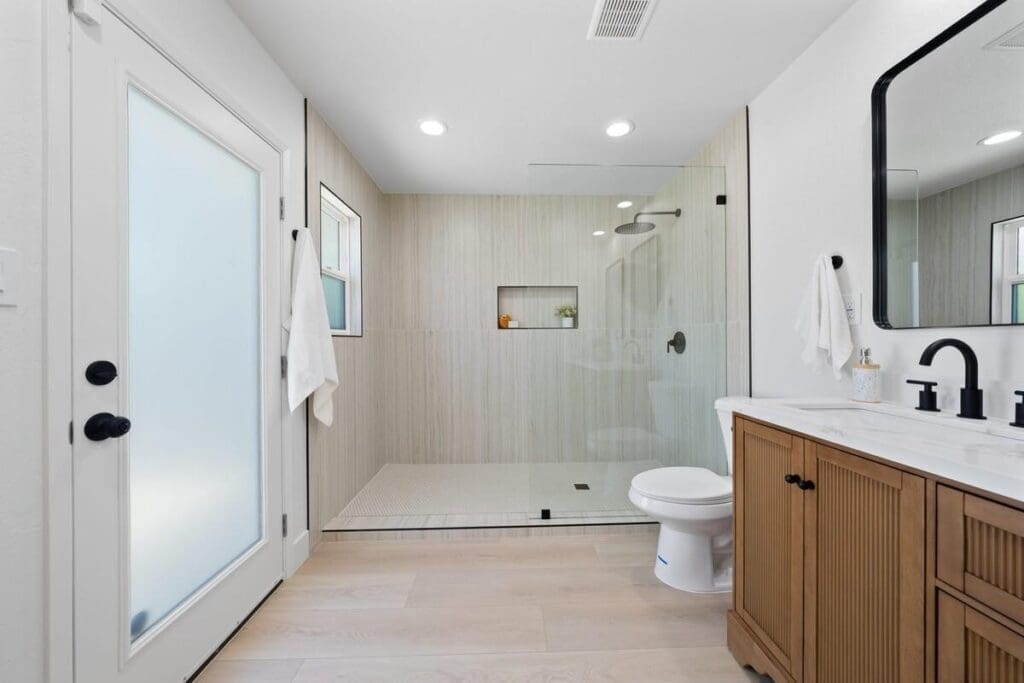
A walk-in shower opens up the room, makes daily use easier, and tends to photograph beautifully with large-format tile and frameless glass. For homeowners who use the shower daily and only reach for a bath a few times a year, it’s usually the better use of both budget and square footage.

The Case for Keeping a Tub

That said, I always ask two questions before recommending tub removal: is there a child in the house who still needs bathing, and is this the only bathroom in the home? If either is true, I generally recommend keeping at least one tub somewhere in the house. It also matters for resale in a family-oriented market, a home with zero bathtubs can be a turn-off for buyers with young kids, even if the primary suite has a beautiful shower.

What About Both?

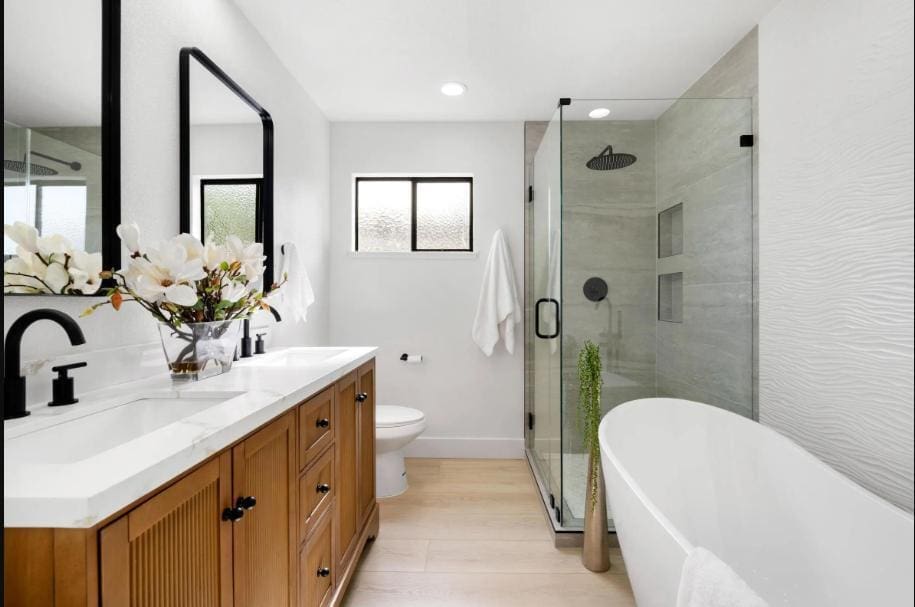
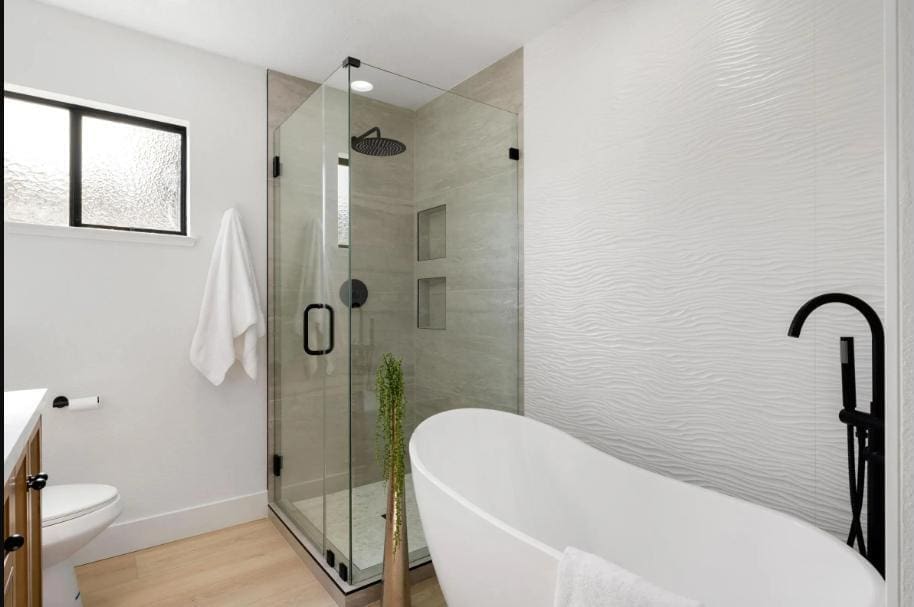
If the bathroom has the square footage, a separate soaking tub and walk-in shower gives you the best of both. This is more common in primary suites than secondary bathrooms, where space is usually tighter. On a recent project in El Dorado Hills, we did exactly this, a frameless glass walk-in shower and a freestanding soaking tub sharing the same primary bathroom, so the homeowners never had to choose between the two.

My Honest Recommendation

For a primary or guest bathroom with no other tub in the house, I lean toward keeping one. For a secondary or hall bathroom in a home that already has a tub elsewhere, a walk-in shower is usually the better use of space and budget. It really comes down to your household, not what’s trending.

If you’re weighing this decision for your own bathroom, my team at America’s Advantage Remodeling can walk through your space and talk through what actually makes sense for how you live, not just what looks good in photos.


Frequently Asked Questions

Q: Should I remove my bathtub for a walk-in shower?

A: If the tub isn’t used daily and you have another tub elsewhere in the home, removing it for a walk-in shower is a popular upgrade that opens up the room. If this is your only tub and you have young children, or you’re concerned about resale, it’s worth keeping at least one tub in the home.

Q: Does removing a bathtub hurt home resale value?

A: It can, if the home ends up with zero bathtubs. Buyers with young children often look for at least one tub in the house, so many homeowners keep a tub in a secondary bathroom even while converting the primary suite to a walk-in shower.

Q: Is a walk-in shower more expensive than a bathtub?

A: Cost depends on materials and tile more than the fixture type itself. A walk-in shower with frameless glass and custom tile can cost more than a standard tub, but a simple shower conversion can also be less expensive than a high-end freestanding tub.

Double Sink Vanity vs. Single Vanity: Which Is Right for Your Bathroom?

Опубликовано: July 29, 2026 в 12:05 pm

Автор:

Категории: Bathroom,All

This question comes up in almost every primary bathroom consultation I do: is a double vanity worth it, or is a single vanity the smarter call? The honest answer depends less on square footage than most people assume, and more on how mornings actually go in your house.

The Case for a Double Sink Vanity

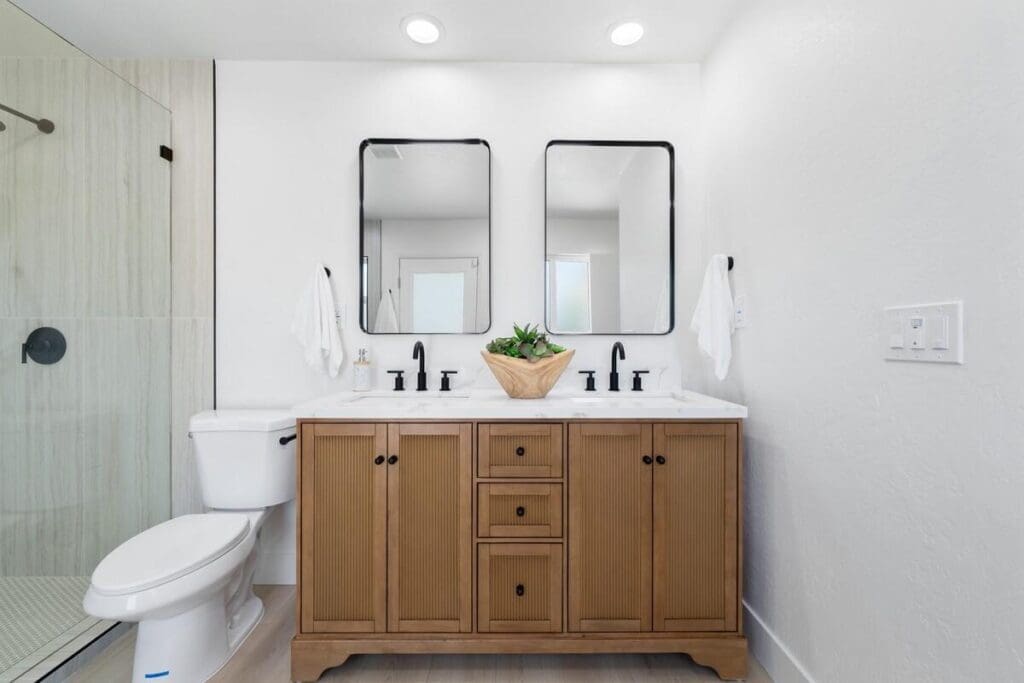
If two people are getting ready at the same time most mornings, a double vanity removes the daily bottleneck. On a recent project of ours on Westmoreland Way, we built a dual-sink vanity into the primary bathroom specifically because the clients had two very different morning routines and were tired of waiting on each other. It’s one of the upgrades clients tell me they notice every single day, not just when guests visit.

The Case for a Single Vanity

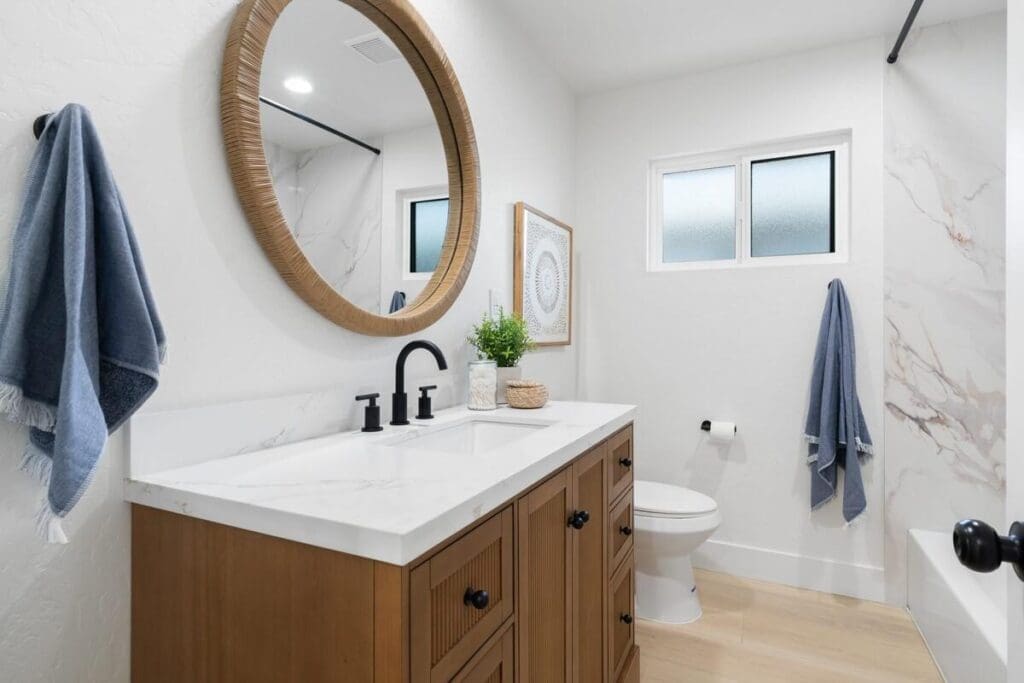
A single vanity isn’t a downgrade in a smaller bathroom, it can mean a bigger mirror, more counter space per person, and a less cramped feel overall. For a secondary or guest bathroom that isn’t used by two people simultaneously, a single vanity is almost always the better use of the footprint. In fact, that same Westmoreland Way home is a good example of this decision working both ways in one house: the primary bathroom got the double vanity above, while a secondary bathroom kept a single vanity with a bigger mirror and a bit more breathing room on the counter.

How Much Space Do You Actually Need?

As a rule of thumb, I recommend at least 60 inches of vanity width before considering a double sink comfortably below that, two sinks tend to feel cramped rather than convenient. If your bathroom is tighter than that, a single vanity with a slightly wider single sink is usually the better tradeoff.

My Honest Recommendation

For a shared primary bathroom used by two people on similar schedules, a double vanity is almost always worth the investment if the space allows it. For a guest bath, kids’ bathroom used one at a time, or any bathroom under about five feet of wall space, I’d put the budget toward a nicer single vanity instead.

If you’re weighing this for your own remodel, my team at America’s Advantage Remodeling can measure your space and walk you through what will actually work not just what looks good in a showroom.

Frequently Asked Questions

Q: Do I need a double vanity in my bathroom?

A: A double vanity makes the most sense if two people use the bathroom at the same time most mornings. If the bathroom is used by one person at a time, a single vanity with more counter space is usually the better choice.

Q: How much space do you need for a double vanity?

A: At least 60 inches of vanity width is generally recommended for a comfortable double vanity. Below that, two sinks tend to feel cramped rather than convenient, and a single vanity is usually the better fit.

Q: Does a double vanity add resale value?

A: In a primary bathroom, a double vanity is a feature many buyers look for and can support resale value. In a smaller secondary bathroom, it’s less impactful and a well-designed single vanity often serves the space better.

Living Room Remodel Ideas: Built-Ins, Fireplace & Flooring That Actually Work

Опубликовано: July 28, 2026 в 12:14 pm

Автор:

Категории: All,Design

The living room or family room doesn’t always get the same remodeling attention as a kitchen or bathroom, but it’s often the room a family spends the most actual hours in. After 25 years working on full home remodels across the Sacramento area, here’s where I see the best return on a living room refresh.

Living Room Built-Ins: What Actually Works

Custom built-in cabinetry flanking a fireplace is one of the most requested upgrades I see in full home remodels, and it’s also one of the most-searched living room upgrades homeowners look into before committing. A few things I tell clients up front: built-ins earn their keep most when they mix closed storage (for the stuff you don’t want on display) with open shelving for books, art, and family photos. Depth matters too, built-ins that are too shallow for real storage end up purely decorative, which is a missed opportunity. On a recent project of ours in Roseville, we flanked the fireplace with matching oak built-ins on both sides, exactly this mix of closed cabinets below and open shelving above, and done well, it made the whole room feel finished and intentional rather than furnished around a gap.

A Fireplace Refresh Changes the Whole Room

Updating dated brick or tile surrounding a fireplace, with a large-format tile, a wood mantel, or a slab material, is one of the highest-impact single changes in a living room, since the fireplace is usually the room’s visual anchor.

Durable, Warm Flooring

Family rooms take more daily wear than almost any other room, kids, pets, foot traffic from the kitchen. Engineered hardwood or high-quality luxury vinyl plank in warm tones has become the go-to choice for durability without sacrificing the warm look many homeowners want.

Layered Lighting Over a Single Overhead Fixture

A single ceiling fixture rarely does a family room justice. Layering recessed lighting, a statement fixture, and a few lamps or sconces gives the room flexibility for movie nights, homework, and everything in between.

Sequencing It Into a Full Home Remodel

In a full home project, the living room typically comes toward the end of the interior phase, after kitchens and bathrooms, since it involves the least plumbing and electrical complexity. That means by the time it’s the living room’s turn, homeowners are usually seeing the most tangible, livable payoff of the whole project.

If you’re planning a full home remodel and want the living room to be more than an afterthought, my team at America’s Advantage Remodeling can help you plan it in from the start.

Frequently Asked Questions

Q: What are the best living room remodel ideas?

A: Custom built-ins around a fireplace, an updated fireplace surround, durable warm-toned flooring, and layered lighting are among the highest-impact living room remodel updates, since they address both daily function and overall feel.

Q: What should living room built-ins include?

A: The best living room built-ins mix closed cabinet storage with open shelving, and are built deep enough for real storage rather than purely decorative display. Flanking a fireplace is the most common and highest-impact placement.

Q: Should I remodel my living room as part of a full home renovation?

A: Yes, if you’re already doing a full home remodel, the living room typically comes at the end of the interior phase and benefits from being planned alongside the rest of the home’s finishes rather than treated as an afterthought.

Q: What flooring is best for a family room?

A: Engineered hardwood or high-quality luxury vinyl plank in warm tones are popular choices for family rooms because they hold up to daily foot traffic, kids, and pets while still giving a warm, finished look.

2026 Bathroom Trends: Colors, Tile & Fixtures Homeowners Are Choosing

Опубликовано: July 27, 2026 в 12:18 pm

Автор:

Категории: Bathroom,All

Bathroom design moves a little slower than kitchen trends, but 2026 is bringing some real shifts away from the all-white, all-chrome look that’s dominated for the last several years. After 25 years watching these changes play out across the Sacramento area, here’s what I’m actually seeing homeowners choose right now.

Warm, Earthy Color Palettes

Soft greens, warm taupe, and earthy neutrals are replacing the stark white-and-gray palettes that have been standard for a decade. It’s a subtle shift, but it makes a bathroom feel more like a retreat and less like a clinical space.

Large-Format Tile Everywhere

Large-format tile continues to grow in popularity: fewer grout lines, easier to keep clean, and it makes a small bathroom feel larger. We’re seeing it move beyond just flooring and into full shower walls and even backsplashes. A recent project of ours in Sacramento (47th Ave) paired warm wood cabinetry with a large-format tile walk-in shower, a good example of how this trend actually looks in a finished space.

Warm Metal Fixtures

Brushed gold and brass fixtures continue gaining ground over the cool chrome and brushed nickel that dominated for years on faucets, shower hardware, and cabinet pulls alike.

Curbless, Zero-Threshold Showers

Beyond just looking sleek, curbless showers are increasingly requested for practical reasons: easier to clean, easier to age in place with, and a more seamless look overall. This is one of the fastest-growing requests we get on bathroom remodels right now. A recent accessible bathroom remodel of ours in Rancho Cordova is a good example: a fully curbless shower with a flush hex-tile floor, built-in grab bars, and a handheld sprayer, practical without sacrificing a clean, finished look.

Statement Vanity Lighting

A single builder-grade light bar over the mirror is on its way out. Sconces flanking the mirror, or a statement fixture above it, are becoming the norm, both for better lighting and a more finished look.

Should You Chase Every Trend?

As with kitchens, I tell bathroom clients the same thing: pick finishes that will hold up over the next decade, not just this year. The good news is that most of what’s trending in 2026- warm tones, large-format tile, curbless showers- also happens to be more timeless and functional, not just stylish.

If you’re planning a bathroom remodel and want to talk through what’s actually worth investing in, my team at America’s Advantage Remodeling is happy to walk through it with you.

Frequently Asked Questions

Q: What bathroom colors are trending in 2026?

A: Warm, earthy palettes, soft greens, warm taupe, and earthy neutrals are trending for 2026, replacing the stark white-and-gray combinations that dominated recent years.

Q: Are curbless showers worth it?

A: Curbless showers are increasingly popular for both style and practicality; they’re easier to clean, more accessible for aging in place, and give a bathroom a more seamless, high-end look.

Q: What fixture finish is trending in bathrooms?

A: Brushed gold and brass fixtures continue to gain ground over cooler finishes like chrome and brushed nickel, especially on faucets and shower hardware.

How Much Does a Full House Renovation Cost? Budgeting by Room

Опубликовано: July 26, 2026 в 7:00 am

Автор:

Категории: All,Bathroom,Kitchen

“How much does a full house renovation cost?” is one of the first questions every homeowner asks, and it’s a fair one, but the more useful question is how that total actually breaks down room by room. Once you commit to a full home remodel, the budget conversation gets a lot more complicated than a single-room project. Instead of asking “what will the kitchen cost,” you’re asking how to split one number across an entire house. After 25 years managing full home remodels across Roseville, Sacramento, and the surrounding communities, here’s how I actually help clients think through that allocation.

Start With Systems and Structure, Even Though It’s the Least Exciting

Electrical, plumbing, HVAC, and any structural repairs should get first claim on the budget, before finishes. It’s tempting to skip ahead to the fun decisions, but underfunding this phase is the single most common cause of a full home remodel running over budget, problems found once walls are open don’t wait for a more convenient time.

Kitchen: The Largest Single Line Item

In most full home remodels, the kitchen takes the largest individual share of the budget, often 25 to 35 percent of the total. Cabinetry, countertops, and appliances add up fast, and it’s usually the room homeowners are least willing to compromise on. The kitchen shown here, with a marble backsplash, brass fixtures, and a professional-grade range, is a good example of where that investment tends to show.

Bathrooms: Smaller Rooms, Real Cost

Bathrooms are physically small but plumbing-heavy, which keeps their share of the budget disproportionate to their square footage, typically 10 to 15 percent per bathroom in a full home remodel.

Living Spaces: Where the Budget Often Stretches Further

Living rooms, family rooms, and dining areas usually cost less per square foot than kitchens and bathrooms, since they involve less plumbing and electrical complexity. That makes this the category where a slightly larger allocation, built-ins, a fireplace update, better flooring, tends to deliver a lot of visible impact without breaking the budget.

A Rough Starting Split

  • Systems and structure: 15 to 20 percent
  • Kitchen: 25 to 35 percent
  • Bathrooms (combined): 15 to 25 percent
  • Living spaces and remaining interior: 15 to 25 percent
  • Contingency: 10 to 20 percent, always

That contingency line isn’t optional. Full home remodels almost always turn up at least one surprise once walls and floors come up, and a healthy buffer is what keeps a surprise from becoming a budget crisis.

Every home and every family’s priorities are different, some clients want to pour extra into the kitchen and keep bathrooms simple, others do the opposite. If you’re planning a full home remodel and want help figuring out where your specific budget should go, my team at America’s Advantage Remodeling can walk through it with you.

Frequently Asked Questions

Q: How much does a full house renovation cost?

A: A full house renovation typically ranges widely based on scope and square footage, but the total is best understood by breaking it into categories: systems and structure, kitchen, bathrooms, living spaces, and a contingency fund. The kitchen alone often accounts for 25 to 35 percent of the total budget.

Q: How should I allocate my budget for a full home remodel?

A: A reasonable starting split is 15 to 20 percent for systems and structure, 25 to 35 percent for the kitchen, 15 to 25 percent combined for bathrooms, 15 to 25 percent for living spaces, and 10 to 20 percent held as contingency.

Q: What takes the biggest share of a full home remodel budget?

A: The kitchen typically takes the largest single share of a full home remodel budget, often 25 to 35 percent of the total, due to the cost of cabinetry, countertops, and appliances.

Q: How much contingency should I budget for a whole house renovation?

A: A contingency of 10 to 20 percent of the total budget is standard for a full home remodel, since unexpected issues behind walls or under floors are common once construction begins.

Kitchen Island Ideas: Size, Storage, and Seating That Actually Work

Опубликовано: July 24, 2026 в 7:04 am

Автор:

Категории: All,Kitchen

A kitchen island is one of the most requested features in any remodel, and also one of the easiest to get wrong. Homeowners come to us with a Pinterest board full of gorgeous islands, but a lot of those photos don’t show you the thing that actually matters: whether the island fits the room, the traffic flow, and how the family actually cooks and eats. After 25 years remodeling kitchens across the Sacramento area, here’s how I help clients think through size, storage, and seating before we ever pick a countertop.

Start With Clearance, Not the Island Itself

Before we talk about how big an island should be, we talk about how much room needs to stay open around it. The standard we design to is a minimum of 42 inches of clearance on all sides, and closer to 48 inches if the island includes seating, so a stool can be pulled out while someone else is still walking past comfortably. Skip this step and even a beautiful island ends up feeling like an obstacle instead of the heart of the kitchen.

Sizing the Island to the Room

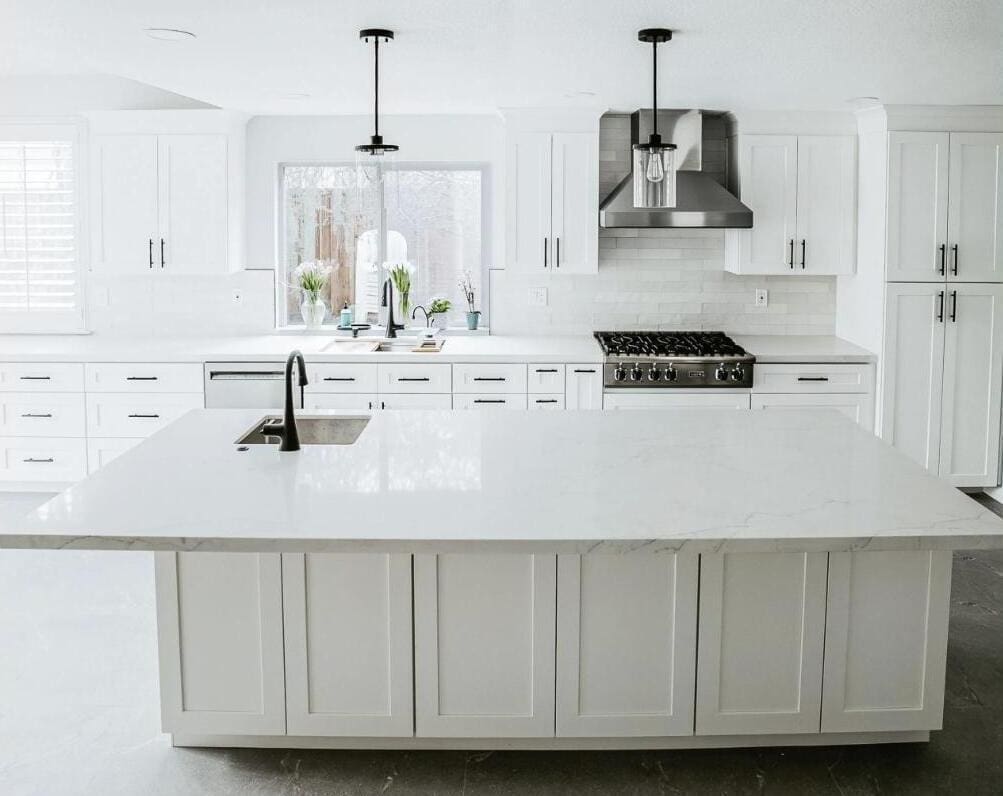
A useful rule of thumb: your island should leave at least 3 feet of clear walking space between it and the surrounding cabinets or counters on every side. In a smaller kitchen, that might mean a compact island with no seating at all, just extra prep space and storage. In a larger, more open-concept layout like the one shown above, there’s room for a full-length island with seating for four and open shelving built into the end. The island should scale to the kitchen, not the other way around.

Storage That Actually Gets Used

The most functional islands mix closed and open storage rather than going all one direction. Deep drawers work well for pots, pans, and small appliances near the range side, while an open shelf or cubby on the seating end is a natural spot for cookbooks, serving pieces, or baskets, and it also breaks up what would otherwise be a solid wall of cabinetry. We’ll often add outlets built into the island base itself, so a mixer or slow cooker can plug in without a cord running across the counter.

Planning for Kitchen Island Seating

Island seating is the single most-searched part of island planning, and it’s usually the detail people get wrong first. For comfortable seating, plan on roughly 24 inches of counter width per person, with knee clearance underneath (typically an overhang of 12 to 15 inches). Counter-height islands (36 inches) pair with counter stools, while bar-height sections (42 inches) need taller stools, mixing the two on the same island is a common way to visually separate a prep zone from a casual seating zone. The island pictured above seats four comfortably along one full side, with the range and prep work staying clear on the opposite side.

How many people you seat also drives the island’s overall length, not just its width. Two stools need roughly 4 feet of usable seating edge; four stools need closer to 8 feet. If the kitchen can’t fit an island that long, an L-shaped island or a seating extension on one end is often a better fit than forcing a too-short island to seat more people than it comfortably can.

A Few Sizing Guidelines

  • Minimum clearance around the island: 42 inches (48+ inches if there’s seating)
  • Seating: roughly 24 inches of counter width per person
  • Standard counter-height overhang for knee clearance: 12–15 inches
  • Smaller kitchens: consider a slim prep island with no seating rather than skipping the island entirely

The right island comes down to the specific shape of your kitchen, not a one-size-fits-all layout pulled from a magazine. If you’re planning a kitchen remodel and want to talk through what size and layout actually makes sense for your space, my team at America’s Advantage Remodeling can walk your kitchen and map it out with you.

Frequently Asked Questions

Q: How big should a kitchen island be?

A: A kitchen island should leave at least 42 inches of clearance on all sides (48+ inches if it includes seating), and should generally scale to leave 3 feet of walking space between the island and surrounding counters or cabinets.

Q: How much seating space do I need per person at a kitchen island?

A: Plan on roughly 24 inches of counter width per person, with 12 to 15 inches of overhang for knee clearance underneath. Two stools need about 4 feet of usable seating edge; four stools need closer to 8 feet.

Q: What’s the best kitchen island seating layout?

A: The best layout depends on island length: a single straight run works well for up to four stools, while an L-shaped island or a seating extension on one end fits more seating without forcing an oversized island into a kitchen that can’t accommodate one.

Q: What’s the difference between counter-height and bar-height island seating?

A: Counter-height islands are typically 36 inches tall and pair with counter stools, while bar-height sections are 42 inches and require taller bar stools; some kitchens mix both to separate a prep zone from a seating zone.

Open Concept Kitchen Remodel: What to Know Before You Remove a Wall

Опубликовано: July 23, 2026 в 7:08 am

Автор:

Категории: All,Kitchen

“Can we just take out this wall?” is one of the first questions homeowners ask when they picture an open concept kitchen. Sometimes the answer is a straightforward yes. Sometimes it means a structural beam, a permit, and a few extra weeks of construction. After 25 years remodeling kitchens across the Sacramento area, here’s what I walk every client through before we ever pick up a sledgehammer.

Load-Bearing vs. Non-Load-Bearing: Why It Matters

The first question is always whether the wall is load-bearing, meaning it’s helping hold up the structure above it. Non-load-bearing walls can usually come out with straightforward framing work. Load-bearing walls can still come out, but the load has to go somewhere, typically a structural beam that transfers the weight to posts or columns on either end, like the column shown above. This isn’t something to guess at; it needs an engineer or a qualified contractor to actually confirm before any wall comes down.

Permits Are Not Optional

Removing a load-bearing wall requires a permit in virtually every jurisdiction we work in, and for good reason, it’s a structural change to the house. Skipping the permit might save a little time up front, but it creates real problems later: inspection issues, insurance complications, and headaches if you ever sell the house and a buyer’s inspector asks who pulled the permit for that missing wall. We handle the permit and engineering review as part of the project, not as an afterthought.

What Construction Actually Looks Like

This is the part homeowners underestimate. Removing a load-bearing wall means temporary support while the new beam goes in, which can mean a few days of exposed framing, dust control between work areas, and the house being genuinely disrupted, not just the kitchen. It’s not a weekend project. Budgeting the right amount of time, and being honest with yourself about living in the house during that phase, makes a big difference in how the whole remodel feels.

Designing an Open Concept Kitchen and Living Room

Once the wall is gone, the design work isn’t over, it’s just starting. An open concept kitchen and living room still needs visual zones: a kitchen island or peninsula that reads as its own space, a rug that anchors the seating area, lighting that changes character from the kitchen to the living room. Without some intentional zoning, a big open room can start to feel like one undefined space rather than a kitchen and a living room that flow together well.

The two spaces should feel connected, not identical. We’ll often keep the kitchen’s flooring, lighting, and cabinetry distinct from the living room’s finishes, while using a shared color palette or consistent trim details to tie the whole space together. A support beam or column, like the one in the photo above, can even become a visual anchor that naturally separates the kitchen from the living room without needing a wall to do it.

A Few Things to Confirm Before You Commit

  • Have a contractor or structural engineer confirm load-bearing status, don’t guess based on wall thickness or location alone
  • Budget for a permit and inspection as part of the project timeline, not an optional add-on
  • Plan for several days of exposed framing and dust control during the wall removal itself
  • Think through lighting and flooring transitions between the old kitchen and living room footprints before construction starts, not after

Opening up a kitchen is one of the most transformative things you can do to a home, but it’s also one of the most structural. If you’re weighing whether a wall in your kitchen can come out, my team at America’s Advantage Remodeling can walk the space with you and give you a straight answer before you commit to anything.

Frequently Asked Questions

Q: How do I design an open concept kitchen and living room so it doesn’t feel like one big undefined space?

A: Use intentional zoning: a kitchen island or peninsula that reads as its own space, a rug that anchors the living room seating area, and lighting that shifts character between the two zones. A structural beam or column left exposed after wall removal can also serve as a natural visual divider.

Q: How much does load-bearing wall removal cost?

A: Load-bearing wall removal costs more than a non-load-bearing wall because it requires an engineered beam, support posts, and a permitted structural inspection, in addition to demolition and finish work. Exact cost depends on the span of the opening and local permit fees.

Q: How do I know if a wall is load-bearing?

A: You can’t reliably tell just by looking at a wall. A contractor or structural engineer needs to check the framing, the direction of the floor joists above, and what the wall is supporting before confirming load-bearing status.

Q: How much does it cost to remove a wall for an open concept kitchen?

A: Cost depends heavily on whether the wall is load-bearing. Non-load-bearing walls are relatively inexpensive to remove. Load-bearing walls cost more because they require an engineered beam, support posts, and permitted inspection, in addition to the demolition and finish work.

Q: Do I need a permit to remove a wall in my kitchen?

A: Yes, in virtually every jurisdiction, removing a load-bearing wall requires a permit and often a structural engineer’s review, since it’s a change to the home’s structure.

Q: What replaces a load-bearing wall when it’s removed?

A: Typically a structural beam spanning the opening, supported by posts or columns on either end that transfer the weight down to the foundation, the way the wall used to.

Kitchen Toe Kick: What It Is, Standard Dimensions, and Why It Matters

Опубликовано: July 10, 2026 в 10:26 am

Автор:

Категории: All,Kitchen

The toe kick is one of those kitchen details nobody notices — until it’s wrong. It’s the small recessed space at the bottom of your base cabinets, and while it seems trivial, it’s the reason you can stand comfortably at your counter without stubbing your toes all day. After 25 years building kitchens across Sacramento, Roseville, and Folsom, I’ve seen how a properly sized and finished toe kick contributes to both comfort and that clean, built-in look. I’m Eugene Chernioglo, and here’s everything worth knowing about the humble kitchen toe kick.

What Is a Toe Kick?

A toe kick is the recessed notch at the bottom front of your base cabinets, where the cabinet face is set back from the floor. That little setback gives your toes somewhere to go when you step up close to the counter or sink, so you can lean in to work without your feet hitting the cabinet. Nearly every base cabinet has one, and it’s covered by a finished panel — sometimes called a toe-kick panel or, in British usage, a kickboard — that hides the gap and the cabinet legs underneath for a clean look.

Standard Toe Kick Dimensions

The toe kick has become standardized across the cabinet industry, which keeps your counter at a comfortable working height:

  • Height: about 3.5 inches — enough clearance for your foot without raising the counter awkwardly.
  • Depth: about 3 inches — enough setback to tuck your toes comfortably as you stand at the counter.

That 3.5-inch toe-kick height is part of the overall base cabinet height: a standard base cabinet is 34.5 inches tall, and with the countertop on top the work surface lands at the standard 36 inches. So the toe kick isn’t separate from your counter height — it’s built into it. In custom kitchens we occasionally adjust the toe-kick height slightly for a very tall household, but the 3.5-inch standard works for most people.

Why Is It Called a “Toe Kick”?

The name is about as literal as it gets: it’s the space where your toes go. When you stand at the counter to chop vegetables or at the sink to wash dishes, the recess lets your feet tuck under the cabinet so you can stand up straight and close to your work. Without it, you’d be standing several inches back and leaning forward all day — hard on your back. You’ll also hear it called a toe space, toe board, plinth, or kickboard, but they all describe the same thing.

Do All Cabinets Need a Toe Kick?

Base cabinets where you stand and work — the main run, the sink base, the prep areas — should have a toe kick for comfort. Wall cabinets don’t need one, since you don’t stand at them the same way. The interesting exceptions are design choices: furniture-style islands and some custom pieces are sometimes built without a toe kick, sitting on visible legs or a solid base to look like freestanding furniture. That’s a deliberate aesthetic decision. But for standard working base cabinets, a toe kick is the norm and I recommend it — the comfort difference over years of daily cooking is real.

Can You Add a Toe Kick to Existing Cabinets?

Sometimes, yes — but it depends on how your existing cabinets were constructed, because the recess has to be cut into or built around the cabinet base. It’s much more straightforward to handle during a remodel or a cabinet replacement than as a one-off modification. If your current cabinets are uncomfortable to stand at, or the toe-kick panel is damaged or missing, that’s worth raising when you’re planning any kitchen work. My team can assess whether your cabinets allow a toe kick to be added or adjusted, and handle the finish so it matches cleanly.

A Small Detail, Done Right

The toe kick proves a point I make on every project: in a kitchen, the small details are what separate a comfortable, well-built space from one that just looks fine in photos. Standard dimensions — 3.5 inches tall, 3 inches deep — exist because they work, and a properly finished toe-kick panel ties the base of your cabinets together. If you’re planning a kitchen remodel and want every detail handled with this kind of care, my team at America’s Advantage Remodeling has been building Sacramento-area kitchens since 2001, entirely in-house. Reach out for a free in-home consultation and we’ll make sure your kitchen is comfortable down to the last three inches.

Frequently Asked Questions

Q: What is a kitchen toe kick?

A: A kitchen toe kick is the recessed notch at the bottom of base cabinets, where the cabinet face is set back from the floor to make room for your toes. It lets you stand comfortably close to the counter without stubbing your feet against the cabinet base. The toe kick is a standard feature on virtually all base cabinets and is both functional and, when finished properly, part of a clean built-in look.

Q: What is the standard toe kick for kitchen cabinets?

A: The standard kitchen toe kick is about 3.5 inches tall and 3 inches deep, a size that has become the industry norm because it comfortably accommodates the average foot while keeping the counter at the standard 36-inch height. Some custom kitchens vary this slightly for taller users or for a different look. The 3.5-inch height is included in the overall base cabinet height of 34.5 inches.

Q: Why is it called a toe kick?

A: It’s called a toe kick because the recessed space is where your toes go when you stand close to the counter — the notch gives your feet somewhere to tuck so you can lean in to work at the counter or sink without kicking the cabinet. The name simply describes its function. You may also hear it called a toe space, toe board, or, in British usage, a kickboard or plinth.

Q: Do all kitchen cabinets need a toe kick?

A: Base cabinets need a toe kick for comfortable standing at the counter, but wall cabinets and some specialty pieces like furniture-style islands do not. The toe kick is specifically a base-cabinet feature tied to standing and working at counter height. Some designs intentionally omit it on islands or furniture-look cabinets to create a different aesthetic, but for standard run-of-the-mill base cabinets where you stand and work, a toe kick is standard and recommended.

Q: Can you add a toe kick to existing cabinets?

A: Yes, a toe kick can sometimes be added or modified on existing cabinets, but it depends on how they were built, since the recess has to be cut into or built around the existing cabinet base. It’s more straightforward to address during a remodel or cabinet replacement than as a standalone change. A remodeler can assess whether your existing cabinets allow a toe kick to be added or adjusted.
Q: What is a kickboard in a kitchen?

A: A kickboard is the British term for the removable panel that covers the toe-kick recess at the bottom of kitchen base cabinets, hiding the cabinet legs and the gap beneath. In American kitchens this same piece is usually called the toe kick or toe-kick panel. It gives the base of the cabinets a finished look and can be removed for access to the floor space underneath.

Kitchen Electrical & Outlet Code: A Licensed Contractor’s Plain-English Guide

Опубликовано: June 30, 2026 в 10:19 am

Автор:

Категории: All,Kitchen

Kitchen electrical is one of those things homeowners don’t think about until a remodel forces the question — and then it turns out to be one of the most code-regulated parts of the whole project, for good reason. Outlets near water, heavy appliance loads, and daily use make the kitchen a place where the electrical code is strict. As a licensed Sacramento contractor (CSLB #1036517) who has wired and rewired kitchens for 25 years, I want to give you a plain-English overview of how kitchen outlet and electrical code works, so you understand what your remodel needs. I’m Eugene Chernioglo. One important note up front: electrical code has national rules but also local amendments, so always confirm specifics with your local Sacramento building department and have a licensed electrician do the actual work.

Why Kitchen Electrical Code Is So Strict

The kitchen combines two things the electrical code takes very seriously: water and high power draw. Countertop appliances like microwaves, toasters, and kettles pull a lot of current, and outlets sit just feet from the sink. The code exists to prevent shocks and overloaded circuits, which is why kitchen requirements are more demanding than most other rooms in the house. Understanding the basics helps you plan a safe, functional kitchen and have an informed conversation with your contractor and electrician.

GFCI Protection: Required on Countertop Outlets

Every countertop outlet in a kitchen must be GFCI-protected. A GFCI (ground-fault circuit interrupter) cuts power in a fraction of a second if it detects current leaking where it shouldn’t — the kind of fault that happens near water. This is a core safety requirement under the National Electrical Code, and it applies to all receptacles serving the countertop. During a remodel, a licensed electrician makes sure every countertop outlet has this protection.

Outlet Spacing: The 24-Inch Rule

Kitchen countertop outlets follow a spacing rule designed so you’re never far from a place to plug in:

  • No point along the countertop should be more than 24 inches from an outlet — which works out to an outlet at least every 4 feet.
  • Any countertop section 12 inches or wider needs at least one outlet.
  • Islands and peninsulas have their own receptacle requirements based on their size.

These rules exist so appliances can be used safely without stretching cords across the kitchen. They also shape where your backsplash outlets land, which is worth coordinating with your backsplash design.

Dedicated Circuits: At Least Two 20-Amp Lines

Kitchen countertop receptacles must be served by at least two dedicated 20-amp small-appliance circuits. Twenty amps (versus the 15 amps common elsewhere in the house) provides the capacity that power-hungry kitchen appliances need, and having at least two circuits means you can run, say, a microwave and a toaster without tripping a breaker. These small-appliance circuits generally shouldn’t also power lighting or other rooms. A licensed electrician sizes and separates the circuits based on your kitchen’s layout and appliances.

Outlet Height and Placement

There isn’t a single universal code height for countertop outlets — they’re typically installed about 15 to 20 inches above the finished counter, which usually puts them just above the backsplash in an accessible, unobtrusive spot. The exact height gets coordinated with your backsplash height and any under-cabinet lighting or features. When my team plans a kitchen, we map outlet locations and heights alongside the cabinet and backsplash design so everything lines up cleanly and meets code.

Why This Is Licensed Work

Kitchen electrical isn’t a place to cut corners or DIY your way through code. The combination of GFCI requirements, spacing rules, dedicated circuits, and local code amendments means this is work for a licensed professional, and in most cases it requires a permit and inspection. As a licensed contractor, my team at America’s Advantage Remodeling handles kitchen electrical as part of our in-house remodels — we coordinate the electrical with the cabinets, counters, and backsplash, pull the permits, and make sure everything passes inspection. If you’re planning a kitchen remodel and want it done safely and to code, reach out for a free in-home consultation. And for the specific code requirements that apply to your address, always confirm with the Sacramento building department and a licensed electrician.

Frequently Asked Questions

Pulled from live Google PAA, filtered through the 3-test conversion filter, written answer-first for AI Overview and featured snippet citation. Answers are written to be code-accurate while directing readers to confirm local requirements with a licensed electrician — important for this YMYL-adjacent topic.

Q: What type of outlet is required in a kitchen?

A: Kitchen countertop outlets are required to be GFCI-protected and, in most modern installations, served by 20-amp circuits to handle kitchen appliances. The National Electrical Code requires GFCI protection for all countertop receptacles because of the proximity to water. Local codes can add requirements, so the safest approach is to confirm with your local building department and have a licensed electrician do the work.

Q: Where should electrical outlets be placed in a kitchen?

A: Kitchen countertop outlets should be placed so that no point along the counter is more than 24 inches from an outlet, which generally means an outlet at least every 4 feet, and any counter section 12 inches or wider needs at least one outlet. Outlets are typically mounted about 15 to 20 inches above the countertop, or just above the backsplash. These spacing rules come from the National Electrical Code and exist so appliances can be used safely without long cords.

Q: How many outlets can be on one kitchen circuit?

A: Kitchen countertop receptacles must be served by at least two 20-amp small-appliance circuits, and these circuits generally should not also power lighting or outlets in other rooms. The code focuses on having enough dedicated circuit capacity rather than a strict outlet count, because kitchen appliances draw heavily. A licensed electrician sizes the circuits to your kitchen’s layout and appliance load.

Q: Are kitchen outlets 15 or 20 amp?

A: Kitchen countertop outlets are generally required to be on 20-amp circuits, because kitchen small appliances like toasters, microwaves, and kettles draw significant power. The receptacles themselves are typically 20-amp-rated to match. Using 15-amp circuits for countertop outlets does not meet modern code for the small-appliance circuits, which is one reason kitchen electrical should be handled by a licensed professional.

Q: What is the height for kitchen counter outlets?

A: Kitchen countertop outlets are typically installed about 15 to 20 inches above the finished countertop, which usually places them a few inches above the backsplash. There is no single universal height in the code for countertop outlets, so the standard is driven by the backsplash height and a comfortable, accessible position. Your remodeler coordinates outlet height with the backsplash and any under-cabinet features.

Q: Do kitchen outlets need to be GFCI?

A: Yes, all kitchen countertop outlets are required to be GFCI-protected under the National Electrical Code, because GFCI devices cut power instantly if they detect a fault, protecting against shock near water. This applies to receptacles serving the countertop. Confirming GFCI protection on every countertop outlet is a basic safety and code requirement that a licensed electrician will handle as part of a remodel.