This question comes up in almost every primary bathroom consultation I do: is a double vanity worth it, or is a single vanity the smarter call? The honest answer depends less on square footage than most people assume, and more on how mornings actually go in your house.
Warm Neutrals Are Replacing Stark White
Greige, mushroom taupe, and creamy warm whites are showing up far more often than the cool, stark white that dominated the last several years. It’s a subtle shift, but it changes the whole feel of a kitchen, warmer and more lived-in, rather than clinical.
Natural Wood Tones Are Back
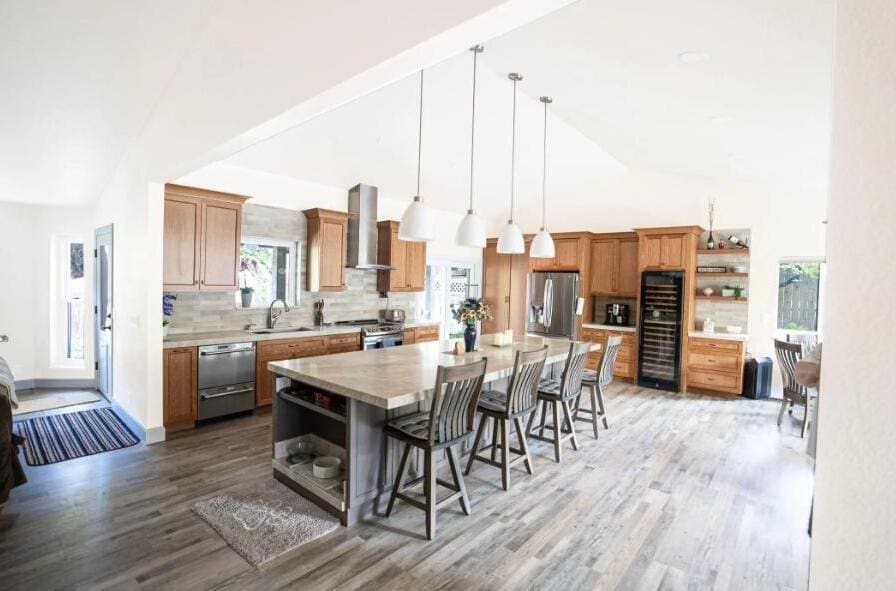
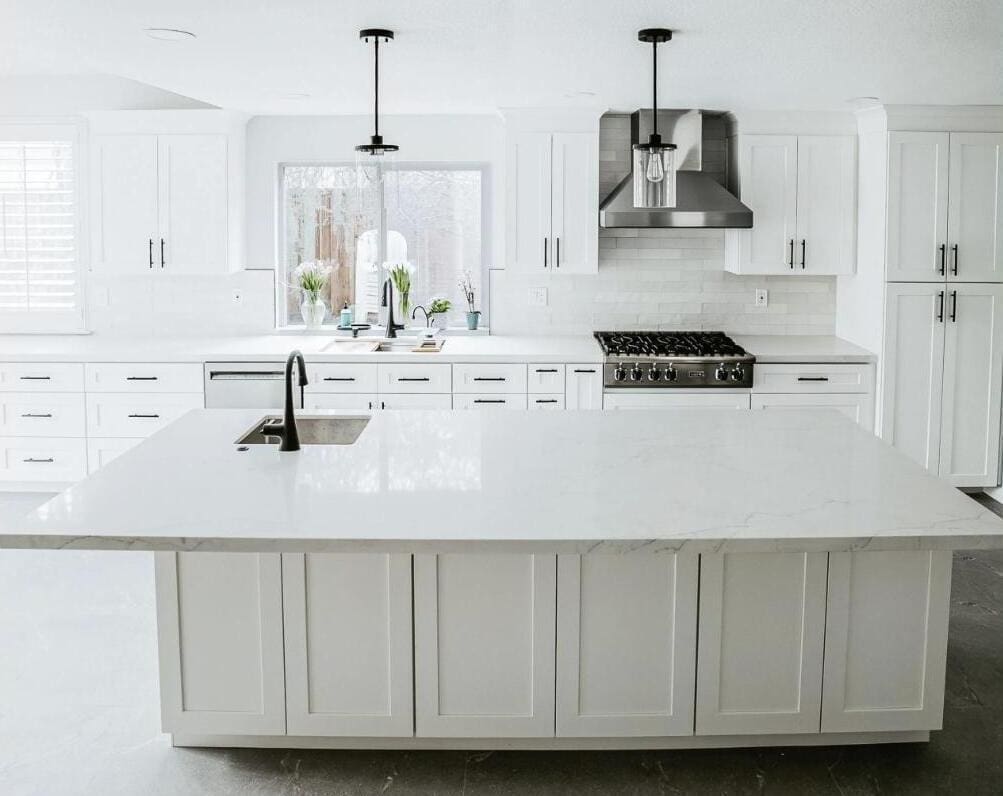
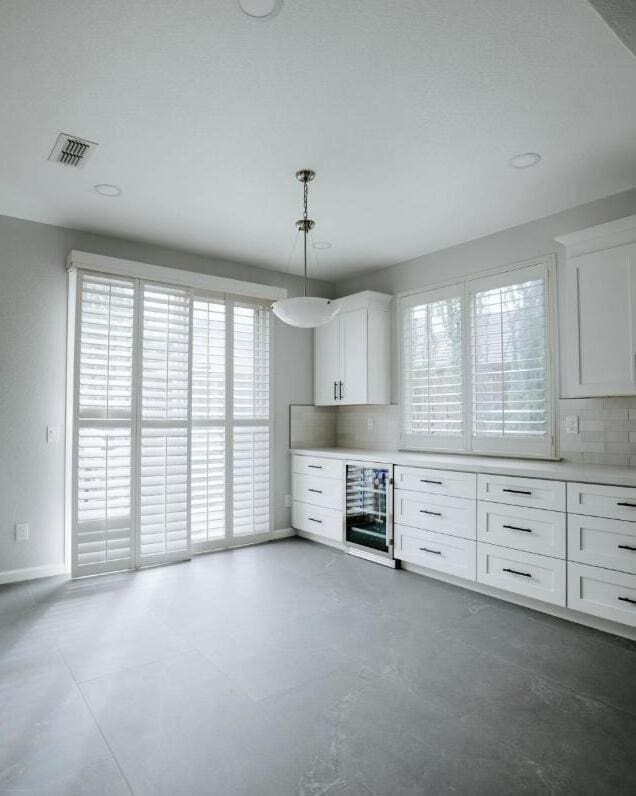
Walnut, cherry, and warm oak cabinetry are having a real moment. On a recent project of ours in Cameron Park, the client kept warm oak cabinetry throughout paired with a built-in wine fridge and open shelving, exactly the kind of warm, natural-material look driving a lot of 2026 requests.
Slab Stone Backsplashes
Instead of tile, full-slab stone backsplashes that run seamlessly from countertop to upper cabinets are becoming a popular upgrade for homeowners who want a more luxurious, continuous look.
Warm Metals Over Chrome
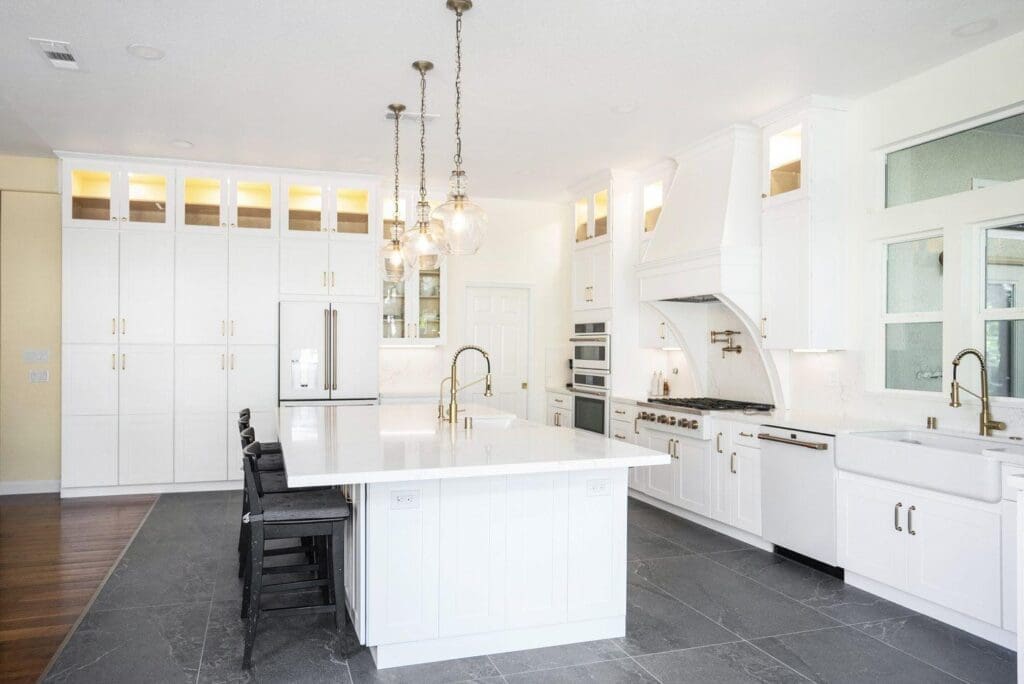
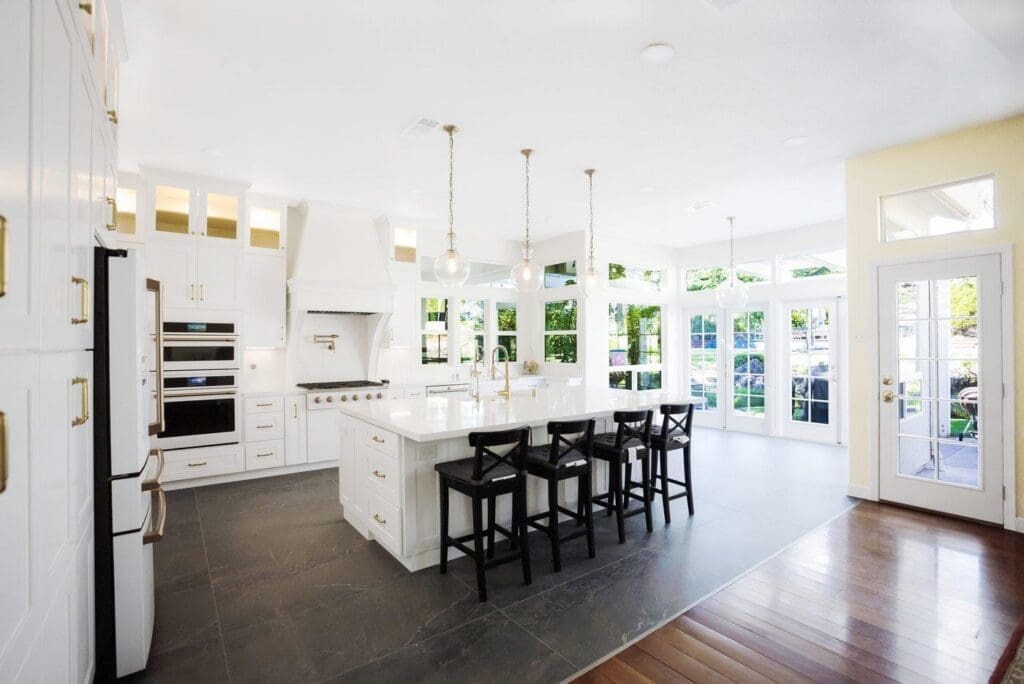
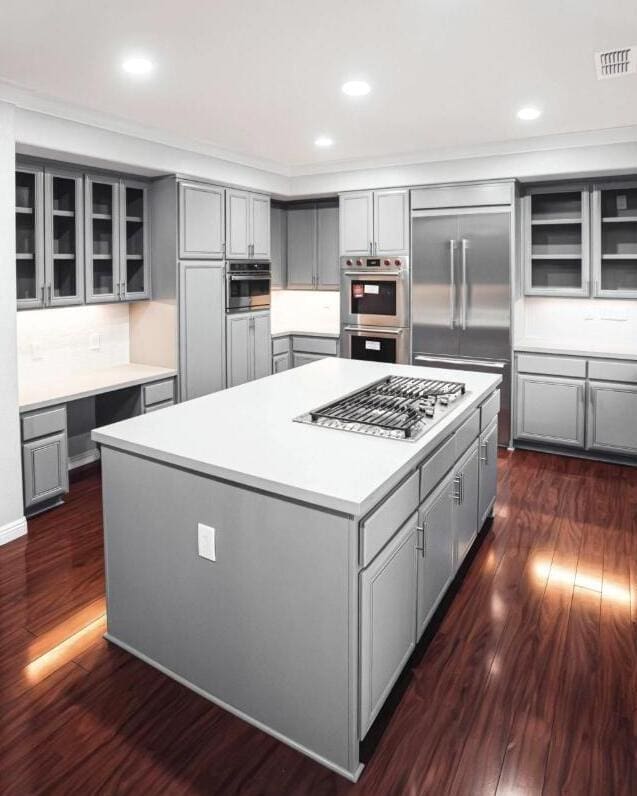
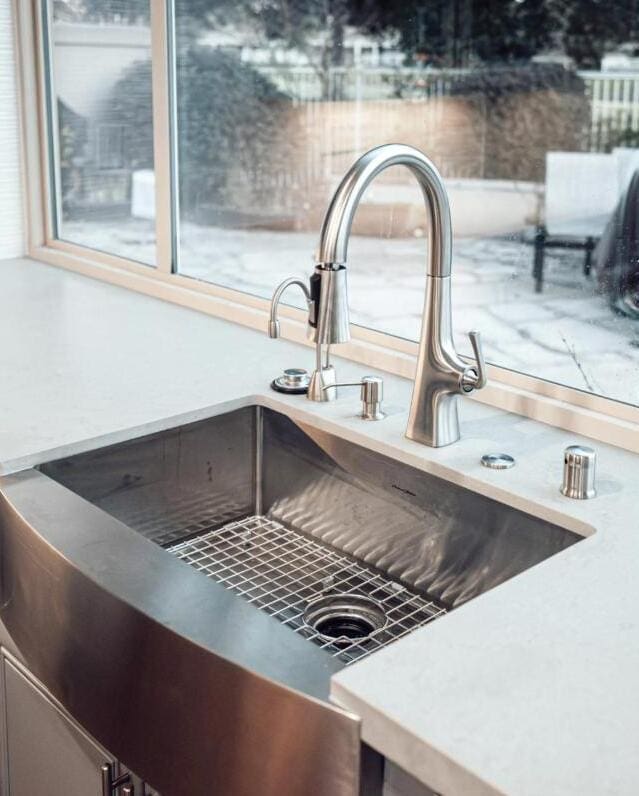
Brass, brushed gold, and other warm-toned fixtures are steadily replacing the cool chrome and stainless finishes that were standard for years, on faucets, cabinet hardware, and especially statement lighting. A recent project of ours in Roseville leaned into this with a pair of brass dome pendants over the island, paired with a mix of white and natural wood cabinetry.
Mixed Materials Over Matchy-Matchy
Rather than one material used throughout, more kitchens are combining wood, stone, and metal deliberately, a wood island against painted perimeter cabinets, for example, or mixed hardware finishes instead of one uniform metal.
Should You Chase the Trend?
Trends are a useful lens, but I always tell clients: choose finishes you’ll still love in ten years, not just what’s popular this year. The good news about the 2026 shift toward warm neutrals and natural materials is that it’s also simply more timeless than some trends of the past decade, which makes it an easier one to commit to.
If you’re planning a kitchen remodel and want to talk through what’s trending versus what actually fits your home long-term, my team at America’s Advantage Remodeling is happy to walk through it with you.
Frequently Asked Questions
Q: Are white kitchens still in style in 2026?
A: White kitchens haven’t disappeared, but warm neutrals like greige, mushroom taupe, and creamy warm whites are increasingly replacing the starker, cooler whites that dominated recent years.
Q: What kitchen colors are trending for 2026?
A: Warm neutrals, natural wood tones like walnut and warm oak, and earthy palettes are trending for 2026, moving away from the stark white and cool gray tones popular in previous years.
Q: Is brass or gold hardware still trending in kitchens?
A: Yes, warm metals like brass and brushed gold continue to gain ground over cooler finishes like chrome, especially on lighting, faucets, and cabinet hardware.
When homeowners come to us planning a full home remodel, the question I hear almost as often as “what will this cost” is “where do we even start?” It’s a good question, because the order you renovate in actually matters done in the wrong sequence, you end up redoing finished work or living through more disruption than necessary. After 25 years managing full home remodels across the Sacramento area, here’s how I sequence a project.
Start With What You Can’t See: Systems First
Before any room gets its new look, the home’s underlying systems need attention: electrical, plumbing, HVAC, and structural issues. On a recent 14-week full home remodel we completed in Sacramento (zip 95819), we started by updating the plumbing and electrical systems and adding insulation and a new HVAC system, all before a single finish surface went in. Doing this first means you’re never cutting into a finished wall or newly tiled floor to fix something that should have been addressed earlier.
Then the Exterior
Once the home’s systems are sound, the exterior is typically next, roofing, siding, and any structural repairs. This protects everything you’re about to build inside from weather exposure during construction, and it also means exterior crews and interior crews aren’t tripping over each other on the same timeline. On that same 95819 project, we refreshed the siding, repainted the facade, installed a new roof, and updated the landscaping as part of this phase.
Kitchen and Bathrooms Next
Kitchens and bathrooms involve the most plumbing, electrical, and structural complexity of any interior rooms, which is why they typically come before simpler cosmetic spaces. Tackling them earlier in the interior phase also means the most disruptive, messiest work is behind you sooner rather than later. The before-and-after shown at the top of this article is a good example of the scale of that transformation, a dated kitchen in Walnut Grove, still wearing its original wallpaper and laminate counters, turned into the finished space on the right.
Living Spaces and Flooring Last
Flooring, paint, and finish work in living rooms, bedrooms, and hallways generally come last. This sequencing protects new floors and finishes from the heavier foot traffic and equipment involved in kitchen and bathroom work, and it means the areas you’ll actually relax in are the freshest when the project wraps. On a recent full home project of ours in Roseville, the living room’s new flooring, built-in shelving, and fireplace surround were among the final pieces to come together, the payoff after the less glamorous systems and kitchen work was already behind us.
4. Remaining interior: flooring, paint, trim, finish work
Every home is different, and a good contractor will adjust this order based on your specific project — but this is the framework that keeps a full home remodel moving efficiently rather than backtracking. If you’re planning a whole-home project, my team at America’s Advantage Remodeling can walk your property and map out a sequence that fits your home and your timeline.
Frequently Asked Questions
Q: What should you remodel first in a full home renovation
A: Start with what’s behind the walls: electrical, plumbing, HVAC, and any structural repairs. Addressing these systems first avoids having to cut into newly finished surfaces later in the project.
Q: Should you do the exterior or interior first in a full home remodel?
A: Exterior work like roofing and siding typically comes after systems but before interior finishes, since it protects the home from weather exposure while interior construction is underway.
Q: Why do kitchens and bathrooms usually get remodeled before living rooms and bedrooms?
A: Kitchens and bathrooms involve the most plumbing, electrical, and structural complexity, so tackling them earlier keeps the most disruptive work concentrated in one phase, while simpler cosmetic spaces like living rooms and bedrooms are typically finished last.
“How much does a full house renovation cost?” is one of the first questions every homeowner asks, and it’s a fair one, but the more useful question is how that total actually breaks down room by room. Once you commit to a full home remodel, the budget conversation gets a lot more complicated than a single-room project. Instead of asking “what will the kitchen cost,” you’re asking how to split one number across an entire house. After 25 years managing full home remodels across Roseville, Sacramento, and the surrounding communities, here’s how I actually help clients think through that allocation.
Start With Systems and Structure, Even Though It’s the Least Exciting
Electrical, plumbing, HVAC, and any structural repairs should get first claim on the budget, before finishes. It’s tempting to skip ahead to the fun decisions, but underfunding this phase is the single most common cause of a full home remodel running over budget, problems found once walls are open don’t wait for a more convenient time.
Kitchen: The Largest Single Line Item
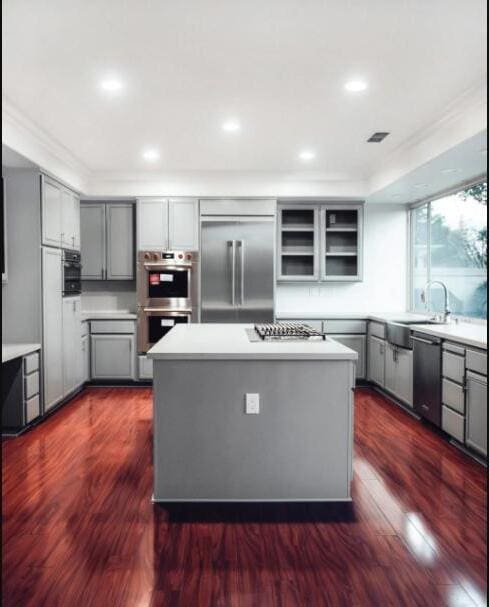
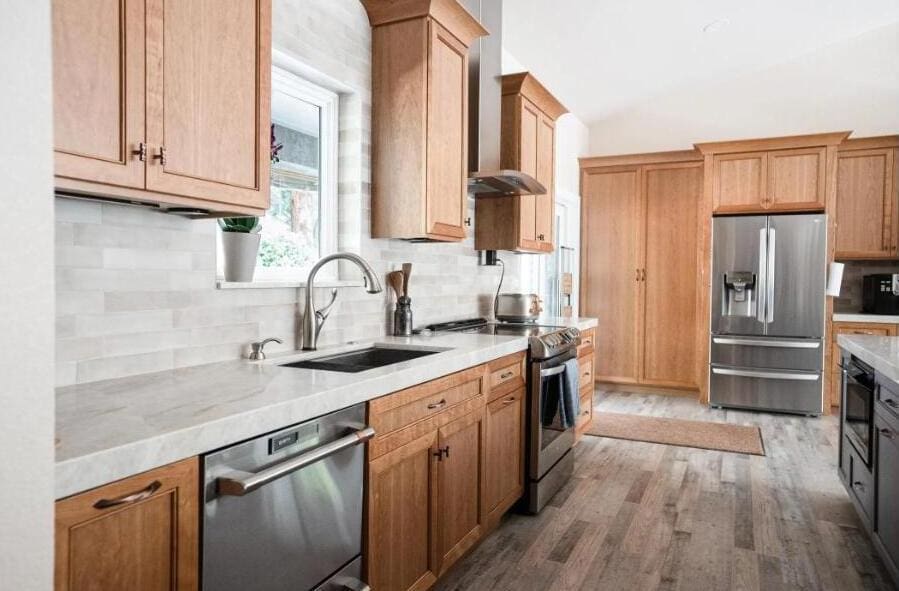
In most full home remodels, the kitchen takes the largest individual share of the budget, often 25 to 35 percent of the total. Cabinetry, countertops, and appliances add up fast, and it’s usually the room homeowners are least willing to compromise on. The kitchen shown here, with a marble backsplash, brass fixtures, and a professional-grade range, is a good example of where that investment tends to show.
Bathrooms: Smaller Rooms, Real Cost
Bathrooms are physically small but plumbing-heavy, which keeps their share of the budget disproportionate to their square footage, typically 10 to 15 percent per bathroom in a full home remodel.
Living Spaces: Where the Budget Often Stretches Further
Living rooms, family rooms, and dining areas usually cost less per square foot than kitchens and bathrooms, since they involve less plumbing and electrical complexity. That makes this the category where a slightly larger allocation, built-ins, a fireplace update, better flooring, tends to deliver a lot of visible impact without breaking the budget.
A Rough Starting Split
Systems and structure: 15 to 20 percent
Kitchen: 25 to 35 percent
Bathrooms (combined): 15 to 25 percent
Living spaces and remaining interior: 15 to 25 percent
Contingency: 10 to 20 percent, always
That contingency line isn’t optional. Full home remodels almost always turn up at least one surprise once walls and floors come up, and a healthy buffer is what keeps a surprise from becoming a budget crisis.
Every home and every family’s priorities are different, some clients want to pour extra into the kitchen and keep bathrooms simple, others do the opposite. If you’re planning a full home remodel and want help figuring out where your specific budget should go, my team at America’s Advantage Remodeling can walk through it with you.
Frequently Asked Questions
Q: How much does a full house renovation cost?
A: A full house renovation typically ranges widely based on scope and square footage, but the total is best understood by breaking it into categories: systems and structure, kitchen, bathrooms, living spaces, and a contingency fund. The kitchen alone often accounts for 25 to 35 percent of the total budget.
Q: How should I allocate my budget for a full home remodel?
A: A reasonable starting split is 15 to 20 percent for systems and structure, 25 to 35 percent for the kitchen, 15 to 25 percent combined for bathrooms, 15 to 25 percent for living spaces, and 10 to 20 percent held as contingency.
Q: What takes the biggest share of a full home remodel budget?
A: The kitchen typically takes the largest single share of a full home remodel budget, often 25 to 35 percent of the total, due to the cost of cabinetry, countertops, and appliances.
Q: How much contingency should I budget for a whole house renovation?
A: A contingency of 10 to 20 percent of the total budget is standard for a full home remodel, since unexpected issues behind walls or under floors are common once construction begins.
A kitchen island is one of the most requested features in any remodel, and also one of the easiest to get wrong. Homeowners come to us with a Pinterest board full of gorgeous islands, but a lot of those photos don’t show you the thing that actually matters: whether the island fits the room, the traffic flow, and how the family actually cooks and eats. After 25 years remodeling kitchens across the Sacramento area, here’s how I help clients think through size, storage, and seating before we ever pick a countertop.
Start With Clearance, Not the Island Itself
Before we talk about how big an island should be, we talk about how much room needs to stay open around it. The standard we design to is a minimum of 42 inches of clearance on all sides, and closer to 48 inches if the island includes seating, so a stool can be pulled out while someone else is still walking past comfortably. Skip this step and even a beautiful island ends up feeling like an obstacle instead of the heart of the kitchen.
Sizing the Island to the Room
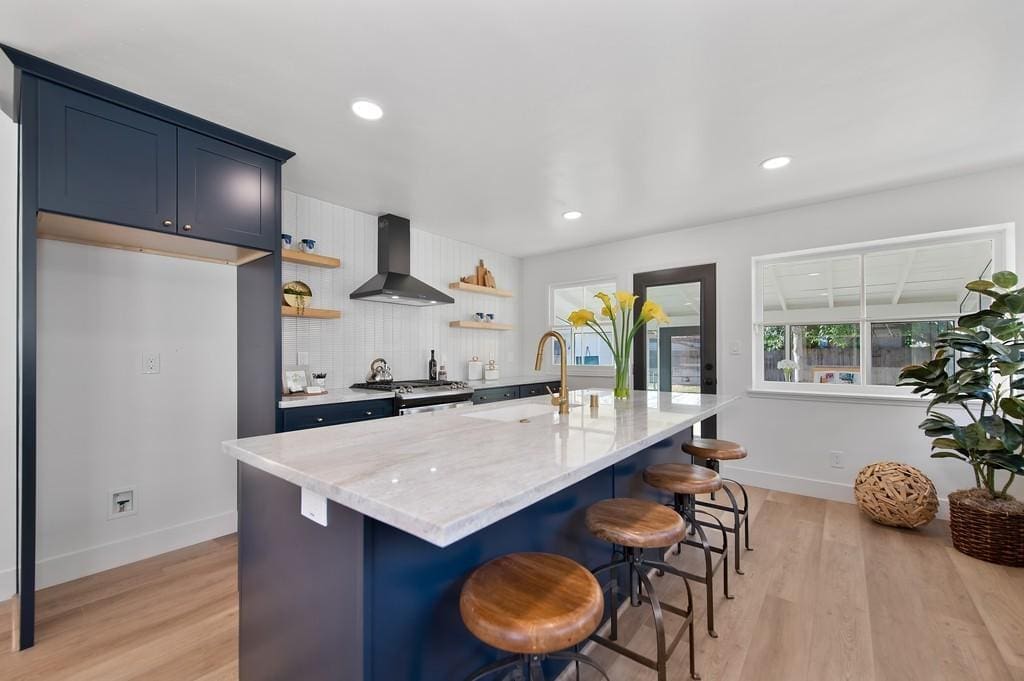
A useful rule of thumb: your island should leave at least 3 feet of clear walking space between it and the surrounding cabinets or counters on every side. In a smaller kitchen, that might mean a compact island with no seating at all, just extra prep space and storage. In a larger, more open-concept layout like the one shown above, there’s room for a full-length island with seating for four and open shelving built into the end. The island should scale to the kitchen, not the other way around.
Storage That Actually Gets Used
The most functional islands mix closed and open storage rather than going all one direction. Deep drawers work well for pots, pans, and small appliances near the range side, while an open shelf or cubby on the seating end is a natural spot for cookbooks, serving pieces, or baskets, and it also breaks up what would otherwise be a solid wall of cabinetry. We’ll often add outlets built into the island base itself, so a mixer or slow cooker can plug in without a cord running across the counter.
Planning for Kitchen Island Seating
Island seating is the single most-searched part of island planning, and it’s usually the detail people get wrong first. For comfortable seating, plan on roughly 24 inches of counter width per person, with knee clearance underneath (typically an overhang of 12 to 15 inches). Counter-height islands (36 inches) pair with counter stools, while bar-height sections (42 inches) need taller stools, mixing the two on the same island is a common way to visually separate a prep zone from a casual seating zone. The island pictured above seats four comfortably along one full side, with the range and prep work staying clear on the opposite side.
How many people you seat also drives the island’s overall length, not just its width. Two stools need roughly 4 feet of usable seating edge; four stools need closer to 8 feet. If the kitchen can’t fit an island that long, an L-shaped island or a seating extension on one end is often a better fit than forcing a too-short island to seat more people than it comfortably can.
A Few Sizing Guidelines
Minimum clearance around the island: 42 inches (48+ inches if there’s seating)
Seating: roughly 24 inches of counter width per person
Standard counter-height overhang for knee clearance: 12–15 inches
Smaller kitchens: consider a slim prep island with no seating rather than skipping the island entirely
The right island comes down to the specific shape of your kitchen, not a one-size-fits-all layout pulled from a magazine. If you’re planning a kitchen remodel and want to talk through what size and layout actually makes sense for your space, my team at America’s Advantage Remodeling can walk your kitchen and map it out with you.
Frequently Asked Questions
Q: How big should a kitchen island be?
A: A kitchen island should leave at least 42 inches of clearance on all sides (48+ inches if it includes seating), and should generally scale to leave 3 feet of walking space between the island and surrounding counters or cabinets.
Q: How much seating space do I need per person at a kitchen island?
A: Plan on roughly 24 inches of counter width per person, with 12 to 15 inches of overhang for knee clearance underneath. Two stools need about 4 feet of usable seating edge; four stools need closer to 8 feet.
Q: What’s the best kitchen island seating layout?
A: The best layout depends on island length: a single straight run works well for up to four stools, while an L-shaped island or a seating extension on one end fits more seating without forcing an oversized island into a kitchen that can’t accommodate one.
Q: What’s the difference between counter-height and bar-height island seating?
A: Counter-height islands are typically 36 inches tall and pair with counter stools, while bar-height sections are 42 inches and require taller bar stools; some kitchens mix both to separate a prep zone from a seating zone.
“Can we just take out this wall?” is one of the first questions homeowners ask when they picture an open concept kitchen. Sometimes the answer is a straightforward yes. Sometimes it means a structural beam, a permit, and a few extra weeks of construction. After 25 years remodeling kitchens across the Sacramento area, here’s what I walk every client through before we ever pick up a sledgehammer.
Load-Bearing vs. Non-Load-Bearing: Why It Matters
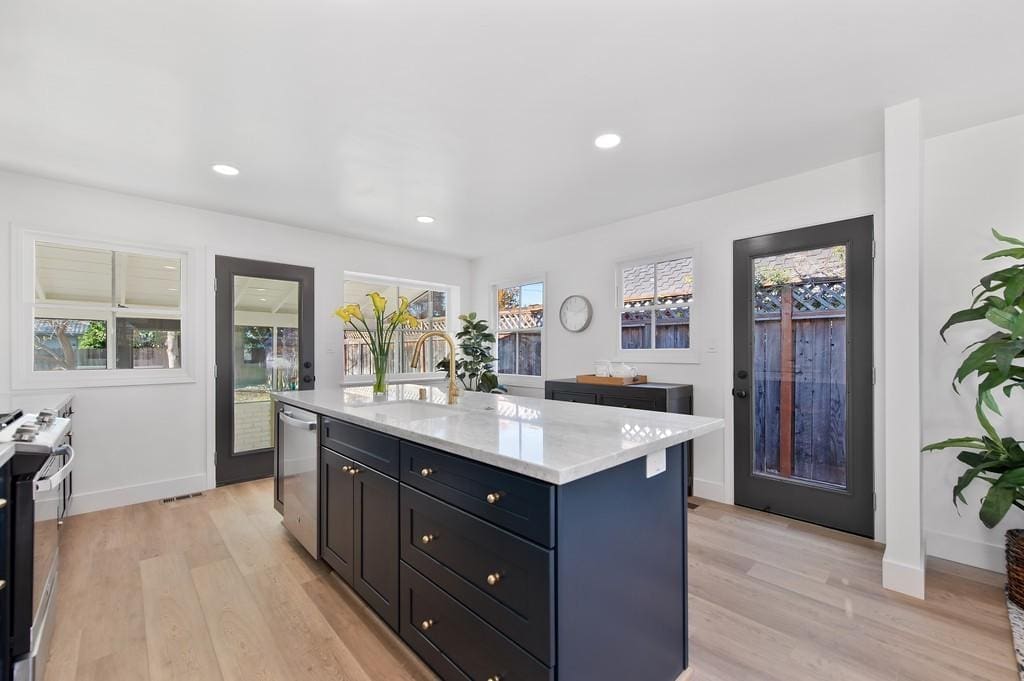
The first question is always whether the wall is load-bearing, meaning it’s helping hold up the structure above it. Non-load-bearing walls can usually come out with straightforward framing work. Load-bearing walls can still come out, but the load has to go somewhere, typically a structural beam that transfers the weight to posts or columns on either end, like the column shown above. This isn’t something to guess at; it needs an engineer or a qualified contractor to actually confirm before any wall comes down.
Permits Are Not Optional
Removing a load-bearing wall requires a permit in virtually every jurisdiction we work in, and for good reason, it’s a structural change to the house. Skipping the permit might save a little time up front, but it creates real problems later: inspection issues, insurance complications, and headaches if you ever sell the house and a buyer’s inspector asks who pulled the permit for that missing wall. We handle the permit and engineering review as part of the project, not as an afterthought.
What Construction Actually Looks Like
This is the part homeowners underestimate. Removing a load-bearing wall means temporary support while the new beam goes in, which can mean a few days of exposed framing, dust control between work areas, and the house being genuinely disrupted, not just the kitchen. It’s not a weekend project. Budgeting the right amount of time, and being honest with yourself about living in the house during that phase, makes a big difference in how the whole remodel feels.
Designing an Open Concept Kitchen and Living Room
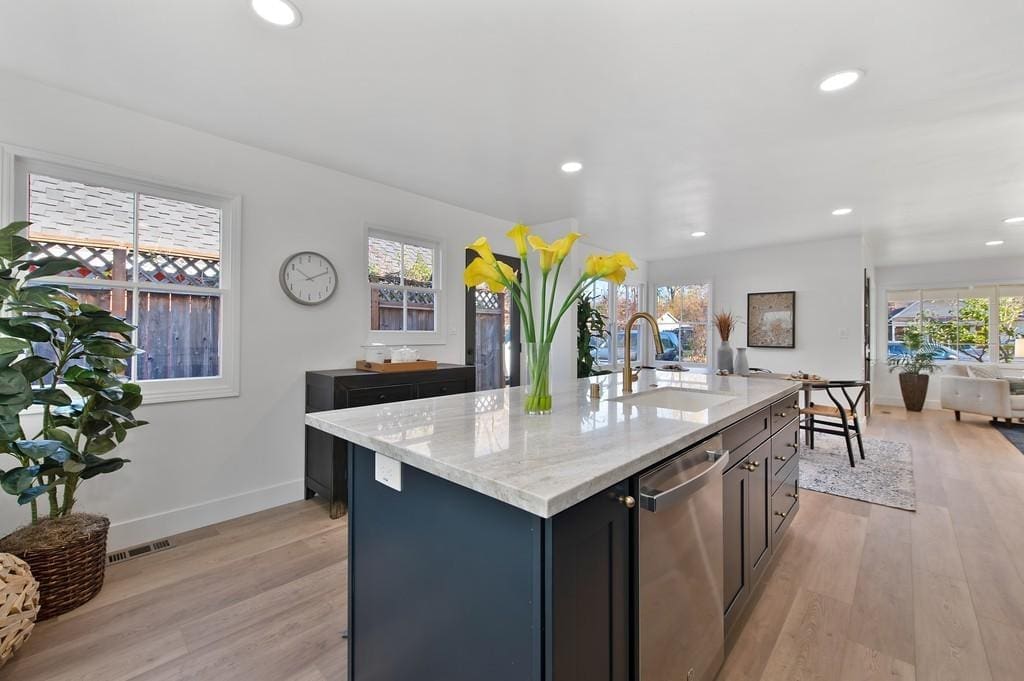
Once the wall is gone, the design work isn’t over, it’s just starting. An open concept kitchen and living room still needs visual zones: a kitchen island or peninsula that reads as its own space, a rug that anchors the seating area, lighting that changes character from the kitchen to the living room. Without some intentional zoning, a big open room can start to feel like one undefined space rather than a kitchen and a living room that flow together well.
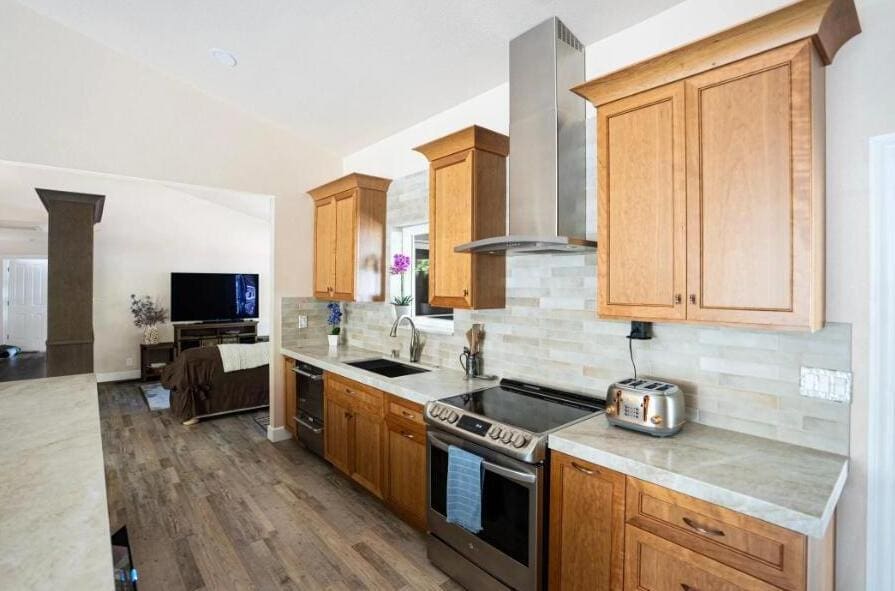
The two spaces should feel connected, not identical. We’ll often keep the kitchen’s flooring, lighting, and cabinetry distinct from the living room’s finishes, while using a shared color palette or consistent trim details to tie the whole space together. A support beam or column, like the one in the photo above, can even become a visual anchor that naturally separates the kitchen from the living room without needing a wall to do it.
A Few Things to Confirm Before You Commit
Have a contractor or structural engineer confirm load-bearing status, don’t guess based on wall thickness or location alone
Budget for a permit and inspection as part of the project timeline, not an optional add-on
Plan for several days of exposed framing and dust control during the wall removal itself
Think through lighting and flooring transitions between the old kitchen and living room footprints before construction starts, not after
Opening up a kitchen is one of the most transformative things you can do to a home, but it’s also one of the most structural. If you’re weighing whether a wall in your kitchen can come out, my team at America’s Advantage Remodeling can walk the space with you and give you a straight answer before you commit to anything.
Frequently Asked Questions
Q: How do I design an open concept kitchen and living room so it doesn’t feel like one big undefined space?
A: Use intentional zoning: a kitchen island or peninsula that reads as its own space, a rug that anchors the living room seating area, and lighting that shifts character between the two zones. A structural beam or column left exposed after wall removal can also serve as a natural visual divider.
Q: How much does load-bearing wall removal cost?
A: Load-bearing wall removal costs more than a non-load-bearing wall because it requires an engineered beam, support posts, and a permitted structural inspection, in addition to demolition and finish work. Exact cost depends on the span of the opening and local permit fees.
Q: How do I know if a wall is load-bearing?
A: You can’t reliably tell just by looking at a wall. A contractor or structural engineer needs to check the framing, the direction of the floor joists above, and what the wall is supporting before confirming load-bearing status.
Q: How much does it cost to remove a wall for an open concept kitchen?
A: Cost depends heavily on whether the wall is load-bearing. Non-load-bearing walls are relatively inexpensive to remove. Load-bearing walls cost more because they require an engineered beam, support posts, and permitted inspection, in addition to the demolition and finish work.
Q: Do I need a permit to remove a wall in my kitchen?
A: Yes, in virtually every jurisdiction, removing a load-bearing wall requires a permit and often a structural engineer’s review, since it’s a change to the home’s structure.
Q: What replaces a load-bearing wall when it’s removed?
A: Typically a structural beam spanning the opening, supported by posts or columns on either end that transfer the weight down to the foundation, the way the wall used to.
The toe kick is one of those kitchen details nobody notices — until it’s wrong. It’s the small recessed space at the bottom of your base cabinets, and while it seems trivial, it’s the reason you can stand comfortably at your counter without stubbing your toes all day. After 25 years building kitchens across Sacramento, Roseville, and Folsom, I’ve seen how a properly sized and finished toe kick contributes to both comfort and that clean, built-in look. I’m Eugene Chernioglo, and here’s everything worth knowing about the humble kitchen toe kick.
What Is a Toe Kick?
A toe kick is the recessed notch at the bottom front of your base cabinets, where the cabinet face is set back from the floor. That little setback gives your toes somewhere to go when you step up close to the counter or sink, so you can lean in to work without your feet hitting the cabinet. Nearly every base cabinet has one, and it’s covered by a finished panel — sometimes called a toe-kick panel or, in British usage, a kickboard — that hides the gap and the cabinet legs underneath for a clean look.
Standard Toe Kick Dimensions
The toe kick has become standardized across the cabinet industry, which keeps your counter at a comfortable working height:
Height: about 3.5 inches — enough clearance for your foot without raising the counter awkwardly.
Depth: about 3 inches — enough setback to tuck your toes comfortably as you stand at the counter.
That 3.5-inch toe-kick height is part of the overall base cabinet height: a standard base cabinet is 34.5 inches tall, and with the countertop on top the work surface lands at the standard 36 inches. So the toe kick isn’t separate from your counter height — it’s built into it. In custom kitchens we occasionally adjust the toe-kick height slightly for a very tall household, but the 3.5-inch standard works for most people.
Why Is It Called a “Toe Kick”?
The name is about as literal as it gets: it’s the space where your toes go. When you stand at the counter to chop vegetables or at the sink to wash dishes, the recess lets your feet tuck under the cabinet so you can stand up straight and close to your work. Without it, you’d be standing several inches back and leaning forward all day — hard on your back. You’ll also hear it called a toe space, toe board, plinth, or kickboard, but they all describe the same thing.
Do All Cabinets Need a Toe Kick?
Base cabinets where you stand and work — the main run, the sink base, the prep areas — should have a toe kick for comfort. Wall cabinets don’t need one, since you don’t stand at them the same way. The interesting exceptions are design choices: furniture-style islands and some custom pieces are sometimes built without a toe kick, sitting on visible legs or a solid base to look like freestanding furniture. That’s a deliberate aesthetic decision. But for standard working base cabinets, a toe kick is the norm and I recommend it — the comfort difference over years of daily cooking is real.
Can You Add a Toe Kick to Existing Cabinets?
Sometimes, yes — but it depends on how your existing cabinets were constructed, because the recess has to be cut into or built around the cabinet base. It’s much more straightforward to handle during a remodel or a cabinet replacement than as a one-off modification. If your current cabinets are uncomfortable to stand at, or the toe-kick panel is damaged or missing, that’s worth raising when you’re planning any kitchen work. My team can assess whether your cabinets allow a toe kick to be added or adjusted, and handle the finish so it matches cleanly.
A Small Detail, Done Right
The toe kick proves a point I make on every project: in a kitchen, the small details are what separate a comfortable, well-built space from one that just looks fine in photos. Standard dimensions — 3.5 inches tall, 3 inches deep — exist because they work, and a properly finished toe-kick panel ties the base of your cabinets together. If you’re planning a kitchen remodel and want every detail handled with this kind of care, my team at America’s Advantage Remodeling has been building Sacramento-area kitchens since 2001, entirely in-house. Reach out for a free in-home consultation and we’ll make sure your kitchen is comfortable down to the last three inches.
Frequently Asked Questions
Q: What is a kitchen toe kick?
A: A kitchen toe kick is the recessed notch at the bottom of base cabinets, where the cabinet face is set back from the floor to make room for your toes. It lets you stand comfortably close to the counter without stubbing your feet against the cabinet base. The toe kick is a standard feature on virtually all base cabinets and is both functional and, when finished properly, part of a clean built-in look.
Q: What is the standard toe kick for kitchen cabinets?
A: The standard kitchen toe kick is about 3.5 inches tall and 3 inches deep, a size that has become the industry norm because it comfortably accommodates the average foot while keeping the counter at the standard 36-inch height. Some custom kitchens vary this slightly for taller users or for a different look. The 3.5-inch height is included in the overall base cabinet height of 34.5 inches.
Q: Why is it called a toe kick?
A: It’s called a toe kick because the recessed space is where your toes go when you stand close to the counter — the notch gives your feet somewhere to tuck so you can lean in to work at the counter or sink without kicking the cabinet. The name simply describes its function. You may also hear it called a toe space, toe board, or, in British usage, a kickboard or plinth.
Q: Do all kitchen cabinets need a toe kick?
A: Base cabinets need a toe kick for comfortable standing at the counter, but wall cabinets and some specialty pieces like furniture-style islands do not. The toe kick is specifically a base-cabinet feature tied to standing and working at counter height. Some designs intentionally omit it on islands or furniture-look cabinets to create a different aesthetic, but for standard run-of-the-mill base cabinets where you stand and work, a toe kick is standard and recommended.
Q: Can you add a toe kick to existing cabinets?
A: Yes, a toe kick can sometimes be added or modified on existing cabinets, but it depends on how they were built, since the recess has to be cut into or built around the existing cabinet base. It’s more straightforward to address during a remodel or cabinet replacement than as a standalone change. A remodeler can assess whether your existing cabinets allow a toe kick to be added or adjusted.
Q: What is a kickboard in a kitchen?
A: A kickboard is the British term for the removable panel that covers the toe-kick recess at the bottom of kitchen base cabinets, hiding the cabinet legs and the gap beneath. In American kitchens this same piece is usually called the toe kick or toe-kick panel. It gives the base of the cabinets a finished look and can be removed for access to the floor space underneath.
Kitchen electrical is one of those things homeowners don’t think about until a remodel forces the question — and then it turns out to be one of the most code-regulated parts of the whole project, for good reason. Outlets near water, heavy appliance loads, and daily use make the kitchen a place where the electrical code is strict. As a licensed Sacramento contractor (CSLB #1036517) who has wired and rewired kitchens for 25 years, I want to give you a plain-English overview of how kitchen outlet and electrical code works, so you understand what your remodel needs. I’m Eugene Chernioglo. One important note up front: electrical code has national rules but also local amendments, so always confirm specifics with your local Sacramento building department and have a licensed electrician do the actual work.
Why Kitchen Electrical Code Is So Strict
The kitchen combines two things the electrical code takes very seriously: water and high power draw. Countertop appliances like microwaves, toasters, and kettles pull a lot of current, and outlets sit just feet from the sink. The code exists to prevent shocks and overloaded circuits, which is why kitchen requirements are more demanding than most other rooms in the house. Understanding the basics helps you plan a safe, functional kitchen and have an informed conversation with your contractor and electrician.
GFCI Protection: Required on Countertop Outlets
Every countertop outlet in a kitchen must be GFCI-protected. A GFCI (ground-fault circuit interrupter) cuts power in a fraction of a second if it detects current leaking where it shouldn’t — the kind of fault that happens near water. This is a core safety requirement under the National Electrical Code, and it applies to all receptacles serving the countertop. During a remodel, a licensed electrician makes sure every countertop outlet has this protection.
Outlet Spacing: The 24-Inch Rule
Kitchen countertop outlets follow a spacing rule designed so you’re never far from a place to plug in:
No point along the countertop should be more than 24 inches from an outlet — which works out to an outlet at least every 4 feet.
Any countertop section 12 inches or wider needs at least one outlet.
Islands and peninsulas have their own receptacle requirements based on their size.
These rules exist so appliances can be used safely without stretching cords across the kitchen. They also shape where your backsplash outlets land, which is worth coordinating with your backsplash design.
Dedicated Circuits: At Least Two 20-Amp Lines
Kitchen countertop receptacles must be served by at least two dedicated 20-amp small-appliance circuits. Twenty amps (versus the 15 amps common elsewhere in the house) provides the capacity that power-hungry kitchen appliances need, and having at least two circuits means you can run, say, a microwave and a toaster without tripping a breaker. These small-appliance circuits generally shouldn’t also power lighting or other rooms. A licensed electrician sizes and separates the circuits based on your kitchen’s layout and appliances.
Outlet Height and Placement
There isn’t a single universal code height for countertop outlets — they’re typically installed about 15 to 20 inches above the finished counter, which usually puts them just above the backsplash in an accessible, unobtrusive spot. The exact height gets coordinated with your backsplash height and any under-cabinet lighting or features. When my team plans a kitchen, we map outlet locations and heights alongside the cabinet and backsplash design so everything lines up cleanly and meets code.
Why This Is Licensed Work
Kitchen electrical isn’t a place to cut corners or DIY your way through code. The combination of GFCI requirements, spacing rules, dedicated circuits, and local code amendments means this is work for a licensed professional, and in most cases it requires a permit and inspection. As a licensed contractor, my team at America’s Advantage Remodeling handles kitchen electrical as part of our in-house remodels — we coordinate the electrical with the cabinets, counters, and backsplash, pull the permits, and make sure everything passes inspection. If you’re planning a kitchen remodel and want it done safely and to code, reach out for a free in-home consultation. And for the specific code requirements that apply to your address, always confirm with the Sacramento building department and a licensed electrician.
Frequently Asked Questions
Pulled from live Google PAA, filtered through the 3-test conversion filter, written answer-first for AI Overview and featured snippet citation. Answers are written to be code-accurate while directing readers to confirm local requirements with a licensed electrician — important for this YMYL-adjacent topic.
Q: What type of outlet is required in a kitchen?
A: Kitchen countertop outlets are required to be GFCI-protected and, in most modern installations, served by 20-amp circuits to handle kitchen appliances. The National Electrical Code requires GFCI protection for all countertop receptacles because of the proximity to water. Local codes can add requirements, so the safest approach is to confirm with your local building department and have a licensed electrician do the work.
Q: Where should electrical outlets be placed in a kitchen?
A: Kitchen countertop outlets should be placed so that no point along the counter is more than 24 inches from an outlet, which generally means an outlet at least every 4 feet, and any counter section 12 inches or wider needs at least one outlet. Outlets are typically mounted about 15 to 20 inches above the countertop, or just above the backsplash. These spacing rules come from the National Electrical Code and exist so appliances can be used safely without long cords.
Q: How many outlets can be on one kitchen circuit?
A: Kitchen countertop receptacles must be served by at least two 20-amp small-appliance circuits, and these circuits generally should not also power lighting or outlets in other rooms. The code focuses on having enough dedicated circuit capacity rather than a strict outlet count, because kitchen appliances draw heavily. A licensed electrician sizes the circuits to your kitchen’s layout and appliance load.
Q: Are kitchen outlets 15 or 20 amp?
A: Kitchen countertop outlets are generally required to be on 20-amp circuits, because kitchen small appliances like toasters, microwaves, and kettles draw significant power. The receptacles themselves are typically 20-amp-rated to match. Using 15-amp circuits for countertop outlets does not meet modern code for the small-appliance circuits, which is one reason kitchen electrical should be handled by a licensed professional.
Q: What is the height for kitchen counter outlets?
A: Kitchen countertop outlets are typically installed about 15 to 20 inches above the finished countertop, which usually places them a few inches above the backsplash. There is no single universal height in the code for countertop outlets, so the standard is driven by the backsplash height and a comfortable, accessible position. Your remodeler coordinates outlet height with the backsplash and any under-cabinet features.
Q: Do kitchen outlets need to be GFCI?
A: Yes, all kitchen countertop outlets are required to be GFCI-protected under the National Electrical Code, because GFCI devices cut power instantly if they detect a fault, protecting against shock near water. This applies to receptacles serving the countertop. Confirming GFCI protection on every countertop outlet is a basic safety and code requirement that a licensed electrician will handle as part of a remodel.
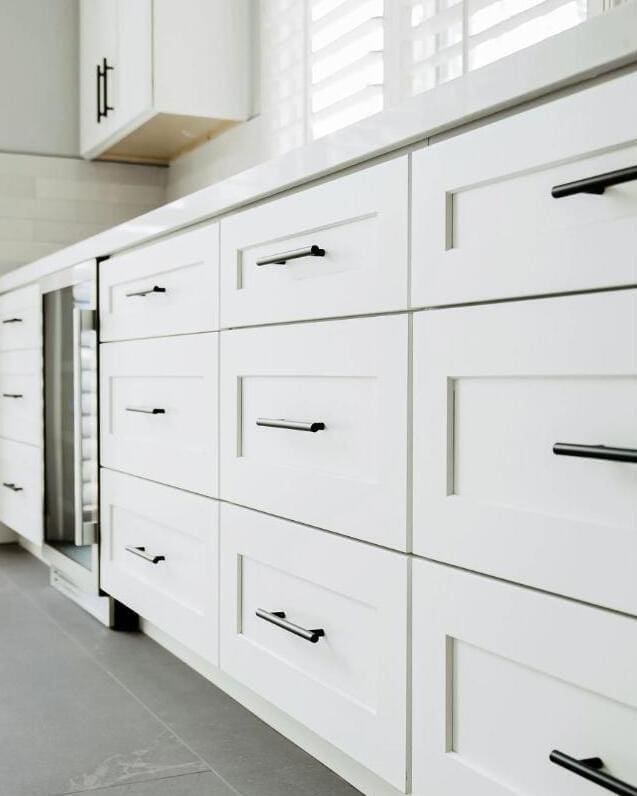
Crown molding is one of those finishing touches that homeowners often overlook until they see two identical kitchens side by side — one with it and one without. The one with crown molding looks finished and custom; the one without looks like the cabinets just stopped. After 25 years installing cabinetry in Sacramento-area kitchens, I can tell you crown molding is one of the highest-impact, lowest-cost details you can add. But it’s not right for every kitchen, and how it’s installed makes all the difference. I’m Eugene Chernioglo, and here’s what you need to know.
What Crown Molding Does for a Kitchen
Crown molding bridges the space between the top of your wall cabinets and the ceiling. When cabinets stop short — which they often do, ending 6 to 18 inches below the ceiling — that gap can look unfinished. Crown molding closes the visual gap and ties the cabinetry into the architecture of the room, giving the whole kitchen a built-in, custom appearance. It’s the difference between cabinets that were installed and cabinets that were designed into the space.
When Crown Molding Makes Sense (and When It Doesn’t)
Crown molding is a strong choice when:
Your cabinets end below the ceiling, leaving a gap that looks unfinished.
You have a traditional or transitional kitchen where the molding complements the door style.
You want to add a custom, high-end feel without major structural work.
It’s usually skipped when you have a strictly modern, flat-panel kitchen where clean uninterrupted lines are the goal, or when cabinets already run all the way to the ceiling. In those cases, a simple square trim or no molding at all suits the look better.
Choosing the Right Crown Molding Profile
The profile — the shape of the molding in cross-section — should match your cabinet style. Stepped or stacked profiles suit traditional kitchens; a simple cove profile works for transitional and shaker-style cabinets; slim, square profiles fit contemporary kitchens. Just as important, the molding should be the same material and finish as the cabinets so it reads as one continuous piece. When my team specs crown molding, we match the profile to your door style so it looks like it was always part of the design, never an afterthought.
How Crown Molding Is Installed
Here’s where craftsmanship shows. Crown molding is installed by first fastening a backer or nailing strip along the top edge of the cabinets, then attaching the molding to that strip at the correct angle using finish nails and adhesive. The corners are where it gets technical — each joint is cut with a precise miter so the molding meets cleanly with no visible gaps. On a kitchen with multiple corners and cabinet heights, getting every joint tight is finish carpentry that rewards experience. A poorly cut crown shows gaps at the corners; a well-cut one looks seamless.
Adding Crown Molding to Existing Cabinets
You don’t need new cabinets to get crown molding. As long as your existing cabinets have a flat top edge to attach a backer strip to, crown molding can be added as a standalone upgrade — a popular way to modernize older cabinets without the cost of replacement. The main consideration is matching the finish, which takes more care on aged cabinets but is very doable. It’s one of the most cost-effective ways to refresh a kitchen that’s structurally fine but looks dated.
Is It Worth It?
For most traditional and transitional kitchens with a gap above the cabinets, crown molding is one of the best-value finishing details you can add — modest cost, big visual payoff. The keys are choosing a profile that matches your cabinets and having it installed by someone who can cut tight corners. If you’re considering crown molding as part of a kitchen project or as a standalone upgrade, my team at America’s Advantage Remodeling has been doing this finish work in Sacramento-area kitchens since 2001, all in-house. Reach out for a free in-home consultation and we’ll show you how the right crown molding transforms a cabinet run.
Frequently Asked Questions
Pulled from live Google PAA, filtered through the 3-test conversion filter, written answer-first for AI Overview and featured snippet citation.
Q: Should you put crown molding on kitchen cabinets?
A: Crown molding is worth adding when your cabinets stop short of the ceiling, because it bridges the gap and gives the kitchen a finished, custom look instead of an unfinished one. It works especially well on traditional and transitional kitchens, and on cabinets that end 6 to 18 inches below the ceiling. For ultra-modern flat-panel kitchens or cabinets that already reach the ceiling, crown molding is often skipped in favor of a cleaner line.
Q: What kind of crown molding for kitchen cabinets?
A: The best crown molding for kitchen cabinets matches the cabinet style and finish — a stepped or stacked profile for traditional kitchens, a simple cove or shaker-compatible profile for transitional kitchens, and a slim, square profile for contemporary looks. It should be the same material and finish as the cabinets so it reads as one piece. A remodeler matches the molding profile to your door style so the whole cabinet run looks intentionally designed.
Q: Does crown molding look good in a kitchen?
A: Yes, crown molding generally looks good in a kitchen when it matches the cabinet style and fills the gap between cabinets and ceiling, giving the room a polished, built-in appearance. It’s most effective in traditional and transitional kitchens and on cabinets that don’t reach the ceiling. The key is choosing a profile that complements the cabinet doors rather than competing with them.
Q: How is crown molding attached to cabinets?
A: Crown molding is attached to a kitchen cabinet by first installing a backer or nailing strip along the top of the cabinets, then fastening the molding to that strip at the correct angle with finish nails and adhesive. Corners are cut with precise miter joints so they meet cleanly. Because crown molding on cabinets requires accurate angle cuts and tight seams, it’s a finish-carpentry job where experience clearly shows in the result.
Q: Can you add crown molding to existing cabinets?
A: Yes, crown molding can be added to existing cabinets as long as there’s a flat top edge to attach a backer strip to, making it a popular way to upgrade a kitchen without replacing the cabinets. The molding must match or be finished to match the existing cabinet color. It’s a relatively contained project that can noticeably modernize older cabinets, though matching the finish on aged cabinets takes care.
Q: Is crown molding out of style?
A: Crown molding on kitchen cabinets is not out of style, though the preferred profiles have shifted toward simpler, cleaner lines and away from very ornate stacked moldings. In contemporary kitchens, slim square profiles or no molding at all are common, while traditional and transitional kitchens still use classic crown. The trend is toward molding that looks intentional and proportionate rather than heavy.
In 25 years of remodeling kitchens across the Sacramento area, I’ve been called in to fix the results of just about every mistake a kitchen project can make — budgets that doubled, layouts that fought the cook every day, contractors who vanished halfway through. The good news is that almost all of these mistakes are avoidable with the right planning and the right team. I’m Eugene Chernioglo, and I want to walk you through the most common kitchen remodel mistakes I see, so your project lands in the “done right” column.
Mistake 1: Rushing the Planning Stage
The single biggest cause of remodel problems is starting demolition before the plan is fully baked. Every decision you make after the walls are open — a cabinet change, a different counter, moving the sink — costs more and slows everything down. The fix is simple but disciplined: finalize your layout, choose your materials, confirm your budget, and pull any permits before a single cabinet comes out. The more you decide up front, the smoother the build.
Mistake 2: Underestimating the Budget and Timeline
Homeowners often budget for the visible items — cabinets, counters, appliances — and forget the things behind the walls. In older Sacramento homes especially, opening up a kitchen can reveal outdated wiring, galvanized plumbing, or surprises that need to be addressed. Build a realistic budget with a contingency, and work with a contractor who gives you a detailed, itemized estimate so there are no vague line items hiding future costs.
Mistake 3: Choosing the Cheapest Contractor
The lowest bid is rarely the best value, and it’s often the most expensive choice in the end. A suspiciously low quote usually means corners will be cut, or change orders will pile up once the work starts. What you actually want is the most accountable contractor — one with strong reviews, a clear written scope, and a team that shows up every day. Reading reviews and asking the right questions up front protects you far better than chasing the cheapest price.
Mistake 4: Neglecting Storage and Counter Space
A beautiful kitchen that doesn’t function is a daily frustration. Two of the most common regrets are too little counter space for real cooking and storage that doesn’t match how the household actually uses the kitchen. Plan your storage around your habits — deep drawers for pots, pull-outs for pantry items, a dedicated spot for the things you use every day — and protect enough continuous counter space for prep. This is where a designer who asks how you cook earns their value.
Mistake 5: Getting the Order of Work Wrong
A kitchen remodel has a correct sequence: design, demolition, rough-in (plumbing, electrical, framing), drywall and paint, flooring, cabinets and countertops, then fixtures and appliances. Doing things out of order — like laying flooring that then has to be cut around cabinets it wasn’t planned for — causes rework and wasted money. An experienced in-house team sequences the trades so each step sets up the next, which is hard to coordinate when you’re juggling separate subcontractors yourself.
How to Avoid All of These
Notice the thread running through every one of these mistakes: they trace back to planning and to the team you choose. Plan thoroughly, budget realistically, and hire for accountability rather than the lowest price, and you sidestep nearly all of them. That’s exactly how my team at America’s Advantage Remodeling has approached Sacramento-area kitchens since 2001 — detailed planning, an itemized quote with no surprises, and one in-house team handling the whole project from demolition to the final walkthrough. If you want a remodel that avoids these pitfalls from the start, reach out for a free in-home consultation.
Frequently Asked Questions
Q: What are common kitchen renovation mistakes?
A: The most common kitchen renovation mistakes are poor planning of the layout and work triangle, underestimating the budget and timeline, choosing the cheapest contractor over the most accountable one, neglecting storage and counter space, and making finish decisions too late. Most of these trace back to rushing the planning stage. A well-planned remodel with the right team avoids nearly all of them.
Q: What is the correct order of a kitchen renovation?
A: The correct order of a kitchen renovation is: design and planning first, then demolition, followed by rough-in work (plumbing, electrical, and any framing), then drywall and paint, then flooring, then cabinets and countertops, and finally fixtures, appliances, and finishing touches. Doing things out of order — like installing flooring before cabinets when it isn’t planned for — causes rework and wasted money. An experienced remodeler sequences the trades so each step builds on the last.
Q: What should be done first when remodeling a kitchen?
A: The first step in remodeling a kitchen is thorough planning and design — finalizing the layout, selecting materials, confirming the budget, and pulling any required permits before any demolition begins. Skipping or rushing this stage is the single biggest cause of remodel problems, from budget overruns to mid-project change orders. The more decisions made up front, the smoother the actual construction goes.
Q: What is the biggest expense in a kitchen remodel?
A: Cabinets are typically the biggest single expense in a kitchen remodel, often accounting for the largest share of the budget, followed by countertops, appliances, and labor. Because cabinets drive so much of the cost, decisions about custom versus stock and door style have a large budget impact. Knowing this helps homeowners allocate their budget where it matters most.
Q: What should you not tell a contractor?
A: You shouldn’t hide your actual budget or your must-haves from a contractor, but you also shouldn’t feel pressured to sign on the spot or accept vague, non-itemized quotes. A trustworthy remodeler gives you a detailed, line-item estimate and a clear scope before you commit. The bigger risk is not what you tell the contractor, but choosing one who won’t put everything in writing.
Q: What to know before remodeling a kitchen?
A: Before remodeling a kitchen, know your realistic budget and timeline, understand that older homes often hide surprises behind the walls, plan your layout and storage around how you actually cook, finalize material choices early, and choose a contractor based on accountability and reviews rather than the lowest bid. Going in with these expectations prevents the most common sources of stress. A detailed plan and the right team make the difference between a smooth remodel and a painful one.
If you have searched for what an ADU costs in California, you have probably seen numbers all over the map — and most of them quoted for Los Angeles or San Diego, not the Sacramento region. I am Eugene Chernioglo. My team at America’s Advantage Remodeling has been building and remodeling homes across Sacramento, Roseville, Folsom, and the surrounding area since 2001, all with our own in-house crews and no subcontractors. Here is a straight answer on what an accessory dwelling unit really costs here in 2026, where the money goes, and what moves the number up or down.
The short answer
In 2026, building an ADU in California typically runs $150,000 to $400,000, or roughly $250 to $500 per square foot all in. In the Sacramento region specifically, most homeowners land toward the lower-to-middle of that range — our labor and land costs run noticeably below the Bay Area and Southern California, so a comparable unit that costs $400,000 in Los Angeles often costs meaningfully less here. The final figure depends on the type of ADU, its size, your site conditions, and your finish level.
ADU cost by type
ADU Type
Typical CA Range (2026)
What Drives the Cost
Garage conversion
$100,000 – $200,000
Shell already exists; cost is insulation, plumbing, electrical, finishes
Attached ADU (addition)
$175,000 – $300,000
New walls and roof tied into the main home; shared utilities help
Detached new-build ADU
$200,000 – $400,000+
Full foundation, framing, roof, and independent utilities
Junior ADU (JADU)
$50,000 – $125,000
Converts existing interior space; capped at 500 sq ft, no full new build
Is converting a garage cheaper than building detached? Yes — almost always. Because the foundation, walls, and roof already exist, a garage conversion skips the most expensive part of construction. That is why it is the most affordable path to a permitted, livable unit for most Sacramento homeowners.
Where the money actually goes
People underestimate everything outside the “box” of the unit itself. A realistic 2026 budget breaks into three buckets:
Hard construction costs (55–70% of budget): framing, roofing, drywall, cabinets, flooring, fixtures — the physical building.
Site work and utilities (15–25%): foundation, grading, sewer and water tie-ins, electrical service, and trenching. Long utility runs and difficult lot access push this up fast.
Soft costs (10–20%): design, engineering, Title 24 energy compliance, and city permit and plan-check fees.
A note on per-square-foot math: it can mislead you on small units. A full kitchen and bathroom cost about the same in a 400 sq ft ADU as in an 800 sq ft one, which makes the smaller unit more expensive per square foot. Always budget by total project cost, not the per-foot number alone.
What raises or lowers your cost
Two ADUs of the same size can differ by tens of thousands of dollars. The variables that matter most:
Site conditions: a flat lot with easy access and a short sewer run is the ideal, low-cost scenario. Slopes, poor soil, or a sewer tie-in 75+ feet away add real money.
Finish level: standard cabinets, quartz, and stock fixtures keep you on budget; custom and high-end selections climb quickly.
Design path: a pre-approved or standard plan moves through permitting faster and cheaper than a fully custom design that needs multiple plan-check rounds.
Code requirements: California requires energy-efficient systems on new residential construction, and some jurisdictions require fire sprinklers — build these into the budget from day one.
Permits, timeline, and the 2026 rules
California has steadily made ADUs easier to build. As of 2026, detached ADUs under 750 sq ft are exempt from impact fees in most jurisdictions, and cities must act on complete applications within set timeframes. Even so, design and permitting still takes roughly 4 to 6 months before construction starts, and the full project commonly runs 10 to 18 months start to finish. Using a city’s pre-approved plan set is the fastest route through plan check.
Only a licensed general contractor with a California State License Board B-license should build an ADU — it is a complete small home requiring permits, inspections, and multiple trades. Our license is CSLB #1036517, and because we self-perform with in-house crews, you have one accountable team from foundation to final walkthrough.
Is an ADU worth it in Sacramento?
For most homeowners here, yes — when it is planned with a realistic budget. A well-built ADU adds rental income, gives you flexible space for family, and increases your property’s long-term value in a high-demand market. The key is accurate budgeting and a builder who uncovers site issues before they become surprise change orders. That is exactly the conversation we have with you before any work begins.
Thinking about an ADU on your Sacramento-area property? We will walk your lot, talk through the realistic cost for your specific site, and give you an itemized estimate with no surprise charges. Reach out for a free in-home consultation.
Get a free, itemized ADU estimate from a licensed Sacramento builder. Call (916) 507-0469 or request your in-home consultation today.
Frequently Asked Questions
Q: How much does it cost to build an ADU in California in 2026?
A: Building an ADU in California in 2026 typically costs $150,000 to $400,000, or about $250 to $500 per square foot. Garage conversions are the most affordable at roughly $100,000 to $200,000, while detached new-build units run $200,000 to $400,000 or more. In the Sacramento region, costs usually fall toward the lower-to-middle of these ranges because local labor and land costs run below coastal California.
Q: What is the cheapest way to build an ADU in California?
A: The cheapest way to build an ADU in California is to convert existing space — most often a garage — rather than building a detached unit from the ground up. The foundation, walls, and roof already exist, so you skip the most expensive part of construction. A Sacramento garage conversion typically runs $100,000 to $200,000, while a comparable detached unit starts around $200,000. Junior ADUs carved out of the existing house can cost even less.
Q: How much does an ADU cost per square foot?
A: An ADU in California costs roughly $250 to $500 per square foot in 2026, including design, permits, and construction. Per-square-foot pricing can be misleading on small units, though, because a full kitchen and bath cost about the same in a 400 sq ft unit as in an 800 sq ft one. Budget by total project cost, not the per-foot figure alone.
Q: What are the disadvantages of ADUs?
A: The main disadvantages of ADUs are the high upfront cost and the hidden expenses that are easy to underestimate. Site work and utilities — foundation, grading, sewer and water tie-ins, and electrical service — add 15 to 25 percent on top of the building itself, and soft costs like design, Title 24 energy compliance, and city permit fees add another 10 to 20 percent. A possible property-tax increase on the added square footage and reduced yard space are other trade-offs. A good contractor identifies all of these before you sign, not mid-project.
Q: How long does it take to build an ADU in California?
A: A California ADU typically takes 10 to 18 months from start to finish, including design and permitting. The design and permit phase alone runs about 4 to 6 months before construction begins. Using a city’s pre-approved plan set is the fastest way through plan check.
Q: Do I need a permit and a licensed contractor to build an ADU?
A: Yes — an ADU is a complete small home that requires building permits, inspections, and a licensed general contractor with a California B-license. Using an unlicensed contractor or handyman for a project this size is a serious risk. Permitted, inspected work also protects your property value and your ability to insure and sell the home.
Q: Is it worth it to build an ADU in California?
A: For most homeowners in the Sacramento region, building an ADU is worth it — a well-built unit adds long-term property value and can generate rental income in a high-demand market. The return depends on build quality, your specific lot, and how the space is used, whether that is rental income, multigenerational living, or a home office. Accurate budgeting and permitted construction are what protect the investment.