countertops Archives - America's Advantage Remodeling

Посты с тэгом: countertops

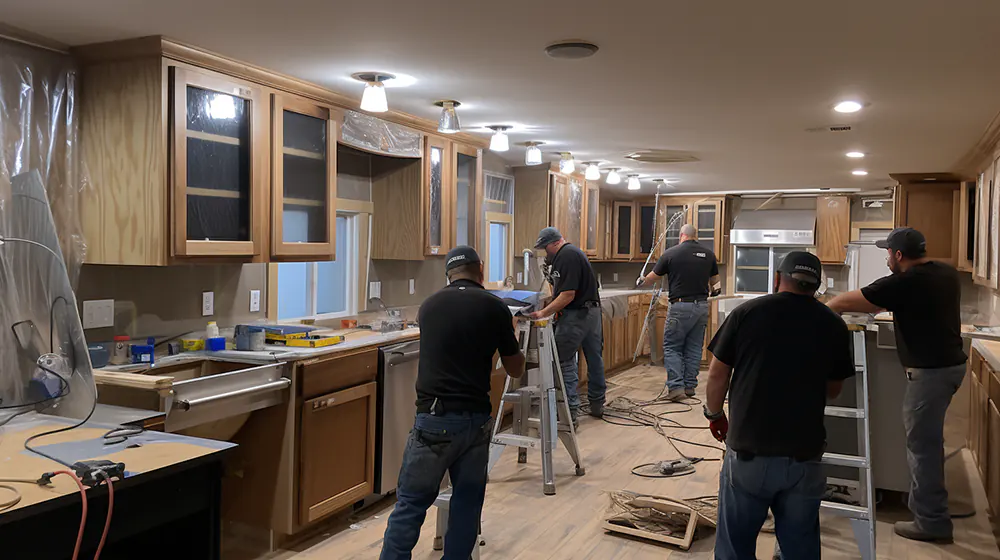
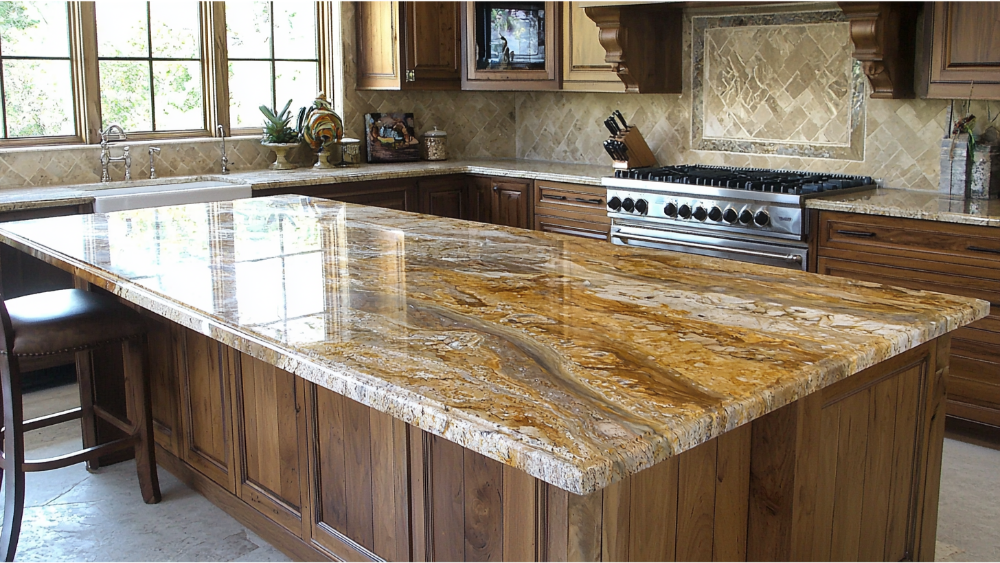
How To Remove Kitchen Countertop in 7 Steps

Опубликовано: March 19, 2025 в 11:32 pm

Автор:

Категории: Kitchen

Тэги: ,

Removing a kitchen countertop might seem like a daunting task, but with the right tools and preparation, it can be a straightforward process. Whether you’re upgrading your kitchen or replacing a damaged surface, carefully following each step will ensure a smooth and efficient removal.

Tools Needed for Removing a Kitchen Countertop

Screwdriver (Phillips and Flathead)

You will need screwdrivers to remove screws from brackets or fasteners securing the countertop to the cabinets. Both Phillips and flathead types may be required depending on the hardware used.

Pry Bar

A pry bar is essential for carefully separating the countertop from the cabinets or backsplash without causing damage. It provides leverage to lift the surface safely.

Utility Knife

Use a utility knife to cut through any sealant, caulk, or adhesive that may be holding the countertop in place. This ensures a clean separation and prevents unnecessary damages.

Power Drill

A power drill can assist in quickly removing screws or bolts, especially if they are tightly secured or numerous. It’s a time-saver compared to using screwdrivers manually.

Putty Knife

A putty knife helps in scraping away residual caulk or adhesive after the main countertop has been removed. This ensures a smooth surface for the next installation.
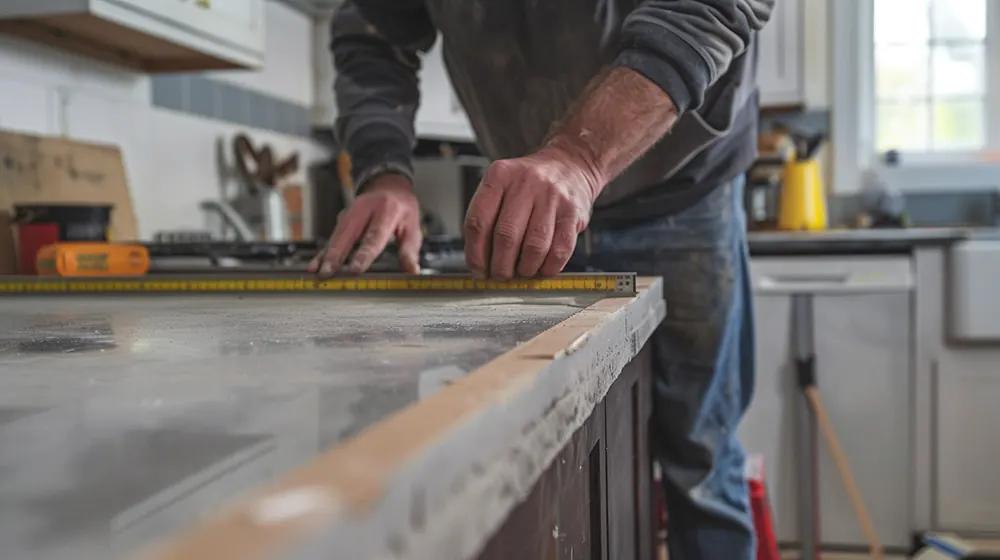
Tape Measure

A tape measure is useful for accurately measuring your countertop before removal, especially if you need to plan for a replacement or disposal.

Work Gloves

Protect your hands with sturdy gloves while handling sharp edges, tools, or heavy materials to avoid injuries.

Safety Goggles

Wearing safety goggles is crucial to protect your eyes from dust, debris, or splinters during the removal process.

Reciprocating Saw (Optional)

If the countertop is fixed with heavy adhesive, a reciprocating saw may be necessary to cut through stubborn areas or to cut the countertop into smaller, more manageable pieces for removal.

Bucket and Sponge

Use a bucket and sponge to clean any adhesive residues or dust after the countertop is removed to keep the workspace neat and ready.

Preparation Steps for Removing a Kitchen Countertop

A nice kitchen countertop

Clear the Workspace

Begin by removing all items from the countertop and surrounding areas. Clearing away appliances, decorations, and kitchenware ensures you have a safe and obstruction-free workspace to handle laminate countertops or other materials.

Turn Off Utilities

Disconnect any utilities connected to the countertop fixtures, such as water lines for sinks or gas lines for stovetops. For an undermount style sink, ensure the plumbing is completely detached to avoid leaks or damages during removal.

Inspect the Old Countertop

Carefully examine the old countertop to identify how it is secured to the cabinets or walls. Most countertops are fastened with screws, adhesives, or brackets that may require different tools or techniques to remove safely.

Protect Surrounding Surfaces

Use plastic sheeting or drop cloths to protect surrounding cabinets, floors, or walls from potential damage. This is especially important when dealing with laminate countertops, as adhesive residues or splinters could harm nearby surfaces.

Prepare Necessary Tools

Gather all required tools, such as a pry bar, utility knife, and safety gear, before beginning the removal. Having everything within reach will save time and keep the process organized as you tackle countertop fixtures and stubborn adhesives.

Measure the Countertop Area

Take accurate measurements of the countertop dimensions using a tape measure. Knowing these measurements is useful if you’re replacing the old countertop and planning for new installations to fit seamlessly.

Step-by-Step Guide to Removing a Kitchen Countertop

Two men removing the old kitchen countertop during a kitchen remodel

Disconnect Utilities

Start by shutting off all utilities connected to the countertop fixtures. Locate the emergency shut off valve to turn off the water supply to the kitchen sink, and disconnect any plumbing fixtures such as pipes or hoses. If your setup includes a garbage disposal, ensure it is unplugged and carefully disconnected from the sink. Taking these precautions will prevent leaks, damage, or accidents during the removal process.

Apply Caulk Softener

Inspect the edges where the countertop meets the backsplash, walls, or cabinets, and look for any sealant or caulk. Use a caulk softener to loosen any hardened sealant, making it easier to cut through with a utility knife. Allow the caulk softener to sit for the recommended time as per the product instructions. This step is crucial for a clean separation without damaging surrounding surfaces.

Remove Fixtures and Accessories

Take out any mounted accessories, such as faucets, soap dispensers, or the kitchen sink, before detaching the countertop. Use a screwdriver or power drill to remove screws and brackets securing the fixtures in place. Carefully lift the kitchen sink out, ensuring no remnants such as adhesive or caulk are pulling against it. If this is a DIY project, label any removed parts or screws for easy reassembly later.

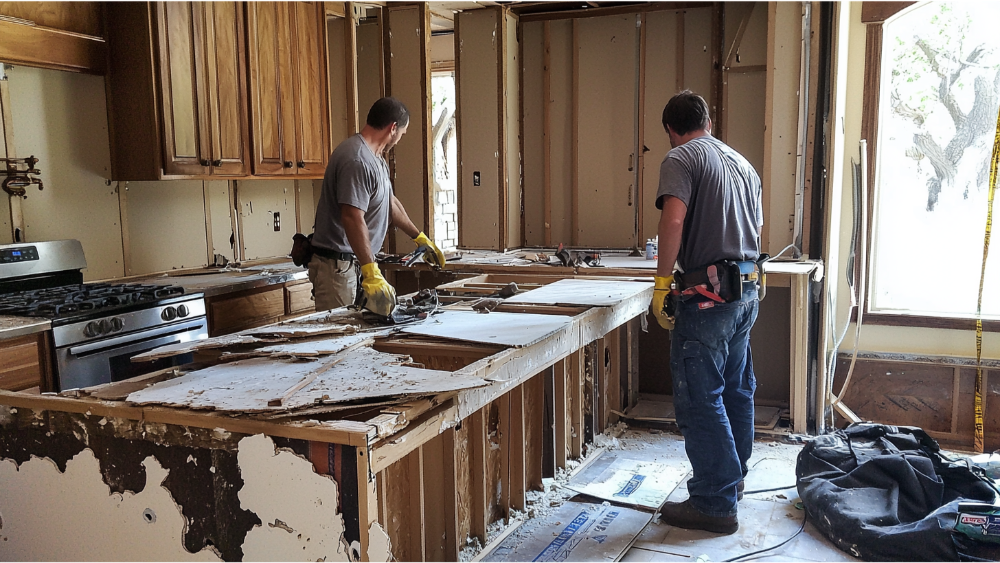
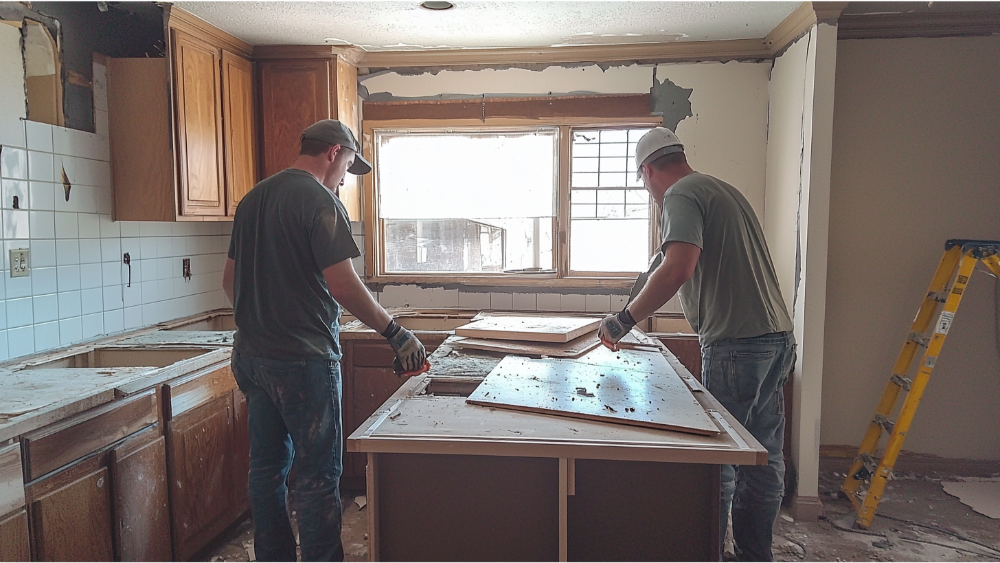
Detach the Countertop from Cabinets

Examine underneath the countertop to locate screws, clips, or brackets holding it to the cabinets. Use a power drill or screwdriver to remove them, keeping the hardware in a safe place for potential reuse. If the countertop is still stuck due to adhesive, run a utility knife along the edges where it meets the cabinets and gently pry it up using a pry bar. Work slowly to avoid damaging the cabinets or breaking the countertop unintentionally.

Cut the Countertop if Necessary

If the countertop is large and cumbersome to handle, consider cutting it into smaller, more manageable sections. Use a reciprocating saw for this step, ensuring you have sufficient safety gear on and the workspace is clear. Carefully measure and cut the countertop sections, paying extra attention around complex areas like the kitchen sink opening. This is especially helpful for DIY project enthusiasts working solo or with limited lifting strength.

Lift and Remove the Countertop

With all attachments removed, carefully lift the countertop from the cabinets, starting from one end and working your way across. If it’s still resisting in spots, double-check for remaining screws, caulk, or adhesive that might still be holding it in place. Have an extra set of hands if the countertop is heavy, especially around wide surfaces or sink cutouts. Once removed, you can dispose of the countertop or set it aside if you’re repurposing it elsewhere.

Clean the Workspace

After the countertop is removed, use a putty knife and sponge to scrape away any remaining adhesive, caulk, or residue on the cabinet surfaces. Use a bucket of warm water and a sponge to wipe down the area, ensuring everything is clean and ready for a new countertop installation. This step ensures a smooth, neat surface essential for ensuring your next countertop fits perfectly and adheres securely to the cabinets.

Tips for a Better Countertop Removal Experience

Two men removing the old kitchen countertop for a kitchen remodel

Label Everything

When disconnecting supply lines or removing fixtures, label each part and its corresponding screws. This will make reassembly and installation of a new countertop more seamless.

Use Proper Lighting

Ensure your workspace is well-lit, especially when working underneath base cabinets or cutting through materials. A headlamp or portable work light can be invaluable.

Protect Your Back

Counter top removal can involve lifting heavy sections. Use proper lifting techniques or enlist help to avoid injuries, particularly around sinks or large base cabinets.

Check for Hidden Screws

Always double-check for any screws, clips, or brackets hidden underneath the counter top or within base cabinets before applying force to pry it free.

Turn Off Power as Needed

If electrical fixtures like cooktops or outlets are built into the counter top, shut off power at the breaker box to ensure a safe removal process.

Test Fit Before Installation

Before removing the old counter top, verify your new counter’s dimensions by placing it over the base cabinets. This ensures a perfect fit and avoids surprises during installation.

Frequently Asked How To Remove Kitchen Countertop Questions

A nice kitchen countertop

Is It Easy to Remove Kitchen Countertops?

To remove countertop can be an accessible DIY project with the right tools and preparation, though it may require effort depending on the materials and installation methods used. Countertops secured with adhesives or drop-in fixtures like sinks may need extra care and proper techniques to avoid damage. Following a step-by-step process ensures a smoother removal and minimizes challenges during the task.

How Much Does It Cost to Remove Countertops in the Kitchen?

The cost to remove kitchen countertops can vary widely based on factors such as the material, the size of the countertop, and whether you choose to hire professionals or do it yourself. On average, professional removal services may cost between $200 and $500, while a DIY removal typically costs less, depending on the tools you already own. However, high-end materials like granite or quartz, which can be heavier and require more care, might increase the expense. Always factor in additional costs for disposal or recycling of the old countertops if not included in the service.

Do Countertop Installers Remove Old Countertops?

Yes, most countertop installers offer removal services for old countertops as part of their installation package or for an additional fee. This service includes detaching the existing countertop and disposing of or recycling the materials based on customer preferences. It’s recommended to confirm this service with your installer beforehand to ensure a smooth transition to your new countertop.

Conclusion

Removing a kitchen countertop can be a manageable task when approached with careful planning and the right tools. By following the outlined steps and tips, you can ensure a safe and efficient process, whether you’re preparing for a new installation or simply disposing of an old countertop. Paying attention to details like labeling parts, working methodically, and enlisting help for heavier sections will help prevent mistakes or injuries. With patience and preparation, you’ll achieve a workspace ready for the next phase of your kitchen renovation project.

The Cost To Replace Kitchen Cabinets And Countertops

Опубликовано: March 12, 2025 в 6:10 pm

Автор:

Категории: Kitchen

Тэги: ,,

Renovating a kitchen by replacing cabinets and countertops can dramatically transform the space, increasing both its functionality and aesthetic appeal. However, it’s important to understand the costs involved to plan your budget effectively. From material choices to labor expenses, several factors influence the overall cost of this type of upgrade.

Cost Breakdown for Countertop Costs

Laminate Countertops

Laminate countertops are one of the most affordable options, making them a popular choice for budget-conscious renovations. Prices typically range from $10 to $40 per square foot, depending on the brand and quality. They come in a variety of colors and patterns, mimicking more expensive materials like stone or wood. While they might not be as durable as other materials, laminate countertops are easy to install and maintain.

Marble Countertops

Marble countertops are a luxurious choice, with costs ranging between $40 and $100+ per square foot, based on the type and rarity of the marble. This natural stone offers unparalleled beauty with unique veining patterns, adding elegance to any kitchen. However, marble requires regular sealing and maintenance to prevent staining and scratches. Its high cost and care needs make it ideal for those willing to invest in a premium aesthetic.

Granite Countertops

Granite countertops typically cost between $35 and $75 per square foot, providing a balance between durability and visual appeal. They are highly resistant to heat and scratches, making them a practical choice for busy kitchens. With numerous colors and patterns available, granite is a versatile option that works well with both stock cabinets and semi-custom cabinets. Like marble, granite needs sealing to maintain its longevity.

Quartz Countertops

Quartz countertops offer a blend of affordability and performance, with prices ranging from $50 to $150 per square foot. Unlike natural stones, quartz is engineered, which ensures consistency in color and design. It is non-porous, making it resistant to staining and easier to clean. Quartz is an excellent choice for those upgrading kitchen spaces with semi-custom cabinets and looking for a durable yet stylish surface.

Butcher Block Countertops

Butcher block countertops are a warm and rustic option, with costs typically ranging from $30 to $100 per square foot, depending on the type of wood and finish. They add a natural charm to any kitchen remodel and are excellent for those looking for eco-friendly countertop materials. While they do require regular sealing to prevent water damage and scratches, they can be sanded and refinished, making them a long-lasting option for those replacing their kitchen countertop. These countertops pair especially well with farmhouse or traditional kitchen designs.

Cost Breakdown for Cabinet Costs

A nice white kitchen remodel

Stock Cabinets

Stock cabinets are the most budget-friendly option, with prices ranging from $60 to $200 per linear foot. These cabinets are pre-manufactured and available in standard sizes and designs, making them an excellent choice for those seeking quick kitchen cabinet installation. While they offer limited customization, they come in a variety of materials, including laminate or engineered wood, and are easy to integrate into most kitchen styles. Stock cabinets are best for cost-conscious projects where functionality and affordability are top priorities.

Semi-Custom Cabinets

Semi-custom cabinets strike a balance between affordability and personalization, costing between $100 and $650 per linear foot. These cabinets allow for slight modifications in dimensions, finishes, and other design details, providing more flexibility than stock cabinets. Available in various materials, including solid wood and engineered wood, they cater to a wide range of aesthetic preferences and budgets. Semi-custom cabinets are ideal for those looking to elevate their kitchen design without committing to the higher costs of fully custom cabinets.

Custom Cabinets

Custom cabinets are the ultimate option for homeowners looking for complete design freedom, with costs ranging from $500 to $1,200 or more per linear foot. These cabinets are built to order, allowing you to choose every detail, from size and layout to material and finish. Solid wood is a common choice for custom cabinetry due to its aesthetic and durability, but other materials like metal or glass can also be used for a unique look. While more expensive, custom cabinets offer unmatched quality and craftsmanship, making them a worthy investment for a truly bespoke kitchen.

Solid Wood Cabinets

Solid wood cabinets are a premium option due to their durability and timeless aesthetic, with prices typically starting at $250 per linear foot. The type of wood significantly impacts the cost, with popular choices like oak, maple, and cherry influencing the price range. Solid wood cabinets are highly durable and can be refinished, which makes them an excellent long-term investment. Their natural beauty enhances any kitchen, whether combined with new cabinets or updated countertops.

Refaced Cabinets

Refacing cabinets is a more affordable alternative to replacing them entirely, with costs ranging from $4,000 to $9,000 for an average kitchen. This option involves replacing the doors, drawer fronts, and hardware while leaving the existing cabinet boxes in place. Refacing is perfect for those with structurally sound cabinets who want a refreshed look at a fraction of the cost of new cabinets. It is a cost-effective way to enhance aesthetics without the need for a complete kitchen cabinet installation.

Factors Affecting Cost for Cabinets and Countertops

A nice kitchen

Material Selection

The type of material chosen significantly impacts the cost of both cabinets and countertops. Premium countertop materials like marble, granite, and quartz tend to be more expensive, while laminate or engineered wood offers more budget-friendly alternatives. Similarly, cabinets made from solid wood or custom materials will drive up costs compared to stock or semi-custom options.

Labor Costs

Labor is a crucial factor that influences the overall cost of replacing kitchen countertops or installing new cabinets. Skilled labor for installing premium countertop materials or custom cabinetry demands higher fees due to the expertise required. Additionally, complex layouts or unique designs may further increase labor costs.

Size and Dimensions

The size of the kitchen and the dimensions of the cabinets and countertops significantly affect the final price. Larger kitchens require more material and labor, which directly increases expenses. For example, replacing kitchen countertops in a spacious kitchen may involve higher costs compared to a smaller one.

Customization Options

Customizing kitchen cabinets or countertops, such as adding intricate designs, special finishes, or unique shapes, raises expenses. Fully custom cabinets or countertops allow you to tailor everything to your preferences but come at a premium cost. Opting for stock or semi-custom options can help keep customization charges lower.

Installation Complexity

The complexity of the installation process also plays a role in determining the cost. Countertops made of delicate or heavy materials, like marble or granite, require careful handling and professional expertise, which can add to labor costs. Similarly, custom cabinet installations with unique layouts or features may demand additional time and effort.

Maintenance and Longevity

The long-term maintenance requirements of the materials can indirectly affect their overall cost. For example, premium countertop materials like marble and butcher block require sealing and care, adding to ongoing expenses. On the other hand, materials like quartz or engineered wood are low-maintenance, making them a more cost-effective choice in the long run.

Tips to Save for Cabinet and Countertop Installation

Explore Semi-Custom Cabinet Offers

Semi-custom cabinet options provide a balance between affordability and style. Look for promotions or discounts on semi-custom cabinets from retailers, as they often run seasonal sales or special offers. By capitalizing on these deals, you can achieve a personalized look for your kitchen without breaking the budget.

Refinish or Replace Cabinet Doors Only

Instead of completely replacing your cabinets, consider refinishing or replacing just the cabinet doors for a refreshed appearance. This approach is significantly more affordable and allows you to update the style while keeping the underlying cabinet structure intact. It’s a cost-effective way to elevate your kitchen’s look without a full renovation.

Take a DIY Approach to Install Kitchen Cabinets

If you’re handy and comfortable with tools, consider installing kitchen cabinets yourself to save on labor costs. Many manufacturers provide easy-to-follow installation guides for their products. Tackling the installation as a DIY project can reduce expenses significantly while giving you the satisfaction of contributing to your kitchen redesign.

Plan Ahead for Sales and Discounts

Timing your purchase with annual sales or special promotions can lead to substantial savings on both cabinets and countertops. Keep an eye out for clearance sales or end-of-season discounts on materials. By planning ahead, you can secure high-quality options at more affordable prices.

Opt for Cost-Friendly Countertop Materials

While premium materials like granite or marble are stunning, alternatives like laminate or engineered stone can be just as stylish at a fraction of the cost. These materials are durable, require less maintenance, and offer a wide range of colors and patterns. Carefully selecting cost-effective countertop materials can reduce your overall renovation expenses.

Frequently Asked Cost to Replace Kitchen Cabinets and Countertops Questions

a nice small kitchen

What is a Realistic Budget for a Kitchen Remodel?

A realistic budget for a kitchen remodel typically ranges from $10,000 to $50,000, depending on the size of the space, the materials used, and the extent of the renovation. Smaller-scale updates, such as refacing cabinets and replacing laminate countertops, can keep costs on the lower end. However, incorporating custom cabinetry, premium countertop materials, and professional labor will place the remodel on the higher end of the budget spectrum.

What is the Most Expensive Part of a Kitchen Remodel?

Cabinets are often the most expensive part of a kitchen remodel, typically accounting for 30% to 40% of the total budget. Custom cabinetry and high-quality materials significantly drive up costs, especially when paired with intricate designs or finishes. Countertops made of premium materials like quartz or marble can also be a substantial expense, particularly in larger kitchens.

What Makes a Kitchen Look Cheap?

A kitchen can look cheap when low-quality materials, such as peeling laminate countertops or particleboard cabinets, are used. Poor lighting, outdated fixtures, and mismatched hardware also contribute to an unpolished and inexpensive appearance. Additionally, cluttered countertops and lack of cohesive design can make the space look unrefined.

Conclusion

Replacing kitchen cabinets and countertops is a significant investment, but with careful planning and informed choices, it is possible to create a stylish and functional space within your budget. By considering cost-saving tips, such as exploring semi-custom options, opting for alternative materials, and timing purchases with sales, you can achieve a remodeled kitchen that meets your needs without overspending. Prioritize quality materials and professional installation where necessary to ensure long-term durability and satisfaction. Whether you’re aiming for a minor update or a complete transformation, thoughtful decisions will help you create a kitchen you’ll enjoy for years to come.

Can You Paint Kitchen Countertops? How Can I Paint My Countertops?

Опубликовано: January 21, 2025 в 11:55 pm

Автор:

Категории: Kitchen

Тэги: ,,

Revamping your kitchen countertops with a fresh coat of paint is an affordable and creative way to transform the heart of your home. This DIY project allows you to customize your countertops to match your style while avoiding the high cost of replacement. With the right tools and techniques, you can achieve a durable and professional-looking finish.

Reach out to America’s Advantage Remodeling for any help you might need!

Types of Countertops That Can Be Painted

A man painting his kitchen countertops

Laminate Countertops

Laminate countertops are among the easiest and most popular surfaces to revamp with countertop paint. Their smooth surface allows for excellent adhesion when paired with the right primer and paint. To paint laminate countertops, ensure the surface is thoroughly cleaned and lightly sanded to remove any glossy finish, which helps the paint stick better. With proper preparation and sealing, you can give laminate countertops a fresh, modern look that mimics more expensive materials, such as stone or wood. This is an affordable solution for homeowners seeking an updated style without the expense of replacing laminate entirely.

Wood Countertops

Painting wood countertops is another great way to refresh your kitchen design while preserving the warmth and character of the material. The natural grain of wood can shine through with the proper painting technique, providing a rustic or contemporary aesthetic, depending on your preference. Use a primer designed for wood surfaces before applying countertop paint to ensure durability and reduce the risk of peeling or chipping. Sanding is crucial for creating a smooth surface and enabling even coverage of the paint. A protective sealer, like polyurethane, will further fortify the surface against scratches and moisture.

Granite Countertops

While painting granite countertops may seem unconventional, it is possible to transform them with countertop paint designed specifically for tougher surfaces. Achieving a professional finish requires extra preparation, as granite is non-porous and very smooth. Start by thoroughly cleaning the surface and sanding it lightly to give the paint something to adhere to. Applying a high-adhesion primer is essential when working with granite countertops to ensure the painted finish lasts over time. Although granite is known for its natural beauty, painting it can be a cost-effective way to adapt your paint countertops to a new color scheme or design style.

Tile Countertops

Tile countertops can also be painted, allowing you to reinvent their look without the labor or expense of retiling. Use paint designed for both the tiles and grout to ensure a cohesive and long-lasting finish. Start by cleaning the tiles thoroughly, sanding them lightly, and applying a primer to create a suitable base for your countertop paint. You can opt for a sleek single-color finish or use stencils to create intricate designs and patterns on your tiles. A durable topcoat is necessary to protect the surface from wear and moisture, making it both functional and stylish.

Concrete Countertops

Concrete countertops provide a blank canvas for creativity, making them highly adaptable to paint transformations. Their porous nature ensures that countertop paint adheres well when paired with an appropriate primer. Before painting, ensure the surface is clean and free of debris, and consider filling any cracks for a seamless final look. You can achieve a variety of finishes, from a smooth matte surface to a high-gloss result, depending on the paint type and technique. By sealing the painted concrete countertops thoroughly, you’ll achieve lasting durability and resilience against daily kitchen use.

Solid Surface Countertops

Solid surface countertops, such as Corian, can be painted to give them a fresh new appearance without the need for replacement. These countertops are non-porous and require proper preparation to ensure the paint adheres effectively. Start by cleaning the surface thoroughly to remove grease or residue, then lightly sand it to create a texture for the primer to cling to. Use a high-quality primer and paint specifically designed for countertops to achieve a smooth and durable finish. A protective topcoat is essential to safeguard the painted surface against scratches, stains, and heat, extending the life of your newly revamped countertops.

Tools and Materials Needed

A painted kitchen countertop

Countertop Paint Kits

Countertop paint kits are specifically designed to simplify the painting process and include all the essential products, such as primer, paint, and topcoat. These kits are tailored to different types of countertop materials, ensuring a durable and cohesive finish. Opt for a kit that matches your specific countertop surface, whether it’s laminate, wood, or tile.

Soap and Water

Before painting, thoroughly clean your countertops using a mix of soap and water to remove grease, dirt, and obstructions that could affect adhesion. A clean surface ensures that the primer and paint bond properly to the countertop materials, preventing peeling or bubbling over time. Use a microfiber cloth or sponge for gentle but effective cleaning.

Sandpaper or Sanding Blocks

Sanding is crucial for creating a slightly rough surface that allows paint and primer to adhere better. For smooth surfaces, such as ceramic tile or granite, use medium to fine-grit sandpaper to scuff the surface lightly. Always wipe away dust with a damp cloth after sanding to maintain a clean working area and prepare for a smooth finish.

Primer

A high-quality primer helps to ensure that the paint properly adheres to different countertop materials like laminate, granite, or concrete. Select a primer appropriate for non-porous surfaces, such as ceramic tile or solid surface countertops, to guarantee a long-lasting finish. Apply the first coat of primer evenly with a roller or bristle brush and allow it to dry completely before painting. If needed, apply a second coat for even coverage and better adhesion.

Epoxy Coating or Topcoat

Epoxy coating or a clear topcoat provides a protective finish that extends the lifespan of your painted countertops. It helps seal the paint, making the surface resistant to scratches, moisture, and heat. Apply multiple layers if recommended, starting with a thin coat and allowing each coat to cure fully for maximum durability. A final smooth finish can be achieved by following the manufacturer’s guidelines carefully.

Painter’s Tape

Use painter’s tape to protect adjacent areas, such as walls, sinks, and appliances, from accidental paint strokes or drips. This ensures clean edges and a professional-looking finish without the need for extensive touch-ups.

Brushes and Rollers

High-quality brushes and foam rollers are essential for even application of paint and topcoat. A foam roller works well for large, flat surfaces, while angled brushes or a bristle brush are useful for painting edges and detailed areas. For the best results, use a thin coat for the first coat, and follow up with a second coat to achieve a streak-free, smooth finish on your newly painted countertops.

Design Ideas for Painted Countertops

A designed kitchen

Faux Marble Finish

Transform your existing countertops into elegant marble countertops using specialized countertop paint techniques. This design works particularly well for bathroom countertops, where a luxurious aesthetic is often desired. Begin by applying a base color, such as white or light gray, and use a fine artist’s brush to mimic natural marble veins with darker shades. Seal the finished design with a heat-resistant topcoat to ensure longevity and protect it from daily wear.

Bold and Vibrant Color Theme

For a modern or eclectic look, consider bold hues like navy blue, emerald green, or deep burgundy for your countertops. This idea works great when coordinated with neutral-colored cabinetry, allowing the countertops to take center stage. Ensure the paint used is heat resistant if the design is intended for kitchen use to safeguard against hot pots and dishes. By updating your existing countertops with striking colors, you can create a fresh focal point in the space.

Two-Tone Countertops

Achieve a contemporary style by incorporating a two-tone design into your painted countertops. For example, create a light base on the outer sections of your kitchen island and a darker central area for a visually appealing contrast. This style can work beautifully in both kitchens and bathrooms and can be easily tailored to any color scheme. Don’t forget to apply a heat-resistant finish, especially for high-use areas, to ensure your countertops remain durable and functional.

Concrete Look

Add an industrial-inspired touch by painting your countertops to mimic the appearance of polished concrete. This works wonderfully for both bathroom and kitchen countertops, offering a sleek, minimalistic style. Use gray tones with subtle speckling effects created with a sponge technique to achieve a realistic concrete texture. A topcoat with heat-resistant properties is essential for kitchen applications to protect the look from heat and daily wear.

Custom Patterns and Stenciling

For a truly unique countertop design, consider using stencils to apply intricate patterns or geometric shapes. This idea is ideal for existing countertops that need an artistic refresh, particularly in bathrooms or modern kitchens. Choose a combination of complementary colors and take your time with each section to ensure crisp, clean lines. Protect the final design with a durable, heat-resistant topcoat to maintain both style and function.

Frequently Asked Paint Kitchen Countertops Questions

A nice kitchen remodel

Is Painting Kitchen Countertops a Good Idea?

Painting kitchen countertops can be a cost-effective and versatile way to refresh the look of your kitchen without the expense of a full renovation. It allows homeowners to customize the design of their countertops with a wide range of colors, patterns, and finishes, from classic faux marble to bold contemporary hues.

It’s important to consider a few factors before deciding. Painted countertops require proper preparation and high-quality materials, including primers and topcoats, to ensure durability and protect against scratches, heat, and moisture. While painting countertops is a relatively simple DIY project, it may not be as long-lasting as replacing them with new materials. For those seeking a budget-friendly and creative solution, painting is a great option, providing you’re committed to regular maintenance and care to preserve the finish.

Does Painting a Countertop Last?

The longevity of a painted countertop depends largely on the preparation, materials used, and the level of care it receives. When high-quality primer, paint, and a durable topcoat are applied correctly, painted countertops can last several years with minimal wear and tear. Proper prep work, such as sanding and cleaning the surface thoroughly, helps create a strong base for the paint to adhere to, reducing the risk of peeling or chipping.

It’s essential to note that painted countertops are not as hardwearing as traditional materials like quartz or granite. Heavy use, exposure to sharp objects, and consistent heat can eventually cause damage. To prolong the life of a painted countertop, it’s recommended to use cutting boards, trivets, and placemats regularly. Periodic reapplication of the protective topcoat can help extend its lifespan and maintain its appearance. While not permanent, painted countertops are a budget-friendly and customizable option for refreshing a space when cared for properly.

What Kind of Paint Do You Use on Kitchen Countertops?

For painting kitchen countertops, it’s crucial to use a durable, heat-resistant, and moisture-resistant paint. Acrylic enamel paint is often recommended, as it provides a hard, glossy finish suitable for high-traffic surfaces. Epoxy paints are another excellent choice due to their exceptional durability and resistance to chipping and stains. Always pair the paint with a quality primer to ensure proper adhesion and a smooth finish. Lastly, seal the painted countertops with a clear, heat-resistant topcoat to protect against daily wear and maintain their appearance over time.

Conclusion

Painting kitchen countertops is an affordable and creative way to breathe new life into your space without undergoing a full renovation. With an array of techniques, colors, and finishes to choose from, this DIY project offers endless opportunities for customization to suit your personal style and home decor. While painted countertops may require more care and maintenance compared to traditional materials, the proper preparation and use of high-quality paints and finishes can ensure a durable and beautiful result. Whether you’re aiming for the elegance of faux marble, the vibrancy of bold colors, or the sleek modernity of a concrete look, a little effort and attention to detail can transform your countertops into stunning focal points.

The Kitchen Countertop Depth Standard to Pass Inspection

Опубликовано: March 25, 2024 в 12:58 am

Автор:

Категории: Kitchen

Тэги: ,,,,

The standard kitchen countertop depth is a crucial aspect of any kitchen design, as it directly affects the functionality and safety of the space. To pass inspection, certain standard measurements must be met when it comes to the depth of kitchen countertops.

In this article, we will discuss these standards and provide tips on how to ensure your kitchen passes inspection with flying colors. Get ready to impress the inspector with these foolproof strategies!

A kitchen remodel done by America’s Advantage Remodeling

Why is Countertop Depth Important?

A close up of a ktichen countertop

The kitchen countertop depth plays a crucial role in the overall efficiency and safety of your kitchen. A depth that is too shallow can limit your workspace, making it difficult to cook and prepare meals. On the other hand, a depth that is too much can cause strain on your back and arms while working.

Additionally, proper standard countertop depth is important for meeting building codes and safety standards. It ensures that there is sufficient space for kitchen appliances, such as stoves and refrigerators, but also for kitchen cabinets to be properly installed without any potential hazards.

The Standard Countertop Depth

someone measuring the depths of  kitchen countertops

The standard depth for kitchen countertops is 25 inches (63.5 cm). This measurement includes the thickness of the countertop itself, which is typically around 1.5 inches (3.8 cm).

However, this measurement may vary depending on the type of countertop materials that are being used. For example, granite or quartz countertops may have a counter depth of around 24 inches (61 cm) due to their thicker composition of 2 inches (5.1 cm).

What Determines the Standards of Kitchen Countertops? 

A perfectly placed countertop

The countertop depth standard is determined by a combination of factors, including:

  • Ergonomic principles: The countertop depth is designed to optimize user comfort and efficiency during kitchen tasks. It takes into account factors such as the average height of individuals and their reach distance, ensuring that the countertop is at an ideal height and distance for comfortable use.
  • Base cabinet size: Standard base cabinets are typically 24 inches deep, and the countertop depth is measured to align with this size. This allows for a seamless fit between the countertop and cabinet, providing stability and support.
  • Safety regulations: The countertop depth standard also considers safety measures to minimize the risk of accidents and injuries in the kitchen. It takes into account factors such as the distance between the countertop and other elements, such as stoves or sinks, to prevent potential hazards and ensure safe operation.
  • Industry standards: The countertop depth standard is influenced by industry practices and guidelines. These standards are developed based on extensive research, feedback from professionals, and best practices in the kitchen design and construction industry. They aim to ensure consistency and compatibility across different kitchen setups.

These standards are put in place to ensure that kitchens are not only aesthetically pleasing but also functional and safe for daily use. By following these standards, homeowners and professionals can create kitchen spaces that are efficient, comfortable, and conducive to a seamless cooking experience.

Standard Countertop Dimensions

A kitchen with countertops with good dimensions

Although the standard depth countertop is one of the most important standards needed to pass inspection. There are also a few others you need to take into play when planning to install a kitchen countertop.

It’s essential to adhere to the following standards to ensure compliance and functionality:

  • Countertop Depth: For deeper countertops there should be about 25 inches deep from the front edge to the wall, accommodating for countertop edging and backsplashes.
  • Countertop Height: The typical height for kitchen countertops is 36 inches from the floor to the countertop surface, suitable for users of average height.
  • Countertop Overhang: A minimum overhang of 1 to 1.5 inches is standard to protect cabinet doors and drawers.
  • Sink Clearance: There should be at least three to four inches of room for the solid surface countertops on the sides of the sink.
  • Appliance Spacing: Allow a minimum of 15 inches of countertop space on either side of cooking appliances for not only safety but also for food preparation and accessible space.
  • Walkway Clearance: A kitchen layout should have a clear walkway of at least 42 inches across countertops for unobstructed movement.
  • Corner Clearance: Ensure at least a 12-inch clearance on the countertop next to corners to open cabinet doors and drawers comfortably.
  • Seating Overhang: If using an under-counter seating area, a 15 to 18-inch overhang is recommended to accommodate legroom.

Note: These standards are a general guide and may vary by location, design requirements, and the specific usage needs of the household. Always check with local codes and regulations for precise requirements. Feel free to reach out to us at America’s Advantage Remodeling for any advice or help you may need.

Tips for Meeting Kitchen Countertop Depth Standards

A kitchen countertop installation meting depth requirements

Here are some tips to keep in mind when designing or doing a complete kitchen renovation, to ensure it passes inspection:

  • Measure carefully: Before installing or even before that, purchasing countertops, be sure to measure the space accurately to ensure that it meets the standard depth requirement.
  • Consider materials: As mentioned earlier, the type of material used may affect the overall depth. For example, marble or granite countertops tend to be thicker than laminate or quartz countertops.
  • Check building codes: Building codes may vary depending on your location, so it’s important to check with your local authorities to ensure that you are meeting all requirements.
  • Leave space for appliances: Make sure there is enough space between the edge of the countertop and any appliances, such as stoves or dishwashers. This not only ensures safety but also allows for proper installation.
  • Consider ergonomics: While meeting the standard depth is important, it’s also crucial to consider your comfort and ease of use when designing your kitchen. Consider how you will be using the countertops and adjust the depth accordingly.

Average Cost of New Countertops

The cost of new kitchen countertops can vary greatly depending on factors such as material, size, and customization. On average, homeowners can expect to spend between $2,000 and $4,500 for a new countertop installation.

However, this cost may go up significantly if you opt for high-end materials or require extensive customization. It’s always advisable to get quotes from different contractors and compare prices to get the best deal.

America’s Advantage Remodeling

At America’s Advantage Remodeling, we understand the importance of meeting kitchen countertop depth standards for both functionality and safety. Our team of experts can help you design and install the perfect countertops for your space, ensuring that all necessary standards are met.

Don’t risk failing inspection due to incorrect countertop depth – contact us today to start your kitchen remodeling journey! Let us help you create the perfect, functional, and compliant kitchen of your dreams.

Frequently Asked Kitchen Countertop Depth Questions (FAQs)

Kitchen countertops

Can I install a countertop with a depth that is less than the standard measurement?

While it may be technically feasible to install a countertop with a depth that is less than the standard measurement, there are a few factors to consider. It is important to note that opting for a shallower depth can significantly limit your workspace, which can be inconvenient, especially if you frequently use your countertop for various tasks.

Additionally, a countertop with a reduced depth may not accommodate certain appliances or items, which can further restrict your functionality. Moreover, it is crucial to prioritize safety when it comes to countertop installations. A shallower countertop may pose safety hazards, such as items tipping over or falling off the edge. Therefore, it is generally recommended to stick to the standard depth of 25 inches to ensure optimal workspace, functionality, and safety.

Are there any exceptions to these standards?

Building codes and regulations may vary depending on your location, so it’s always best to check with local authorities for precise requirements.

Additionally, some exceptions may be made for individuals with specific accessibility needs. However, it’s important to note that these exceptions are typically granted on a case-by-case basis and require proper documentation and validation.

Are bathroom countertops the same as kitchen island countertops?

No, bathroom countertops typically have a standard counter depth of 21 inches deep, while kitchen island countertops usually follow a standard counter depth of 25 inches deep.

This is because bathroom countertops are typically smaller and don’t require as much workspace for food and appliances. It’s important to consider the specific usage needs when determining countertop thickness for different areas of your home.

Conclusion

To summarize, the typical measurement for kitchen countertops is 25 inches (63.5 cm), although this can differ based on the countertop material. Adhering to building codes and regulations concerning countertop dimensions is crucial to guarantee the safety and functionality of your kitchen.

Remember to measure accurately, consider materials, and prioritize ergonomics when planning your countertop installation. By following these standards and tips, you can create a beautiful and functional kitchen that meets all requirements. So go ahead and get started on designing your dream kitchen remodel or installation today! Happy renovating!

Mobile Home Kitchen Remodel: What Does This Look Like?

Опубликовано: January 22, 2024 в 3:53 am

Автор:

Категории: Kitchen

Тэги: ,,,,,,,,,,,,,

Introduction

The kitchen space is the heart of any home, and that holds true for even mobile homes. Whether you’re a full-time resident or using your mobile home as a vacation retreat, a well-designed and functional kitchen can make all the difference.

If you’re looking to give your mobile home kitchen an upgrade, this guide will provide you with tips and ideas for remodeling within budget.

Planning Your Remodel

A remodeled kitchen in a mobile home

Before jumping into any renovation project, it’s essential to plan out your remodel thoroughly. This will not only help you stay within budget but also ensure that the result is exactly what you envisioned.

Here are a few things to consider when planning your mobile home kitchen remodel:

  • Budget: Determine how much you can afford to spend on your kitchen makeover. This will help you prioritize your expenses and make informed decisions.
  • Layout: The layout of your kitchen is crucial for functionality and flow. Take measurements of your space or whole house and consider different layouts to find the most suitable one for your kitchen, dining room, and/or family room.
  • Materials: Choose durable, easy-to-maintain materials that are also within your budget. Opt for lightweight materials as they are more suitable for mobile homes.
  • Style: Decide on a style that can surely inspire you and reflect your taste while complementing the rest of your home. Whether it’s modern style, farmhouse style, or traditional, make sure to stick to a cohesive theme.

Upgrades to Consider

A team of professionals upgrading a kitchen

Depending on your budget, you can choose to do a complete overhaul of your mobile home remodel or make small, impactful upgrades.

Here are a few upgrades to consider:

  • Cabinetry: Replacing old kitchen cabinets with new ones can bring an instant transformation to your kitchen. There are so many different types you can add to your kitchen remodel. Base cabinets are a great idea, or even open shelving cabinets work well! If replacing is not an option, consider repainting the existing ones and changing the hardware for a fresh look on the old cabinets, without the hassle of buying new cabinets.
  • Countertops and Kitchen Island: Kitchen countertops and kitchen islands are essential elements in a kitchen, complemented by the kitchen table. If you have the budget, consider upgrading to granite or quartz for a modern and durable look. These materials not only enhance the aesthetics of your kitchen but also provide long-lasting functionality.
  • Flooring: Upgrading your kitchen flooring can make a significant impact on the overall appearance of your kitchen and improve your mobile home living experience. Vinyl or laminate flooring is a cost-effective option that is also easy to maintain and are great ideas for flooring in a mobile home kitchen remodel.
  • Lighting: In your own kitchen good lighting, including natural light, can make all the difference in a kitchen. Consider adding under-cabinet lighting for better visibility and ambiance.
  • Appliances: If your budget allows, consider upgrading to energy-efficient appliances, including a range hood, that not only improve functionality but also save on electricity costs.
  • Storage Space: Maximize your storage space by adding shelves, racks, or pull-out drawers to your cabinets, including a pantry cabinet. This will not only make organizing easier but also free up counter space.
  • Painting: A fresh coat of paint can do wonders for your kitchen mobile home walls, especially if you’re on a budget. Choose a paint color that complements your chosen style and adds personality to your kitchen walls.

Tips for a Successful Remodel

A couple working on their kitchen remodel
  • Stick to Your Budget: As tempting as it may be to splurge, stick to your budget and avoid unnecessary expenses.
  • DIY where Possible: Consider doing some of the work yourself to save on labor costs. However, leave complex tasks such as plumbing and electrical work to professionals.
  • Research and Compare Prices: Do your research and compare prices before making any purchases. You may find better deals or alternatives that fit your budget better.
  • Plan for Contingencies: Unexpected issues can arise during a double-wide mobile home remodel, so it’s always best to have a contingency fund for any additional expenses.
  • Don’t Rush: Take your time and plan out every detail of your remodel. Rushing can lead to mistakes and added costs in the long run.

DIY vs Hiring Professionals

When it comes to a mobile home kitchen remodel, you may be tempted to take on some of the work yourself to save money. While this can be a cost-effective approach, it’s essential to know your limitations and hire professionals for complex tasks such as electrical and plumbing work for a bathroom remodel. This will ensure that the remodel is done safely and up to code.

Pros vs Cons Of DIY

A DIY (do it your self) kitchen remodel project

Pros:

  • Cost-effective
  • Personal satisfaction and sense of accomplishment
  • Flexibility to work at your own pace

Cons:

  • Time-consuming
  • Requires specific skills and knowledge for certain tasks

Pros vs Cons For Hiring Professionals

A professional working on a mobile home remodel

Pros:

  • Efficient and timely completion of the project
  • Expertise in specific areas
  • Compliance with building codes and regulations

Cons:

  • Can be expensive, depending on the scope of work
  • Limited control over the project

Whether you opt for a DIY approach or hire professionals for your mobile home kitchen remodel largely depends on your budget, skills, and timeline of the project. DIY can be cost-effective and offer a sense of personal satisfaction, but it can be time-consuming and may require specific skills for certain tasks.

On the other hand, hiring professionals ensures timely and efficient completion of the project with adherence to building codes, but it can be more expensive. Carefully consider the pros and cons of each approach concerning your situation before making a decision.

America’s Advantage Remodeling

The America's Advantage team restoring a kitchen

If you’re considering a mobile home kitchen remodeling project or any remodeling task in general, why not let the experts take over the reins?

Here at America’s Advantage Remodeling, we are your solution for all your remodeling needs. Located in Roseville, California, we bring a wealth of experience, expertise, and commitment to quality that ensures your vision is transformed into reality.

From remodeling your kitchen to revamping your laundry room, master bath, and guest bath, we’ve got you covered.

Don’t spend another minute playing with DIY challenges – get in touch with us today, and let’s work together to create the home of your dreams. Your perfect mobile kitchen is just one call away with America’s Advantage Remodeling.

Frequently Asked Questions

Can I remodel my mobile home kitchen on a limited budget?

Yes, there are several cost-effective upgrades you can make to your mobile home kitchen to enhance its appeal and functionality. Some additional ideas include replacing outdated appliances, installing a backsplash, and upgrading countertops.

How long does a mobile home kitchen remodel take?

A mobile home kitchen remodel timeline varies depending on the scope of work. Generally, it can take anywhere from 2 to 6 weeks to complete. Factors such as the complexity of the project, availability of materials, and any unforeseen challenges can impact the duration. It is advisable to consult with a professional contractor to get a more accurate estimate based on your specific needs.

Can I make changes to the layout of my mobile home kitchen?

Yes, you have the flexibility to make changes to the layout of your mobile home kitchen, as long as the modifications adhere to the local building codes and regulations specific to your area.

It is always recommended to consult a professional with expertise in mobile home renovations to ensure that the changes are implemented safely and effectively. Their guidance will provide you with valuable insights and help you navigate any potential challenges that may arise during the process.

Conclusion

A freshly remodeled kitchen

A mobile home kitchen remodel is an exciting and worthwhile project that can greatly enhance the functionality and aesthetics of your home. With careful planning, a realistic budget, and consideration of DIY vs professional services, you can achieve your dream kitchen without breaking the bank.

Remember to stick to a cohesive theme, such as modern or farmhouse, and prioritize upgrades based on your needs and budget. From upgrading appliances to installing new countertops and cabinets, there are endless possibilities to transform your mobile home kitchen.

And if you need any assistance, America’s Advantage Remodeling is always here to help with our expertise and exceptional service!