paint Archives - America's Advantage Remodeling

Посты с тэгом: paint

Can You Paint Kitchen Countertops? How Can I Paint My Countertops?

Опубликовано: January 21, 2025 в 11:55 pm

Автор:

Категории: Kitchen

Тэги: ,,

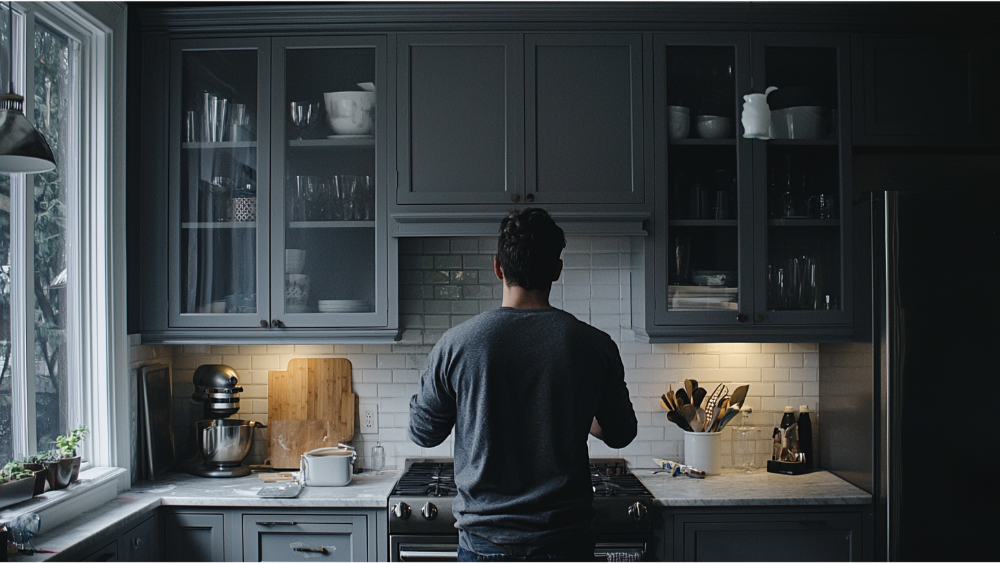
Revamping your kitchen countertops with a fresh coat of paint is an affordable and creative way to transform the heart of your home. This DIY project allows you to customize your countertops to match your style while avoiding the high cost of replacement. With the right tools and techniques, you can achieve a durable and professional-looking finish.

Reach out to America’s Advantage Remodeling for any help you might need!

Types of Countertops That Can Be Painted

A man painting his kitchen countertops

Laminate Countertops

Laminate countertops are among the easiest and most popular surfaces to revamp with countertop paint. Their smooth surface allows for excellent adhesion when paired with the right primer and paint. To paint laminate countertops, ensure the surface is thoroughly cleaned and lightly sanded to remove any glossy finish, which helps the paint stick better. With proper preparation and sealing, you can give laminate countertops a fresh, modern look that mimics more expensive materials, such as stone or wood. This is an affordable solution for homeowners seeking an updated style without the expense of replacing laminate entirely.

Wood Countertops

Painting wood countertops is another great way to refresh your kitchen design while preserving the warmth and character of the material. The natural grain of wood can shine through with the proper painting technique, providing a rustic or contemporary aesthetic, depending on your preference. Use a primer designed for wood surfaces before applying countertop paint to ensure durability and reduce the risk of peeling or chipping. Sanding is crucial for creating a smooth surface and enabling even coverage of the paint. A protective sealer, like polyurethane, will further fortify the surface against scratches and moisture.

Granite Countertops

While painting granite countertops may seem unconventional, it is possible to transform them with countertop paint designed specifically for tougher surfaces. Achieving a professional finish requires extra preparation, as granite is non-porous and very smooth. Start by thoroughly cleaning the surface and sanding it lightly to give the paint something to adhere to. Applying a high-adhesion primer is essential when working with granite countertops to ensure the painted finish lasts over time. Although granite is known for its natural beauty, painting it can be a cost-effective way to adapt your paint countertops to a new color scheme or design style.

Tile Countertops

Tile countertops can also be painted, allowing you to reinvent their look without the labor or expense of retiling. Use paint designed for both the tiles and grout to ensure a cohesive and long-lasting finish. Start by cleaning the tiles thoroughly, sanding them lightly, and applying a primer to create a suitable base for your countertop paint. You can opt for a sleek single-color finish or use stencils to create intricate designs and patterns on your tiles. A durable topcoat is necessary to protect the surface from wear and moisture, making it both functional and stylish.

Concrete Countertops

Concrete countertops provide a blank canvas for creativity, making them highly adaptable to paint transformations. Their porous nature ensures that countertop paint adheres well when paired with an appropriate primer. Before painting, ensure the surface is clean and free of debris, and consider filling any cracks for a seamless final look. You can achieve a variety of finishes, from a smooth matte surface to a high-gloss result, depending on the paint type and technique. By sealing the painted concrete countertops thoroughly, you’ll achieve lasting durability and resilience against daily kitchen use.

Solid Surface Countertops

Solid surface countertops, such as Corian, can be painted to give them a fresh new appearance without the need for replacement. These countertops are non-porous and require proper preparation to ensure the paint adheres effectively. Start by cleaning the surface thoroughly to remove grease or residue, then lightly sand it to create a texture for the primer to cling to. Use a high-quality primer and paint specifically designed for countertops to achieve a smooth and durable finish. A protective topcoat is essential to safeguard the painted surface against scratches, stains, and heat, extending the life of your newly revamped countertops.

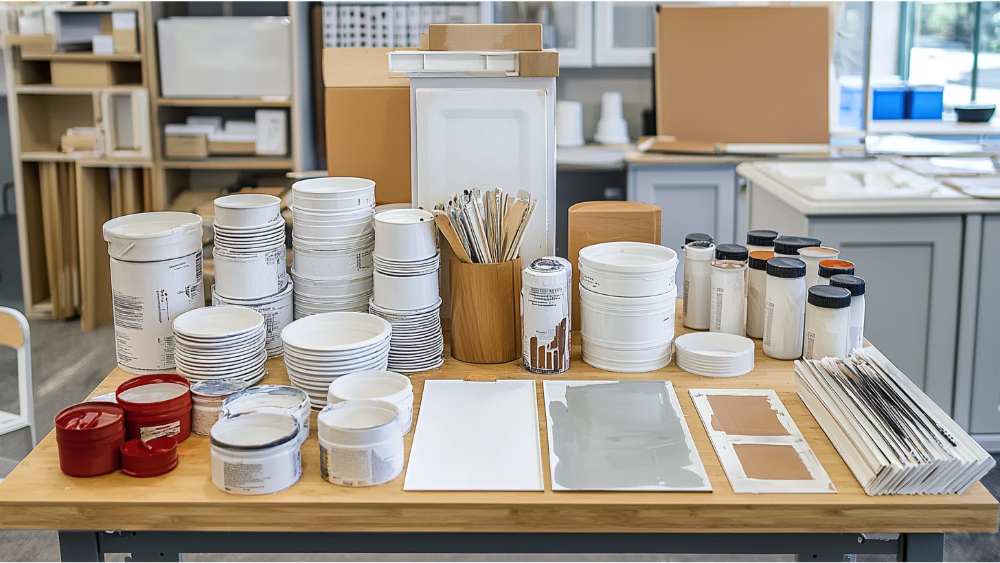
Tools and Materials Needed

A painted kitchen countertop

Countertop Paint Kits

Countertop paint kits are specifically designed to simplify the painting process and include all the essential products, such as primer, paint, and topcoat. These kits are tailored to different types of countertop materials, ensuring a durable and cohesive finish. Opt for a kit that matches your specific countertop surface, whether it’s laminate, wood, or tile.

Soap and Water

Before painting, thoroughly clean your countertops using a mix of soap and water to remove grease, dirt, and obstructions that could affect adhesion. A clean surface ensures that the primer and paint bond properly to the countertop materials, preventing peeling or bubbling over time. Use a microfiber cloth or sponge for gentle but effective cleaning.

Sandpaper or Sanding Blocks

Sanding is crucial for creating a slightly rough surface that allows paint and primer to adhere better. For smooth surfaces, such as ceramic tile or granite, use medium to fine-grit sandpaper to scuff the surface lightly. Always wipe away dust with a damp cloth after sanding to maintain a clean working area and prepare for a smooth finish.

Primer

A high-quality primer helps to ensure that the paint properly adheres to different countertop materials like laminate, granite, or concrete. Select a primer appropriate for non-porous surfaces, such as ceramic tile or solid surface countertops, to guarantee a long-lasting finish. Apply the first coat of primer evenly with a roller or bristle brush and allow it to dry completely before painting. If needed, apply a second coat for even coverage and better adhesion.

Epoxy Coating or Topcoat

Epoxy coating or a clear topcoat provides a protective finish that extends the lifespan of your painted countertops. It helps seal the paint, making the surface resistant to scratches, moisture, and heat. Apply multiple layers if recommended, starting with a thin coat and allowing each coat to cure fully for maximum durability. A final smooth finish can be achieved by following the manufacturer’s guidelines carefully.

Painter’s Tape

Use painter’s tape to protect adjacent areas, such as walls, sinks, and appliances, from accidental paint strokes or drips. This ensures clean edges and a professional-looking finish without the need for extensive touch-ups.

Brushes and Rollers

High-quality brushes and foam rollers are essential for even application of paint and topcoat. A foam roller works well for large, flat surfaces, while angled brushes or a bristle brush are useful for painting edges and detailed areas. For the best results, use a thin coat for the first coat, and follow up with a second coat to achieve a streak-free, smooth finish on your newly painted countertops.

Design Ideas for Painted Countertops
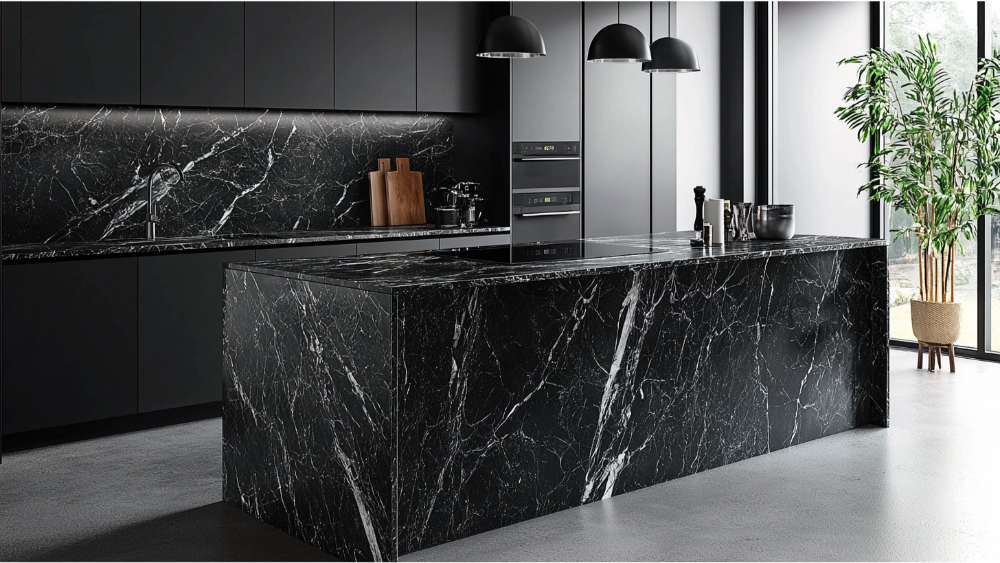
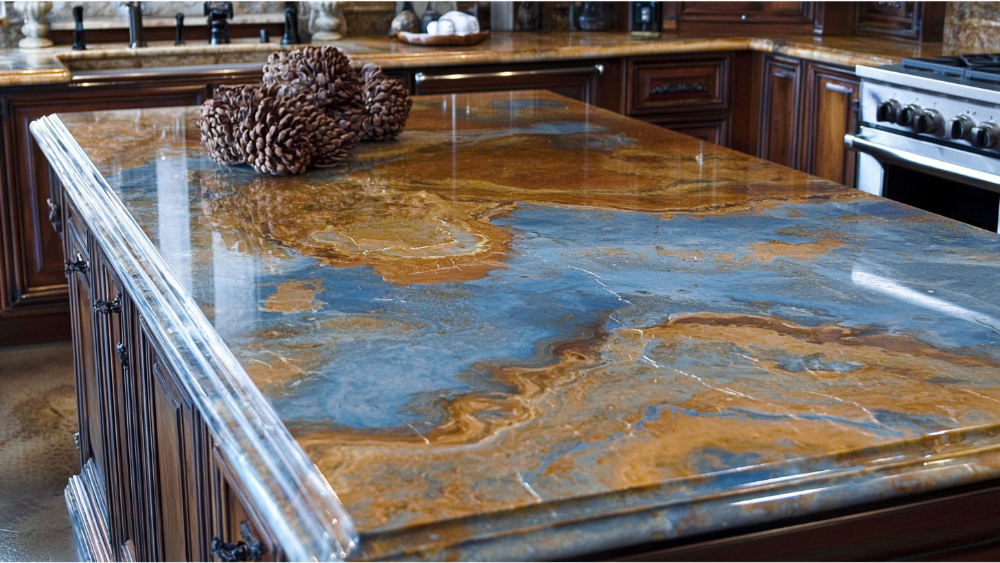
A designed kitchen

Faux Marble Finish

Transform your existing countertops into elegant marble countertops using specialized countertop paint techniques. This design works particularly well for bathroom countertops, where a luxurious aesthetic is often desired. Begin by applying a base color, such as white or light gray, and use a fine artist’s brush to mimic natural marble veins with darker shades. Seal the finished design with a heat-resistant topcoat to ensure longevity and protect it from daily wear.

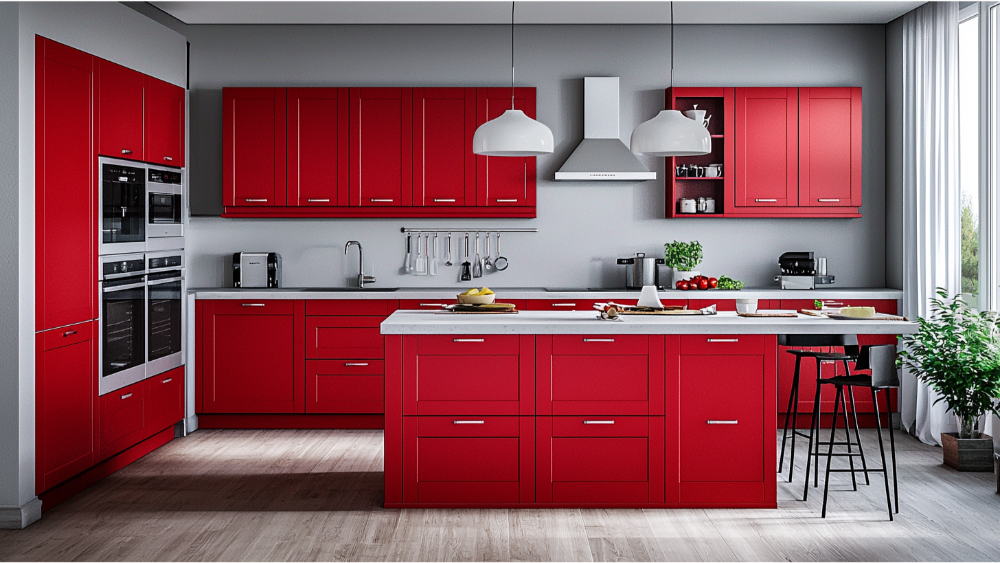
Bold and Vibrant Color Theme

For a modern or eclectic look, consider bold hues like navy blue, emerald green, or deep burgundy for your countertops. This idea works great when coordinated with neutral-colored cabinetry, allowing the countertops to take center stage. Ensure the paint used is heat resistant if the design is intended for kitchen use to safeguard against hot pots and dishes. By updating your existing countertops with striking colors, you can create a fresh focal point in the space.

Two-Tone Countertops

Achieve a contemporary style by incorporating a two-tone design into your painted countertops. For example, create a light base on the outer sections of your kitchen island and a darker central area for a visually appealing contrast. This style can work beautifully in both kitchens and bathrooms and can be easily tailored to any color scheme. Don’t forget to apply a heat-resistant finish, especially for high-use areas, to ensure your countertops remain durable and functional.

Concrete Look

Add an industrial-inspired touch by painting your countertops to mimic the appearance of polished concrete. This works wonderfully for both bathroom and kitchen countertops, offering a sleek, minimalistic style. Use gray tones with subtle speckling effects created with a sponge technique to achieve a realistic concrete texture. A topcoat with heat-resistant properties is essential for kitchen applications to protect the look from heat and daily wear.

Custom Patterns and Stenciling

For a truly unique countertop design, consider using stencils to apply intricate patterns or geometric shapes. This idea is ideal for existing countertops that need an artistic refresh, particularly in bathrooms or modern kitchens. Choose a combination of complementary colors and take your time with each section to ensure crisp, clean lines. Protect the final design with a durable, heat-resistant topcoat to maintain both style and function.

Frequently Asked Paint Kitchen Countertops Questions

A nice kitchen remodel

Is Painting Kitchen Countertops a Good Idea?

Painting kitchen countertops can be a cost-effective and versatile way to refresh the look of your kitchen without the expense of a full renovation. It allows homeowners to customize the design of their countertops with a wide range of colors, patterns, and finishes, from classic faux marble to bold contemporary hues.

It’s important to consider a few factors before deciding. Painted countertops require proper preparation and high-quality materials, including primers and topcoats, to ensure durability and protect against scratches, heat, and moisture. While painting countertops is a relatively simple DIY project, it may not be as long-lasting as replacing them with new materials. For those seeking a budget-friendly and creative solution, painting is a great option, providing you’re committed to regular maintenance and care to preserve the finish.

Does Painting a Countertop Last?

The longevity of a painted countertop depends largely on the preparation, materials used, and the level of care it receives. When high-quality primer, paint, and a durable topcoat are applied correctly, painted countertops can last several years with minimal wear and tear. Proper prep work, such as sanding and cleaning the surface thoroughly, helps create a strong base for the paint to adhere to, reducing the risk of peeling or chipping.

It’s essential to note that painted countertops are not as hardwearing as traditional materials like quartz or granite. Heavy use, exposure to sharp objects, and consistent heat can eventually cause damage. To prolong the life of a painted countertop, it’s recommended to use cutting boards, trivets, and placemats regularly. Periodic reapplication of the protective topcoat can help extend its lifespan and maintain its appearance. While not permanent, painted countertops are a budget-friendly and customizable option for refreshing a space when cared for properly.

What Kind of Paint Do You Use on Kitchen Countertops?

For painting kitchen countertops, it’s crucial to use a durable, heat-resistant, and moisture-resistant paint. Acrylic enamel paint is often recommended, as it provides a hard, glossy finish suitable for high-traffic surfaces. Epoxy paints are another excellent choice due to their exceptional durability and resistance to chipping and stains. Always pair the paint with a quality primer to ensure proper adhesion and a smooth finish. Lastly, seal the painted countertops with a clear, heat-resistant topcoat to protect against daily wear and maintain their appearance over time.

Conclusion

Painting kitchen countertops is an affordable and creative way to breathe new life into your space without undergoing a full renovation. With an array of techniques, colors, and finishes to choose from, this DIY project offers endless opportunities for customization to suit your personal style and home decor. While painted countertops may require more care and maintenance compared to traditional materials, the proper preparation and use of high-quality paints and finishes can ensure a durable and beautiful result. Whether you’re aiming for the elegance of faux marble, the vibrancy of bold colors, or the sleek modernity of a concrete look, a little effort and attention to detail can transform your countertops into stunning focal points.

How Much Does It Cost to Paint Kitchen Cabinets?

Опубликовано: December 17, 2024 в 9:19 pm

Автор:

Категории: Kitchen

Тэги: ,,,

Painting kitchen cabinets can be an affordable way to give your kitchen a fresh, updated look without the expense of a full renovation. The cost to paint kitchen cabinets varies depending on factors like the size of your kitchen, the type of paint you choose, and whether you hire a professional or go the DIY route. Understanding these variables can help you plan your project and stay within budget.

The Cost of Painting Cabinets

The typical cost to paint kitchen cabinets ranges from $900 to $3,800, depending on various factors such as the size of the kitchen, the type of paint, and whether you choose to hire a professional or do the work yourself. For a small to medium-sized kitchen, professionals may charge around $30 to $60 per linear foot of cabinetry.

DIY projects, on the other hand, can cost significantly less, often between $200 to $600, as you’ll mostly be paying for paint, primer, and supplies. However, hiring experts can deliver a higher-quality, longer-lasting finish, which may justify the added expense.

Factors That May Affect the Cost of Painting Kitchen Cabinets

A man painting his kitchen

Number and Size of Cabinet Doors

The total number of cabinet doors and their size play a significant role in determining the cost to paint. Larger or more intricate doors require additional time and materials, leading to higher expenses. Details such as grooves, carvings, or molding on the cabinet doors may require more preparation and precision during painting. If there are extra doors for a pantry or island, they can add significantly to the total cost of the project.

Square Footage of the Cabinets

The square footage of your cabinets directly impacts the overall cost to paint, as it determines how much paint and primer will be needed. Larger surface areas also require more time for sanding, priming, and multiple coats of paint to achieve a smooth finish.

Small kitchens generally cost less due to fewer cabinets, but larger spaces with many square feet of cabinetry may lead to higher professional or DIY expenses. Understanding the total square footage ahead of time can help you estimate more accurate costs.

Condition of Existing Cabinets

The state of your existing cabinets is another key factor when calculating the cost. Cabinets in poor condition, with peeling paint, cracks, or damage, require extra prep work such as repairs, sanding, or priming, which can increase expenses. If the cabinets are in good shape, the process is faster and less expensive. Proper preparation of existing cabinets is essential to ensure the new paint adheres well and provides a smooth, professional look.

Hiring Professional Painters vs. DIY

Whether you hire professional painters or go the DIY route significantly affects how much you’ll spend. Professional painters offer the expertise, tools, and skills to deliver a high-quality finish that is long-lasting and uniform. However, their services come with premium rates that can raise your cost to paint cabinets. DIY projects can be much cheaper, but they require ample time, effort, and at least some painting skills to achieve satisfactory results.

Type and Quality of Paint Used

The cost to paint kitchen cabinets also depends on the type and quality of paint you choose. Premium paints may have a higher price but provide better durability and scratch resistance, which is important for cabinets. Specialized finishes, like semi-gloss or high-gloss, can enhance the look but may require more coats, adding to the overall expense. It’s essential to select a paint that is specifically designed for cabinets to ensure it withstands the wear and tear of daily use.

Labor Costs and Time Requirements

Labor costs and the time required for the project are crucial factors that influence the overall cost of painting kitchen cabinets. Professional painters typically charge either a flat rate or an hourly rate for their work. The level of experience of the painter also affects pricing, as seasoned professionals may charge more for their expertise.

On average, cabinet painting projects can take several days to complete, depending on the size of the kitchen and the condition of the cabinets. For DIYers, the time commitment might be even longer, especially if unfamiliar with the process or working without additional help.

Additional Supplies and Equipment

Beyond paint and labor, additional supplies and equipment can add to the total cost of the project. For professionals, these expenses are often included in their service fees, but DIYers will need to factor in the cost of items like sandpaper, brushes, rollers, drop cloths, painter’s tape, and cleaning supplies.

For more extensive projects, tools such as sprayers or power sanders may be required, which can either be purchased or rented. Proper tools and supplies are essential to ensure the project is completed efficiently and with a high-quality finish.

Cost Comparison: Professional Painting and DIY

A man painting his kitchen cabinets

When planning your kitchen cabinet painting project, deciding between a DIY approach and hiring a professional who can paint kitchen cabinets professionally is a crucial consideration. Below are the key factors for both options to help you weigh the pros and cons and make an informed decision.

Professional Painter Factors

Quality of Finish

Hiring a professional ensures a high-quality and durable finish for your kitchen cabinet painting project. Experts have the experience, precision, and specialized techniques to achieve a uniform, smooth surface that enhances the overall look of your kitchen. They’ll also handle the proper refinishing of cabinet hardware and other intricate details, providing a polished and cohesive result.

Time Efficiency

Professionals can complete the project faster and more efficiently compared to the DIY route. Equipped with the necessary tools and a streamlined process, they can often finish a kitchen cabinet refinishing job in a few days. For busy homeowners, this speed can justify the higher cost, especially when avoiding the long hours of labor DIY would require.

Higher Initial Expense

Professional painters charge for their labor and expertise, leading to a starting cost of around $900 and potentially reaching $3,800 depending on the scope of the project. While this cost is significantly higher than the DIY approach, it includes all necessary supplies, proper tools, and additional services like cabinet hardware adjustments or repair work.

Experience and Risk Reduction

A critical advantage of hiring a professional is their expertise in handling complex tasks, such as cabinets with intricate molding or damaged surfaces. They ensure the paint adheres properly and lasts longer, reducing the risk of peeling, uneven finishes, or frequent re-dos. This reliability can save you money and effort in the long run.

DIY Cabinet Painting Factors

A nice kitchen remodeled by professionals

Cost-Effectiveness

One of the biggest advantages of a DIY kitchen cabinet painting project is the lower cost. By taking on the work yourself, you’ll primarily need to budget for materials like paint, primer, sandpaper, and brushes, which can range from $200 to $600. However, while the upfront cost savings are appealing, you’ll need to invest significant time and effort, which may offset the monetary benefits for some people.

Time Commitment and Skill

Painting kitchen cabinets is time-intensive, requiring multiple steps like cleaning, sanding, priming, and applying multiple coats of paint. If you’re inexperienced, the process can take much longer as you learn on the job. Mistakes during the project might lead to uneven finishes or require touch-ups, so a willingness to practice patience and attention to detail is essential for success.

Tools and Materials Selection

DIYers have to ensure they choose the right tools and supplies for a durable and professional look. High-quality cabinet paint and appropriate primers designed for kitchen cabinet refinishing are vital to achieving a finish that withstands daily wear and tear. Additionally, you’ll need items like painter’s tape, drop cloths, and possibly specialized tools like a spray paint sprayer if aiming for a smooth, brush-stroke-free result.

Customization and Control

With DIY, you have complete control over the final look, from choosing the paint color to deciding how to handle cabinet hardware. This level of customization allows you to align the finished product with your personal vision. However, executing this control to a high standard requires meticulous preparation and careful application techniques.

Frequently Asked How Much Does It Cost to Paint Kitchen Cabinets Questions

A nice remodeled kitchen

Is It Worth It to Have Kitchen Cabinets Professionally Painted?

Deciding whether to hire a professional to repaint kitchen cabinets ultimately depends on your budget, time, and desired outcome. When considering a kitchen upgrade, homeowners often weigh the options of painting, refacing kitchen cabinets, or opting to completely replace kitchen cabinets.

While replacing cabinets provides a brand-new look and maximum customization, it comes at a significantly higher cost compared to repainting or refacing. Painting, when done professionally, offers a cost-effective solution that refreshes your kitchen’s appearance and extends the life of your cabinets without the expense of full replacement.

Professional cabinet painting stands out for the durability and quality of the finish. Experts use high-grade tools and materials to achieve a smooth, consistent application that resists wear and tear over time. This level of craftsmanship is particularly important for cabinets that endure daily use, ensuring the results are long-lasting. Compared to DIY, a professional painter minimizes the risk of uneven coverage, peeling paint, or other imperfections, which could necessitate costly revisions later.

Hiring a professional for repainting kitchen cabinets can be a quicker and more seamless process, especially for homeowners who lack the time or experience to tackle the project themselves. For those wanting a refreshed look without the disruption of a full renovation, professional repainting is an excellent middle ground between refacing kitchen cabinets and full replacement.

How Much Can I Expect to Pay to Have My Kitchen Cabinets Painted?

The cost of having your own cabinets professionally painted can vary depending on factors such as the size of your kitchen, the complexity of the work, and the materials used. On average, a professional paint job for kitchen cabinets ranges between $900 and $3,800. For a typical kitchen, this cost takes into account labor, preparation, and the use of high-quality materials, such as acrylic paint, which is known for its durability and smooth finish.

Acrylic paint is a popular choice among professionals due to its superior adhesion and resistance to wear and tear, making it ideal for cabinets that see daily use. The price of a professional paint job also includes the expertise needed to ensure that the paint is applied evenly and lasts longer than a DIY alternative. While it’s more expensive upfront than doing the job yourself, the long-term durability and polished appearance of professionally painted cabinets often make the investment worthwhile.

What Is the Downside of Painting Cabinets?

One downside of painting cabinets is the potential for an uneven or short-lived finish if the preparation and application are not done correctly. Cabinets endure frequent use, so improper techniques or low-quality materials can result in peeling, chipping, or fading over time, necessitating costly touch-ups or a full repaint.

The process itself can be labor-intensive and time-consuming, particularly for those attempting a DIY approach without the necessary skills or tools. When improperly painted, cabinets may also negatively impact the overall aesthetic and value of your kitchen, making precision and expertise critical to achieving desirable results.

Conclusion

Multi-color cabinets

Deciding whether to paint your kitchen cabinets is a significant choice that depends on your budget, time, and expectations for the final result. Professional cabinet painting offers numerous benefits, including a high-quality, durable finish, time efficiency, and expert craftsmanship that minimizes risks and ensures long-lasting results. While the upfront cost may be higher compared to a DIY project, many homeowners find the investment worthwhile due to the polished and professional appearance it delivers.

On the other hand, a DIY approach can save money but requires a substantial time commitment and carries the risk of unsatisfactory results if not done correctly. The best option will align with your personal priorities and resources, allowing you to achieve the kitchen transformation you desire.

How to Correctly Paint Kitchen Cabinets

Опубликовано: October 29, 2024 в 9:37 pm

Автор:

Категории: Kitchen

Тэги: ,,,

Painting kitchen cabinets can be a cost-effective way to breathe new life into your kitchen without the need for a full renovation. With the right preparation and technique, you can achieve a professional-looking finish. This guide will walk you through each step of the process to ensure your cabinets turn out beautifully.

Materials Needed and Why

Materials used to paint kitchen cabinets

Sandpaper (120-grit and 220-grit)

Sanding is a crucial step in preparing your cabinets for painting, as it helps to smooth out imperfections and creates a surface that the paint can easily adhere to. Start with 120-grit sandpaper to remove any existing finish and follow up with 220-grit sandpaper to achieve a finer, smooth texture ready for priming.

Screwdriver

Use a screwdriver to remove all cabinet doors and hardware, making it easier to paint each surface evenly and thoroughly.

Painter’s Tape

Use painter’s tape to protect areas around the cabinets that you don’t want to paint, such as walls, countertops, and hinges. Carefully apply the tape to create clean, sharp lines, ensuring a professional-looking finish once the paint is applied.

Drop Cloths or Plastic Sheeting

Place drop cloths or plastic sheeting on the floor and over any surfaces you want to protect from paint splatters. This will help to keep your work area clean and minimize any potential cleanup after the painting process.

Cleaning Supplies

A man standing in front of his freshly painted cabinets

Thoroughly clean the cabinets using a mild detergent or a dedicated grease remover to eliminate any dirt, grease, or residue that could affect paint adhesion. Ensuring a clean surface is essential to achieving a smooth, long-lasting finish.

Paint Brushes

Select high-quality paint brushes that are suitable for the type of paint you’re using, ensuring they will provide smooth and even coverage. Opt for angled brushes for detailing around edges and flat brushes for larger surfaces to achieve a flawless finish.

Roller and Tray

Rollers provide efficient coverage for larger cabinet surfaces, reducing streaks and ensuring a smooth, even coat of paint. Use a tray to load the roller evenly with paint, minimizing drips and achieving a consistent application.

Primer

Primer is essential for ensuring the longevity and durability of your paint job, as it helps the paint adhere better to the cabinet surfaces and provides a uniform base for the topcoat. Choose a primer that is compatible with the type of paint you intend to use, whether it be oil-based or water-based, to achieve the best results.

Paint

Choose a high-quality paint that is specifically designed for cabinetry to ensure a durable, long-lasting finish. Whether you select a latex or oil-based paint, ensure it complements your primer and provides the color and finish you desire for your kitchen cabinets.

Wood Filler

Wood filler is used to patch up any holes, dents, or scratches on your cabinets before painting, providing a smooth and even surface. Be sure to choose a filler that can be sanded and is compatible with your chosen paint for seamless and durable repair.

Caulking Gun and Caulk

A caulking gun and caulk are essential for sealing gaps and seams around your cabinets, preventing moisture from seeping in and ensuring a smooth finish. Apply caulk along edges and joints before painting to enhance durability and aesthetics, using a caulking gun for precise application.

Dust Mask and Safety Glasses

Wear a dust mask and safety glasses while sanding and painting to protect yourself from inhaling dust particles and harmful fumes. Safety gear is crucial to maintain your health and well-being throughout the painting process.

Stirrers and Paint Can Opener

Stirrers are necessary to thoroughly mix your paint, ensuring even color and consistency before application. A paint can opener makes it easy to access the paint without damaging the lid, allowing for a mess-free opening and closing throughout your project.

Tack Cloth

A tack cloth is a sticky, woven fabric used for removing fine dust and lint from surfaces after sanding. This ensures the cabinets are perfectly clean and ready for priming and painting, preventing imperfections in the final coat.

Adhesion Promoter (optional)

An adhesion promoter enhances the bond between the cabinet surface and the primer, especially useful for slick or glossy surfaces. While optional, it can significantly improve paint adherence and durability, ensuring a longer-lasting finish.

Paint Sprayer (optional)

A paint sprayer can offer a smooth, professional finish with minimal brush marks and significantly speeds up the painting process. It is especially useful for covering large surfaces and intricate cabinet details efficiently, though it requires proper masking and ventilation.

Step-by-Step Guide to Painting Kitchen Cabinets

A man painting his kitchen cabinets black

Step 1: Remove Cabinet Doors and Hardware

Start by carefully removing the cabinet doors from the existing cabinets using a screwdriver, taking care to keep track of all screws and hardware for reassembly. Labeling each door and its corresponding hardware can simplify reinstallation while ensuring each part is returned to its original position. This step allows for easier access to all surfaces of the existing cabinets, ensuring an even and thorough paint job.

Step 2: Clean Cabinet Surfaces

Thoroughly clean all the cabinet doors and cabinet frames using cleaning supplies to remove grease, dirt, and residue. A clean surface will ensure better paint adhesion and a smoother finish. Allow surfaces to dry completely before moving to the next step.

Step 3: Sand the Surfaces

Using 120-grit sandpaper, sand all the cabinet doors and frames to remove the original finish. Follow up with 220-grit sandpaper for a smoother finish. This preparation step is crucial to ensure that the primer and paint adhere properly. Don’t forget to wear a dust mask and safety glasses for protection.

Step 4: Apply Wood Filler

A man painting his kitchen cabinets gray

Inspect your cabinets for any holes, scratches, or dents. Use a wood filler to patch these imperfections and sand smooth when dry. Ensuring any blemishes are addressed will provide an even surface for painting cabinets.

Step 5: Tape Off Surrounding Areas

Protect walls, countertops, and any other areas you don’t wish to be painted by applying painter’s tape. Place drop cloths or plastic sheeting on the floor and surrounding surfaces to protect them from paint splatters.

Step 6: Prime the Cabinets

Apply a coat of primer to all the cabinet doors and frames, using the appropriate brush or roller depending on the size of the surface. Be sure to follow the primer’s drying time instructions. Using a primer compatible with your chosen latex paint is essential for a long-lasting, professional-looking finish.

Step 7: Paint the Cabinets

Apply the first coat of paint to the cabinet doors and frames using high-quality paint from your local paint store, ensuring even coverage while following the drying time guidelines. If you have the option, using a spray paint technique can provide a smoother finish, especially for detailed cabinet boxes, minimizing visible brush strokes. Allow the first coat to dry fully before applying a second coat for a rich, even color that stands out. Remember to paint cabinets in a well-ventilated area to ensure safety and optimal drying conditions.

Step 8: Reassemble the Cabinets

Carefully reattach the cabinet doors and hardware once the painted cabinets are completely dry, ensuring a precise fit and alignment. By allowing adequate drying time, you secure a durable finish that will withstand daily kitchen use. This final step brings a professionally polished look to your beautifully revamped kitchen.

Step 9: Final Touches

After reassembling, inspect the cabinets for any touch-ups that might be necessary, such as tiny paint corrections or additional caulking. Clean up any lingering dust or debris, and replace or polish the hardware if needed to enhance the overall look. Finally, consider adding soft-close hinges or liners for an added touch of luxury and functionality to your newly painted cabinets.

Common Mistakes to Avoid

When painting kitchen cabinets, it’s crucial to avoid common pitfalls that can compromise the quality of your finished project. Here are some key mistakes to watch out for:

Painting Without Sanding

Skipping the sanding step might seem like a timesaver, but it can lead to poor paint adhesion and an uneven finish. Sanding removes the old finish and creates a smooth, roughened surface that the primer and paint can adhere to effectively. Ensure that you sand all surfaces thoroughly to achieve the best results.

Skipping the Primer

Neglecting to use primer is another common mistake that can affect the durability and appearance of your cabinets. Primer acts as a bonding agent between the surface and the paint, helping it adhere better while creating an even base for color application. Without it, the paint may peel or chip over time. Always apply a quality primer suitable for your cabinet material before painting.

Not Allowing Enough Time to Dry Between Coats

Patience is key when painting cabinets, particularly when it comes to drying times between coats. Allow each coat of paint to dry completely before applying the next, adhering to the manufacturer’s recommended drying times. This ensures a smooth, durable finish that will withstand daily wear and tear.

Frequently Asked Paint Kitchen Cabinets Questions

Kitchen cabinets painted red

What Do Professional Painters Use to Paint Kitchen Cabinets?

Professional painters often rely on a specific set of tools and products to ensure a high-quality finish on kitchen cabinets. They typically use high-quality, durable latex or acrylic paints that resist chipping and are easy to clean. For detailed surfaces, professionals may utilize a spray gun for an ultra-smooth, factory-like finish, which minimizes brush strokes and provides a consistent coating.

Prior to applying paint, they use a top-notch primer chosen to suit the cabinet material, ensuring proper adhesion and a flawless surface for color application. Additionally, professional painters employ a range of brushes and rollers, depending on the details and scale of the work, along with masking tapes and drop cloths to protect surrounding areas from unwanted drips and splatters. Finally, they always prioritize safety by ensuring the work area is well-ventilated and wearing appropriate protective gear.

Should I Use a Brush or Roller to Paint Kitchen Cabinets?

Choosing between a brush and a roller for painting kitchen cabinets depends on the specific finish you desire and the efficiency you’re aiming for. Brushes are ideal for details and edges, allowing precise control in corners and around intricate moldings. They can effectively cover areas that are not accessible with a roller, especially when working with different surfaces or shapes.

On the other hand, rollers are excellent for larger, flat surfaces and can help achieve smooth, even coats with minimal effort. Using a roller reduces visible brush strokes and can significantly speed up the painting process. For the best results, many professionals recommend using a combination of both: a brush for corners and detailed work, and a small foam roller for larger, flat areas. This method allows you to take advantage of the detailed touch of a brush while achieving a smooth, uniform finish with a roller.

Do I Have to Sand Kitchen Cabinets Before Painting?

Yes, sanding kitchen cabinets before painting is a crucial step that should not be overlooked. Sanding helps to remove the existing finish, creating a smooth, roughened surface that is essential for the primer and paint to adhere effectively. This process ensures that the paint bonds properly with the cabinet material, reducing the likelihood of peeling or chipping over time.

While it may seem like an extra effort, proper sanding contributes significantly to achieving a durable and professional-looking finish. It’s particularly important if the cabinets have a glossy surface, as this requires sanding to allow the new paint to stick. Always use fine-grit sandpaper and work systematically to ensure all surfaces are adequately prepared before proceeding with primer and paint application.

Conclusion

Nice kitchen cabinets

Painting your kitchen cabinets can be a rewarding project that transforms the entire look and feel of your space without the expense of a complete remodel. By following a systematic process and avoiding common pitfalls, you can achieve a high-quality, professional finish. Proper preparation, including sanding and priming, ensures durability and enhances the overall aesthetic, while careful selection of paints and tools makes the task more manageable. Remember, patience and attention to detail are key. With dedication and some elbow grease, the result will reflect your efforts, bringing a refreshed and rejuvenated atmosphere to your kitchen.