cleaning Archives - America's Advantage Remodeling

Посты с тэгом: cleaning

Why Does My Bathroom Smell Like Sewage? Common Causes and Solutions

Опубликовано: May 3, 2025 в 11:00 am

Автор:

Категории: Bathroom

Тэги: ,,

Where is the Sewage Smell Coming From?

Walking into a bathroom and being hit with a strong, nasty smell can ruin your day. But if that smell smells like rotten eggs or raw sewage, it’s more than just gross – it’s a warning.

A sewer gas smell in your bathroom can mean hidden problems in your plumbing system that can affect your health, comfort and even your home’s safety. Sewer gases are a byproduct of the sewer system. They’re hydrogen sulfide, methane and ammonia – all of which can be harmful if not contained. Your plumbing fixtures, toilets, sinks and tubs are designed to block these gases with P-traps (those u-shaped pipes) and sealed connections.

Another important part is the vent pipe which allows sewer gases to safely vent through the roof.

When one of these systems fails – whether it’s a dry trap, sewer line issues or poor ventilation – gases can escape and you’ll get a strong sewer smell in the bathroom. That rotten egg smell is more than just a nuisance – it can mean harmful gases in your home and even a leak in your main sewer line.

So why does my bathroom smell like sewage? Let’s break down the most common causes of sewage odors, what you can try yourself and when to call a plumber.

Plumbing Issues Behind the Sewage Smell in the Bathroom

Dry P-Trap Allows Sewer Gases to Enter

One of the simplest reasons for that sewer gas smell is a dry P-trap. That u-shaped pipe under your bathroom sink, tub or shower holds water that acts as a barrier and prevents sewer gases from entering your home.

If the fixture hasn’t been used in a while – like a guest bathroom – the water can evaporate.Once dry, the trap no longer prevents bad odorsfrom rising back into your home and it’s hard to keep your bathroom smelling fresh. This is a common reason for that sudden bathroom smell like sewage you can’t quite figure out.

Solution: Run water in all bathroom drains, especially the less used fixtures, at least once a week to maintain the water seal. For bathrooms that are rarely used, consider installing a trap primer to automatically replenish the water supply and keep those odors away.

Broken Toilet Seal Causes Sewer Gas Leak

The wax ring that connects your bathroom toilet to the drainpipe is crucial in blocking out sewer gases. If that toilet seal is worn, damaged or misaligned, gases from the sewer system can enter your bathroom. This often results in strong toilet smells especially around the base of the fixture.

You may also notice water seeping from under the toilet bowl or a slight wobble when you sit down – signs of a compromised or broken seal.

Solution: If you think it’s a wax ring issue, shut off the water supply to the toilet tank and remove the toilet to replace the wax ring. This is a quick job for a plumber and will eliminate the odor if a faulty seal is the cause.

Clogged Drains and Shower Drain Clogs
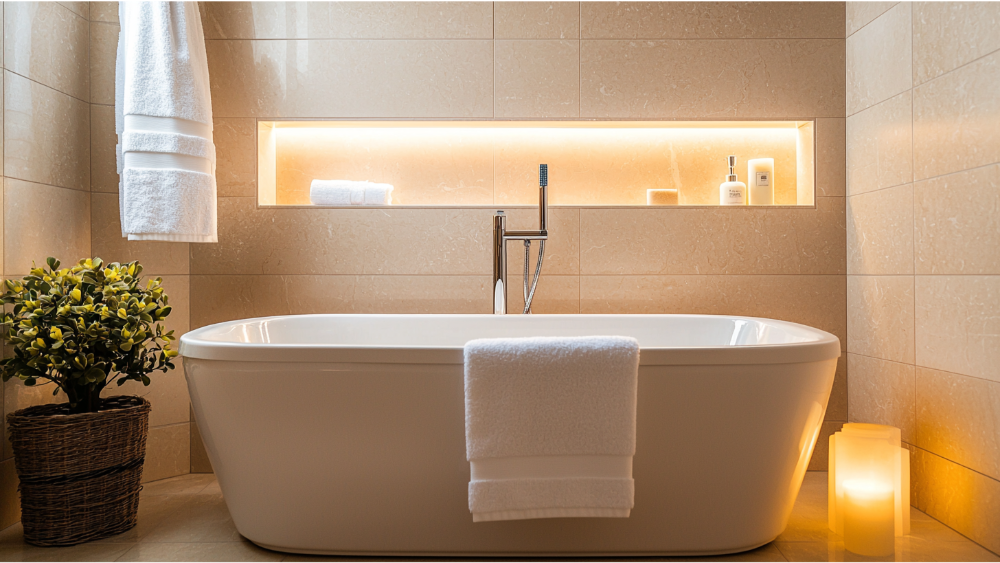
A bath tub with aesthetic lighting

Clogged drains in the drain system are another common source of sewage smell. Hair, soap scum and toothpaste can form blockages in the bathroom sink or tub, creating a bacteria breeding ground. A clogged shower drain can trap stagnant water and organic matter that will release an unpleasant smell over time.

You may also hear gurgling or bubbling sounds when water goes down – a sign of air trapped behind a clog or worse, a problem in the main sewer line. If your bathroom smell is strongest when water drains slowly, this may be the culprit.

Solution: Try flushing the drain with hot water, baking soda and vinegar. A plumbing snake or manual auger can help break up stubborn blockages. Avoid harsh drain cleaners which can damage your pipes or worsen the clog. For deep or recurring clogs, call a plumber.

Sewer Pipe or Septic Tank Issues

If your bathroom still smells like sewage after clear drains and functioning fixtures, the problem may be deeper in your sewer pipe or septic tank. Sewer pipe cracks, tree root invasions or a full septic tank can force sewage gases back into your home.

These issues can cause multiple drains to act up at once – slow draining, bubbling toilets or that strong, lingering sewage smell in the bathroom. You may also notice the toilet paper isn’t flushing correctly or waste is backing up into lower level fixtures.

Solution: If you’re on a septic system, pump the tank every 3-5 years. For homes on municipal sewage, a camera inspection of your main sewer line can reveal any hidden damage or blockages. The sooner sewer line issues are addressed the easier (and less expensive) they are to fix.

Poor Ventilation Traps Odors in the Bathroom

Inadequate Ventilation Allows Sewer Gases to Build Up

A well-designed bathroom has an exhaust fan or vent pipe that keeps the air moving and removes foul odors and moisture. But if your bathroom lacks proper ventilation – or has a fan that’s broken or undersized – sewer gases and humidity can build up over time and make it hard to keep your bathroom smelling fresh.

Moist air and sewage gases trapped in an unventilated space can also cause mildew and condensation issues and make the smell in bathroom areas worse.

Solution: Install or repair your bathroom fan and make sure it’s venting air outside – not just into the attic. For bathrooms without windows, upgrade to a system with a humidity sensor so the air circulates reliably. At America’s Advantage Remodeling we include proper ventilation in every remodel we do.

Proper Ventilation Prevents Unpleasant Smells

Good air flow is one of the most overlooked elements of a fresh, smelling bathroom. It helps remove humidity, odors and even microscopic sewage gases that may be lingering after a flush or shower.

Solution: If you’re remodeling or designing a new bathroom, prioritize air flow along with your fixture choices. A good vent pipe setup combined with modern fans and sealed plumbing will protect your space from odor buildup and moisture damage.

When the Odor Isn’t Caused by Plumbing

A nice modern bathroom

Mold, Mildew or a Dead Animal?

Sometimes what smells like sewage isn’t plumbing related at all. A musty odor could be mold or mildew growing behind tile or drywall. A sudden, pungent rotten egg smell may be a dead rodent in your wall, crawl space or even ductwork.

These non-plumbing issues can still cause a bathroom smell like sewage so it’s important to look beyond the pipes if the problem persists.

Solution: For mold, clean affected surfaces with disinfectant and improve air flow. For suspected dead animals, call pest control or a crawl space cleaning service to locate and remove the source.

What to Try Before Calling a Professional

DIY Fixes for Sewage Smell in Bathroom

  • Run water in all traps to restore water seals
  • Flush drains with baking soda and vinegar
  • Use a plumbing snake to clear minor clogs
  • Avoid drain cleaners that can damage your drain system
  • Check for toilet seal issues and replace if the toilet is loose or leaking
  • Sanitize the toilet bowl, tank and toilet brush holder regularly
  • Don’t flush large wads of toilet paper which can cause clogs and backups

When to Call a Professional

If your bathroom still smells like sewage after trying all the DIY solutions it’s clear the issue goes deeper than surface level clogs or dry traps. Persistent sewer odors are often a sign of a hidden problem in your plumbing system and the longer they’re left untreated the greater the risk to your home’s safety and air quality.

A recurring bathroom smell like sewage could mean a cracked or deteriorating main sewer line which allows sewage gases to enter your home’s structure. These gases which may include hydrogen sulfide and methane are not only unpleasant they can be hazardous to your health if left unchecked.

Another possibility is a clogged vent pipe. Your vent pipe is crucial in maintaining air pressure in your drain system. When it becomes clogged – often by leaves, debris or even animal nests – it can disrupt water flow in your plumbing and cause toilet smells, slow draining or gurgling sounds. This blockage can also prevent gases from venting properly and force them back into your home instead.

A faulty or compromised toilet seal is also a common but often overlooked culprit. Over time even a small leak in the wax ring beneath the toilet bowl can cause big odor issues and water damage to your bathroom floor. And while replacing a wax ring may seem simple, improper installation can make the problem worse.

If you’ve flushed your shower drain, cleaned traps and checked for visible leaks but still have a lingering bad smell it’s time to call in a pro. A professional plumber can do a full inspection including camera scoping of the main sewer line, smoke testing for hidden leaks and pressure testing your sewer system for ventilation issues.

Calling a pro early can save you from costly repairs down the line. What may start as a bathroom smell can escalate into major plumbing repairs, mold growth or even structural issues if left unresolved.

How America’s Advantage Remodeling Helps Sacramento Homeowners

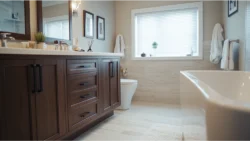
A nice bathroom

Drainage System Repairs & Plumbing Fixture Upgrades

We fix clogged drains, P-traps, and everything in between to eliminate bathroom smell problems at the source. Our licensed pros also upgrade outdated plumbing fixtures to modern, efficient systems that improve air quality and odor control.

Bathroom Remodels That Eliminate Odors for Good

If your bathroom’s layout, materials or ventilation just isn’t cutting it we offer full remodels that solve the problem for good. From fixing airflow to replacing leaky fixtures we’ll design a space that’s clean, modern and comfortable – with a bathroom smelling fresh long after we’re done.

Local, Honest Service You Can Count On

As a family owned business here in Sacramento we believe in treating our customers like neighbors. That means upfront pricing, high quality work and no high pressure sales – just solutions you can trust.

Explore Our Bathroom Remodeling Services →

Conclusion: Why Does My Bathroom Smell Like Sewage

Still wondering why does my bathroom smell like sewage? Your home is telling you there’s a leak, a clog or a ventilation problem. Don’t ignore it.

From bathroom smell to deeper plumbing issues America’s Advantage Remodeling helps homeowners eliminate the source and get a clean smelling bathroom again.

Schedule your bathroom inspection today – and say goodbye to that sewage smell for good.
Contact Our Team →

How to Clean Wood Kitchen Cabinets

Опубликовано: August 19, 2024 в 3:31 pm

Автор:

Категории: Kitchen

Тэги: ,,

Cleaning wood kitchen cabinets is essential not only for maintaining their appearance but also for preserving their longevity. Over time, cabinets can accumulate dirt, grease, and fingerprints, which can dull their finish and create an unhealthy environment. In this guide, we will explore effective methods and tips to ensure your wood cabinets remain both beautiful and functional, enhancing the overall aesthetic of your kitchen.

Basic Cleaning Techniques

A person wiping down the kitchen cabinets

Prepare a Cleaning Solution

To prepare a cleaning solution, start by mixing a few drops of mild dish soap with warm water in a bowl. This gentle solution will effectively cut through grease and grime without damaging the wood finish. It’s important to use a soft cloth or sponge dipped in the warm water solution, ensuring you wring it out well to avoid soaking the cabinets. Regularly wiping down your cabinets with this solution will help maintain their shine and keep them looking fresh.

Use Baking Soda for Stubborn Stains

For stubborn stains that won’t budge with the basic cleaning solution, baking soda can be an excellent remedy. Create a paste by mixing equal parts of baking soda and water, then gently apply it to the stained area using a soft cloth or sponge. Allow the paste to sit for a few minutes to penetrate the stain before gently scrubbing in a circular motion. Rinse the area with a clean, damp cloth to remove any residue, and dry thoroughly to prevent moisture damage to the wood.

Daily Wipe Down

Incorporating a daily wipe-down into your kitchen cleaning routine can significantly extend the life of your wood cabinets. Using a soft, damp cloth to quickly remove any spills or crumbs ensures that dirt does not accumulate over time. Pay special attention to areas near appliances and countertops, where grease and food particles tend to gather. This simple practice helps maintain not only the aesthetics of your cabinets but also a cleaner and healthier kitchen environment.

Deep Clean with Vinegar Solution

For a deeper clean, you can create a vinegar solution that helps to eliminate more stubborn grime and disinfect your cabinets. Combine equal parts of white vinegar and water in a spray bottle, shaking gently to mix. Lightly spray the solution onto the cabinet surfaces, focusing on areas with built-up grease or sticky residues. Wipe down with a soft cloth to reveal a refreshed and gleaming finish, ensuring you dry the wood thoroughly afterward to prevent any potential damage.

Avoid Harsh Chemicals

When cleaning wood cabinets, it’s crucial to avoid harsh chemicals that can damage the finish and compromise the wood’s integrity. Products containing ammonia, bleach, or solvent-based cleaners should be completely avoided, as they may strip away protective coatings or lead to discoloration. Instead, opt for natural and gentle cleaning solutions that effectively remove grime while preserving the beauty of your cabinetry. By using safe methods, you can ensure your clean wood cabinets not only look great but also stand the test of time.

Protective Measures

A microfiber cloth used to clean kitchen cabinets

To keep your wood kitchen cabinets in optimal condition, consider implementing the following protective measures:

Use a Microfiber Cloth

Using a microfiber cloth for cleaning your wood kitchen cabinets is highly recommended due to its gentle yet effective texture. Unlike traditional cleaning cloths, microfiber captures dust and dirt without scratching the wood finish, ensuring a thorough clean.

They are more absorbent, allowing for efficient wipe-downs without the need for excessive moisture, which can be harmful to the wood. Incorporating microfiber cloths into your cleaning routine helps maintain the cabinets’ beauty while minimizing the risk of damage.

Implement a Greasy Cabinet Cleaning Method

Implementing a greasy cabinet cleaning method is essential for maintaining the appearance of your wood cabinets, particularly in kitchens where cooking oils and food residues are prevalent. Begin by applying a mixture of warm water and a few drops of dish soap with a soft cloth to the greasy areas.

For extra cleaning power, consider adding a few drops of lemon juice to the solution, which not only enhances the cleaning effectiveness but also leaves a fresh scent. After scrubbing the areas gently, be sure to rinse with a clean, damp cloth and dry thoroughly to avoid any moisture-related damage.

Wipe Cabinets Promptly

Wiping cabinets promptly after spills or splatters is vital to prevent stains and damage. When food or liquids are left to sit, they can penetrate the wood finish, leading to more challenging cleaning tasks down the line. Keeping a soft, damp cloth nearby while cooking can serve as a quick reminder to address any messes immediately. This simple habit fosters a cleaner kitchen environment and helps preserve the integrity of your wood cabinets.

Avoid Excess Water

When cleaning wood kitchen cabinets, it’s crucial to avoid using excessive water as it can seep into the wood, causing warping or damage over time. Instead, use a lightly dampened cloth and ensure that it is well-wrung out before wiping down surfaces.

Regularly checking for any moisture accumulation in joints or crevices will help prevent long-term issues, maintaining the integrity of your cabinets. By adhering to this principle, you can ensure that your cabinets remain in optimal condition for years to come.

Apply a Protective Finish

To enhance the durability and appearance of your cabinet doors, consider applying a protective finish. A high-quality wood polish or wax can provide a barrier against dirt, moisture, and daily wear and tear, ensuring that the natural beauty of the wood remains intact.

Regularly applying this finish not only revitalizes the shine of your cabinet doors but also helps prevent scratches and scuffs from accumulating over time. It’s an easy step to add to your cleaning routine that can significantly prolong the life of your cabinets.

Common Mistakes

A person who is not cleaning the cabinets correctly

Maintaining wood kitchen cabinets requires care and attention, yet certain common mistakes can hinder their longevity and appearance. Here are a few pitfalls to avoid:

Using Harsh Scrubbing Tools

One of the most significant mistakes is the use of abrasive sponges or scouring pads during cleaning. These tools can scratch and damage the wood furniture finish, leading to dullness and potential long-term wear. Instead, opt for soft cloths or sponges that are gentle on the surface to preserve the cabinet’s integrity.

Neglecting to Test Cleaning Solutions

Another common oversight is failing to test new cleaning products on a small, inconspicuous area before full application. Certain cleaners, even those marketed as safe for wood, could contain ingredients that may affect the finish adversely. Always perform a spot check to ensure compatibility with your cabinets and consider the importance of deep cleaning.

Overlooking Regular Maintenance

Many homeowners make the mistake of waiting too long between cleanings, which can lead to the accumulation of greasy kitchen cabinets that are much harder to remove. Regular maintenance and cleaning routines are essential for preventing build-up and maintaining a fresh appearance. Make it a habit to wipe clean surfaces regularly.

Ignoring Humidity Levels

Finally, an often-overlooked factor is the impact of humidity on wood cabinets. Excess moisture in the air can cause wood to swell, while extremely dry conditions can lead to cracking. Implementing appropriate climate control measures can mitigate these fluctuations and protect your cabinetry from environmental damage, especially after a good deep clean cabinet session.

Frequently Asked How to Clean Wood Kitchen Cabinets Questions

Kitchen cabinets

What is the Best Thing to Use to Clean Wood Cabinets?

When dealing with greasy wood cabinets, a gentle yet effective cleaning solution is essential. A mixture of warm water and a few drops of dish soap can break down oily residues without damaging the wood finish. For tougher grime, consider adding vinegar or lemon juice to enhance the cleaning power naturally. Always remember to use a soft cloth to avoid scratching the surface while ensuring thorough drying afterwards.

Can You Use Dawn Dish Soap to Clean Wood Cabinets?

Yes, Dawn dish soap can be an effective option for cleaning wood cabinets, primarily due to its gentle formulation and grease-fighting properties. When using it, mix a few drops of Dawn with warm water to create a soapy solution that effectively cuts through grease and grime without overly saturating the wood. Always use a soft cloth to apply this mixture, ensuring that the cleaning method remains gentle and does not scratch the wood finish.

However, it’s crucial to safely rinse and dry the cabinets after cleaning to prevent any soap residue or moisture from causing damage. Remember that while Dawn is safe for most wood finishes, it is still recommended to test the solution on a small, inconspicuous area first. By taking these precautions, you can maintain the beauty and integrity of your wood cabinets while ensuring a thorough clean.

Is Murphy’s Oil Soap Good for Wood Cabinets?

Murphy’s Oil Soap is a popular choice for cleaning wood surfaces, including cabinets, due to its gentle formulation that effectively removes dirt and grime while preserving the wood’s natural finish. This soap is specifically designed for use on wood and can help restore the shine and beauty of your cabinets. When using Murphy’s Oil Soap, dilute it according to the manufacturer’s instructions and apply it with a soft cloth, ensuring you wipe in the direction of the wood grain. Regular use can help maintain the integrity of your cabinets while providing a beautiful, polished appearance.

However, it’s important to note that while Murphy’s Oil Soap is generally safe for most wood finishes, overuse or improper dilution can lead to a buildup of residue. To avoid this, it’s advisable to follow a consistent cleaning schedule, paired with thorough rinsing techniques, to eliminate any soap remnants. Always perform a spot test in an inconspicuous area before applying it to the entire surface, ensuring compatibility with your specific cabinet finish. By incorporating Murphy’s Oil Soap as part of your cleaning regime, you can effectively maintain the beauty and functionality of your wood kitchen cabinets.

Conclusion

Kitchen cabinets

Maintaining wood kitchen cabinets is essential for preserving their beauty and longevity. By implementing the right cleaning techniques and avoiding common mistakes, homeowners can ensure their cabinets remain in excellent condition helping to prolong the need for cabinet replacement. Regular cleaning with gentle substances not only protects the wood’s finish but also enhances its natural charm.

In addition to consistent care, being aware of environmental factors such as humidity can further safeguard cabinetry against damage. By following these best practices, you can enjoy your beautiful wood kitchen cabinets for many years to come, with each cleaning session reinforcing their elegance and functionality.

Kitchen Soffit: What They Are, Ideas, and All You Need to Know

Опубликовано: January 29, 2024 в 8:39 pm

Автор:

Категории: Kitchen

Тэги: ,,,,,,,,

Introduction

If you’re an enthusiastic home decorator or just someone who enjoys kitchen remodeling, you’ve likely come across the term “kitchen soffits.” But what precisely are they, why are they significant, and how do they affect the overall appearance and ambiance of your kitchen?

In this article, we’ll dive into everything you need to know about kitchen soffits, exploring their design, functionality, and potential impact on your home.

What is a Kitchen Soffit?

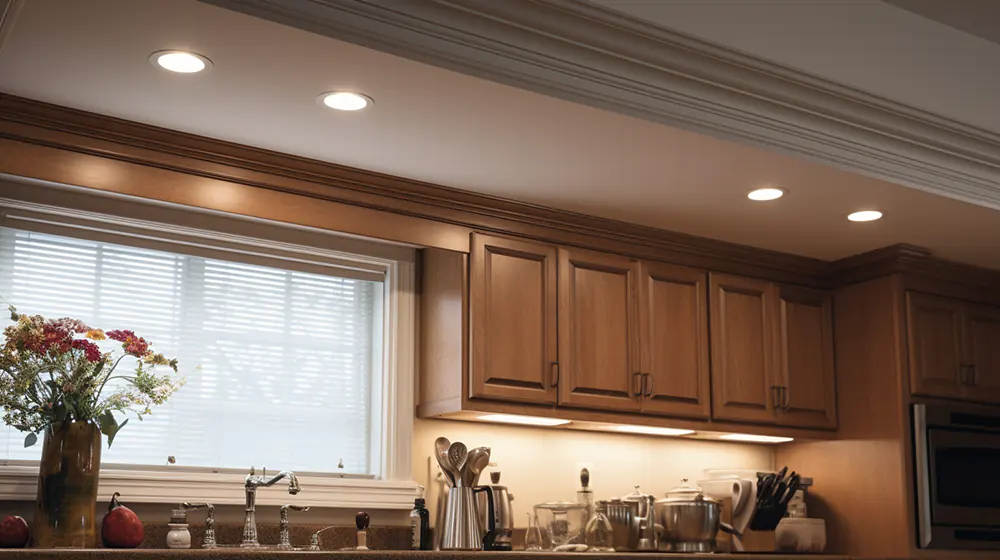
A kitchen soffit is a box-like structure that is typically installed above the tall upper kitchen cabinets. It is designed to bridge the gap between the top of the tall cabinets and the ceiling. Soffits can be made from various materials such as drywall, wood, or even metal.

Types of Kitchen Soffits

Remodeled kitchen with brand new kitchen soffit
  • Standard Soffit: The most common type of cabinet soffit is a standard box-like structure that is installed above the tall cabinets. It can be made from various materials and can be customized based on individual preferences.
  • Drop Ceiling Soffit: This type of soffit is built lower than the actual kitchen ceiling, creating a layered effect. It can be used to add dimension to the kitchen or to hide exposed pipes and wires.
  • Recessed Soffit: A recessed soffit is built into the wall, creating a seamless transition between the cabinets and the ceiling. This type is often used in modern kitchens for a sleek and minimalist look. ‘

Best Kitchen Soffit Ideas

Kitchen soffit

Now that we know what kitchen soffits are and the types available, let’s explore some of the best kitchen soffit ideas to elevate your home decor.

  • Include lighting: Soffits are also an excellent way to add extra lighting to your kitchen. You can install LED lights inside the soffit, creating a warm and inviting ambiance.
  • Contrasting trim colors: If your kitchen has dark cabinets, consider using lighter-colored soffits to create a contrasting effect. This will not only make your space look more aesthetically pleasing but also add depth and dimension.
  • Incorporate storage: Soffits can also be used as additional storage space in the kitchen. You can install open shelves or cabinets inside the soffit to store items that are not frequently used or to display decorative pieces.
  • Add multiple rows of kitchen cabinets: If you have a large kitchen with tall ceilings, consider adding multiple rows of cabinets and using soffits to connect them. This will not only provide extra storage but also create a visually appealing look.
  • Incorporate Greenery: Make your kitchen soffit a place that celebrates life by incorporating greenery. Small indoor plants or herb gardens can thrive in this space, adding a burst of freshness and color. This not only enhances the overall aesthetic of the kitchen but also improves air quality.
  • Display Artwork: Transform your kitchen soffits into a mini-gallery where you can showcase artwork or family photos. This personal touch can make the kitchen feel more intimate and tailored to your style.
  • Use Textural Elements: Adding textural elements like shiplap, bead board, or tin tiles to your kitchen soffit can create visual interest and charm. These materials draw the eye up and can complement the overall design theme of your kitchen.

Maintenance and Cleaning

A clean kitchen soffit

Like any other part of the kitchen, soffits also require regular maintenance and cleaning. Here are some tips to keep your kitchen soffit in top shape:

  • Dust Regularly: Use a duster or a dry cloth to remove dust and dirt from the surface of the soffit.
  • Use Mild Cleaners: If your soffit is made from a material that can be cleaned, use mild cleaners and a damp cloth to wipe it down.
  • Avoid Harsh Chemicals: Harsh chemicals can cause damage to the finish of your soffit. Avoid using them when cleaning.
  • Inspect for Damage: Regularly check your kitchen soffit for any signs of damage or wear and tear. Repair or replace any damaged parts to maintain the structure’s integrity.

Pros vs Cons

When considering remodeling your kitchen cabinets or simply making upgrades, it’s crucial to weigh the pros and cons of every element, and kitchen soffits are no exception.

These features can be both beneficial and restrictive, depending on the specific needs and layout of your kitchen.

Below, we will dive into the advantages and disadvantages of installing soffits in your kitchen to help you make an informed decision.

Pros:

white kitchen soffits
  • Hide Wires and Pipes: One of the main reasons for installing kitchen soffits is to hide unsightly wires and pipes that are necessary for utilities such as lighting and plumbing lines. By concealing these elements, the kitchen looks more polished and aesthetically pleasing.
  • Utilize Space: Another reason for installing kitchen soffits is to utilize the space between the cabinets and ceiling. This area is often overlooked but can be utilized for storage purposes. Soffits can be built with an open shelf or cabinets to provide additional storage space in the kitchen.
  • Add Visual Interest: Kitchen soffits can also add visual interest to the overall design and make it a more modern kitchen. They can be customized with different materials and textures to complement the rest of the kitchen and can be painted the same or different colors as the rest of the kitchen. Soffits can also help create a sense of continuity between the upper cabinetry and the rest of the kitchen.

Cons:

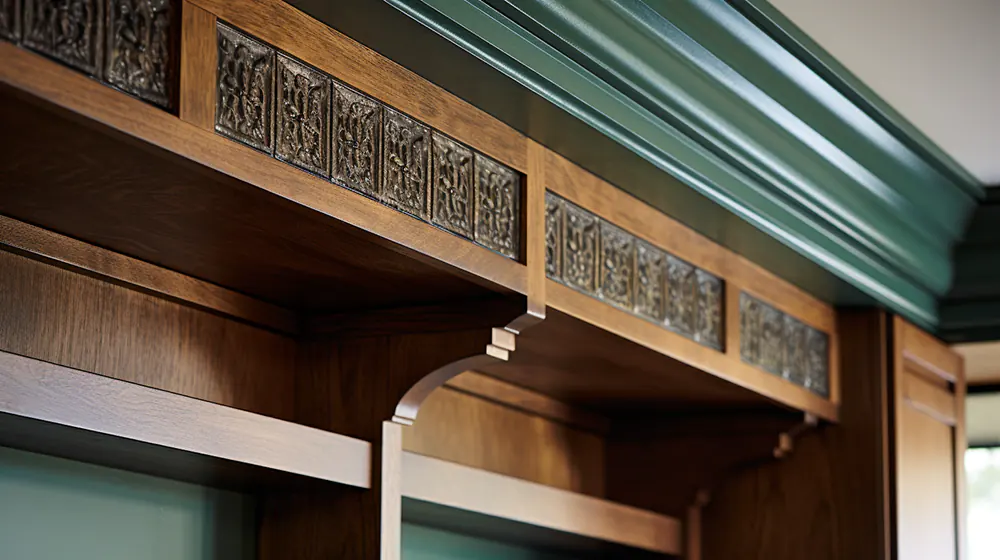
wood and green kitchen soffits
  • Limited Headroom: When installing a kitchen soffit, consider that it can restrict headroom, potentially causing inconvenience for taller individuals as they move around the kitchen and existing cabinets.
  • Cost: The installation of a kitchen soffit may lead to significant expenses, particularly if it involves electrical or plumbing work, adding to the overall investment required.
  • Difficult to Remove: Removing a kitchen soffit in the future could present a challenging and time-consuming task, potentially resulting in damage to the existing structure or walls.

Installation Process

Installation of kitchen soffits

The installation process for kitchen soffits may vary depending on the type and materials used. It is recommended to hire a professional contractor or carpenter for this job, especially if it involves electrical or plumbing work. Here are some general steps that may be involved in the installation process:

Measurements: First, measure the area where the soffit will be installed to determine the precise size and shape needed for a perfect fit.

Build the Frame: Next, using wood or metal, construct a sturdy frame for the soffit based on the measurements taken earlier.

Add Support: If necessary, reinforce the structure by adding extra support beams to ensure that the soffit can bear weight without any issues.

Install Material: Once the frame is complete, it’s time to carefully install the chosen material (drywall, wood, etc.) onto the frame, ensuring a seamless and secure finish.

Finishing Touches: To complete the project, consider adding any additional features such as shelves or cabinets, and then paint or decorate the soffit to seamlessly blend with the rest of the kitchen decor.

Soffit Alternatives

Alternative to kitchen soffits

While kitchen soffits have their benefits, they are not always necessary or practical. Here are some alternatives to consider:

  • Extended Cabinets: Instead of installing a separate soffit, you can opt for extended upper cabinets that reach to the ceiling. This option provides additional storage space and eliminates the need for a soffit.
  • Crown Molding: This is another alternative to kitchen soffits. It adds a decorative touch to the top of cabinets and can also serve as a cover for any exposed wires or pipes.
  • Exposed Beams: For a more rustic or industrial look, exposed beams can be installed in place of kitchen soffits. This option adds character to the kitchen and creates a unique design element.

Frequently Asked Questions About Kitchen Soffits

Are kitchen soffits necessary?

No, they are not necessary, but they can serve a purpose in hiding wires and pipes, creating additional storage space, or improving the overall aesthetics of the space.

Can I remove the kitchen soffits?

Yes, it is possible to remove kitchen soffits if they are solely for aesthetic purposes, such as to create more open space or update the kitchen’s look with new cabinets.

However, if the soffits house essential utilities like electrical wiring, plumbing, or HVAC ducts. It is crucial to consult a professional contractor or structural engineer before proceeding with removal to ensure the safety and structural integrity of the space.

How much does it cost to install kitchen soffits?

The cost of installing kitchen soffits can vary significantly based on factors such as the materials used, the size of the project, and any additional customizations. For the most accurate estimate, it’s advisable to consult with a contractor who can provide a detailed breakdown of costs.

Conclusion

Kitchen soffits

Kitchen soffits can be a valuable addition to any kitchen, providing both functional and aesthetic benefits, including more storage space and seasonal decor.

However, it’s essential to carefully consider the pros and cons before deciding if they are right for your kitchen remodel. Additionally, proper installation is crucial for ensuring safety and structural integrity, as well as maximizing storage space.

With this guide, you now have a better understanding of kitchen soffits and their alternatives, allowing you to make an informed decision on whether to include them in your kitchen remodeling or upgrades, while also considering the potential for more storage space and seasonal decor.

So, make sure to do thorough research and consult with a professional Such as America’s Advantage Remodeling before making any important decisions. It’s always better to be well-informed and seek expert advice when needed.