cabinets Archives - America's Advantage Remodeling

Посты с тэгом: cabinets

Two-Tone Kitchen Cabinets: The 2025 Trend That’s Here to Stay

Опубликовано: May 1, 2025 в 11:20 pm

Автор:

Категории: Kitchen

Тэги: ,,

What Are Two-Tone Kitchen Cabinets?

Two-tone kitchen cabinets are a design-forward approach where cabinetry is finished in two different colors or materials—often with lighter shades on the upper cabinets and a darker shade on the lower cabinetry or island.

This has evolved from a niche style to a mainstream must-have especially in modern renovations. While the traditional all-white kitchen with wood accents is still popular, today’s homeowners are opting for subtle variation and bold contrasts to make their kitchens more interesting. Whether you want a clean, minimalist space or a warm and cozy environment, two-tone cabinetry is perfect for almost any style.

Common Two-Tone Cabinet Layouts

Upper and Lower Color Separation

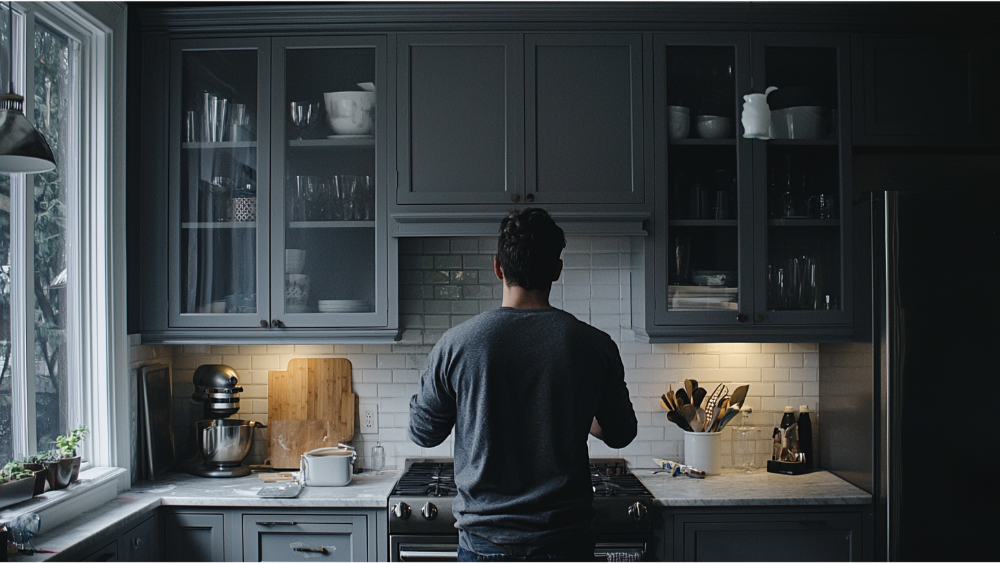
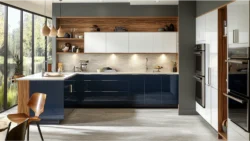
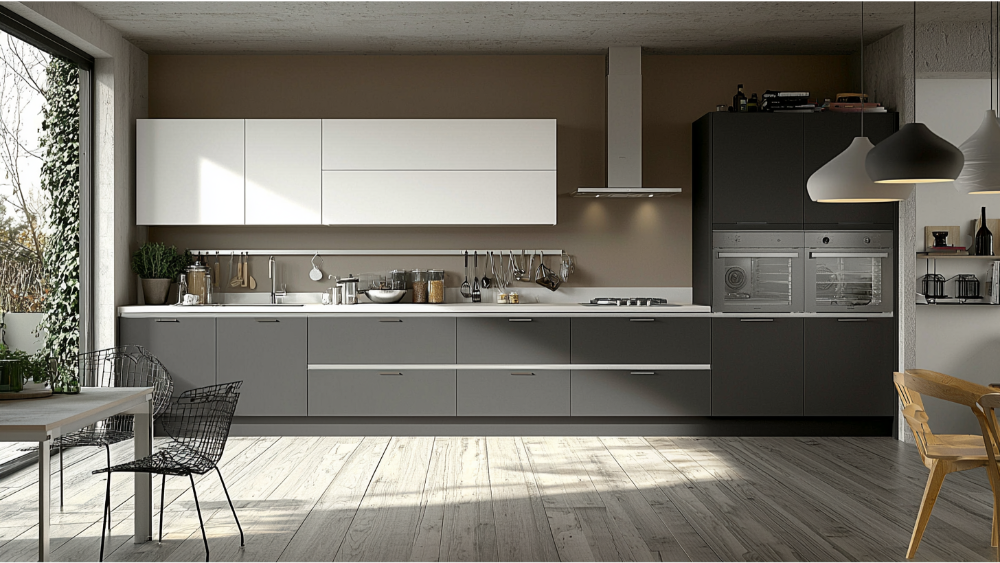
A classic combo uses lighter shades on upper cabinets—like white or soft taupes—and a darker shade below, like charcoal, deep blue or black cabinets. This adds contrast and balances the visual weight in the room.

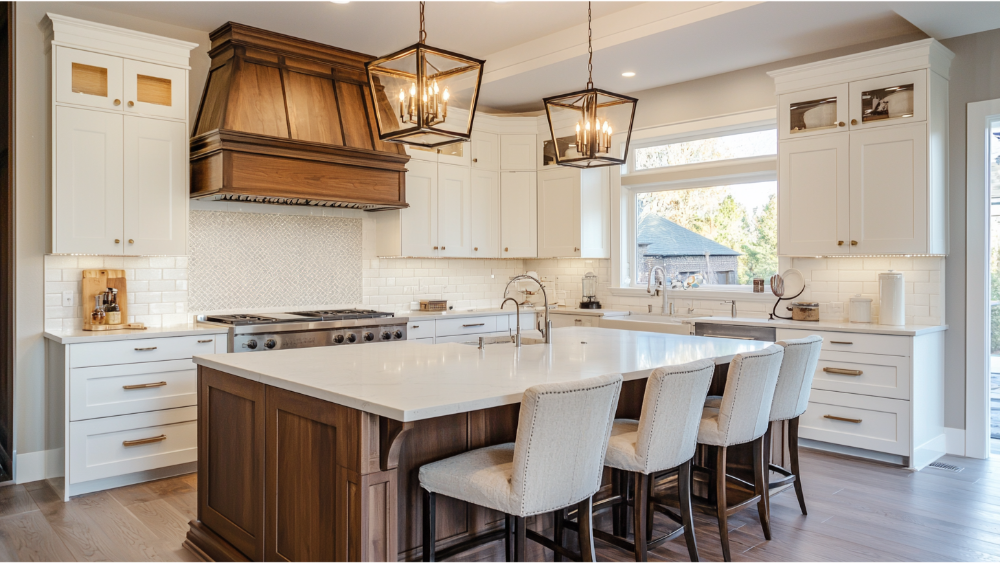
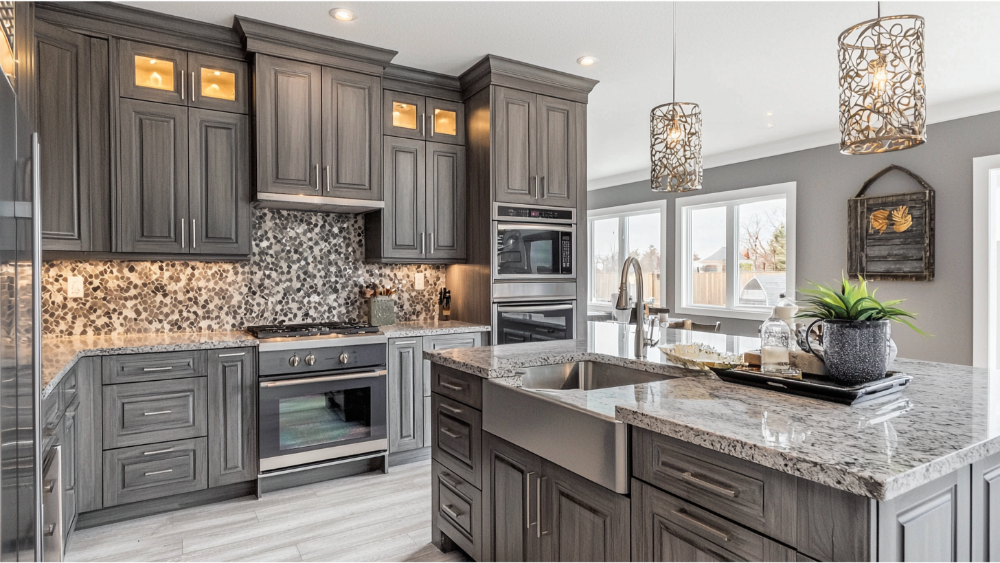
Contrasting Kitchen Island

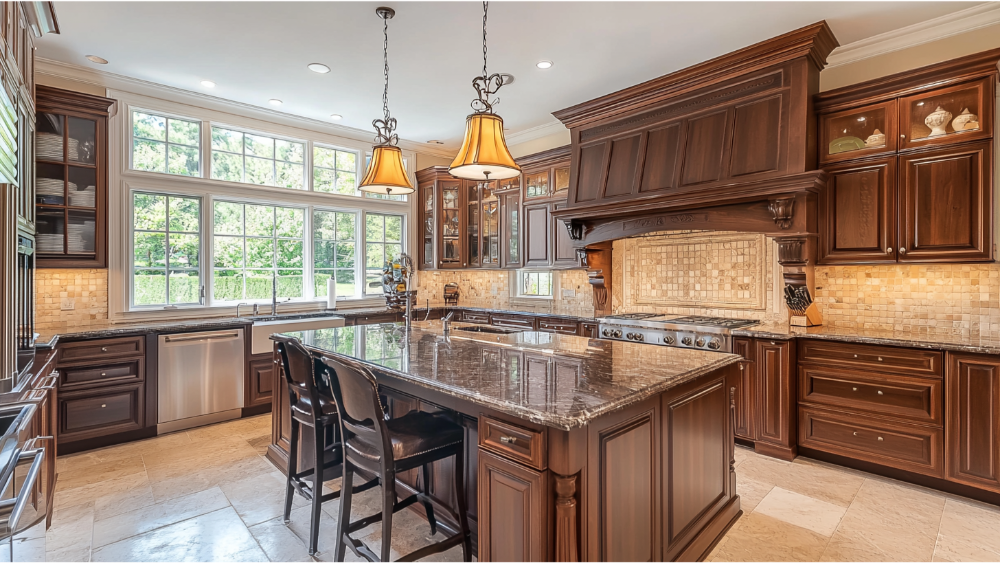
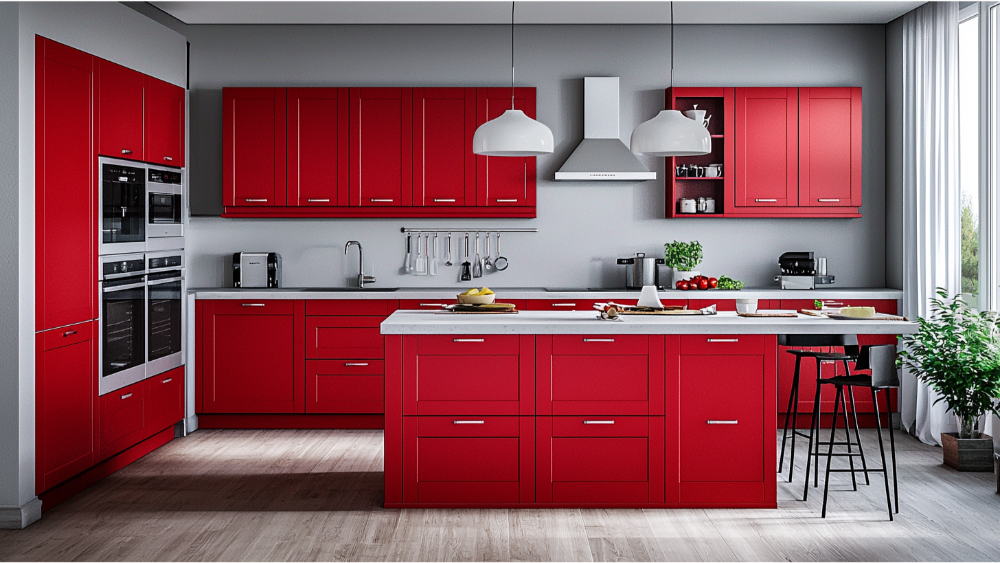
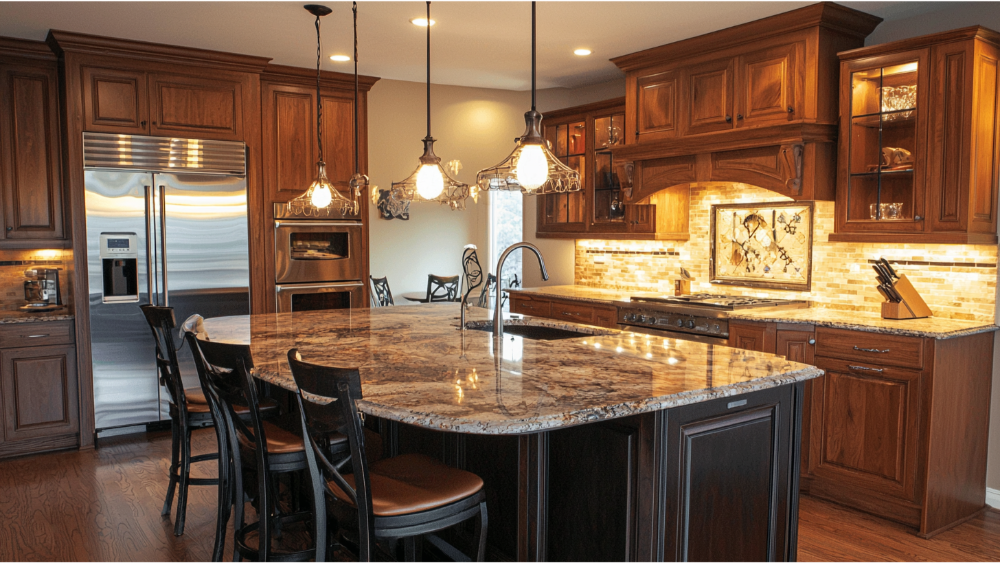
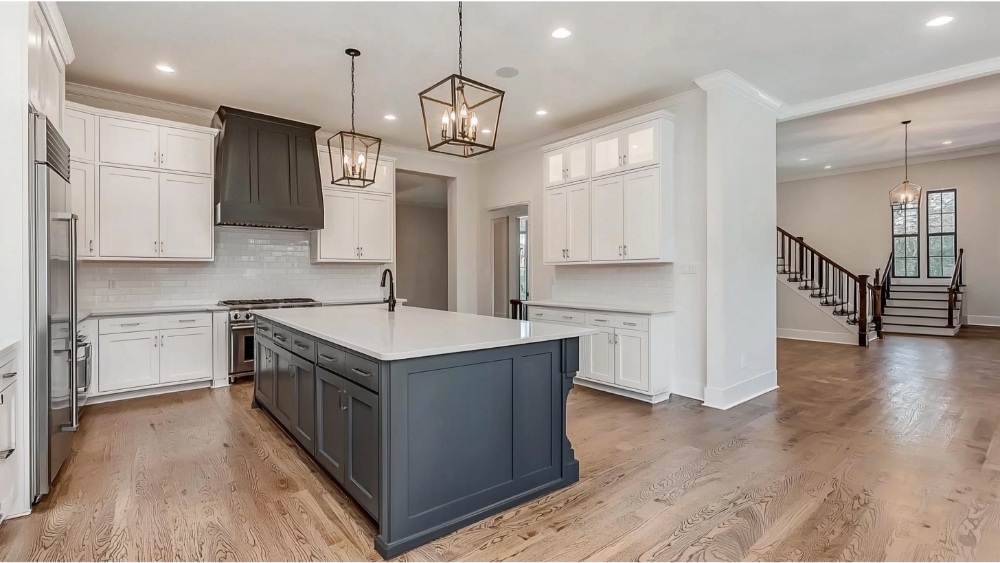
One of the most striking applications is a two-tone kitchen island that’s a different color than the surrounding cabinets. Whether it’s painted a bold accent color or finished in natural wood tones, the island becomes a focal point—especially when paired with bar stools in matching materials or finishes.

Mixed Materials Within the Same Run

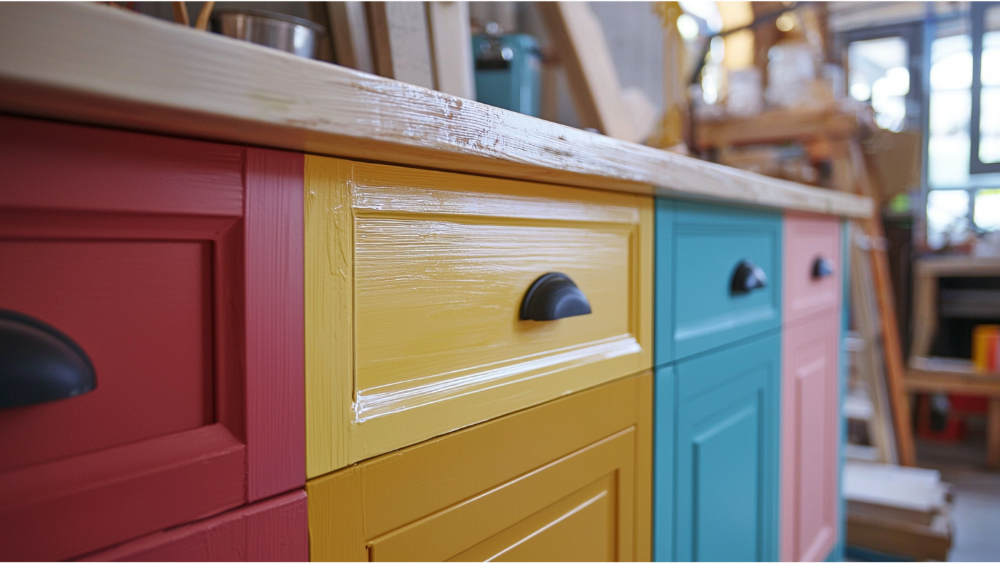
Some kitchens use different colors side-by-side in one linear cabinet layout. For example, a wall of black cabinets with an adjacent run in a warm wood tone creates visual separation between prep areas and dining zones.

Why Homeowners Are Choosing Two-Tone Cabinets in 2025

A modern two tone kitchen cabinet design

This isn’t just about looks—it’s about functionality, personality and making smart design decisions that enhance everyday living. In 2025, homeowners are prioritizing spaces that are beautiful and functional. Two-tone cabinetry delivers on both.

Visual Impact and Functionality

Using two shades breaks up the monotony of one color across the entire room. It adds movement and rhythm to the design and draws the eye across the space and gives each zone its own identity.

Create Depth and Dimension

By combining different colors or materials you add layers to the design and make the room feel more dynamic. This is especially important in open floor plans where the kitchen must blend with adjacent living and dining spaces.

Practicality and Style

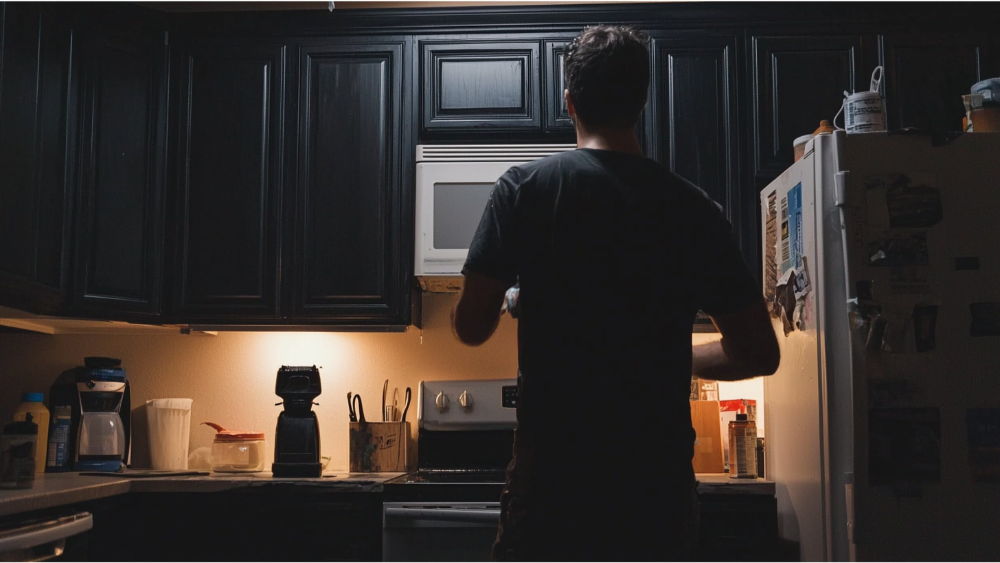
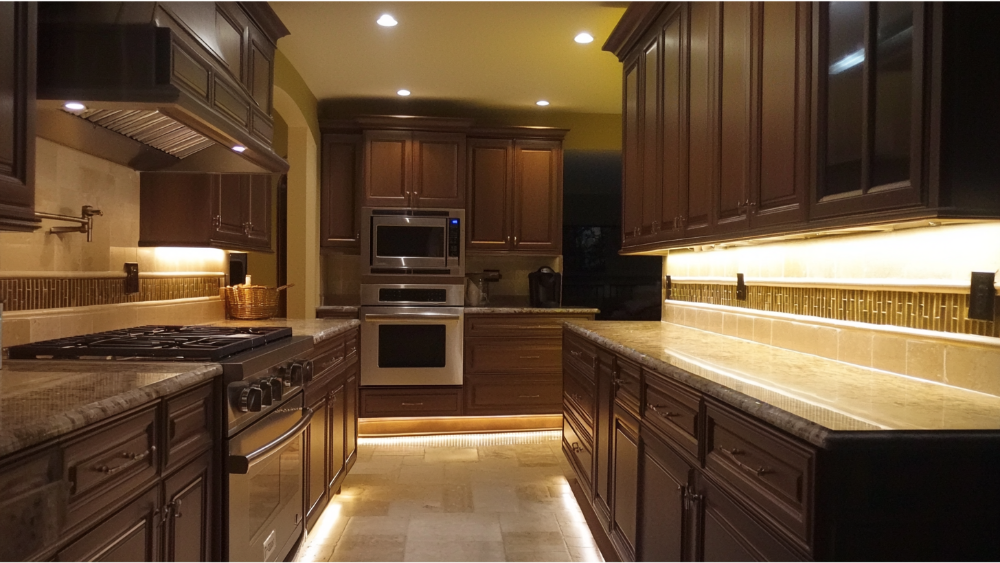
Lighter shades on top like white cabinetry or cream tones help reflect light and open up the space. Darker lower cabinetry like navy or black cabinets is more forgiving with spills, smudges and daily wear and offers a functional benefit without sacrificing style.

Be You

Your kitchen should be you. Whether you choose high contrast or more subtle variation, two-tone cabinets allow for personal expression in a room that’s often the heart of the home.

2025 Two-Tone Color Combinations

Brown and beige kitchen cabinet combination

Color is where it gets real. The top combos this year balance classic with modern.

White Cabinetry with Deep Blue or Navy Bases

High contrast, classic. Works in coastal, transitional and contemporary styles. White uppers keep it light, deep blue lower cabinets bring elegance and depth.

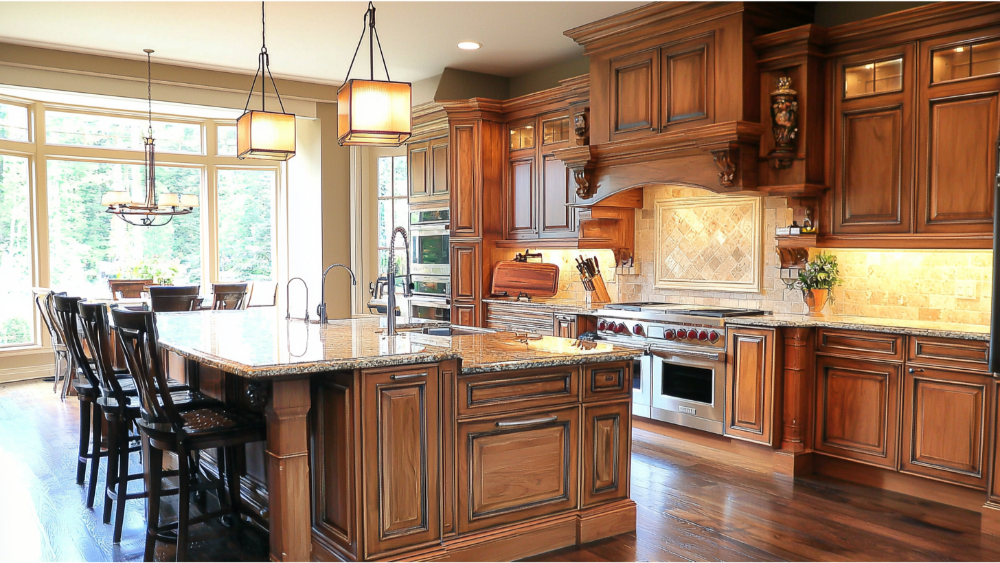
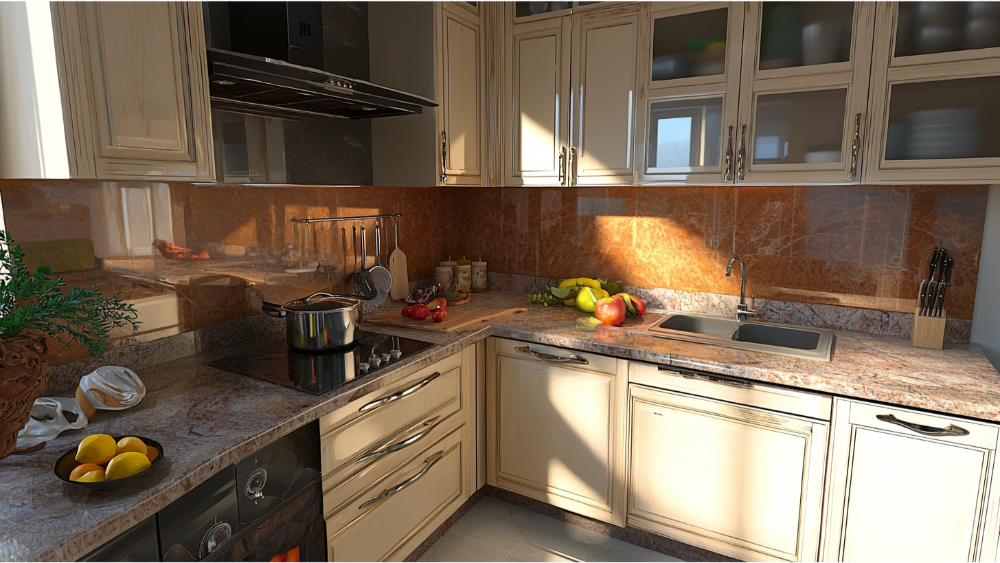
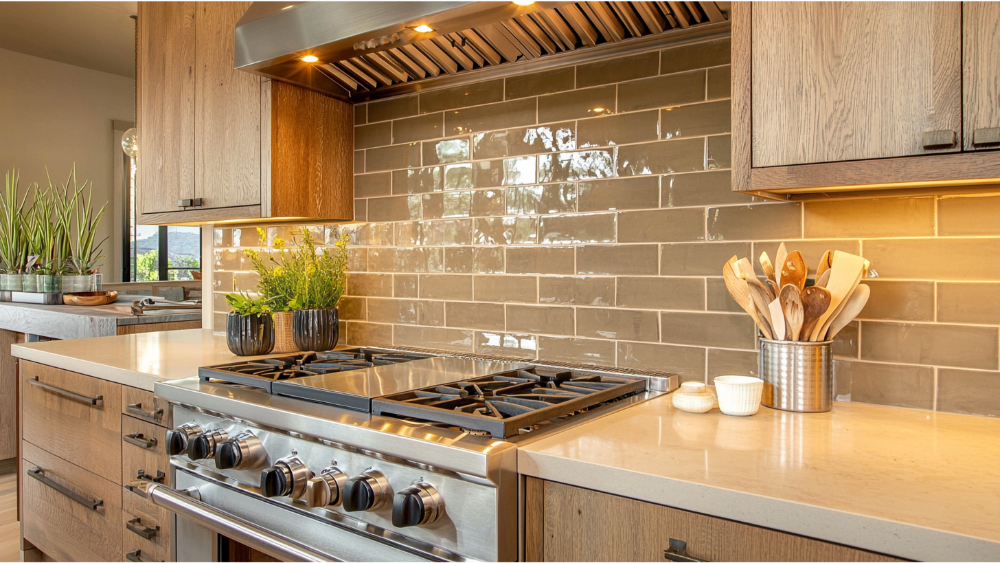
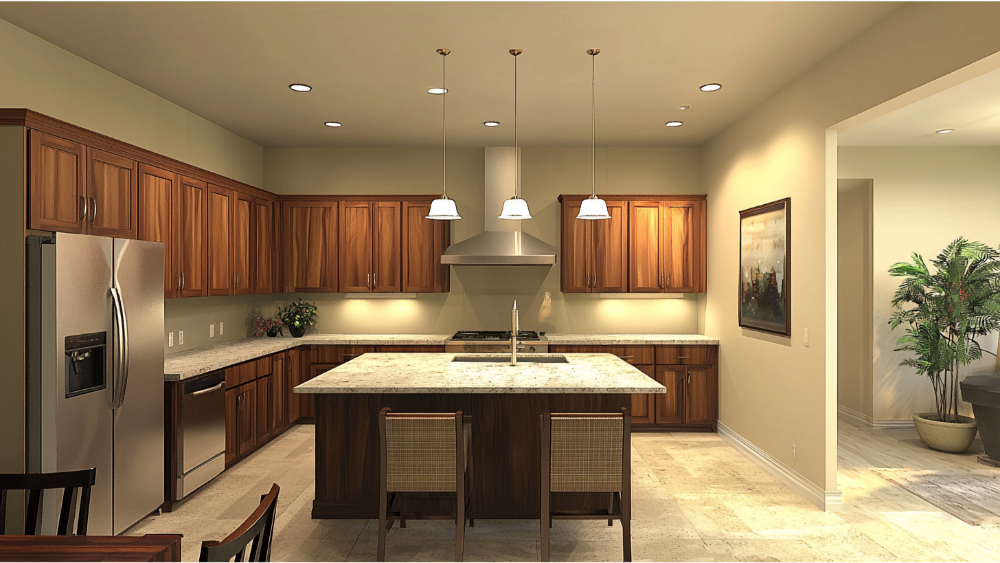
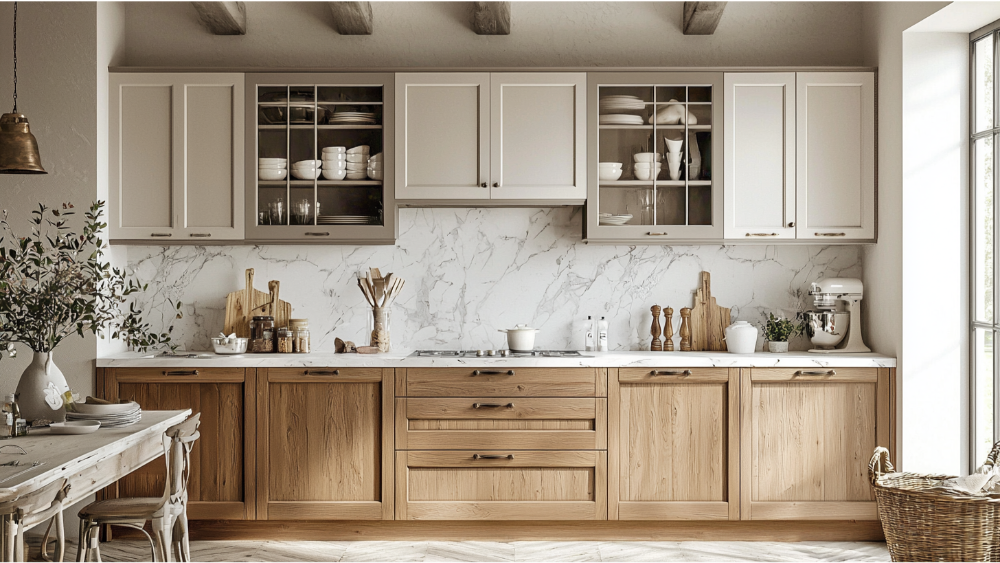
Greige and Wood Tones

Soft, warm gray-beige tones with natural finishes like white oak or walnut is timeless and organic. This combo feels cozy in kitchens with open shelving or minimal upper cabinetry.

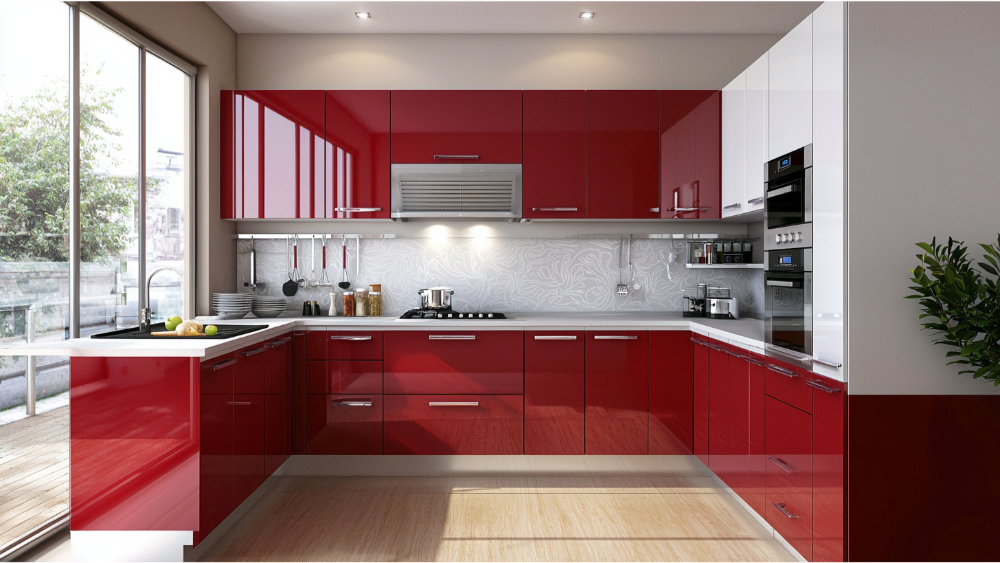
Black Cabinets and White Kitchen Walls

Bold, dramatic. Black cabinets bring grounding to the space especially when paired with white countertops or backsplash material. Great for homeowners who want contrast without overwhelming the room.

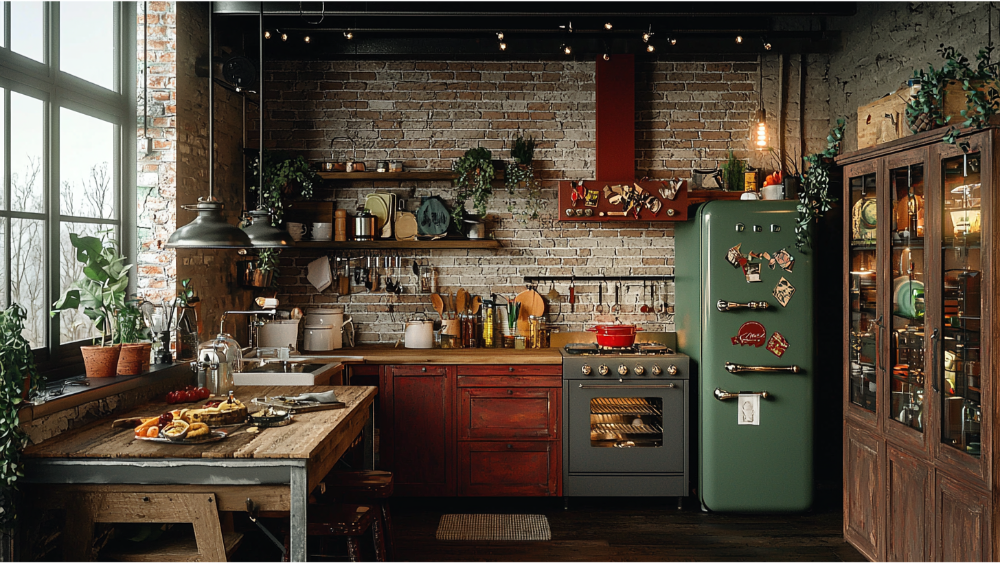
Sage Green with White Oak

Natural, calming and fresh. This combo brings warmth and softness. Perfect for a nature-inspired kitchen with clean lines and details.

Subtle Variation vs. High Contrast

Not every two-tone kitchen needs extreme color difference. Sometimes using two shades from the same family—like a soft gray and a charcoal—can create a cohesive look that’s modern and refined.

Or high contrast with completely different colors—like deep green and bright white—adds boldness and visual drama. The key is choosing combinations that fit your lifestyle and the overall style of your home.
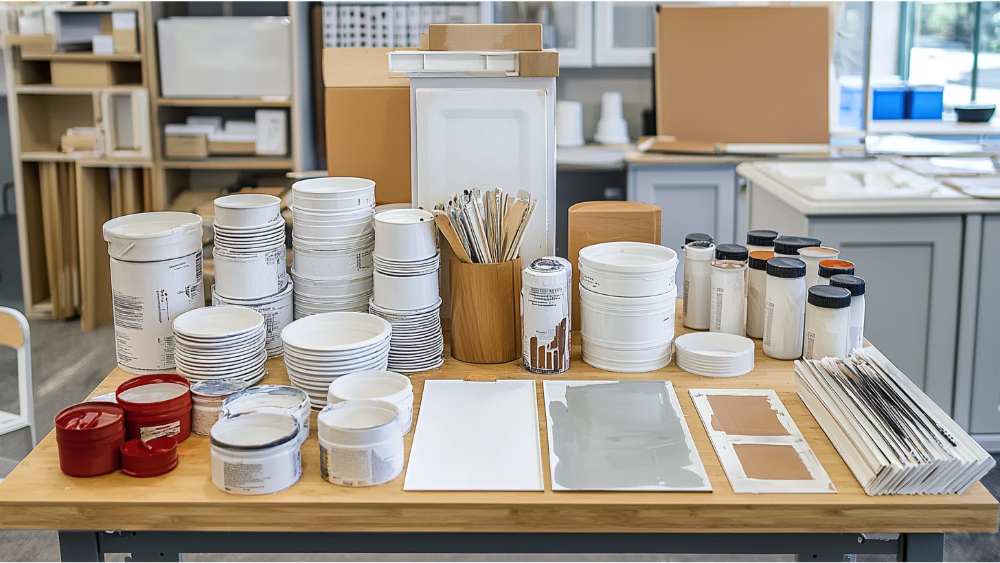
Finish

The finish—matte, satin or gloss—can change the entire feel of the kitchen. Matte is more subtle and forgiving of fingerprints, satin is soft sheen. Glossy reflects more light and is perfect for modern or contemporary kitchens.Mixing finishes across upper and lower cabinetry adds another layer of texture and interest.

Designing a Kitchen With Two Shades: Tips and Tricks

Two-tone cabinetry is flexible but success comes down to planning.

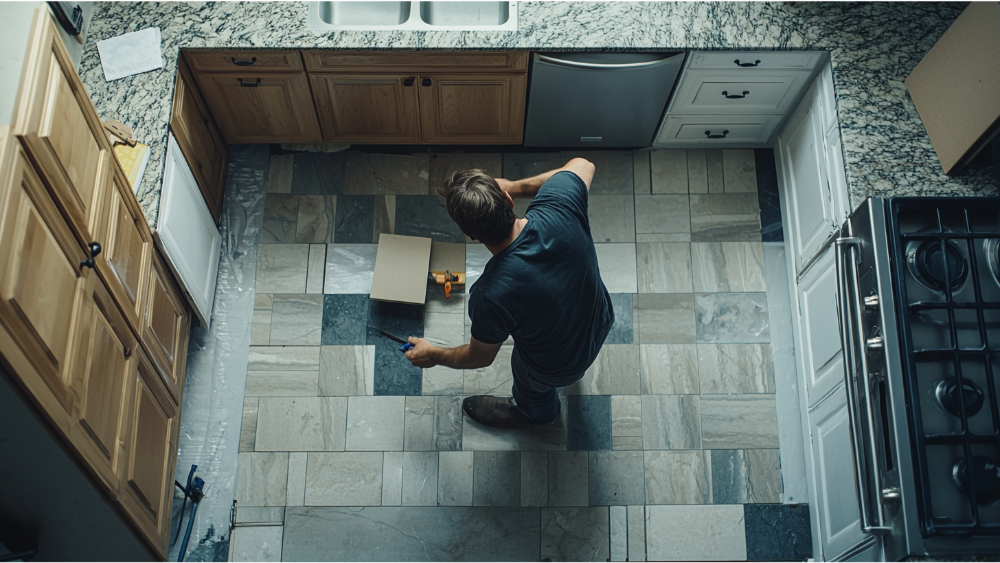
Coordinate With Fixed Elements

Counters, backsplash and flooring play a big role in tying the two colors together. Choose tones that work with both cabinetry shades for a cohesive look.

Consider the Room’s Natural Light

If your kitchen lacks natural light, use lighter shades on the upper cabinets to brighten the space. If you have plenty of sunlight, you can use darker colors more freely—even on the island or floor-to-ceiling pantry units.

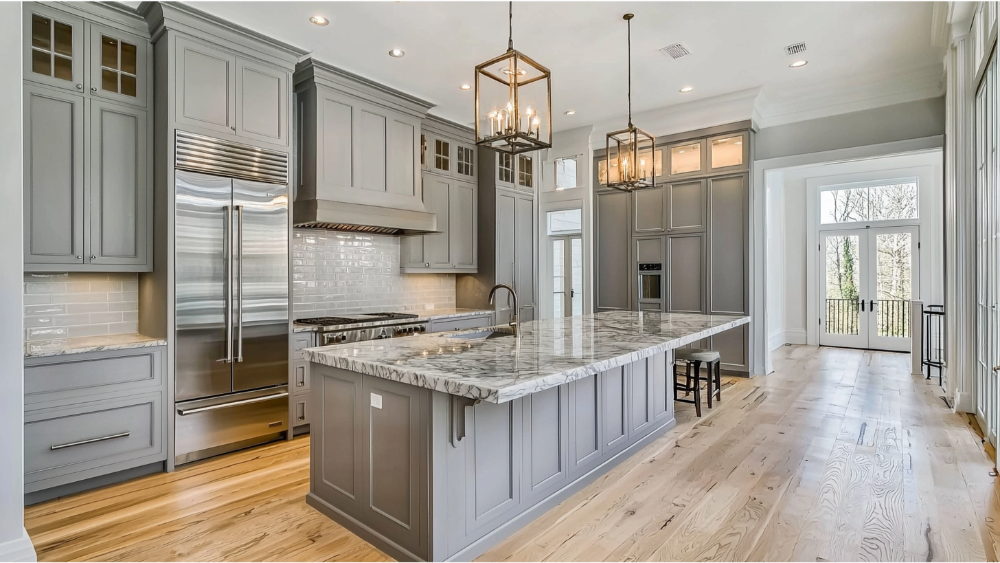
Use the Island to Anchor the Space

A kitchen island in a contrasting color creates a visual break and helps define the cooking and entertaining zones. Consider using bold colors like navy, forest green or even a rich eggplant if your surrounding cabinetry is more neutral.

Bar Stools Can Tie the Palette Together

Bar stools are a simple design opportunity. Choose styles that match the island—black metal, natural wood or upholstered seating—and you’ll naturally bridge the two cabinetry tones.

Think in Terms of Storage and Zones

Two-tone cabinetry can help define functionality. For example, use one color for the prep and cooking zones and a second for pantry or coffee station cabinets. This not only adds contrast but helps organize the room visually and practically.
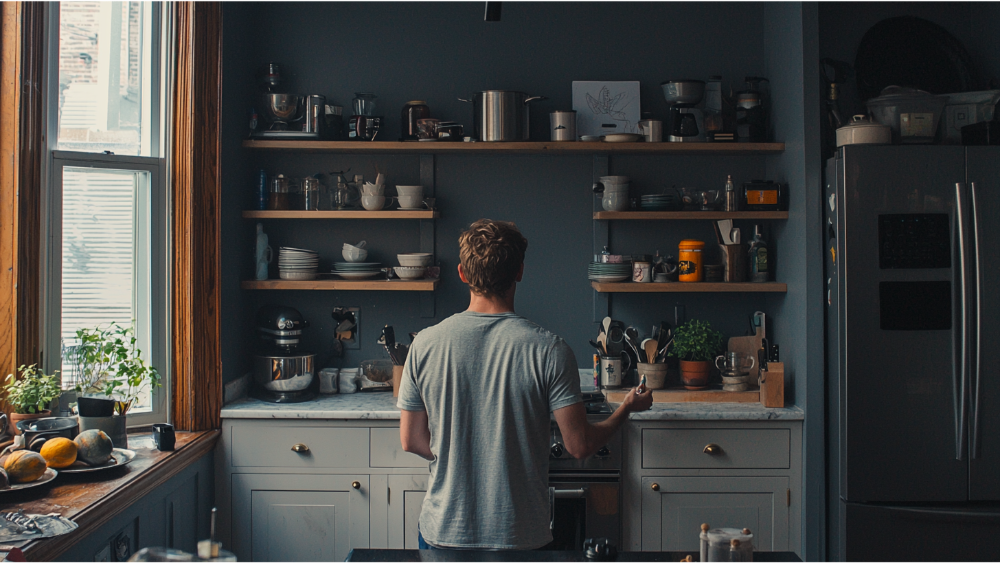
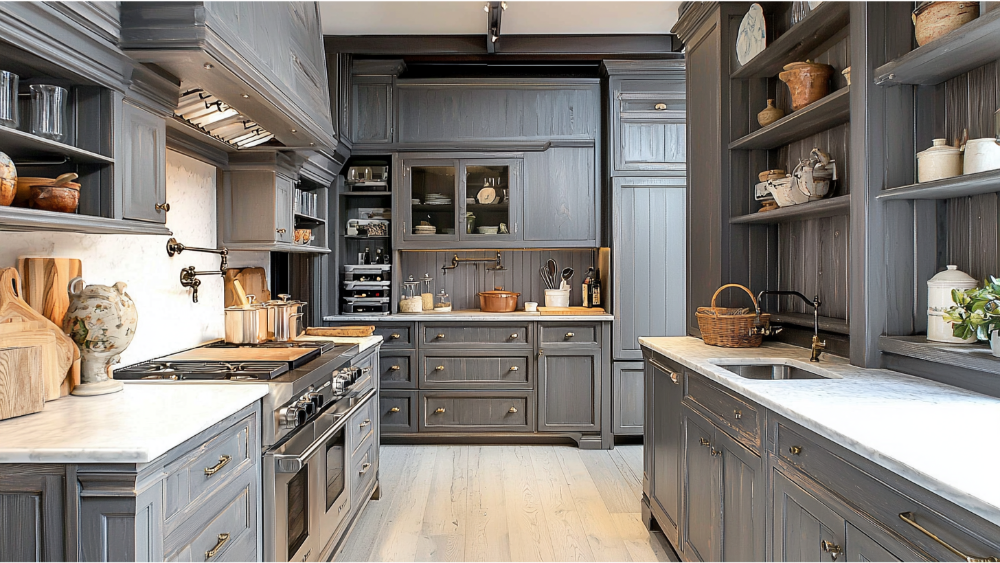
a two tone kitchen design with white and blue kitchen cabinets

Open shelving is on the rise especially when paired with two-tone cabinetry. When used instead of upper cabinets, open shelves offer a break from bulkier storage and allow you to display beautiful dishware or decorative accents.

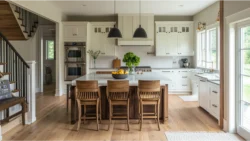
Open Shelving with White Uppers

Use open shelving in a white kitchen to maintain the bright open feel. Floating white oak shelves are popular—they warm up a monochromatic kitchen and look great with darker base cabinets.

Adding Drama with Contrast and Texture

Want to add drama without overwhelming the space? Use natural textures like wood tones or rattan in shelving, lighting and bar stools. These layered details work with both cool and warm cabinetry shades.

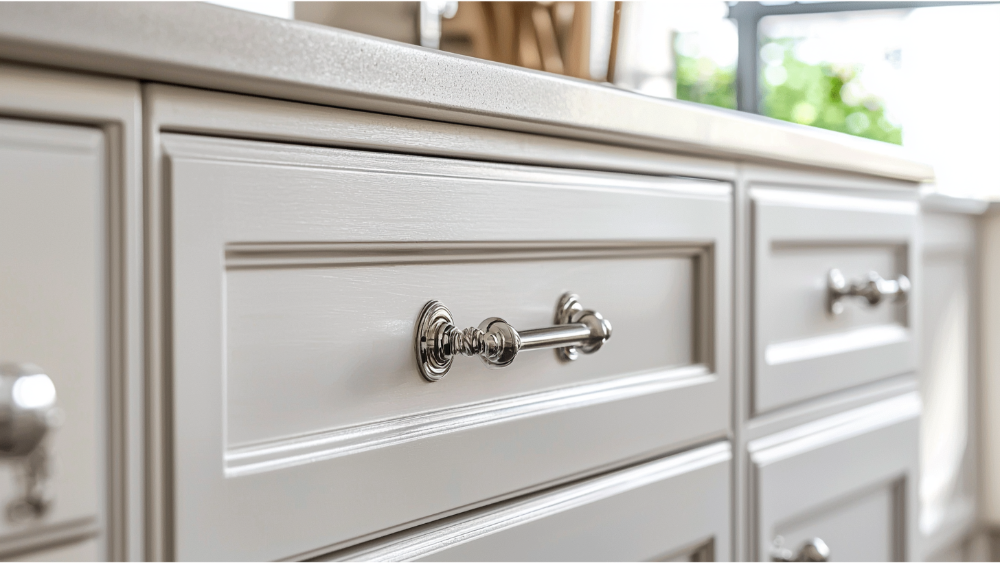
Clean Lines and Minimal Hardware

In modern kitchens clean lines and minimal hardware make two-tone design more sophisticated. Handleless or integrated pulls can simplify the cabinetry and keep the focus on the color story.

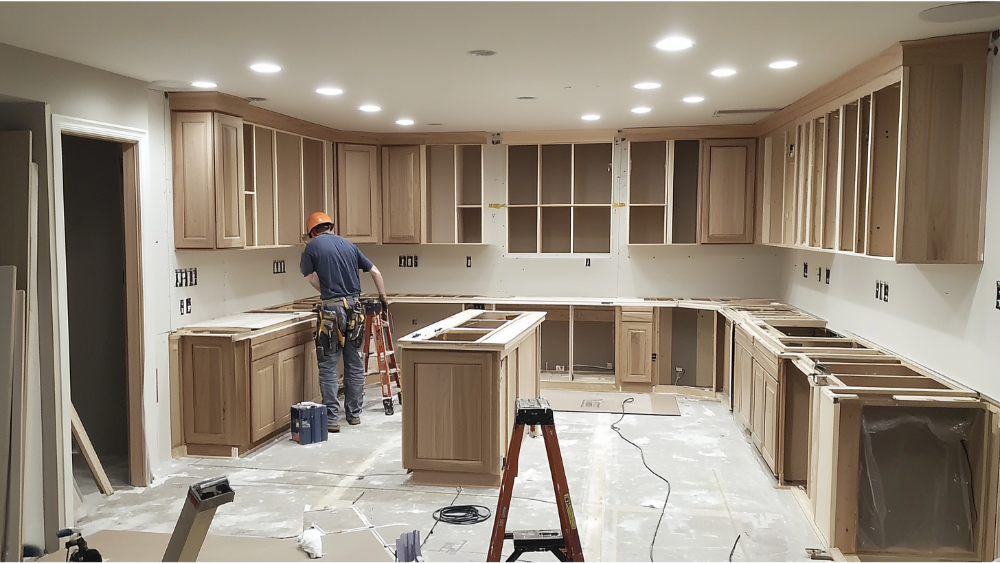
Real-Life Examples: Two-Tone Designs by America’s Advantage Remodeling

From black and white kitchens to white oak and sage green kitchens our team has remodeled hundreds of Northern California homes using the two-tone technique.

Browse our kitchen remodeling gallery to see different colors, layouts and materials. Whether it’s a white kitchen with a navy island or a modern kitchen with matte black and walnut finishes, we have plenty of ideas to inspire your project.

Expanding on the Two-Tone Cabinetry Across the Entire Kitchen

One of the benefits of two-tone cabinetry is how it transforms the entire kitchen. Whether you have a small or large layout or an open-concept design the use of two different tones across the cabinetry can define zones, guide movement and enhance the architectural character of the space

In many homes cabinetry isn’t limited to the perimeter and island. You’ll find tall pantry cabinets, built-in storage towers or appliance garages—all opportunities to add contrast and continuity with color and finish. Adding a contrasting finish or shade to specific doors—like those covering tall pantry cabinets—can be an accent without overwhelming the space.

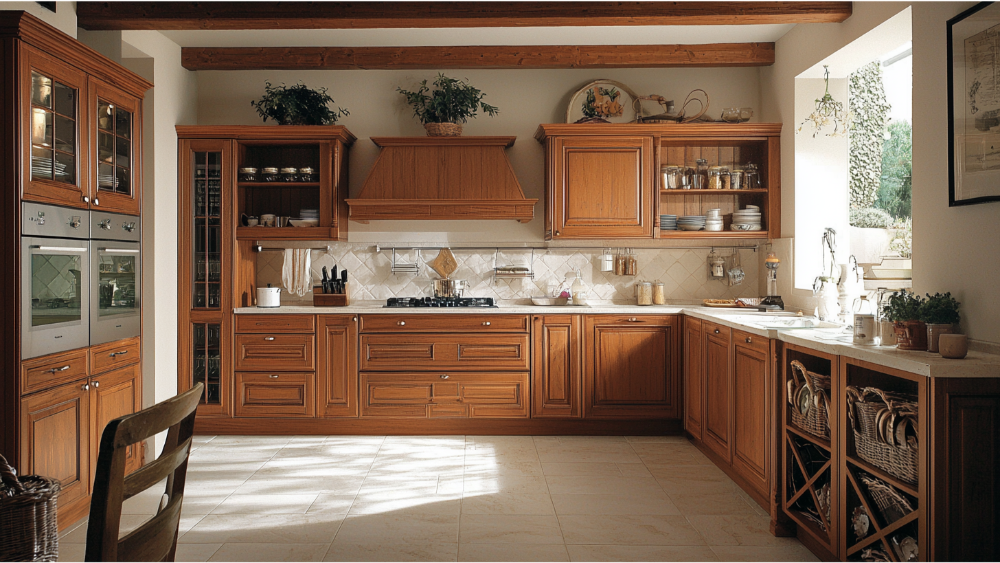
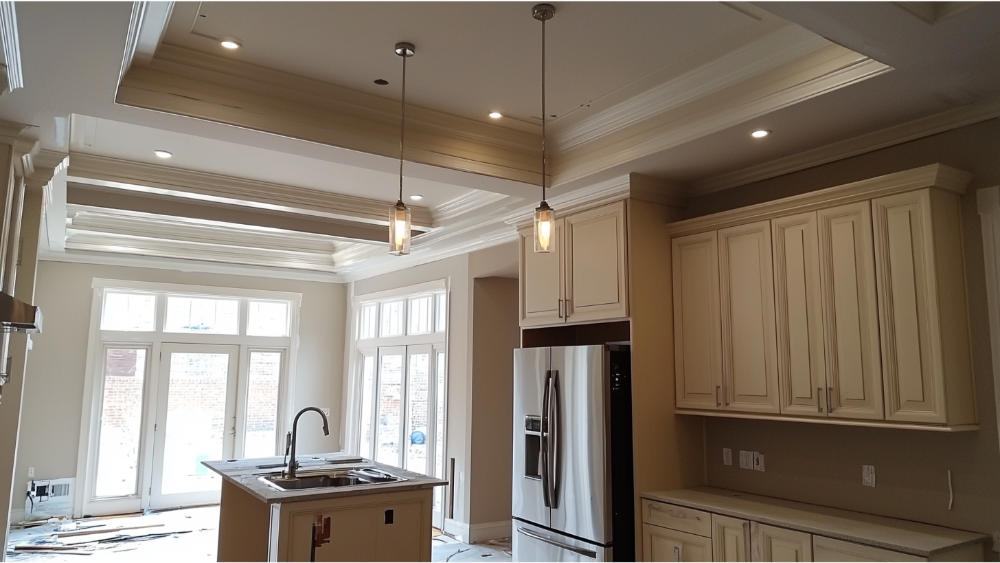
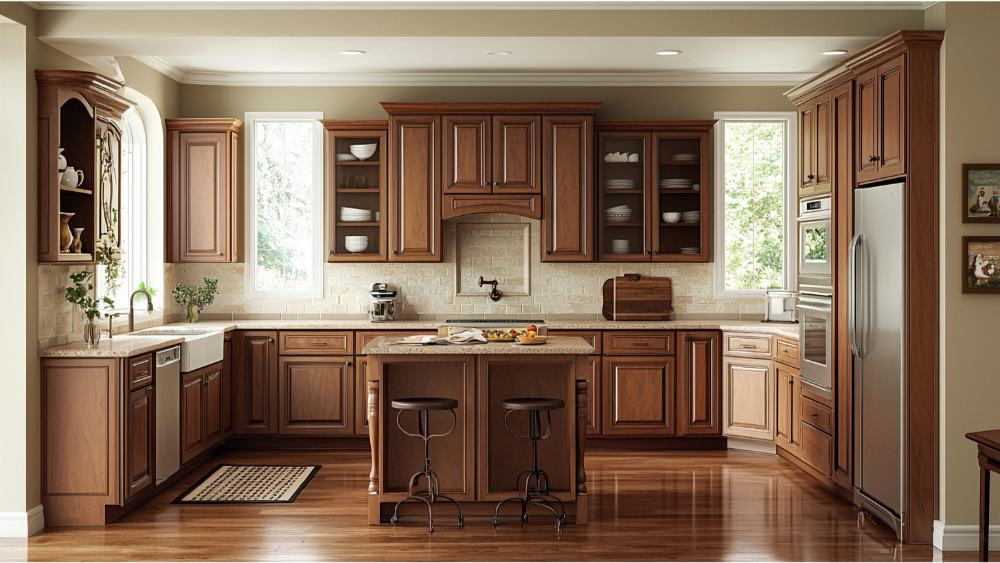
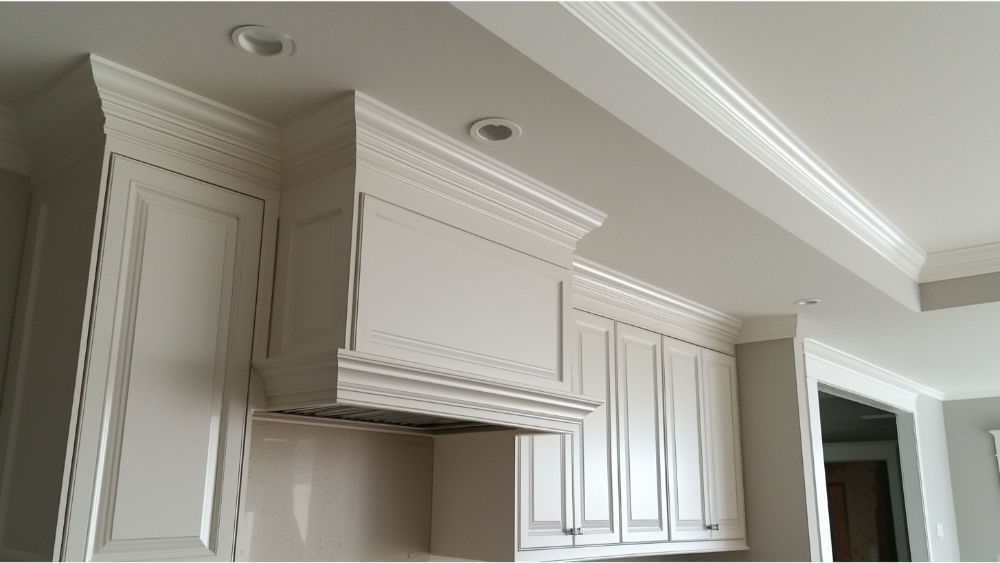
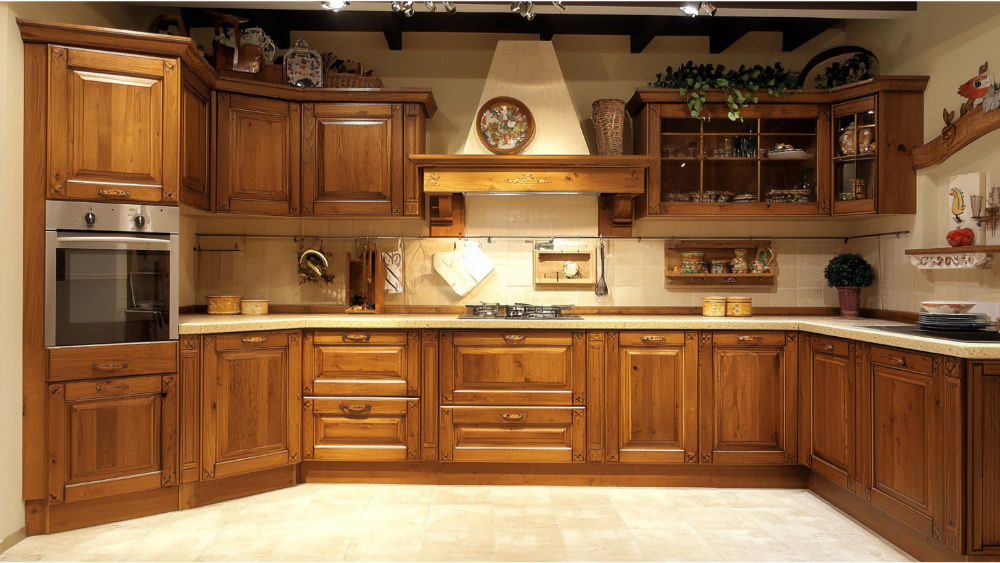
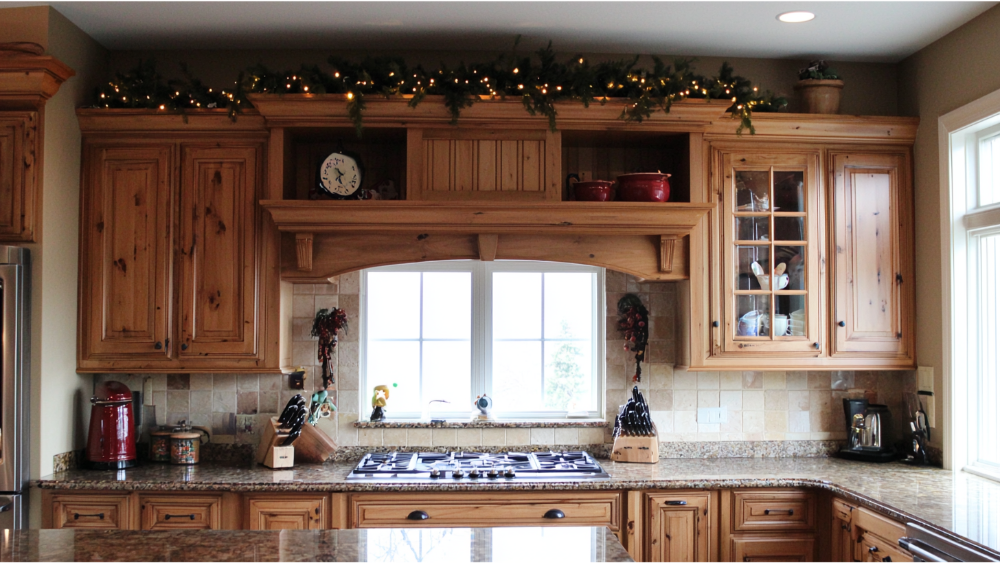
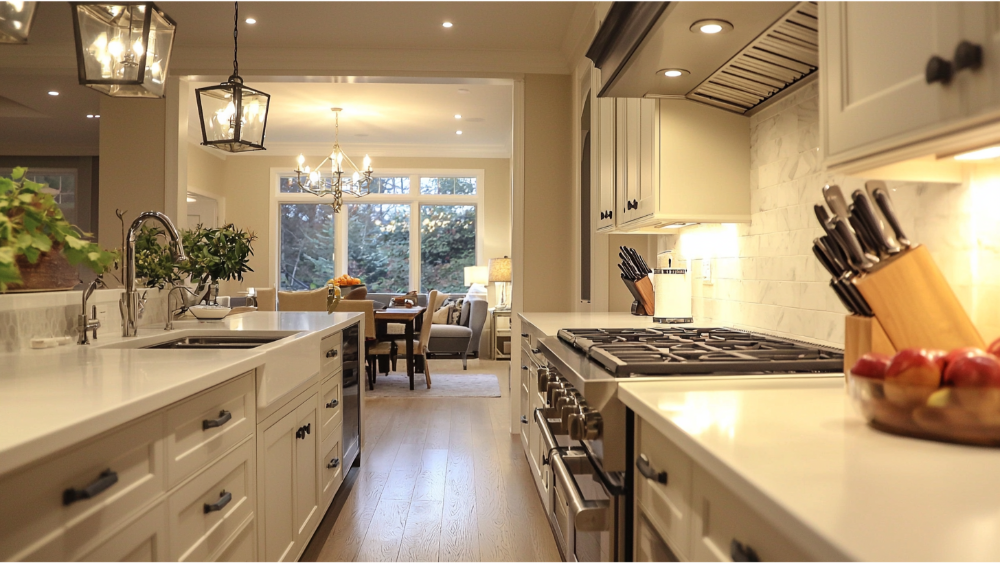
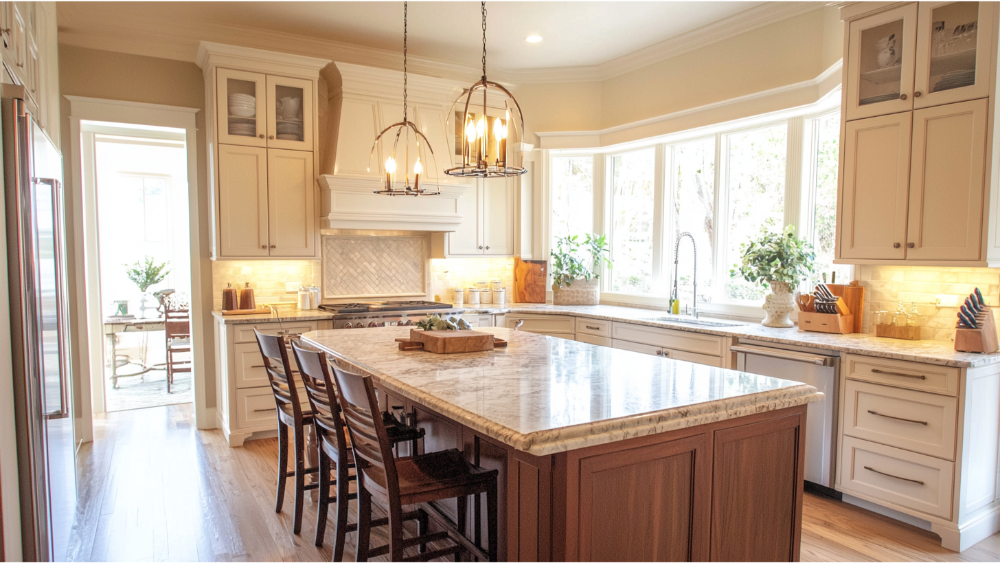
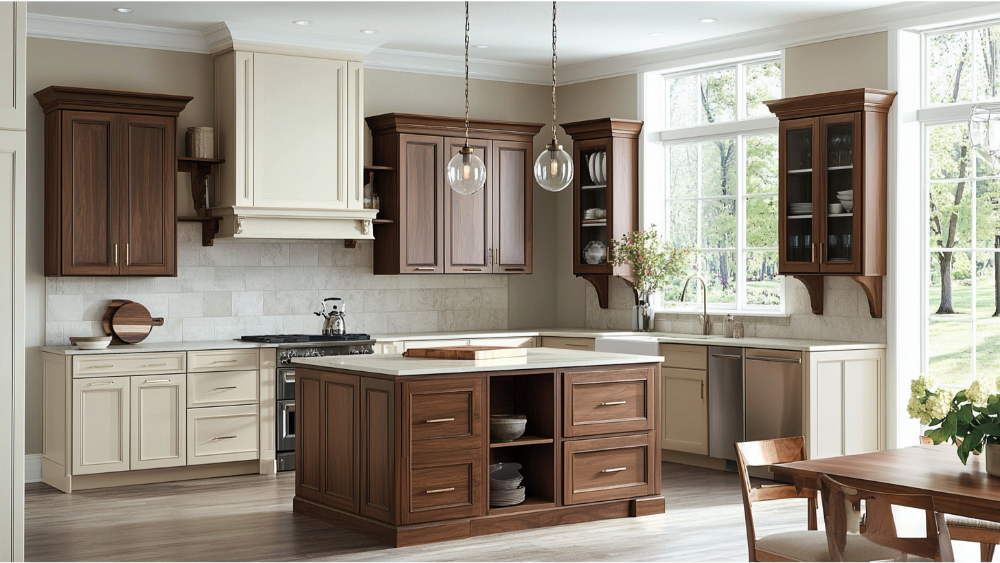
White Cabinets are Still King in Traditional and Transitional Designs

While darker tones and bold color combinations are becoming more popular white cabinets are still the top choice in modern and traditional kitchen designs. Their clean look, ability to reflect light and visual neutrality make them a safe and stylish choice for any remodel. When paired with darker bases or rich wood tones white cabinets add dimension to the space while maintaining the timeless feel. A perfect match.

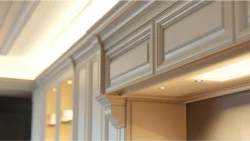
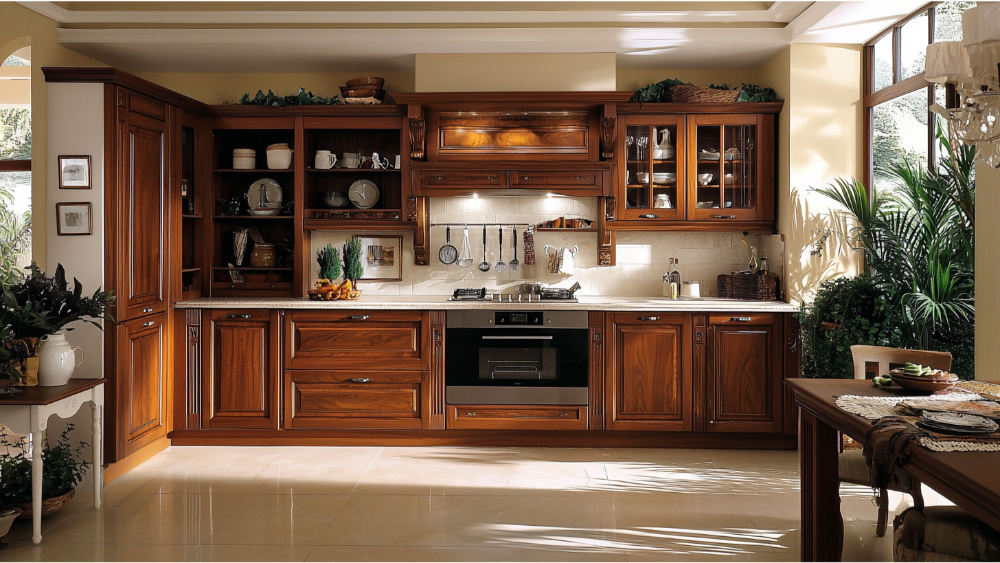
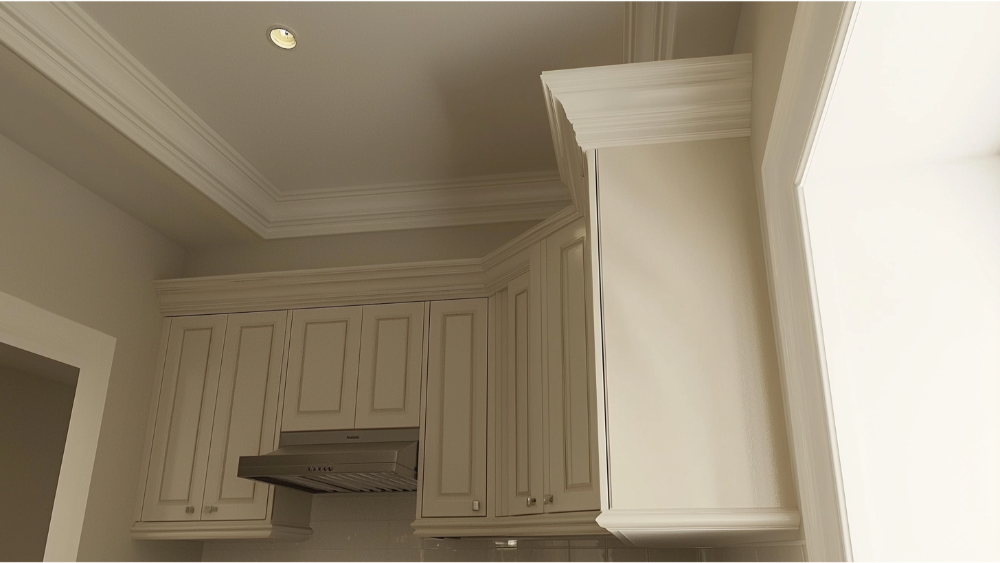
In a traditional kitchen combining white cabinets with soft cream or beige walls or detailed crown molding can create a space that feels both elegant and approachable. Add in a contrasting island or glass-paneled upper doors for visual interest and display potential. A classic pairing.

Accent Walls and Focal Points: More Ways to Use Color Creatively

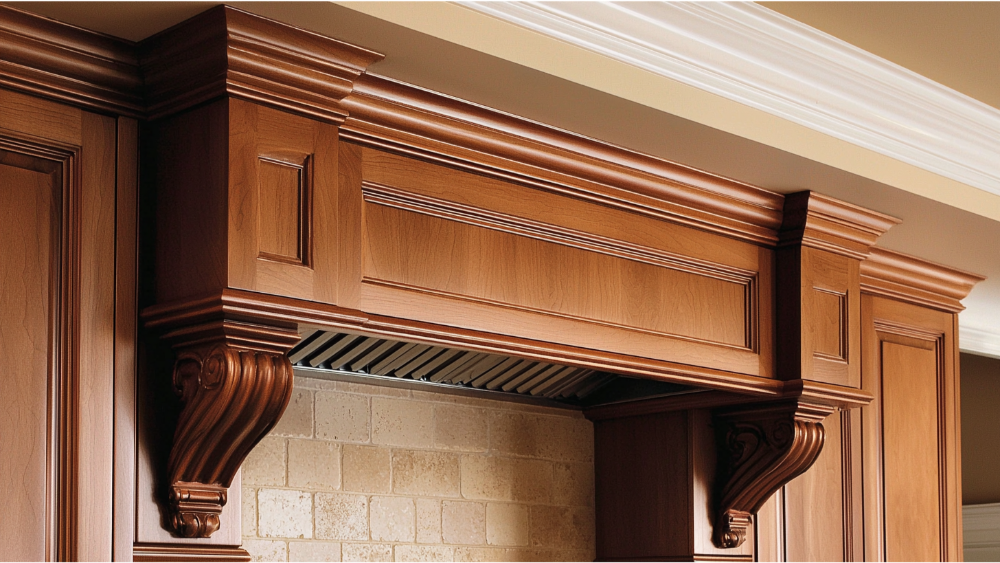
The contrast in a two-tone kitchen isn’t limited to the cabinets themselves. Homeowners in 2025 are pairing their cabinetry choices with other bold design elements—like a painted accent wall or decorative tile. These elements add contrast and become a visual focal point in the kitchen. Whether you’re showcasing a range hood, framing a window or highlighting a shelving area an accent wall adds to the rhythm of the room and ties together all the cabinetry colors.

Why Two-Tone Kitchens are a Versatile Favorite

two tone kitchen cabinets in brown and light gray

Perhaps the biggest benefit of two-tone kitchens is how versatile they are. You can go bold with contrast or stay subtle with tone-on-tone variations.

It also offers flexibility down the road. If you ever want to refresh your look you can paint or reface just the upper or lower cabinets—or even change the doors on a few key elements, making it a contemporary kitchen. The whole room will feel new again without redoing the entire kitchen

Should I Choose Two-Tone Cabinets for My Remodel?

Yes—if you want a fresh current design that still feels timeless. Two-tone cabinetry is perfect for those who want personality and contrast without sacrificing cohesion.

It’s Flexible, Smart and Memorable

Whether you love minimalist whites or crave high contrast two-tone styles can be customized to your taste. Use darker cabinetry where wear-and-tear is most common and lighter shades to keep the space feeling open and inviting.

Two-Tone Kitchen Cabinet FAQs

White uppers and darker lower cabinetry—especially deep blue, charcoal or black—remain the go-to pairing in 2025. It’s a classic yet modern look that fits many home styles.

Do I have to use drastically different colors?

Not at all. You can achieve a beautiful effect with subtle variation between two shades in the same family. This often creates a softer more cohesive look.

Can I reface my existing cabinets for a two-tone look?

Yes. Cabinet refacing is a cost-effective way to achieve a two-tone look without full replacement. You can choose new finishes or veneers for upper and lower cabinets separately.

Will this trend last or go out of style?

Two-tone kitchens are timeless—especially when done in timeless tones. Focus on quality materials, balanced contrast and a layout that works for your lifestyle.

Can I have open shelving with two-tone cabinets?

Yes. Open shelving can be a visual bridge between your two cabinet tones and looks especially beautiful in white oak or other natural wood finishes.

Let’s Design a Kitchen That’s You

At America’s Advantage Remodeling we bring years of kitchen design expertise to every project. From helping you choose the right two colors to balancing tones across cabinets, islands and shelving our team is here to guide you to a cohesive look that’s beautiful, functional and custom.

Contact us

Schedule a free consultation and get started today.

The Cost To Replace Kitchen Cabinets And Countertops

Опубликовано: March 12, 2025 в 6:10 pm

Автор:

Категории: Kitchen

Тэги: ,,

Renovating a kitchen by replacing cabinets and countertops can dramatically transform the space, increasing both its functionality and aesthetic appeal. However, it’s important to understand the costs involved to plan your budget effectively. From material choices to labor expenses, several factors influence the overall cost of this type of upgrade.

Cost Breakdown for Countertop Costs

Laminate Countertops

Laminate countertops are one of the most affordable options, making them a popular choice for budget-conscious renovations. Prices typically range from $10 to $40 per square foot, depending on the brand and quality. They come in a variety of colors and patterns, mimicking more expensive materials like stone or wood. While they might not be as durable as other materials, laminate countertops are easy to install and maintain.

Marble Countertops

Marble countertops are a luxurious choice, with costs ranging between $40 and $100+ per square foot, based on the type and rarity of the marble. This natural stone offers unparalleled beauty with unique veining patterns, adding elegance to any kitchen. However, marble requires regular sealing and maintenance to prevent staining and scratches. Its high cost and care needs make it ideal for those willing to invest in a premium aesthetic.

Granite Countertops

Granite countertops typically cost between $35 and $75 per square foot, providing a balance between durability and visual appeal. They are highly resistant to heat and scratches, making them a practical choice for busy kitchens. With numerous colors and patterns available, granite is a versatile option that works well with both stock cabinets and semi-custom cabinets. Like marble, granite needs sealing to maintain its longevity.

Quartz Countertops

Quartz countertops offer a blend of affordability and performance, with prices ranging from $50 to $150 per square foot. Unlike natural stones, quartz is engineered, which ensures consistency in color and design. It is non-porous, making it resistant to staining and easier to clean. Quartz is an excellent choice for those upgrading kitchen spaces with semi-custom cabinets and looking for a durable yet stylish surface.

Butcher Block Countertops

Butcher block countertops are a warm and rustic option, with costs typically ranging from $30 to $100 per square foot, depending on the type of wood and finish. They add a natural charm to any kitchen remodel and are excellent for those looking for eco-friendly countertop materials. While they do require regular sealing to prevent water damage and scratches, they can be sanded and refinished, making them a long-lasting option for those replacing their kitchen countertop. These countertops pair especially well with farmhouse or traditional kitchen designs.

Cost Breakdown for Cabinet Costs

A nice white kitchen remodel

Stock Cabinets

Stock cabinets are the most budget-friendly option, with prices ranging from $60 to $200 per linear foot. These cabinets are pre-manufactured and available in standard sizes and designs, making them an excellent choice for those seeking quick kitchen cabinet installation. While they offer limited customization, they come in a variety of materials, including laminate or engineered wood, and are easy to integrate into most kitchen styles. Stock cabinets are best for cost-conscious projects where functionality and affordability are top priorities.

Semi-Custom Cabinets

Semi-custom cabinets strike a balance between affordability and personalization, costing between $100 and $650 per linear foot. These cabinets allow for slight modifications in dimensions, finishes, and other design details, providing more flexibility than stock cabinets. Available in various materials, including solid wood and engineered wood, they cater to a wide range of aesthetic preferences and budgets. Semi-custom cabinets are ideal for those looking to elevate their kitchen design without committing to the higher costs of fully custom cabinets.

Custom Cabinets

Custom cabinets are the ultimate option for homeowners looking for complete design freedom, with costs ranging from $500 to $1,200 or more per linear foot. These cabinets are built to order, allowing you to choose every detail, from size and layout to material and finish. Solid wood is a common choice for custom cabinetry due to its aesthetic and durability, but other materials like metal or glass can also be used for a unique look. While more expensive, custom cabinets offer unmatched quality and craftsmanship, making them a worthy investment for a truly bespoke kitchen.

Solid Wood Cabinets

Solid wood cabinets are a premium option due to their durability and timeless aesthetic, with prices typically starting at $250 per linear foot. The type of wood significantly impacts the cost, with popular choices like oak, maple, and cherry influencing the price range. Solid wood cabinets are highly durable and can be refinished, which makes them an excellent long-term investment. Their natural beauty enhances any kitchen, whether combined with new cabinets or updated countertops.

Refaced Cabinets

Refacing cabinets is a more affordable alternative to replacing them entirely, with costs ranging from $4,000 to $9,000 for an average kitchen. This option involves replacing the doors, drawer fronts, and hardware while leaving the existing cabinet boxes in place. Refacing is perfect for those with structurally sound cabinets who want a refreshed look at a fraction of the cost of new cabinets. It is a cost-effective way to enhance aesthetics without the need for a complete kitchen cabinet installation.

Factors Affecting Cost for Cabinets and Countertops

A nice kitchen

Material Selection

The type of material chosen significantly impacts the cost of both cabinets and countertops. Premium countertop materials like marble, granite, and quartz tend to be more expensive, while laminate or engineered wood offers more budget-friendly alternatives. Similarly, cabinets made from solid wood or custom materials will drive up costs compared to stock or semi-custom options.

Labor Costs

Labor is a crucial factor that influences the overall cost of replacing kitchen countertops or installing new cabinets. Skilled labor for installing premium countertop materials or custom cabinetry demands higher fees due to the expertise required. Additionally, complex layouts or unique designs may further increase labor costs.

Size and Dimensions

The size of the kitchen and the dimensions of the cabinets and countertops significantly affect the final price. Larger kitchens require more material and labor, which directly increases expenses. For example, replacing kitchen countertops in a spacious kitchen may involve higher costs compared to a smaller one.

Customization Options

Customizing kitchen cabinets or countertops, such as adding intricate designs, special finishes, or unique shapes, raises expenses. Fully custom cabinets or countertops allow you to tailor everything to your preferences but come at a premium cost. Opting for stock or semi-custom options can help keep customization charges lower.

Installation Complexity

The complexity of the installation process also plays a role in determining the cost. Countertops made of delicate or heavy materials, like marble or granite, require careful handling and professional expertise, which can add to labor costs. Similarly, custom cabinet installations with unique layouts or features may demand additional time and effort.

Maintenance and Longevity

The long-term maintenance requirements of the materials can indirectly affect their overall cost. For example, premium countertop materials like marble and butcher block require sealing and care, adding to ongoing expenses. On the other hand, materials like quartz or engineered wood are low-maintenance, making them a more cost-effective choice in the long run.

Tips to Save for Cabinet and Countertop Installation

Explore Semi-Custom Cabinet Offers

Semi-custom cabinet options provide a balance between affordability and style. Look for promotions or discounts on semi-custom cabinets from retailers, as they often run seasonal sales or special offers. By capitalizing on these deals, you can achieve a personalized look for your kitchen without breaking the budget.

Refinish or Replace Cabinet Doors Only

Instead of completely replacing your cabinets, consider refinishing or replacing just the cabinet doors for a refreshed appearance. This approach is significantly more affordable and allows you to update the style while keeping the underlying cabinet structure intact. It’s a cost-effective way to elevate your kitchen’s look without a full renovation.

Take a DIY Approach to Install Kitchen Cabinets

If you’re handy and comfortable with tools, consider installing kitchen cabinets yourself to save on labor costs. Many manufacturers provide easy-to-follow installation guides for their products. Tackling the installation as a DIY project can reduce expenses significantly while giving you the satisfaction of contributing to your kitchen redesign.

Plan Ahead for Sales and Discounts

Timing your purchase with annual sales or special promotions can lead to substantial savings on both cabinets and countertops. Keep an eye out for clearance sales or end-of-season discounts on materials. By planning ahead, you can secure high-quality options at more affordable prices.

Opt for Cost-Friendly Countertop Materials

While premium materials like granite or marble are stunning, alternatives like laminate or engineered stone can be just as stylish at a fraction of the cost. These materials are durable, require less maintenance, and offer a wide range of colors and patterns. Carefully selecting cost-effective countertop materials can reduce your overall renovation expenses.

Frequently Asked Cost to Replace Kitchen Cabinets and Countertops Questions

a nice small kitchen

What is a Realistic Budget for a Kitchen Remodel?

A realistic budget for a kitchen remodel typically ranges from $10,000 to $50,000, depending on the size of the space, the materials used, and the extent of the renovation. Smaller-scale updates, such as refacing cabinets and replacing laminate countertops, can keep costs on the lower end. However, incorporating custom cabinetry, premium countertop materials, and professional labor will place the remodel on the higher end of the budget spectrum.

What is the Most Expensive Part of a Kitchen Remodel?

Cabinets are often the most expensive part of a kitchen remodel, typically accounting for 30% to 40% of the total budget. Custom cabinetry and high-quality materials significantly drive up costs, especially when paired with intricate designs or finishes. Countertops made of premium materials like quartz or marble can also be a substantial expense, particularly in larger kitchens.

What Makes a Kitchen Look Cheap?

A kitchen can look cheap when low-quality materials, such as peeling laminate countertops or particleboard cabinets, are used. Poor lighting, outdated fixtures, and mismatched hardware also contribute to an unpolished and inexpensive appearance. Additionally, cluttered countertops and lack of cohesive design can make the space look unrefined.

Conclusion

Replacing kitchen cabinets and countertops is a significant investment, but with careful planning and informed choices, it is possible to create a stylish and functional space within your budget. By considering cost-saving tips, such as exploring semi-custom options, opting for alternative materials, and timing purchases with sales, you can achieve a remodeled kitchen that meets your needs without overspending. Prioritize quality materials and professional installation where necessary to ensure long-term durability and satisfaction. Whether you’re aiming for a minor update or a complete transformation, thoughtful decisions will help you create a kitchen you’ll enjoy for years to come.

Should You Install Tile After or Before Kitchen Cabinets? Professional Advice

Опубликовано: January 2, 2025 в 7:47 pm

Автор:

Категории: Kitchen

Тэги: ,,

When renovating a kitchen, one important decision involves the timing of installing tile in relation to the cabinets. This choice can impact the overall look and functionality of the space, as well as the installation process. Understanding the pros and cons of each approach can help ensure the best outcome for your kitchen project.

Installing Tile Before Kitchen Cabinets

Pros:

Uniform Look

Installing the tile floor underneath the cabinets results in a seamless, uniform appearance throughout the kitchen, with no noticeable gaps or transitions. This method creates a polished, professional look that enhances the finished floor. It also ensures that the flooring remains consistent no matter how your layout or cabinet arrangement changes over time. A uniform floor can also help increase the resale value of your home by giving it a more cohesive aesthetic.

Flexibility for Renovations

With the tile underneath the cabinets, future renovations are easier. You can replace floor cabinets without worrying about matching or patching the ceramic tile. This added flexibility can save time and money in the long run, as you won’t need to redo the floor during a cabinet update. It also allows for easier adjustments if you ever decide to rearrange the layout of your kitchen.

Watertight Seal

Placing the tile floor first offers better protection against spills and water damage. The tile installation creates a barrier that prevents water from seeping into the subfloor. This is especially important in kitchens, where water and spills are common. A properly sealed floor reduces the risk of mold growth and structural damage, making it a more durable and long-lasting solution.

Cons:

Higher Costs

Installing the ceramic tile under the cabinets requires more materials and labor, as the tile floor will cover areas that are not visible. This increases the upfront cost of the project. While this investment adds flexibility and durability, it may not be necessary if you’re certain the cabinets will remain in place long-term. Homeowners working within a tight budget might find the additional expense difficult to justify.

Time-Intensive

Laying tile underneath the floor cabinets before you install cabinets takes more time, which could delay the overall renovation timeline. This extra step requires careful planning and coordination to ensure the cabinets fit perfectly afterward. For those on a tight schedule, this approach may not be ideal, as it can significantly extend the duration of the project.

Installing Tile After Kitchen Cabinets

A man installing tile flooring in his kitchen

Pros:

Cost-Effective

Tiling only the exposed areas of the kitchen floor reduces material and labor costs, making this method a more budget-friendly option. By focusing on visible areas, you save on purchasing unnecessary tiles and can allocate your budget to other aspects of the renovation. This approach is ideal for those working within tight financial constraints.

Reduced Risk of Damage

Installing the ceramic tile after the floor cabinets minimizes the chance of damaging the tile floor during the cabinet installation process. This is especially helpful on busy renovation sites. Heavy cabinetry or movement of tools during installation can chip or crack tiles, so avoiding tiling beneath cabinets adds an extra layer of protection. It also reduces the likelihood of needing to replace damaged tiles later.

Efficient Installation

Since there’s less area to cover, the tile installation process is faster when you avoid tiling beneath the cabinets. This saves valuable time for contractors and homeowners alike, allowing renovations to be completed more quickly. It also means less disruption in your home, which is particularly beneficial if you’re living in the space during the renovation.

Cons:

Uneven Transitions

This method might create slight height differences between the tile floor and the floor cabinets, resulting in less visual consistency on the finished floor. These transitions can sometimes be noticeable in areas like exposed cabinet edges or kickboards. Over time, this unevenness might also affect how certain appliances or furniture sit on the floor.

Limited Renovation Options

If you remove or replace the floor cabinets in the future, untiled areas may be exposed, requiring patchwork or additional tile installation to match the rest of the floor. Matching older tiles with new ones can be challenging if the original design or material is no longer available. This limitation might lead to extra costs and delays during future renovations.

Final Recommendation

Installing the tile floor before the kitchen cabinets is the better choice for most projects. While it requires more materials and upfront costs, the benefits include a clean, uniform finished floor and easier future renovations. The tile underneath the cabinets ensures that the ceramic tile installation is watertight and visually seamless. For a long-term solution that prioritizes durability and aesthetics, tiling before installing cabinets is the ideal approach.

Factors to Consider for Tiling BEFORE Kitchen Cabinets

Material Type

When installing porcelain tile under the base cabinets, ensure it is durable enough to withstand the weight of the cabinetry. Porcelain tile is a long-lasting and resilient choice that can handle heavy loads without cracking. It’s also important to select a consistent style and color since the tile will cover the entire floor, even under unseen areas. Consider whether a concrete slab or cement board underlayment is required to provide additional structural support. Proper preparation ensures a level surface for tile install, extending the longevity of the entire floor.

Installation Process

Laying tile before installing new cabinets requires precise measurements to ensure cabinetry fits perfectly over the tiled surface. The tile install should account for adjustments due to expansion and contraction, which are especially critical when working with materials like porcelain tile. Using a proper backer board or cement board can help stabilize the tiles and prevent issues like cracking over time. During installation, pay attention to creating a seamless, watertight surface to protect the subfloor from spills. It’s a longer process, but one that guarantees a flawless finish.

Future Renovations

Tiling the entire floor before placing base cabinets provides flexibility for future remodeling. If you decide to replace or move cabinets later, the consistent flooring won’t require patchwork or matching outdated porcelain tiles. This is particularly important if the existing tile design or size is discontinued in the future. Renovating over a complete tile surface ensures a smooth process without additional expenses. For long-term convenience, investing in a full-floor tile install is worthwhile.

Factors to Consider for Tiling AFTER Kitchen Cabinets

A man installing tile on his kitchen floor

Budget Constraints

If you’re managing a tight renovation budget, tiling only the visible areas of the kitchen floor is more economical. This approach reduces the cost of materials, as you won’t need to purchase tiles for areas hidden under base cabinets. Homeowners can also save on labor costs, as the tile install area is smaller and requires less time to complete. Choosing this method allows you to allocate funds to other upgrades, such as higher-end new cabinets or countertops. It’s a practical way to achieve a functional kitchen without exceeding your financial limits.

Risk of Damage

Avoiding tiling under the base cabinets reduces the chance of damaging porcelain tiles during their installation. Heavy tools, movement of cabinets, and other equipment can easily chip or crack tiles, leading to additional repairs or replacements. By focusing on tiled areas that are not under cabinets, you lower the risk of costly mishaps during renovations. Consider using protective coverings for tiled areas as further reinforcement if other work is ongoing in the kitchen. An efficient approach here can keep the entire floor in pristine condition.

Appearance and Consistency

Tiling after cabinets can lead to minor differences in the floor’s height or alignment. Situations such as uneven transitions between the tile and surrounding surfaces may detract from the seamless look of the room. If you opt for this method, careful planning is needed to avoid noticeable gaps or edges around base cabinets and kickboards. Additionally, limited tiling may make the floor appear less cohesive if future modifications expose untiled areas. Ensure the porcelain tile design complements the visible layout for a polished appearance in the finished kitchen.

Frequently Asked Should You Install Tile After or Before Kitchen Cabinets Questions

A beautiful tile kitchen floor

Is it Better to Install Tile Before Cabinets?

Installing tile before cabinets is generally the preferred method for most kitchen renovation projects. This approach ensures a seamless and uniform flooring appearance, as the tile will extend throughout the entire space, including under the cabinets. Such a layout not only enhances the overall aesthetic but also prevents the need for future patchwork if you decide to update or relocate cabinets later on. Furthermore, tiling before cabinet installation creates a watertight barrier, reducing the risk of damage to the subfloor from spills or leaks.

While tiling before cabinets may require more materials and labor, leading to higher upfront costs, it also adds value by providing flexibility for future renovations. This method eliminates the challenges of matching old tiles when replacements are needed and ensures that appliances and furniture sit evenly on the new floor. If you’re planning to find cabinets for your remodel, this approach ensures a polished and long-lasting look. For long-term durability, functionality, and a polished finish, installing tile before cabinets is a wise investment for any kitchen remodeling project.

Should You Install Backsplash Before or After Cabinets?

The decision to install backsplash before or after cabinets largely depends on factors such as whether you’re planning to replace the cabinets, your personal preference, and the overall design timeline. Installing the backsplash before cabinets allows for a more cohesive and seamless look, as the backsplash can extend entirely up to the wall without interruptions. This method works best if you’re starting from scratch or completely replacing the cabinets during a remodel. It also helps create a clean, continuous aesthetic that complements the entire kitchen design.

On the other hand, some homeowners prefer to install the backsplash after the cabinets are in place. This approach gives you greater precision in aligning the backsplash with the cabinetry layout and reduces the likelihood of unnecessary material waste. If you’re keeping your existing cabinets and only updating the backsplash, this order simplifies the process and allows for customization around the current layout. Ultimately, the right choice depends on your project scope and personal preference, ensuring the end result aligns with your vision for the space.

Do You Tile Under the Dishwasher?

Whether or not to tile under the dishwasher depends on your kitchen layout and renovation goals. Tiling under the dishwasher provides a consistent flooring height and ensures that the appliance can be easily slid in and out for installation, maintenance, or replacement. This approach is particularly beneficial when combined with tiling under the toe kick and base cabs, as it creates a uniform and level surface for all kitchen components.

However, if you’re working with a tight budget or want to minimize the use of tiles, you can choose to stop tiling at the base cabinet line, just in front of the dishwasher. Keep in mind that this could lead to issues with adjusting the appliance’s height or removing it in the future, especially if the untiled section is lower than the surrounding floor. For a clean and functional design, ensure that the tiled edge near the dishwasher is properly aligned with the toe kick for a polished finish.

Conclusion

Deciding whether to tile before or after installing kitchen cabinets involves careful consideration of your renovation goals, budget, and desired aesthetic. While tiling before cabinets provides a seamless and durable finish that accommodates future changes, tiling after cabinets can reduce costs and installation time. Each method has its own advantages, from achieving a polished, cohesive look to preventing unnecessary material usage. The right approach depends on your specific needs and long-term plans for the space. By understanding the pros and cons of each option and planning accordingly, you can create a functional and visually appealing kitchen that aligns with your vision and priorities.

How Much Does It Cost to Paint Kitchen Cabinets?

Опубликовано: December 17, 2024 в 9:19 pm

Автор:

Категории: Kitchen

Тэги: ,,,

Painting kitchen cabinets can be an affordable way to give your kitchen a fresh, updated look without the expense of a full renovation. The cost to paint kitchen cabinets varies depending on factors like the size of your kitchen, the type of paint you choose, and whether you hire a professional or go the DIY route. Understanding these variables can help you plan your project and stay within budget.

The Cost of Painting Cabinets

The typical cost to paint kitchen cabinets ranges from $900 to $3,800, depending on various factors such as the size of the kitchen, the type of paint, and whether you choose to hire a professional or do the work yourself. For a small to medium-sized kitchen, professionals may charge around $30 to $60 per linear foot of cabinetry.

DIY projects, on the other hand, can cost significantly less, often between $200 to $600, as you’ll mostly be paying for paint, primer, and supplies. However, hiring experts can deliver a higher-quality, longer-lasting finish, which may justify the added expense.

Factors That May Affect the Cost of Painting Kitchen Cabinets

A man painting his kitchen

Number and Size of Cabinet Doors

The total number of cabinet doors and their size play a significant role in determining the cost to paint. Larger or more intricate doors require additional time and materials, leading to higher expenses. Details such as grooves, carvings, or molding on the cabinet doors may require more preparation and precision during painting. If there are extra doors for a pantry or island, they can add significantly to the total cost of the project.

Square Footage of the Cabinets

The square footage of your cabinets directly impacts the overall cost to paint, as it determines how much paint and primer will be needed. Larger surface areas also require more time for sanding, priming, and multiple coats of paint to achieve a smooth finish.

Small kitchens generally cost less due to fewer cabinets, but larger spaces with many square feet of cabinetry may lead to higher professional or DIY expenses. Understanding the total square footage ahead of time can help you estimate more accurate costs.

Condition of Existing Cabinets

The state of your existing cabinets is another key factor when calculating the cost. Cabinets in poor condition, with peeling paint, cracks, or damage, require extra prep work such as repairs, sanding, or priming, which can increase expenses. If the cabinets are in good shape, the process is faster and less expensive. Proper preparation of existing cabinets is essential to ensure the new paint adheres well and provides a smooth, professional look.

Hiring Professional Painters vs. DIY

Whether you hire professional painters or go the DIY route significantly affects how much you’ll spend. Professional painters offer the expertise, tools, and skills to deliver a high-quality finish that is long-lasting and uniform. However, their services come with premium rates that can raise your cost to paint cabinets. DIY projects can be much cheaper, but they require ample time, effort, and at least some painting skills to achieve satisfactory results.

Type and Quality of Paint Used

The cost to paint kitchen cabinets also depends on the type and quality of paint you choose. Premium paints may have a higher price but provide better durability and scratch resistance, which is important for cabinets. Specialized finishes, like semi-gloss or high-gloss, can enhance the look but may require more coats, adding to the overall expense. It’s essential to select a paint that is specifically designed for cabinets to ensure it withstands the wear and tear of daily use.

Labor Costs and Time Requirements

Labor costs and the time required for the project are crucial factors that influence the overall cost of painting kitchen cabinets. Professional painters typically charge either a flat rate or an hourly rate for their work. The level of experience of the painter also affects pricing, as seasoned professionals may charge more for their expertise.

On average, cabinet painting projects can take several days to complete, depending on the size of the kitchen and the condition of the cabinets. For DIYers, the time commitment might be even longer, especially if unfamiliar with the process or working without additional help.

Additional Supplies and Equipment

Beyond paint and labor, additional supplies and equipment can add to the total cost of the project. For professionals, these expenses are often included in their service fees, but DIYers will need to factor in the cost of items like sandpaper, brushes, rollers, drop cloths, painter’s tape, and cleaning supplies.

For more extensive projects, tools such as sprayers or power sanders may be required, which can either be purchased or rented. Proper tools and supplies are essential to ensure the project is completed efficiently and with a high-quality finish.

Cost Comparison: Professional Painting and DIY

A man painting his kitchen cabinets

When planning your kitchen cabinet painting project, deciding between a DIY approach and hiring a professional who can paint kitchen cabinets professionally is a crucial consideration. Below are the key factors for both options to help you weigh the pros and cons and make an informed decision.

Professional Painter Factors

Quality of Finish

Hiring a professional ensures a high-quality and durable finish for your kitchen cabinet painting project. Experts have the experience, precision, and specialized techniques to achieve a uniform, smooth surface that enhances the overall look of your kitchen. They’ll also handle the proper refinishing of cabinet hardware and other intricate details, providing a polished and cohesive result.

Time Efficiency

Professionals can complete the project faster and more efficiently compared to the DIY route. Equipped with the necessary tools and a streamlined process, they can often finish a kitchen cabinet refinishing job in a few days. For busy homeowners, this speed can justify the higher cost, especially when avoiding the long hours of labor DIY would require.

Higher Initial Expense

Professional painters charge for their labor and expertise, leading to a starting cost of around $900 and potentially reaching $3,800 depending on the scope of the project. While this cost is significantly higher than the DIY approach, it includes all necessary supplies, proper tools, and additional services like cabinet hardware adjustments or repair work.

Experience and Risk Reduction

A critical advantage of hiring a professional is their expertise in handling complex tasks, such as cabinets with intricate molding or damaged surfaces. They ensure the paint adheres properly and lasts longer, reducing the risk of peeling, uneven finishes, or frequent re-dos. This reliability can save you money and effort in the long run.

DIY Cabinet Painting Factors

A nice kitchen remodeled by professionals

Cost-Effectiveness

One of the biggest advantages of a DIY kitchen cabinet painting project is the lower cost. By taking on the work yourself, you’ll primarily need to budget for materials like paint, primer, sandpaper, and brushes, which can range from $200 to $600. However, while the upfront cost savings are appealing, you’ll need to invest significant time and effort, which may offset the monetary benefits for some people.

Time Commitment and Skill

Painting kitchen cabinets is time-intensive, requiring multiple steps like cleaning, sanding, priming, and applying multiple coats of paint. If you’re inexperienced, the process can take much longer as you learn on the job. Mistakes during the project might lead to uneven finishes or require touch-ups, so a willingness to practice patience and attention to detail is essential for success.

Tools and Materials Selection

DIYers have to ensure they choose the right tools and supplies for a durable and professional look. High-quality cabinet paint and appropriate primers designed for kitchen cabinet refinishing are vital to achieving a finish that withstands daily wear and tear. Additionally, you’ll need items like painter’s tape, drop cloths, and possibly specialized tools like a spray paint sprayer if aiming for a smooth, brush-stroke-free result.

Customization and Control

With DIY, you have complete control over the final look, from choosing the paint color to deciding how to handle cabinet hardware. This level of customization allows you to align the finished product with your personal vision. However, executing this control to a high standard requires meticulous preparation and careful application techniques.

Frequently Asked How Much Does It Cost to Paint Kitchen Cabinets Questions

A nice remodeled kitchen

Is It Worth It to Have Kitchen Cabinets Professionally Painted?

Deciding whether to hire a professional to repaint kitchen cabinets ultimately depends on your budget, time, and desired outcome. When considering a kitchen upgrade, homeowners often weigh the options of painting, refacing kitchen cabinets, or opting to completely replace kitchen cabinets.

While replacing cabinets provides a brand-new look and maximum customization, it comes at a significantly higher cost compared to repainting or refacing. Painting, when done professionally, offers a cost-effective solution that refreshes your kitchen’s appearance and extends the life of your cabinets without the expense of full replacement.

Professional cabinet painting stands out for the durability and quality of the finish. Experts use high-grade tools and materials to achieve a smooth, consistent application that resists wear and tear over time. This level of craftsmanship is particularly important for cabinets that endure daily use, ensuring the results are long-lasting. Compared to DIY, a professional painter minimizes the risk of uneven coverage, peeling paint, or other imperfections, which could necessitate costly revisions later.

Hiring a professional for repainting kitchen cabinets can be a quicker and more seamless process, especially for homeowners who lack the time or experience to tackle the project themselves. For those wanting a refreshed look without the disruption of a full renovation, professional repainting is an excellent middle ground between refacing kitchen cabinets and full replacement.

How Much Can I Expect to Pay to Have My Kitchen Cabinets Painted?

The cost of having your own cabinets professionally painted can vary depending on factors such as the size of your kitchen, the complexity of the work, and the materials used. On average, a professional paint job for kitchen cabinets ranges between $900 and $3,800. For a typical kitchen, this cost takes into account labor, preparation, and the use of high-quality materials, such as acrylic paint, which is known for its durability and smooth finish.

Acrylic paint is a popular choice among professionals due to its superior adhesion and resistance to wear and tear, making it ideal for cabinets that see daily use. The price of a professional paint job also includes the expertise needed to ensure that the paint is applied evenly and lasts longer than a DIY alternative. While it’s more expensive upfront than doing the job yourself, the long-term durability and polished appearance of professionally painted cabinets often make the investment worthwhile.

What Is the Downside of Painting Cabinets?

One downside of painting cabinets is the potential for an uneven or short-lived finish if the preparation and application are not done correctly. Cabinets endure frequent use, so improper techniques or low-quality materials can result in peeling, chipping, or fading over time, necessitating costly touch-ups or a full repaint.

The process itself can be labor-intensive and time-consuming, particularly for those attempting a DIY approach without the necessary skills or tools. When improperly painted, cabinets may also negatively impact the overall aesthetic and value of your kitchen, making precision and expertise critical to achieving desirable results.

Conclusion

Multi-color cabinets

Deciding whether to paint your kitchen cabinets is a significant choice that depends on your budget, time, and expectations for the final result. Professional cabinet painting offers numerous benefits, including a high-quality, durable finish, time efficiency, and expert craftsmanship that minimizes risks and ensures long-lasting results. While the upfront cost may be higher compared to a DIY project, many homeowners find the investment worthwhile due to the polished and professional appearance it delivers.

On the other hand, a DIY approach can save money but requires a substantial time commitment and carries the risk of unsatisfactory results if not done correctly. The best option will align with your personal priorities and resources, allowing you to achieve the kitchen transformation you desire.

Kitchen Cabinet Soffit: What Are They and What Do I Do With Them?

Опубликовано: November 12, 2024 в 4:54 pm

Автор:

Категории: Kitchen

Тэги: ,,

Kitchen cabinet soffits, often considered an architectural challenge, can present unique opportunities for enhancing both the functionality and aesthetic of a kitchen. These spaces between the top of cabinets and the ceiling can sometimes lead to design dilemmas for homeowners. However, with creativity and strategic planning, soffits can be transformed into stylish features or utilized for additional storage.

What is a Kitchen Cabinet Soffit?

A kitchen cabinet soffit is a space located above the wall-mounted cabinets and below the ceiling. Often, this area is enclosed with drywall or paneling to create a more cohesive look with the rest of the kitchen. Traditionally, soffits were constructed to hide plumbing, wiring, or ductwork, providing a practical solution for concealing these essential but unsightly components.

Today, they remain a ubiquitous element in kitchen design, offering a blank canvas that can be adapted to suit a variety of styles and functions. Whether left open for display, creatively decorated, or used to house lighting, soffits have the potential to enhance the overall ambiance and utility of a kitchen space.

Reasons for Having a Soffit Above Cabinets

kitchen cabinet soffit

Concealing Structural Elements

Kitchen soffits play an important role in hiding essential structural elements such as plumbing, wiring, and ductwork. Without soffits, these components might become visible and disrupt the tidy appearance of a kitchen. Existing cabinets often leave little room to disguise these elements, making soffits an ideal solution. By covering unsightly features, soffits allow for a seamless transition between kitchen cabinets and the ceiling.

Enhanced Aesthetic Appeal

Incorporating soffits into your kitchen design provides an opportunity to enhance visual appeal by adding unique finishing touches. One popular approach is to use crown molding on the soffits to create a continuous flow from the upper cabinets to the ceiling. This technique helps to anchor the existing cabinets visually, making the room feel more cohesive and polished. The use of creative design elements within kitchen soffits can ultimately elevate the overall ambiance of the space.

Additional Storage Potential

While traditional soffits are often enclosed, they can instead be utilized as additional storage space. Open soffits above kitchen cabinets offer a place to display decorative items or store infrequently used kitchenware. Adapting the soffit to include cabinets or shelves can optimize storage, making the most of vertical space. Utilizing this area effectively can help to maintain an organized kitchen while simultaneously integrating functionality with design.

Design Ideas for Kitchen Cabinet Soffits

Kitchen cabinet soffit

Hidden Storage Shelves

Turn the empty space above your really tall cabinets into discreet, hidden storage. During a kitchen renovation, consider designing soffits with built-in shelves that blend seamlessly with the overall cabinetry. These shelves can store infrequently used items, creating a clutter-free kitchen environment. By employing this creative idea, homeowners can optimize their use of space while maintaining an elegant kitchen design.

Illuminated Display

Incorporate rope lights into your kitchen cabinet soffit to transform it into an eye-catching feature. Running the rope lights along the length of the soffit can provide a soft glow that enhances ambient lighting, contributing to kitchen renovation efforts. The illuminated space can then be used to display decorative pieces or plants, adding a personal touch. This creative idea not only highlights the design but also embraces the functionality by adding lighting.

Artful Molding Accents

Utilize the empty space in your kitchen soffits to add captivating crown molding accents. Including ornate or minimalist molding during your kitchen renovation can lend a refined finish to the space, drawing eyes upwards and adding height perception. Such creative ideas help to unify the ceiling and cabinets, making the kitchen feel more cohesive. This approach can especially benefit kitchens with high ceilings, adding character to the upper areas.

Chalkboard Panels

This creative idea provides a unique space for jotting down grocery lists, recipes, or family messages, making use of previously empty spaces. It adds a personal touch to the kitchen while remaining functional and fun, inviting interaction from family members or guests.

Decorative Tile Inlay

Transform the kitchen soffit into an artistic focal point by incorporating decorative tile inlay. Use tiles in various colors and patterns to create a mosaic or a geometric design, adding both texture and visual interest to the kitchen. This creative design idea not only enhances the aesthetic appeal but also reflects personal style, contributing to a more customized and stylish kitchen environment.

Natural Greenery

Enhance your kitchen’s ambiance by incorporating natural greenery into the taller cabinet’s soffit area. Install planters or small shelves specifically designed to hold embellishing plants or herbs above the cabinets. This creative idea brings a touch of nature indoors, improving air quality and bringing visual vibrancy and natural beauty to the kitchen. Opting for low-maintenance plants such as succulents can make this addition both beautiful and practical.

Pros of Soffits in the Kitchen

Kitchen cabinet soffit

Concealment of Structural Elements

Kitchen soffits are adept at hiding necessary yet unsightly elements like plumbing, ductwork, and wires. This ensures a clean and uncluttered look by preventing these items from being visible.

Aesthetic Enhancement

Incorporating soffits into kitchen design can enhance the overall aesthetic. With options such as crown molding and decorative elements, soffits create a seamless transition between cabinets and ceilings, adding a polished finish.

Utilization of Vertical Space

Soffits can be transformed into additional storage, providing options for open storage or closed cabinets. This can be especially useful in maximizing vertical space in smaller kitchens where more cabinets may not be feasible.

Cons of Kitchen Soffits

Kitchen cabinet soffit

Restriction of Vertical Space

One significant downside is that soffits can limit the use of vertical space, particularly if not used for storage. They can also create a feeling of confinement, particularly in kitchens with lower ceilings.

Kitchen Soffit Removal Challenges

Removing soffits to install new cabinets can be a demanding process. It often involves addressing hidden elements previously concealed, which can make kitchen soffit removal an intricate and costly task.

Potential for Dated Look

While there are many design possibilities, the traditional use of soffits can make a kitchen look dated. This is particularly true in modern designs that favor sleek, open spaces and require creative updates to remain relevant.

Frequently Asked Kitchen Cabinet Soffit Questions

Kitchen cabinet soffit

Why is There a Soffit Above My Kitchen Cabinets?

Kitchen cabinet soffits serve several practical purposes, primarily focused on enhancing functionality and improving aesthetics. Initially, soffits were introduced to mask unsightly structural components such as pipes, ducts, wiring, and other utilities that are essential but need to be hidden from view. By concealing these elements, soffits provide a tidy and organized appearance to the kitchen space.

They play a significant role in integrating the design of the room by offering a seamless transition between the cabinets and the ceiling. This can prevent an unfinished look that might arise from abrupt cabinetwork stopping short of the ceiling. Soffits can be designed to include extra storage space, providing practicality in kitchens where vertical space utilization is crucial. Consequently, soffits are a strategic design choice that balances aesthetics with essential architectural functions, making them a common feature in many kitchens.

Are Soffits Necessary in a Kitchen?

Determining whether soffits are necessary in a kitchen depends on several factors, including the kitchen’s design, architectural requirements, and storage needs. Soffits have been utilized to conceal essential structural elements like ductwork and plumbing that couldn’t feasibly be incorporated elsewhere. As such, they can be an integral component for maintaining a clean aesthetic when these elements are present.
However, in more modern kitchen designs that prioritize open and expansive spaces, soffits can seem restrictive and outdated. Without the constraints of structural elements that need concealing, eliminating soffits can provide more vertical space, offering a sleeker appearance and increased storage options through taller cabinets. The necessity of soffits should be weighed against the architectural requirements of the space and the overall design vision for the kitchen.

Can I Remove the Soffit Above Cabinets?

Removing the soffit above kitchen cabinets is a decision that hinges on several considerations. One must assess whether the soffit is concealing crucial elements such as ductwork, plumbing, or electrical wiring. If these are present, their relocation or modification will be necessary, which can add complexity and cost to the renovation project. It’s also important to consider the structural role the soffit might be playing; in some cases, it could be integral to the integrity of the building’s framework.

The removal process itself can be disruptive and may require professional expertise to ensure safety and compliance with building codes. On the design end, removing a soffit can open up the space, allowing for taller cabinets and a modern, streamlined appearance. Individuals contemplating this change should weigh the aesthetic benefits against the potential challenges and costs involved, ideally in consultation with a qualified contractor or designer.

Conclusion

Kitchen cabinet soffit

Kitchen cabinet soffits offer a blend of functionality and aesthetic appeal, serving to conceal structural elements while providing design continuity. They present a dichotomy of pros and cons that homeowners must carefully consider. Soffits can effectively hide necessary utilities and add a cohesive look to the kitchen, while also offering additional storage options. On the flip side, they can limit vertical space and potentially date the design of the space.

For those considering kitchen remodeling, understanding the specific role of soffits in the architecture can help in deciding whether to retain or remove them. Balancing practical needs with modern design trends is key to making an informed decision that enhances both the functionality and visual appeal of the kitchen.

How to Correctly Paint Kitchen Cabinets

Опубликовано: October 29, 2024 в 9:37 pm

Автор:

Категории: Kitchen

Тэги: ,,,

Painting kitchen cabinets can be a cost-effective way to breathe new life into your kitchen without the need for a full renovation. With the right preparation and technique, you can achieve a professional-looking finish. This guide will walk you through each step of the process to ensure your cabinets turn out beautifully.

Materials Needed and Why

Materials used to paint kitchen cabinets

Sandpaper (120-grit and 220-grit)

Sanding is a crucial step in preparing your cabinets for painting, as it helps to smooth out imperfections and creates a surface that the paint can easily adhere to. Start with 120-grit sandpaper to remove any existing finish and follow up with 220-grit sandpaper to achieve a finer, smooth texture ready for priming.

Screwdriver

Use a screwdriver to remove all cabinet doors and hardware, making it easier to paint each surface evenly and thoroughly.

Painter’s Tape

Use painter’s tape to protect areas around the cabinets that you don’t want to paint, such as walls, countertops, and hinges. Carefully apply the tape to create clean, sharp lines, ensuring a professional-looking finish once the paint is applied.

Drop Cloths or Plastic Sheeting

Place drop cloths or plastic sheeting on the floor and over any surfaces you want to protect from paint splatters. This will help to keep your work area clean and minimize any potential cleanup after the painting process.

Cleaning Supplies

A man standing in front of his freshly painted cabinets

Thoroughly clean the cabinets using a mild detergent or a dedicated grease remover to eliminate any dirt, grease, or residue that could affect paint adhesion. Ensuring a clean surface is essential to achieving a smooth, long-lasting finish.

Paint Brushes

Select high-quality paint brushes that are suitable for the type of paint you’re using, ensuring they will provide smooth and even coverage. Opt for angled brushes for detailing around edges and flat brushes for larger surfaces to achieve a flawless finish.

Roller and Tray

Rollers provide efficient coverage for larger cabinet surfaces, reducing streaks and ensuring a smooth, even coat of paint. Use a tray to load the roller evenly with paint, minimizing drips and achieving a consistent application.

Primer

Primer is essential for ensuring the longevity and durability of your paint job, as it helps the paint adhere better to the cabinet surfaces and provides a uniform base for the topcoat. Choose a primer that is compatible with the type of paint you intend to use, whether it be oil-based or water-based, to achieve the best results.

Paint

Choose a high-quality paint that is specifically designed for cabinetry to ensure a durable, long-lasting finish. Whether you select a latex or oil-based paint, ensure it complements your primer and provides the color and finish you desire for your kitchen cabinets.

Wood Filler

Wood filler is used to patch up any holes, dents, or scratches on your cabinets before painting, providing a smooth and even surface. Be sure to choose a filler that can be sanded and is compatible with your chosen paint for seamless and durable repair.

Caulking Gun and Caulk

A caulking gun and caulk are essential for sealing gaps and seams around your cabinets, preventing moisture from seeping in and ensuring a smooth finish. Apply caulk along edges and joints before painting to enhance durability and aesthetics, using a caulking gun for precise application.

Dust Mask and Safety Glasses

Wear a dust mask and safety glasses while sanding and painting to protect yourself from inhaling dust particles and harmful fumes. Safety gear is crucial to maintain your health and well-being throughout the painting process.

Stirrers and Paint Can Opener

Stirrers are necessary to thoroughly mix your paint, ensuring even color and consistency before application. A paint can opener makes it easy to access the paint without damaging the lid, allowing for a mess-free opening and closing throughout your project.

Tack Cloth

A tack cloth is a sticky, woven fabric used for removing fine dust and lint from surfaces after sanding. This ensures the cabinets are perfectly clean and ready for priming and painting, preventing imperfections in the final coat.

Adhesion Promoter (optional)

An adhesion promoter enhances the bond between the cabinet surface and the primer, especially useful for slick or glossy surfaces. While optional, it can significantly improve paint adherence and durability, ensuring a longer-lasting finish.

Paint Sprayer (optional)

A paint sprayer can offer a smooth, professional finish with minimal brush marks and significantly speeds up the painting process. It is especially useful for covering large surfaces and intricate cabinet details efficiently, though it requires proper masking and ventilation.

Step-by-Step Guide to Painting Kitchen Cabinets

A man painting his kitchen cabinets black

Step 1: Remove Cabinet Doors and Hardware

Start by carefully removing the cabinet doors from the existing cabinets using a screwdriver, taking care to keep track of all screws and hardware for reassembly. Labeling each door and its corresponding hardware can simplify reinstallation while ensuring each part is returned to its original position. This step allows for easier access to all surfaces of the existing cabinets, ensuring an even and thorough paint job.

Step 2: Clean Cabinet Surfaces

Thoroughly clean all the cabinet doors and cabinet frames using cleaning supplies to remove grease, dirt, and residue. A clean surface will ensure better paint adhesion and a smoother finish. Allow surfaces to dry completely before moving to the next step.

Step 3: Sand the Surfaces

Using 120-grit sandpaper, sand all the cabinet doors and frames to remove the original finish. Follow up with 220-grit sandpaper for a smoother finish. This preparation step is crucial to ensure that the primer and paint adhere properly. Don’t forget to wear a dust mask and safety glasses for protection.

Step 4: Apply Wood Filler

A man painting his kitchen cabinets gray

Inspect your cabinets for any holes, scratches, or dents. Use a wood filler to patch these imperfections and sand smooth when dry. Ensuring any blemishes are addressed will provide an even surface for painting cabinets.

Step 5: Tape Off Surrounding Areas

Protect walls, countertops, and any other areas you don’t wish to be painted by applying painter’s tape. Place drop cloths or plastic sheeting on the floor and surrounding surfaces to protect them from paint splatters.

Step 6: Prime the Cabinets

Apply a coat of primer to all the cabinet doors and frames, using the appropriate brush or roller depending on the size of the surface. Be sure to follow the primer’s drying time instructions. Using a primer compatible with your chosen latex paint is essential for a long-lasting, professional-looking finish.

Step 7: Paint the Cabinets

Apply the first coat of paint to the cabinet doors and frames using high-quality paint from your local paint store, ensuring even coverage while following the drying time guidelines. If you have the option, using a spray paint technique can provide a smoother finish, especially for detailed cabinet boxes, minimizing visible brush strokes. Allow the first coat to dry fully before applying a second coat for a rich, even color that stands out. Remember to paint cabinets in a well-ventilated area to ensure safety and optimal drying conditions.

Step 8: Reassemble the Cabinets

Carefully reattach the cabinet doors and hardware once the painted cabinets are completely dry, ensuring a precise fit and alignment. By allowing adequate drying time, you secure a durable finish that will withstand daily kitchen use. This final step brings a professionally polished look to your beautifully revamped kitchen.

Step 9: Final Touches

After reassembling, inspect the cabinets for any touch-ups that might be necessary, such as tiny paint corrections or additional caulking. Clean up any lingering dust or debris, and replace or polish the hardware if needed to enhance the overall look. Finally, consider adding soft-close hinges or liners for an added touch of luxury and functionality to your newly painted cabinets.

Common Mistakes to Avoid

When painting kitchen cabinets, it’s crucial to avoid common pitfalls that can compromise the quality of your finished project. Here are some key mistakes to watch out for:

Painting Without Sanding

Skipping the sanding step might seem like a timesaver, but it can lead to poor paint adhesion and an uneven finish. Sanding removes the old finish and creates a smooth, roughened surface that the primer and paint can adhere to effectively. Ensure that you sand all surfaces thoroughly to achieve the best results.

Skipping the Primer

Neglecting to use primer is another common mistake that can affect the durability and appearance of your cabinets. Primer acts as a bonding agent between the surface and the paint, helping it adhere better while creating an even base for color application. Without it, the paint may peel or chip over time. Always apply a quality primer suitable for your cabinet material before painting.

Not Allowing Enough Time to Dry Between Coats

Patience is key when painting cabinets, particularly when it comes to drying times between coats. Allow each coat of paint to dry completely before applying the next, adhering to the manufacturer’s recommended drying times. This ensures a smooth, durable finish that will withstand daily wear and tear.

Frequently Asked Paint Kitchen Cabinets Questions

Kitchen cabinets painted red

What Do Professional Painters Use to Paint Kitchen Cabinets?

Professional painters often rely on a specific set of tools and products to ensure a high-quality finish on kitchen cabinets. They typically use high-quality, durable latex or acrylic paints that resist chipping and are easy to clean. For detailed surfaces, professionals may utilize a spray gun for an ultra-smooth, factory-like finish, which minimizes brush strokes and provides a consistent coating.

Prior to applying paint, they use a top-notch primer chosen to suit the cabinet material, ensuring proper adhesion and a flawless surface for color application. Additionally, professional painters employ a range of brushes and rollers, depending on the details and scale of the work, along with masking tapes and drop cloths to protect surrounding areas from unwanted drips and splatters. Finally, they always prioritize safety by ensuring the work area is well-ventilated and wearing appropriate protective gear.

Should I Use a Brush or Roller to Paint Kitchen Cabinets?

Choosing between a brush and a roller for painting kitchen cabinets depends on the specific finish you desire and the efficiency you’re aiming for. Brushes are ideal for details and edges, allowing precise control in corners and around intricate moldings. They can effectively cover areas that are not accessible with a roller, especially when working with different surfaces or shapes.

On the other hand, rollers are excellent for larger, flat surfaces and can help achieve smooth, even coats with minimal effort. Using a roller reduces visible brush strokes and can significantly speed up the painting process. For the best results, many professionals recommend using a combination of both: a brush for corners and detailed work, and a small foam roller for larger, flat areas. This method allows you to take advantage of the detailed touch of a brush while achieving a smooth, uniform finish with a roller.

Do I Have to Sand Kitchen Cabinets Before Painting?

Yes, sanding kitchen cabinets before painting is a crucial step that should not be overlooked. Sanding helps to remove the existing finish, creating a smooth, roughened surface that is essential for the primer and paint to adhere effectively. This process ensures that the paint bonds properly with the cabinet material, reducing the likelihood of peeling or chipping over time.

While it may seem like an extra effort, proper sanding contributes significantly to achieving a durable and professional-looking finish. It’s particularly important if the cabinets have a glossy surface, as this requires sanding to allow the new paint to stick. Always use fine-grit sandpaper and work systematically to ensure all surfaces are adequately prepared before proceeding with primer and paint application.

Conclusion

Nice kitchen cabinets

Painting your kitchen cabinets can be a rewarding project that transforms the entire look and feel of your space without the expense of a complete remodel. By following a systematic process and avoiding common pitfalls, you can achieve a high-quality, professional finish. Proper preparation, including sanding and priming, ensures durability and enhances the overall aesthetic, while careful selection of paints and tools makes the task more manageable. Remember, patience and attention to detail are key. With dedication and some elbow grease, the result will reflect your efforts, bringing a refreshed and rejuvenated atmosphere to your kitchen.

Thinking About Grey Kitchen Cabinets? Here are 11 Ideas For Your Kitchen

Опубликовано: October 19, 2024 в 6:17 pm

Автор:

Категории: Kitchen

Тэги: ,

1 | Bold Two-Tone Design

Modern grey kitchen cabinets can create a stunning contrast when paired with a bold two-tone design. Combining the neutral, calming appeal of grey with vibrant or deep hues can elevate your kitchen’s aesthetic to a contemporary and sophisticated level. This design choice allows for versatility, as modern grey kitchen cabinets can be paired with a multitude of colors, such as navy blue or rich emerald green, to highlight specific sections or features within the space.

Such a dynamic combination not only adds depth and interest to the kitchen but also offers flexibility in accessorizing with accents like hardware and backsplash. Ultimately, incorporating modern grey kitchen cabinets in a bold two-tone design brings a sleek, stylish edge that complements both traditional and modern décor elements.

2 | Matte Finish Cabinets

Grey kitchen cabinets

Matte finish grey cabinets combine elegance and practicality, offering a refined look without the distractions of reflective surfaces. This subtle finish pairs beautifully with many color walls, allowing you to experiment with different hues and create a perfect blend of sophisticated tones and playful accents.

The matte texture enhances the soft, subdued quality of grey, while providing a durable and easy-to-maintain surface ideal for busy kitchens. When matched with vibrant or neutral walls, these cabinets can create a warm, inviting environment that balances modern aesthetics with functional design.

3 | Accent with Metallic Hardware

Accenting grey cabinets with metallic hardware is an excellent strategy for infusing your kitchen with a bold touch of elegance. Using metallic elements like brushed gold or sleek chrome can add a sophisticated gleam that complements the soft, understated tones of gray.

This style choice not only enhances the modern appeal of your kitchen but also adds a layer of texture and interest to the overall design. By integrating metallic hardware, you create a striking contrast that highlights the sleek lines of the cabinets, resulting in a stylish and contemporary look.

4 | Integrate Glass-Front Cabinets

Grey kitchen cabinets

Integrating glass-front cabinets with grey cabinetry offers a versatile design option that beautifully balances openness and style. The transparency of glass-fronted units introduces an airy, light quality to the space, making kitchens feel more expansive and inviting.

This feature allows you to showcase attractive dishes or decorative items, adding a personalized touch while complementing the understated elegance of grey cabinets. The combination of grey and glass effortlessly blends practicality with aesthetic appeal, providing a modern yet timeless look that adapts to various decor styles.

5 | Add a Pop of Color with a Backsplash

Adding a vibrant backsplash to your grey kitchen cabinets is an excellent way to infuse your space with personality and charm. Consider a brightly painted tile backsplash that catches the eye and contrasts beautifully with the subdued elegance of grey cabinets.

This pop of color can transform the kitchen, offering a focal point that draws attention and creates visual interest. Painted tile backsplashes are available in a myriad of designs and hues, allowing you to tailor the look to complement your style and enhance the sophisticated tone of your cabinetry.

6 | Incorporate Open Shelving

Grey kitchen cabinets

Incorporating open shelving with grey cabinets creates a distinctive design that merges functionality with modern aesthetics. Open shelves offer easy access to frequently used items while providing an opportunity to display your favorite kitchenware, plants, or cookbooks.

This feature ensures that the kitchen feels airy and spacious, maintaining a sense of openness that complements the soft, neutral tones of grey cabinetry. By integrating open shelving, you add a touch of warmth and personalization that enhances the overall appeal of your kitchen while staying true to contemporary design principles.

7 | Wood Accents for Warmth

Pairing grey kitchen cabinets with wood accents is an effective way to introduce warmth and texture into your space. The natural grains and rich tones of wood create a welcoming contrast to the cool, neutral hues of grey cabinetry, resulting in a balanced and inviting atmosphere.

Whether through wooden countertops, shelving, or floors, these accents add depth and organic charm that enhance the kitchen’s overall aesthetic. The combination of grey and wood allows for a harmonious blend that fits seamlessly within both modern and rustic designs, creating a timeless and cozy kitchen environment.

8 | Use Textured Finishes for Depth

Grey kitchen cabinets

Incorporating textured finishes in your grey kitchen cabinets can elevate the aesthetic appeal by adding a layer of depth and interest. Textured finishes like distressed wood effects or linear graining provide a tactile dimension that enhances the visual richness of your kitchen cabinetry.

These textured elements not only draw attention but also give a subtle nod to craftsmanship, making the space feel more bespoke and tailored. By playing with different textures, you introduce a sensory experience that complements the calm, understated elegance of grey.

9 | Choose Contrasting Countertops

Pairing grey kitchen cabinets with contrasting countertops is another fantastic idea to enhance the visual dynamics of your kitchen. Opt for materials like white marble, black granite, or even vibrant quartz to create a stunning juxtaposition that highlights the cabinets’ sleek design while providing a durable and functional workspace.

This contrast adds depth and interest to the kitchen layout, resulting in a cohesive look that merges elegance with practicality. By choosing distinct countertop materials, you emphasize the cabinets’ versatility and create a timeless balance of modern and classic elements.

10 | Incorporate Built-In Appliances

Grey kitchen cabinets

Incorporating built-in appliances with grey kitchen cabinets can help streamline the kitchen’s design, emphasizing a sleek and polished appearance. By aligning appliances such as ovens, microwaves, or coffee machines within the cabinetry, you maintain a seamless flow that contributes to a clutter-free and organized environment.

This integration leverages the subtle sophistication of grey, allowing it to act as a cohesive backdrop that highlights the functional elegance of your kitchen. Built-in appliances not only save space but also contribute to a modern and minimalistic kitchen aesthetic, seamlessly blending functionality with style.

11 | Incorporate Under-cabinet Lighting

Adding under-cabinet lighting to your grey kitchen cabinets is a brilliant way to enhance both functionality and ambiance. This strategic lighting option illuminates the countertop workspace, making it easier to perform tasks like chopping, reading recipes, or cooking.

Under-cabinet lights create a warm and inviting glow that emphasizes the elegant tones of grey cabinetry, adding depth and sophistication to the space. Available in various styles and colors, these lights can be customized to suit your kitchen’s design, offering an additional layer of visual appeal that complements the modern and sleek appearance of grey cabinets.

Frequently Asked Grey Kitchen Cabinets Questions

Grey kitchen cabinets

Are Grey Kitchen Cabinets Still in Style?

Absolutely, grey kitchen cabinets continue to be in style and are favored for their versatility and timeless appeal. Grey acts as a neutral palette that can be adapted to various design styles, from modern to traditional, making it a popular choice among homeowners and designers alike.

This enduring trend is largely due to grey’s ability to seamlessly blend with different colors and materials, allowing for creative and personalized kitchen designs. Whether utilized in a minimalist setting or combined with bold accents, grey cabinets provide a foundation that can be easily refreshed and updated, ensuring they remain stylish and relevant in ever-evolving design landscapes.

What Color Countertop with Grey Cabinets?

Selecting the right color countertop to pair with grey kitchen cabinets can significantly influence the overall aesthetic and feel of your kitchen. White countertops, such as those made from marble or quartz, offer a crisp and clean look that contrasts beautifully with grey, creating a bright and airy atmosphere.

Black or dark-colored countertops, on the other hand, provide a dramatic contrast that enhances a modern and sophisticated look. If you want a more subtle blend, opt for shades of beige or soft neutrals which offer a warm and harmonious balance.

Natural stone countertops with varied patterns can add depth and interest, complementing the understated elegance of grey while adding an organic touch. Each choice brings unique characteristics to the space, allowing homeowners to align their kitchen design with their personal style.

What Color Flooring Looks Best with Grey Cabinets?

Choosing the right flooring color to complement grey kitchen cabinets can enhance the overall design and ambiance of your space. Light-colored flooring, like ash or birch wood, creates a bright and open feel, contrasting subtly with grey cabinets while maintaining a serene and cohesive look. For a bold yet elegant effect, consider dark hardwoods or slate tiles, which add richness and depth.

Neutral-toned flooring options, such as beige tiles, offer warmth and a seamless blend with grey cabinetry, supporting an understated and classic appearance. Incorporating patterns or textures, like herringbone wood or textured tiles, can introduce an additional layer of interest, ensuring that the kitchen becomes a harmonious and inviting environment. Each flooring choice brings unique characteristics that can be tailored to suit both modern and traditional kitchen designs.

Conclusion

Incorporating grey into your kitchen design offers a versatile and timeless solution that suits a wide range of styles and preferences. Whether paired with warm wood accents, bold contrasting countertops, or textured finishes, grey cabinets provide a sophisticated backdrop that enhances the aesthetic appeal of any kitchen.

Their ability to harmonize with various colors and materials makes them a perennial favorite among homeowners and designers, ensuring their relevance in both contemporary and classic settings. By thoughtfully selecting complementary elements such as countertops and flooring, grey kitchen cabinets can help you craft a personalized and stylish space that is both functional and welcoming.

Whats Better: Cool, Natural, or Warm Light Under Kitchen Cabinets?

Опубликовано: September 30, 2024 в 3:13 pm

Автор:

Категории: Kitchen

Тэги: ,

Choosing the right lighting for your kitchen can transform the space dramatically, especially when it comes to illuminating the area beneath your cabinets. This blog explores the various lighting options available, focusing on cool, natural, and warm light tones. We will dive into how each lighting type can impact the ambiance and functionality of your kitchen, discuss the benefits and drawbacks of each option, and offer practical tips on making the best decision based on your personal style and kitchen design.

Why Under-Cabinet Lighting Matters

Under kitchen cabinet lighting

Enhanced Functionality

Proper under-cabinet lighting significantly improves the task lighting in your kitchen. With LED lights strategically placed beneath cabinets, you can illuminate countertops precisely where you prepare meals, cut ingredients, or follow recipes, making your kitchen tasks safer and easier.

Aesthetic Appeal

Cabinet lights can add a visual layer to your kitchen’s overall design. Warm lighting under cabinets can create a cozy atmosphere during evening hours, accentuating your kitchen’s style and complementing its color scheme, leading to an inviting ambiance.

Energy Efficiency

Implementing energy-efficient light fixtures like LED lights under your cabinets can reduce energy consumption. These fixtures offer longevity and durability, ensuring your kitchen remains well-lit without significantly impacting your electricity bill, thereby supporting sustainable living.

Breakdown of Lighting Types

Cool Light

Appearance

Cool light typically features a bluish-white hue that can make a space feel modern and sleek. Often compared to daylight, this type of lighting can enhance the visibility of your kitchen’s details.

Best For

Cool lighting is ideal for kitchens where clarity and precision are required. It is perfect for task-oriented areas where accuracy is essential, such as where you might be slicing vegetables or reading recipes.

Pros

LED lighting is often the key to achieving cool light in kitchens, as it is energy-efficient and long-lasting. By utilizing LED options, homeowners can enjoy bright, effective lighting while reducing energy costs.

In addition to energy savings, LED lighting enhances the visual clarity of food and cooking surfaces. This improved visibility aids in precise tasks, making it easier to prepare meals and navigate the kitchen safely.

LED lighting contributes to a modern aesthetic, offering a contemporary look that complements modern kitchen designs. This stylish illumination not only serves a functional purpose but also elevates the overall ambiance of the space.

Cons

The bluish tone can sometimes feel harsh and might not suit every kitchen ambiance. This aspect of the lighting can detract from the overall aesthetic and comfort of the space.

Additionally, this light can make the area feel less cozy, which isn’t ideal for evening dinners or warm family gatherings. A more inviting atmosphere is often desired for such occasions, and the bluish hue may not provide that warmth.

Warm Light

Under kitchen cabinet lighting

Appearance

Warm light emits a soft, yellowish glow that brings a sense of coziness and comfort to a space. It closely mimics the hue created by traditional incandescent bulbs, creating a welcoming and intimate environment.

Best For

Warm lighting is best for creating a cozy and inviting atmosphere, making it ideal for dining areas and kitchens where a relaxed, intimate setting is desired. This type of light is perfect for evening meals or family gatherings, enhancing the warmth and comfort of the space. The softer hue can help to blend seamlessly with traditional or rustic kitchen designs, contributing to a harmonious and welcoming environment. Some may prefer warm lights over cool or natural lights for these reasons.

Pros

Warm light enhances the coziness of a kitchen, creating an inviting atmosphere that is perfect for hosting and entertaining. It complements traditional and rustic kitchen designs, accentuating wood tones and natural elements. Warm light is less harsh on the eyes, contributing to a more relaxing and comforting environment suitable for leisurely meals and family gatherings.

Cons

Reduced visibility can be an issue, as certain lighting may not provide the same level of clarity for intricate tasks compared to cool lighting. The perception of colors can be affected, sometimes altering the appearance of the true colors of food and kitchen surfaces.

Natural Light

Appearance

Natural light mimics the balanced white light of daylight, offering a neutral and balanced hue that closely resembles the natural sunlight that streams through windows. This type of lighting is gentle on the eyes and provides true-to-life color rendering, ensuring that the colors in your kitchen appear as they would in natural daylight.

Best For

Natural light is best for kitchens where a true color representation is essential, such as in spaces where food preparation and presentation are important. This type of lighting is ideal for those looking to achieve an open and airy feel, as it brings the vibrant ambiance of natural daylight indoors. Kitchens with ample natural light can benefit from the balanced brightness it provides, helping create a refreshing and revitalizing atmosphere.

Pros

Versatility is key, as it provides a middle ground that is neither too harsh nor too cozy. This balance allows for a comfortable environment suitable for various activities.

True colors are another advantage, as they offer accurate color representation that enhances both food presentation and kitchen style. This feature ensures that the aesthetics of your culinary creations are highlighted beautifully.

Cons

Inconsistent availability of natural light can pose challenges, as it varies significantly based on the time of day and weather conditions. To address this issue, many find it necessary to supplement natural light with artificial solutions, such as LED light bars, to ensure a more consistent lighting environment.

Choosing the Right Light for Your Kitchen

Under kitchen cabinet lighting

Cool Light

Cool light is best suited for modern and contemporary kitchen styles. This lighting pairs well with sleek cabinet designs featuring flat-panel or high-gloss finishes. Recessed lighting and under cabinet lights with LED strips enhance the clean lines and minimalist vibe of such kitchens. Countertop materials like stainless steel or polished quartz complement the bluish hue, adding to the sophisticated feel of the space.

Warm Light

Warm lights complement traditional and farmhouse kitchen styles, where comfort and coziness are paramount. This lighting option works well with shaker-style cabinets or those with a distressed wood finish. Use under cabinet lights to accentuate the warm tones of granite or butcher block countertops. The soft glow of warm light enriches the inviting atmosphere, making it perfect for spaces that emphasize gathering and relaxation.

Natural Light

Natural light is ideal for transitional kitchen styles that blend elements of both modern and traditional aesthetics. Open shelving and light-colored cabinets work well to reflect and enhance the natural light, creating an airy and spacious feel. Countertop materials such as light marble or granite pair excellently, offering a balanced and neutral canvas. Recessed lighting and a strategically placed cabinet light can supplement this when natural light fluctuates, ensuring evenly lit spaces throughout the day.

Task Lighting Vs Ambient Lighting

Under kitchen cabinet lighting

Task Lighting

When considering task lighting, the focus is on providing bright, concentrated illumination for specific work areas within the kitchen, such as preparation zones and countertops. Cabinet lighting options, particularly an LED light bar, are excellent for task-specific areas as they supply direct light without casting shadows.

Halogen lights, with their intense output and warm glow, can also be positioned strategically to highlight key working surfaces, enhancing visibility for detailed tasks like chopping or reading recipes.

Ambient Lighting

Ambient lighting serves the purpose of creating an overall illumination that provides a general sense of brightness throughout the kitchen. This type of lighting is crucial for setting the tone and mood of the space, making it feel open and welcoming. Ambient lighting often relies on broader, more diffuse light sources, like flood lights, to cover large areas.

Accent lighting, such as decorative fixtures or under-cabinet lights with dimmable options, can also contribute to the ambient ambiance while emphasizing architectural features or specific design elements of the kitchen. This combination of lighting types ensures both functionality and an inviting atmosphere are achieved within the kitchen environment.

Frequently Asked Cool Natural Or Warm Light Under Kitchen Cabinets Questions

Under kitchen cabinet lighting

Should Under Cabinet Lights Be Warm or Cool?

The choice between warm or cool under cabinet lights largely depends on the overall mood and style of your kitchen, as well as the primary function of the lighting. Warm under-cabinet lights are ideal for creating a cozy and inviting atmosphere, perfectly suited for traditional or farmhouse-style kitchens. This type of lighting enhances earth tones and wood finishes, making it a great choice for spaces where warm hues dominate.

Cool under cabinet lights are perfect for modern or contemporary kitchens, where a sleek and clean aesthetic is desired. The bluish tints complement stainless steel appliances and glossy surfaces, offering both a sophisticated look and clearer visibility for intricate tasks. Ultimately, the decision should align with the style and functionality you wish to achieve in your culinary space.

Are LED Lights Better Than Halogen for Under Cabinets?

When it comes to selecting the best lighting for under cabinets, many homeowners find themselves choosing between LED and halogen options. LED lights are often preferred for several reasons, including their energy efficiency and long lifespan. They consume significantly less power compared to halogen bulbs and have a much longer operational life, often lasting up to 25,000 hours or more. This makes LEDs an eco-friendly and cost-effective choice over time.

On the other hand, halogen lights deliver a warm, bright output that some may find more visually appealing for certain kitchen styles. However, they tend to use more energy and generate a considerable amount of heat, which may not be ideal for all spaces. Frequent replacement is usually required due to their shorter lifespan.

Thus, if energy consumption and longevity are primary concerns, LED lights tend to be a superior option for under-cabinet installations. However, for those who favor the traditional warmth and intensity of light, halogen might still hold appeal despite its downsides. Ultimately, the best choice depends on individual preferences and the specific needs of your kitchen environment.

Do LED Under Cabinet Lights Get Hot?

LED under cabinet lights are known for their energy efficiency and minimal heat output compared to traditional lighting options like halogen bulbs. While all lights generate some level of heat during operation, LEDs remain relatively cool, making them a safer and more environmentally friendly option for kitchen settings.

The design of LED lighting systems includes heat sinks that effectively dissipate any heat produced, ensuring that the surfaces around them remain cool to the touch. This feature not only enhances safety by reducing the risk of burns or heat damage to cabinetry and other kitchen components but also contributes to the longevity of the bulbs themselves, further making LEDs a preferable choice for modern home lighting solutions.

Conclusion

Under kitchen cabinet lighting

Selecting the right kitchen lighting involves balancing both style and functionality to meet the unique needs of your space. Understanding the differences between warm, cool, and natural light can help achieve the desired atmosphere, whether it’s a cozy, inviting environment or a sleek, contemporary look. Task lighting plays a critical role in illuminating work areas, while ambient lighting ensures the kitchen feels open and welcoming.

The choice between LED and halogen options depends largely on priorities such as energy efficiency, lifespan, and heat output, with LEDs generally offering more advantages. By carefully considering these factors, homeowners can create a well-lit kitchen that not only enhances the visual appeal but also improves everyday functionality.

How to Decorate Top of Kitchen Cabinets

Опубликовано: September 18, 2024 в 2:15 am

Автор:

Категории: Kitchen

Тэги: ,

Decorating the top of kitchen cabinets is an often-overlooked opportunity to infuse personality and style into your kitchen space. With the right decor, you can transform this unused area into an appealing focal point that complements your overall design theme. Whether you prefer minimalistic elegance or a more eclectic, vibrant look, the top of your cabinets can showcase unique pieces that reflect your taste.

You can create a visually engaging kitchen environment by incorporating elements such as greenery, art, or decorative kitchenware.

Creative Ways to Decorate the Top of Your Kitchen Cabinets

Add Greenery

Adding greenery is a versatile and refreshing way to decorate the top of tall cabinets in your kitchen. Utilizing plants with trailing vines or tall leafy greens can draw the eye upward, creating an illusion of a more spacious area.

Opt for easy-to-care-for plants, such as pothos or ferns, which thrive with moderate light and minimal upkeep. To create a visually pleasing arrangement, consider grouping plants in clusters or mixing them with decorative pots or vases that match your kitchen’s color scheme.

Display Artwork

Displaying artwork on the top of your kitchen cabinets can add sophistication and personal flair to the space. Select pieces that complement your kitchen’s color palette and overall decor theme. Consider using a mix of framed prints or canvas paintings to introduce texture and interest. For a cohesive look, arrange artwork in varying heights to create depth, and pair it with subtle lighting to highlight the pieces and enhance their visual impact.

Install Lighting

Installing lighting on top of your kitchen cabinets can significantly enhance visual interest and transform previously blank space into an illuminated showcase. Consider using LED strip lights or puck lights, as these options are subtle yet effective in highlighting decorative elements placed above.

Lighting draws attention to your selected decor and adds warmth and ambiance to the entire room. By strategically placing lights, you can create depth and draw focus to art pieces or greenery, making this area an integral part of your kitchen’s overall design.

Showcase Glassware

Decorated kitchen cabinets

Showcasing glassware on the top of your kitchen cabinets can elegantly utilize display space while adding a touch of sophistication to your kitchen. Choose a selection of decorative glassware, such as vintage vases, colorful bottles, or elegant decanters, that complement your kitchen’s design style.

The transparency of glassware can create an open and airy feel while varying heights and shapes help in crafting a dynamic visual display. By placing glassware on cabinet tops, you can turn this often-overlooked area into a striking feature that enhances the overall aesthetic of your kitchen.

Use Baskets for Storage

Using rustic baskets for storage is a practical yet stylish approach to decorating the tops of kitchen cabinetry. These baskets provide an ideal solution for keeping infrequently used items neatly contained while complementing a cozy, farmhouse aesthetic.

The woven texture adds visual interest and warmth, creating a charming contrast against sleek or painted cabinet finishes. By varying the sizes and shapes of the baskets, you can create an organized yet dynamic display, adding both functionality and rustic elegance to your kitchen’s decor.

Incorporate a Vintage Collection

Incorporating a vintage collection on the top of your kitchen cabinets can transform empty space into a nostalgic showcase. Choose antique items, such as vintage tins, classic cookbooks, or retro kitchen utensils, that adds character and charm.

By placing these collectibles above the cabinet doors, you create a focal point that draws the eye upward. Consider mixing different sizes and textures to enhance visual interest while seamlessly integrating with your kitchen’s existing decor.

Create a Seasonal Display

Creating a seasonal display on the top of your kitchen cabinets is an excellent way to utilize vertical space and refresh your kitchen’s look throughout the year. Begin by rotating decor objects that align with each season’s theme, such as spring blooms, autumn foliage, or winter ornaments.

Integrating seasonal colors and textures can invigorate the upper cabinets, ensuring they remain a dynamic part of your home decor. These occasional updates not only celebrate the changing seasons but also provide an opportunity to express your style and creativity visibly and engagingly.

Integrate Sculptural Pieces

Integrating sculptural pieces into your dream kitchen decor is an inventive way to enhance the aesthetic appeal of the space above your cabinets. These decor items, such as abstract figures, modern busts, or geometric shapes, can add a unique touch, amplifying the artistic elements of your kitchen design.

By strategically placing sculptures with varying heights and materials, you create a compelling visual narrative that draws attention upward. This not only adds depth to your kitchen but also complements your personal style, making the space feel curated and intentional.

Matching Decorations with Kitchen Styles

Decorated kitchen cabinets

Modern Minimalist

Decor Idea

For a modern minimalist kitchen, opt for sleek, monochromatic decorations such as simple black or white vases and geometric objects. The clean lines and restrained color palette will maintain the minimalist aesthetic while adding subtle elegance to the space.

Why It Matches

The clean lines and unobtrusive shapes complement a minimalist aesthetic, enhancing the simplicity and elegance of modern kitchens. This design approach not only creates a visually appealing space but also promotes functionality and ease of use.

Cozy Farmhouse

Decor Idea

Woven baskets and vintage tin signs add a charming touch to any space, blending functionality with nostalgic decor. They are perfect for enhancing your home’s aesthetic.

Why It Matches

These elements add warmth and rustic charm, aligning perfectly with the inviting and homely feel of farmhouse-style kitchens. Together, they create a cozy atmosphere that makes cooking and gathering with family a delightful experience.

Eclectic Boho

Decor Idea

A vibrant mix of colorful plant pots and eclectic art pieces creates a dynamic and inviting atmosphere. This combination adds personality and charm to any space.

Why It Matches

The diversity and vibrancy of these items reflect the bohemian style of eclectic decor, adding layers of texture and color to boho kitchen designs. They create a warm and inviting atmosphere that encourages creativity and self-expression.

Industrial Chic

Decorated kitchen cabinets

Decor Idea

Metallic sculptures paired with rustic wooden crates create a striking contrast in art and design. This combination adds a unique and intriguing element to any space.

Why It Matches

These elements provide a blend of raw textures and rugged material aesthetics, which align perfectly with the industrial chic style that often features exposed structures and neutral palettes. This approach not only enhances the visual appeal but also creates a warm and inviting atmosphere.

Traditional Elegance

Decor Idea

Classic porcelain figurines and ornate candle holders add a touch of elegance to any space. Their timeless beauty makes them perfect for decoration or as thoughtful gifts.

Why It Matches

These timeless pieces add a sense of refined luxury and sophistication, enhancing the formal and luxurious feel prevalent in traditional kitchen designs. Their classic craftsmanship and elegant details create a harmonious blend of beauty and functionality that complements the overall aesthetic.

Frequently Asked How to Decorate Top of Kitchen Cabinets Questions

Decorated kitchen cabinets

Should You Decorate the Top of Kitchen Cabinets?

Decorating the top of kitchen cabinets is a personal choice that depends on your style preference and the overall aesthetic you wish to achieve in your kitchen. Some individuals enjoy the opportunity to utilize this often-overlooked space to add personal touches, whether through decorative accents or practical storage solutions.

Decorating these high spaces can help create a cohesive design and draw the eye upward, enhancing the visual height of the room. On the other hand, leaving the tops of cabinets undecorated can aid in maintaining a clean, uncluttered look, which may appeal to those who prefer minimalist or streamlined designs. These individuals often would rather opt for a kitchen cabinet remodel to increase the overall aesthetics of their kitchen instead of adding to the aesthetics. Before deciding, consider how decoration would fit with your kitchen’s existing design elements and whether it aligns with your lifestyle and organization preferences.

What to Put on Top of Kitchen Cabinets to Keep Clean

Keeping the tops of kitchen cabinets clean can be a manageable task by utilizing the right decor items and storage solutions. Consider using decorative storage boxes or baskets with lids to keep items dust-free while maintaining a tidy appearance. These containers can hold seldom-used kitchen items, recipe collections, or seasonal decor.

Placing a layer of clear adhesive shelf liner on top of the cabinets can protect surfaces from dust and grease, making cleaning easier. Decorative trays can also help organize items, making it simple to remove them when it’s time to clean. By integrating these practical yet stylish solutions, you ensure the space remains both functional and aesthetically pleasing.

How Often Should You Clean on Top of Kitchen Cabinets?

Cleaning the tops of kitchen cabinets is typically recommended every three to six months. This frequency ensures that dust, grease, and any potential buildup are kept at a manageable level, maintaining both hygiene and appearance.

However, the exact timing can depend on factors such as how often you cook, your kitchen’s ventilation, and whether your decor items accumulate dust quickly. Regular inspection can help determine the best cleaning interval for your specific kitchen environment, ensuring that your space remains inviting and free from unwanted residue. Don’t forget that how you clean wood kitchen cabinets, laminate, venire and many others are dictated by the material your cabinets are made out of. will dictate how you clean them

Conclusion

Decorating the top of kitchen cabinets is a creative endeavor that allows you to inject your personal style into an often overlooked space. Whether you prefer the sleek lines of a modern minimalist approach, the rustic charm of a cozy farmhouse, or the vibrant textures of eclectic boho design, there are countless ways to make this space your own. Thoughtful decoration can enhance the overall aesthetic of your kitchen and dining room, drawing the eye upwards and adding dimension and interest. Ultimately, balancing practical considerations with decorative flair can transform your kitchen into a cohesive and inviting environment. Tailor your choices to fit seamlessly with your existing decor and lifestyle, creating a space that reflects your taste and functions well within your daily life.

8 Budget Kitchen Remodel Ideas to Start With

Опубликовано: August 10, 2024 в 6:33 pm

Автор:

Категории: Kitchen

Тэги: ,,

Budget kitchen remodeling involves making strategic upgrades to a kitchen while keeping expenses in check. This approach focuses on enhancing the functionality and aesthetic appeal of the space without undertaking extensive renovations or significant costs.

By prioritizing essential updates, such as painting cabinets, replacing hardware, or updating fixtures, homeowners can create a fresh, modern look that increases both the usability and value of their kitchen. The key is to find creative solutions that deliver impactful results while adhering to financial limitations.

Budget Kitchen Remodel Ideas

1 | Refurbish Existing Cabinets

Instead of replacing cabinets entirely, consider repainting or refinishing your existing cabinets for a fresh look without the hefty price tag. This not only saves you money but also allows you to customize the color and finish to match your style. It’s a more sustainable option that reduces waste by keeping your current cabinets in use.

2 | Upgrade Cabinet Hardware

Kitchen cabinet hardware

Swapping out old cabinet hardware for trendy knobs and pulls can dramatically enhance the visual appeal of your kitchen on a budget. This simple upgrade can transform the overall look and feel of the space, making it feel fresh and modern. With a variety of styles and finishes available, you can easily find options that match your personal taste and kitchen decor.

3 | Install Laminate Countertops

Choose laminate countertops as an affordable alternative to more expensive materials, providing an upgraded look with easy maintenance. They come in a variety of colors and patterns, allowing you to customize your kitchen or bathroom to fit your style. Laminate countertops are resistant to stains and scratches, making them a practical choice for busy households.

4 | Add a Backsplash

Kitchen tile backsplash

A stylish backsplash can transform the look of your kitchen and can be achieved inexpensively with peel-and-stick tiles or painted panels. These options offer a wide variety of colors and designs, allowing you to personalize your space effortlessly. They’re easy to install, making it a perfect DIY project for a weekend refresh!

5 | Incorporate Stainless Steel Appliances

Look for gently used or clearance stainless steel appliances that can boost the aesthetic and functionality of your kitchen without exceeding your budget. These appliances not only add a sleek, modern look but also offer durability that can last for years. Consider checking local classifieds, online marketplaces, or appliance outlets for great deals. Investing in quality appliances can enhance your cooking experience while still keeping your finances in check!

6 | Consider New Cabinets

A man installing new kitchen cabinets

If your budget allows, investing in a few new kitchen cabinets can dramatically improve storage and organization, making the kitchen more functional while still maintaining a budget-friendly approach. Consider choosing cabinets with versatile designs that can adapt to your changing needs. Adding some open shelving can create a modern look while providing easy access to your favorite kitchen items.

7 | Use Open Shelving

Replace upper cabinets with open shelving for a modern look that can make your kitchen feel more spacious. This option is often more affordable and allows you to display decorative dishware or cookbooks, adding a personal touch to your kitchen design. Open shelving encourages organization and easy access to your favorite kitchen items, making cooking a more enjoyable experience. Embrace the beauty of simplicity and let your kitchen reflect your unique style!

8 | Incorporate Lighting Upgrades

Lighting in a kitchen

Enhance the ambiance of your kitchen by upgrading light fixtures. Consider installing pendant lights over the island or under-cabinet lighting to brighten up workspaces. Affordable options can easily be found at home improvement stores, allowing you to elevate the mood of your kitchen without significant investment. A well-lit kitchen not only enhances functionality but also creates a welcoming atmosphere for family and friends.

Things to Consider for a Budget Kitchen Remodel

A couple planning their new kitchen remodel

Evaluate Existing Layout

When planning a budget kitchen remodel, it’s essential to evaluate the existing layout to identify areas that may benefit from reconfiguration. Effective kitchen remodels focus on optimizing workspace flow and storage, which can significantly enhance the kitchen’s functionality without necessitating major structural changes. By carefully considering how you use the space and making a kitchen remodel checklist, you can make strategic upgrades that align with your needs while staying within budget.

Maximize Kitchen Cabinets

Maximizing kitchen cabinets is a crucial step in any budget remodel. By utilizing vertical space and incorporating clever storage solutions like pull-out shelves or organizers, you can enhance accessibility and functionality without straining your kitchen budget. This approach not only optimizes the use of available space but also allows for a more streamlined cooking experience.

Set a Realistic Budget

When considering a budget kitchen remodel, it’s crucial to take a close look at your current kitchen layout. An efficient kitchen layout maximizes workflow and makes the most of the available space, ensuring that your updates provide not just aesthetic appeal but also enhanced functionality. By strategically assessing how each area works together, you can make informed decisions that allows your remodel to save money while improving your cooking environment.

Prioritize Upgrades

A man utilizing the upgrades he made in his kitchen

When planning an affordable kitchen remodel, it’s important to prioritize upgrades that will have the most impact without draining your budget. A thoughtful kitchen makeover can transform the space into a functional and stylish area, allowing you to enjoy a beautiful kitchen while adhering to financial limitations. By focusing on cost-effective solutions, you can create a space that reflects your personal taste and lifestyle.

Research Affordable Options

Researching affordable options is a key step in any budget kitchen remodel. Look for sales, online discounts, and local stores that offer competitive pricing on materials and fixtures. By taking the time to compare prices and explore different retailers, you can ensure that you find the best deals while still achieving the kitchen of your dreams.

Incorporate Smart Storage Solutions

Incorporating smart storage solutions can significantly enhance the efficiency of your kitchen space. Consider adding drawer dividers, lazy susans, or magnetic strips to keep utensils organized and easily accessible. These tidying options not only optimize storage but also contribute to a clutter-free and visually appealing kitchen environment.

Frequently Asked Budget Kitchen Remodel Questions

What is a Realistic Budget for a Kitchen Remodel?

Determining a realistic budget for a kitchen remodel depends on several factors, including the scope of the project, the quality of materials chosen, new appliances, and any labor costs associated with hiring professionals.

On average, a small kitchen remodel cost sits between $10,000 to $15,000, while a more extensive renovation might range from $20,000 to $50,000, or even higher. To get the most accurate estimate, it’s vital to outline your priorities, research material costs, and account for potential unexpected expenses that might arise during the process.

By creating a comprehensive list of desired updates and their associated costs, you can establish a clear financial framework to guide your decisions. It’s also beneficial to set aside an additional 10-20% of your overall budget to accommodate unforeseen issues that may surface, such as plumbing or electrical upgrades. This contingency fund will help to avoid financial strain if unexpected repairs or changes are necessary.

What is the Most Expensive Part of a Kitchen Remodel?

The most expensive part of a kitchen remodel often relates to the selection and installation of new cabinetry and countertops, as they significantly impact both the aesthetic and functionality of the whole room. Quality materials and custom designs can escalate costs quickly, with fine cabinetry and natural stone countertops potentially doubling or tripling the budget allocated for these upgrades. Choosing prefabricated options or opting for laminate surfaces can provide beautiful alternatives while keeping the expenses manageable.

Another considerable expense arises from replacing old flooring, which not only requires materials but also often necessitates extensive preparation work. If the existing flooring is uneven, damaged, or outdated, investing in premium materials can enhance the kitchen’s overall appeal and durability. Whether opting for hardwood, tile, or vinyl, the costs associated with labor and the need for underlayment or subfloor repairs can significantly increase the overall budget. Careful planning and selection of flooring can balance quality and affordability, ensuring that the remodel remains within financial limits while delivering stylish results.

What Should You Not Forget in a Kitchen Remodel?

When remodeling your kitchen, one essential element not to forget is the selection and arrangement of base cabinets. Base cabinets serve as the foundation of your cabinetry system, providing vital storage space and supporting the countertops. Ensuring that these cabinets blend functionality with your preferred style is crucial, as they play a significant role in shaping the overall aesthetics and usability of the kitchen. Consider options that offer ample storage while maximizing accessibility, such as soft-close drawers or additional pull-out shelves, to make your kitchen both beautiful and practical.

Conclusion

A kitchen remodel

Embarking on a budget kitchen remodel can be a rewarding experience, provided you approach it with careful planning and creativity. By evaluating your space, setting a realistic budget, prioritizing impactful upgrades, and exploring affordable options, you can design a kitchen that perfectly suits your needs and reflects your style. Incorporating smart storage solutions and remaining aware of potential expenses will further enhance the functionality of your kitchen while keeping costs in check.

With these strategies in mind, you’ll be well on your way to achieving a stunning transformation that enhances both the beauty and utility of one of the most important spaces in your home.